How to Paint Kitchen Cupboards Without Sanding: Easy Guide
Are you tired of your kitchen cupboards looking dull and outdated? Painting them can give your kitchen a fresh, new look without the hassle of a complete renovation.
But the thought of sanding them down first can be daunting, right? What if you could skip that tedious step altogether? That’s right—no more sanding, no more mess. This guide will reveal a simple and efficient way to paint your kitchen cupboards without the need for sanding.
Imagine transforming your kitchen with less effort, less time, and less stress. Ready to discover the secret to a quick and stunning kitchen makeover? Keep reading, and learn how you can achieve a professional finish without the dust and hard labor.
Choosing The Right Paint
Choosing the right paint for kitchen cupboards can simplify your project. Opt for high-quality, self-priming paint that adheres well to surfaces. Ensure proper cleaning and use a bonding primer for best results, making sanding unnecessary.
Choosing the right paint for your kitchen cupboards can make or break the entire project. With countless options available, it’s crucial to select one that suits your needs and enhances your kitchen’s aesthetics. A well-chosen paint not only transforms the look but also ensures durability and ease of maintenance.
Types Of Paint For Cupboards
Selecting the right type of paint for your kitchen cupboards is essential for achieving a smooth finish and long-lasting results. – Acrylic Paint: Known for its durability and resistance to moisture, acrylic paint is a popular choice for kitchen cupboards. It dries quickly and provides a glossy finish that can withstand frequent cleaning. – Chalk Paint: If you’re aiming for a rustic or vintage look, chalk paint can be your go-to option. It adheres well without the need for sanding and offers a matte finish, making it perfect for those looking to add character to their kitchen. – Milk Paint: Made from natural ingredients, milk paint is environmentally friendly and provides a unique, textured look. It works well on cabinets with an existing finish, adhering without extensive prep work.
Best Colors For Kitchens
Choosing the right color can significantly impact the mood and perception of space in your kitchen. – White and Cream: These timeless colors create an illusion of space and cleanliness. They pair well with any decor, making them ideal for smaller kitchens needing a bright, airy feel. – Gray and Blue: These colors offer a modern touch while maintaining a calm atmosphere. Light gray or blue cabinets can complement stainless steel appliances, adding a sleek look to contemporary kitchens. – Bold Colors: If you’re feeling adventurous, opt for bold colors like navy, emerald green, or mustard yellow. These hues can make a statement and infuse personality, especially in larger kitchens with ample natural light. What color resonates with your style and complements your kitchen’s existing elements? Remember, the color you choose should not only reflect your personality but also harmonize with the overall theme of your home.

Credit: www.instagram.com
Gathering Supplies
Gather essential supplies like a degreaser, primer, and quality paint to transform kitchen cupboards. Choose brushes or rollers for smooth application. Proper tools ensure a seamless and durable finish without the need for sanding.
Gathering supplies is crucial for painting kitchen cupboards without sanding. A well-prepared workspace makes the process smoother and more efficient. Start by ensuring you have all the necessary tools and equipment. This step is vital for achieving a professional finish without the mess and hassle of sanding.
Essential Tools
A successful painting project requires specific tools. Consider a high-quality primer to help the paint adhere better. Choose a brush set that includes angled brushes for edges and corners. Use rollers for larger surfaces, making the job quicker. Don’t forget painter’s tape for protecting adjacent areas. A paint tray helps you apply paint evenly and avoid spills. Cloths or paper towels are handy for cleaning up.
Safety Equipment
Safety is essential when painting. Protect your skin with gloves, especially if using chemicals. A mask ensures you don’t inhale fumes from paint or primer. Goggles protect your eyes from splashes or dust. Adequate ventilation is necessary, so consider using a fan if working indoors. Wear old clothes to prevent stains. Keep a first-aid kit nearby for minor accidents.
Preparing Cupboards
Transform kitchen cupboards without sanding by using a quality bonding primer. Apply paint with a foam roller for a smooth finish. Choose durable, high-quality paint to ensure lasting results and vibrant colors.
Preparing your kitchen cupboards for a fresh coat of paint is crucial for achieving a professional finish without the hassle of sanding. While it might seem tempting to skip preparation steps, they ensure your paint adheres well and lasts longer. Let’s dive into two essential preparatory tasks: cleaning surfaces and removing hardware.
Cleaning Surfaces
Before grabbing your paintbrush, start with a thorough cleaning. Dust and grime can prevent paint from sticking properly, ruining your efforts. Use a degreasing cleaner to wipe down all cupboard surfaces. Even if your kitchen is spotless, grease can settle invisibly over time. Consider using a mixture of warm water and vinegar for a natural alternative. Scrub gently but thoroughly, ensuring every nook and cranny is dirt-free.
Removing Hardware
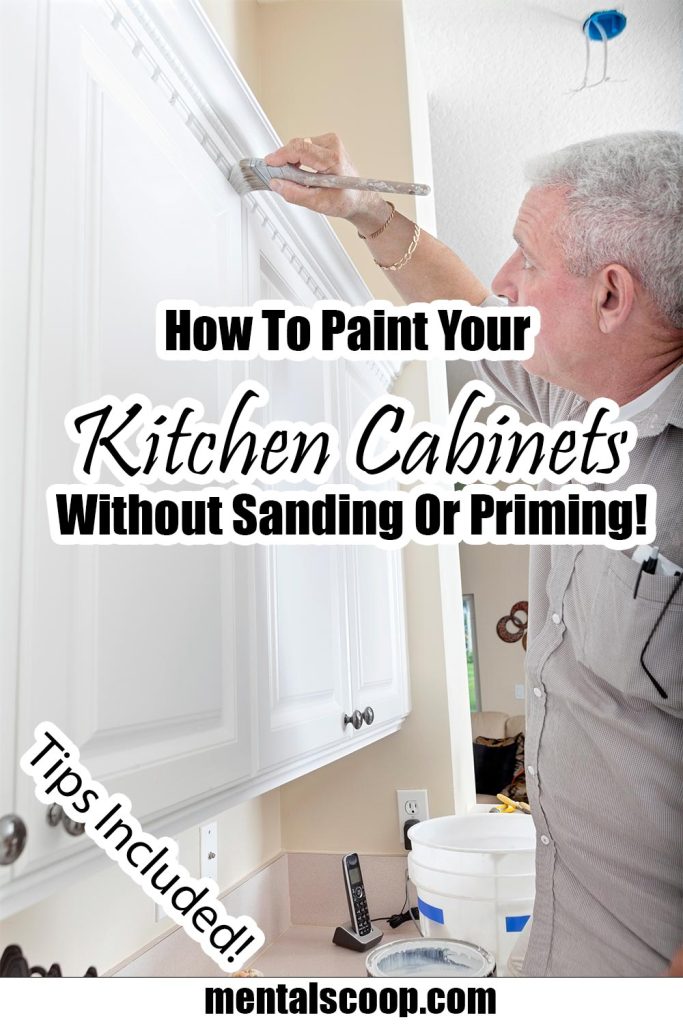
Removing hardware is a game-changer. It allows you to paint uninterrupted surfaces for a seamless finish. Plus, it prevents accidental paint smudges on handles and hinges. Take a few minutes to unscrew handles, knobs, and hinges. Place them in a labeled container to avoid mixing them up later. If possible, snap a photo before removal. This simple trick helps you remember where each piece belongs, saving you frustration during reassembly. These preparation steps might seem minor, but they make all the difference in transforming your kitchen cupboards effortlessly. Ready to give your cabinets a fresh, new look?
Credit: www.facebook.com
Applying Primer
Applying primer is a crucial step for painting kitchen cupboards without sanding. Primer adheres to surfaces, creating a smooth base for paint. Choose a high-quality primer suitable for kitchen cabinets to ensure durability and a polished finish.
Applying primer is a crucial step when painting kitchen cupboards without sanding. It ensures that the paint adheres well and lasts longer. Skipping the sanding process can save you time and effort, but it demands the right approach to priming.
Selecting Primer
Choosing the right primer is essential for a successful paint job. Look for a high-quality bonding primer, specifically designed to adhere to slick surfaces like laminate or varnished wood. Brands like Zinsser and KILZ offer excellent options that provide a strong base for your paint. Consider the color of your final paint when selecting a primer. If you’re going for a darker shade, a tinted primer can help you achieve better coverage with fewer coats. This small step can make a big difference in the final look of your cupboards.
Proper Application Techniques
Start by thoroughly cleaning your cupboards to remove grease and grime. Use a degreaser or a mixture of water and vinegar for this task. A clean surface is essential for the primer to stick properly. Apply the primer using a high-quality brush or a foam roller for smooth, even coverage. Pay attention to corners and edges where the primer might pool. It’s important to keep your strokes consistent to avoid visible brush marks. Allow the primer to dry completely before moving on to painting. This usually takes a few hours, but always refer to the manufacturer’s instructions. Rushing this step can compromise the durability of your paint job. Isn’t it satisfying to know that by properly applying primer, you’re setting the foundation for a beautiful, long-lasting kitchen transformation without the hassle of sanding?
Painting Techniques
Transform your kitchen by painting cupboards without sanding. Clean surfaces well, then apply a bonding primer. Finish with a durable paint for a fresh look.
Transforming your kitchen cupboards with a fresh coat of paint can breathe new life into your space. The good news? You don’t need to sand them down to achieve a stunning finish. With the right techniques, you can save time while ensuring your cupboards look professionally done. Let’s dive into some effective painting techniques that will make your kitchen makeover a breeze.
Brush Vs. Roller
Deciding between a brush and a roller can significantly impact the final look of your cupboards. Brushes are excellent for detailed work and edges, allowing you to reach those tricky corners with precision. However, they can sometimes leave brush strokes, which might not be the desired effect for everyone. On the other hand, rollers are fantastic for covering large, flat surfaces quickly. They provide a more even finish and can help you achieve a smooth look without much effort. Consider using a combination of both: a brush for the edges and a roller for the main sections.
Achieving Smooth Finishes
A smooth finish is all about the right preparation and application technique. Start by cleaning the cupboards thoroughly to remove any grease or grime. A clean surface is crucial for the paint to adhere properly. Use a high-quality primer designed for cabinets to ensure the paint sticks well and lasts longer. When applying paint, use thin coats and allow each layer to dry completely before adding another. This patience will pay off with a flawless finish. Remember, the devil is in the details. Pay attention to drying times and environmental factors like humidity, which can affect how the paint dries. Are you ready to transform your kitchen without the hassle of sanding? With these techniques, you’re well on your way to a stunning kitchen upgrade.
Drying And Curing
Ensure kitchen cupboards are thoroughly cleaned before painting. Use a bonding primer to help paint adhere without sanding. Allow proper drying and curing time for lasting results.
Painting kitchen cupboards without sanding can be a game changer for your home renovation project. After investing time in selecting colors and applying paint, the final stage of drying and curing is crucial for achieving a flawless finish. Understanding these stages ensures your cupboards look fresh and last longer.
Drying Times
Drying times vary based on the type of paint used. Quick-dry paints might seem convenient, but patience is key to avoid smudges or peeling. Typically, latex paints dry to the touch within an hour, but oil-based paints require more time. Consider using fans or opening windows to speed up the process. However, avoid excessive airflow that may cause dust to settle on the paint. Have you ever waited impatiently for paint to dry, only to regret it later? Allow a full day for complete drying to ensure a smooth finish.
Curing For Durability
Curing refers to the hardening process that strengthens the paint. While paint might feel dry, it can take up to a week to fully cure. This is when the paint achieves its maximum durability. During this time, avoid heavy cleaning or placing items against the cupboards. A gentle approach preserves the integrity of the paint and prevents damage. Is the wait worth it? Absolutely. Proper curing extends the lifespan of your cupboards, saving you future headaches. Consider the long-term benefits over short-term convenience. By understanding drying and curing, you secure a professional-looking result. Embrace this final step with patience, knowing your efforts will pay off.
Reattaching Hardware
Reattach the hardware carefully after the paint dries. Ensure screws and handles fit snugly for a polished look. Use a screwdriver to secure everything in place, checking each piece for stability and alignment.
Reattaching hardware to your freshly painted kitchen cupboards can be both exciting and transformative. It’s like giving your kitchen a final touch that can significantly impact its overall look. Whether you’re using the original hardware or opting for something new, this step requires careful attention to detail.
Choosing New Hardware
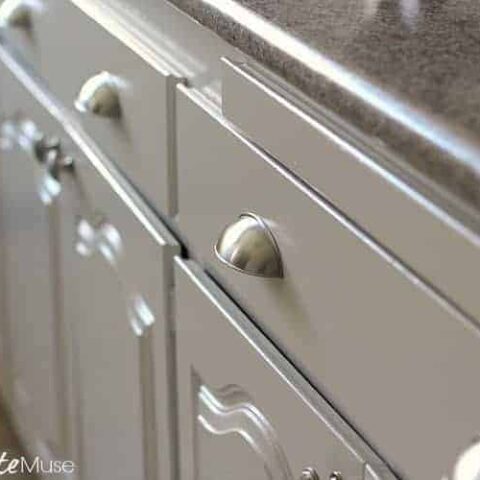
Selecting new hardware can dramatically change the vibe of your kitchen. Consider the style and color that will complement your freshly painted cupboards. For a modern look, go for sleek, metallic handles; for a rustic feel, opt for wooden knobs. Don’t forget about functionality. Choose handles and knobs that are comfortable to use, especially if you cook often. Spend some time exploring different shapes and sizes to find what fits best.
Installing Handles And Knobs
Before you start drilling, make sure to measure accurately where each piece will go. Use a template or a measuring tape to ensure uniform placement across all cupboards. Gather all necessary tools, like a drill and screwdriver, before starting. Secure the hardware tightly, but avoid over-tightening as it might damage the paint or the cupboards themselves. Remember, attention to detail during installation not only enhances the appearance but also ensures longevity of your kitchen hardware. If you encounter any misalignment, simply adjust and re-tighten to achieve a perfect fit. Do you think your kitchen’s personality is in the details? Choosing and installing hardware is a great way to express it!
Maintaining Painted Cupboards
Transform your kitchen cupboards with fresh paint without the hassle of sanding. Clean surfaces thoroughly to remove dirt. Apply a primer designed for glossy surfaces, then paint with high-quality cabinet paint for a smooth finish. Keep your cupboards looking bright and new with occasional cleaning using mild soap and water.
Maintaining painted kitchen cupboards is key to ensuring their longevity and keeping them looking fresh and vibrant. After all, you’ve invested time and effort into transforming your kitchen, so it’s essential to preserve that new-found charm. With a few straightforward strategies, you can keep your cupboards in top shape without the hassle of constant repainting.
Cleaning Tips
Regular cleaning is crucial to maintaining the appearance of your painted cupboards. Use a soft cloth dampened with a mild soap solution to wipe away grease and grime. Avoid abrasive cleaners that could damage the paint finish. For stubborn stains, a mixture of baking soda and water can work wonders. Gently rub the paste on the stain and wipe it off with a clean, damp cloth. Remember, a little elbow grease goes a long way in preserving the paint. Make it a habit to clean spills immediately to prevent staining. It might seem like a small task, but it makes a big difference in the long run. Are you ready to make cleaning part of your routine?
Touch-up Techniques
Even the best paint job might need a touch-up now and then. Keep a small container of the original paint for quick fixes. This allows you to seamlessly blend minor chips or scratches. Before touching up, clean the area thoroughly and ensure it’s dry. Use a fine brush for precision and apply the paint in thin layers, allowing it to dry completely between coats. Consider applying a clear topcoat for added protection. This not only shields the paint but also gives a polished finish. How often do you think about adding an extra layer of protection to your cupboards? Maintaining your painted kitchen cupboards doesn’t have to be a daunting task. With these simple strategies, you can enjoy your refreshed space for years to come. What techniques will you try first?
Credit: thepalettemuse.com
Frequently Asked Questions
Can You Paint Over Kitchen Cabinets Without Sanding?
Yes, you can paint kitchen cabinets without sanding. Use a high-quality bonding primer for better adhesion. Clean surfaces thoroughly, ensuring no grease or dirt remains. Apply paint in thin coats for a smooth finish. Choose durable paint for lasting results.
Ensure proper ventilation during painting.
Do I Need To Sand Kitchen Cabinets Before Painting?
Yes, sanding kitchen cabinets before painting is essential. It ensures better paint adhesion and a smooth finish. Clean the surface thoroughly, then sand lightly to remove any gloss. This step helps the primer and paint to stick effectively, resulting in a durable and professional-looking finish.
Can I Just Paint Over My Kitchen Cabinets?
Yes, you can paint over kitchen cabinets. Clean, sand, and prime them first for best results. Use high-quality paint for durability.
Is It Better To Spray Paint Or Brush Paint Kitchen Cabinets?
Spray painting offers a smoother finish and is faster for large surfaces. Brush painting provides more control and is ideal for detailed work. Choose spray for a modern look and brush for a traditional touch. Consider your skill level and desired outcome when deciding.
Conclusion
Painting kitchen cupboards can transform your space. Skip the sanding hassle. Use the right primer and paint. Clean surfaces thoroughly before starting. Apply primer evenly. Choose high-quality paint for lasting results. Let each coat dry completely. Patience is key. Enjoy your refreshed kitchen look.
It’s simple and effective. Anyone can do it. Save time and effort. Your kitchen will shine with new life. Get creative with colors. Experiment with finishes. Achieve a clean and fresh appearance. Your kitchen will thank you. Now, grab your brush.
Start painting. Your new kitchen awaits!