
Picture this: You’re in your kitchen, ready to whip up your favorite meal, but there’s an annoying drip, drip, drip coming from your sink. It’s a leaky drain.
Sound familiar? You’re not alone. Many homeowners face this frustrating issue at some point. But there’s good news—you can fix it yourself, often without calling a plumber. You’ll discover simple steps to identify the source of the leak and learn how to repair it efficiently.
Imagine the satisfaction of solving this problem with your own two hands, saving money, and preventing further damage to your kitchen. Dive in and let’s tackle that leaky kitchen sink drain together, so you can get back to enjoying your home without the constant drip.
Identifying The Leak Source
Start by examining the pipes beneath the sink. Check for any visible water stains or drips. Feel around joints and connections to detect moisture. Identifying the exact spot of leakage is crucial for an effective repair.
Identifying the source of a kitchen sink drain leak is crucial. A careful examination can save time and prevent further damage. Leaks might appear small, but they can lead to bigger issues if ignored. Discovering the exact spot where water escapes is the first step to fixing it. This can involve checking various components underneath the sink.Common Leak Areas
- Drain connections: These can loosen over time.
- P-trap: This curved pipe can develop cracks.
- Seals and gaskets: Wear and tear can cause leaks.
- Supply lines: These might have small punctures.
Signs Of A Leaky Drain
- Water stains under the sink.
- Unpleasant odors from trapped moisture.
- Pooling water on the floor.
- Mold or mildew growth around pipes.
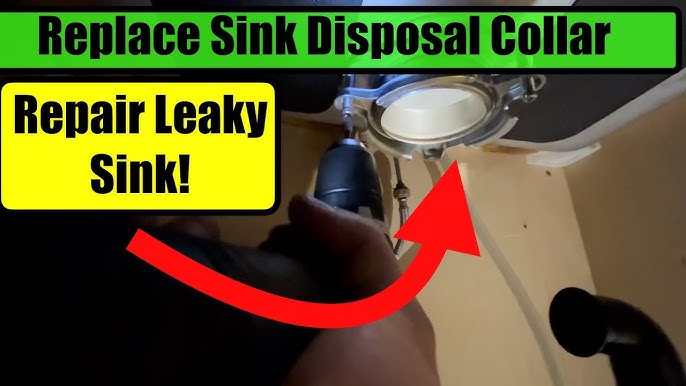
Credit: www.youtube.com
Gathering Necessary Tools
Gather the essential tools for fixing a leaky kitchen sink drain. Prepare a wrench, plumber’s tape, and a bucket. Ensure you have these items ready before starting the repair.
Gathering the right tools is the first step to fixing your leaky kitchen sink drain efficiently. It’s a bit like setting up your workspace before diving into a project—it can make or break your repair experience. Having everything you need at your fingertips can save time and prevent frustration. Plus, it helps you feel prepared for any unexpected challenges that might pop up during the repair process.Essential Tools List
Start by assembling a basic toolkit. Here’s what you should have:- Adjustable wrench:Perfect for loosening and tightening pipes and nuts.
- Plumber’s tape:Helps seal pipe threads to prevent leaks.
- Bucket:Catch water to avoid spills under the sink.
- Screwdriver:Handy for removing screws from drain covers.
- Cleaning cloth:Wipe away grime and water for a clean work area.
Optional Tools For Complex Repairs
Sometimes, a simple toolkit isn’t enough. Are you ready for those tougher repairs?- Pipe cutter:Ideal for cutting through metal pipes when resizing is needed.
- Drain snake:Useful for clearing stubborn clogs deep in the pipes.
- Epoxy putty:A quick fix for small holes or cracks in pipes.
- Plunger:Helps clear minor blockages without dismantling pipes.
Tightening Loose Connections
Tightening loose connections is crucial for fixing a leaky kitchen sink drain. Over time, nuts and bolts can loosen, causing leaks. Addressing these connections can save you from water damage. Here’s a simple guide to help you fix this issue.
Checking Pipe Joints
First, inspect the pipe joints beneath your sink. Look for any visible gaps or spaces. Check if the pipes connect securely. Sometimes, joints become loose after constant use. Ensure that all sections fit snugly together.
Securing Nuts And Bolts
Use a wrench to tighten any loose nuts. Turn each nut clockwise until it’s firm. Ensure not to over-tighten, which may damage the pipes. Next, check the bolts around the drain area. Tighten them with a screwdriver if necessary. Tight connections prevent leaks effectively.
Replacing Worn-out Washers
Replacing worn-out washers is a straightforward yet vital step in fixing a leaky kitchen sink drain. Washers are small but mighty components that help create a watertight seal. Over time, they can deteriorate, causing leaks. Identifying and replacing these can be a game-changer in restoring your sink’s functionality and preventing further damage. It’s a task that you can handle with a little patience and the right tools.
Removing The Old Washer
Begin by turning off the water supply to avoid any unexpected sprays. Locate the nut that holds the washer in place under the sink. Use a wrench to carefully loosen and remove it, keeping track of any accompanying parts. If the washer sticks, gently pry it loose with a screwdriver.
Inspect the washer once removed. You’ll notice the wear and tear that caused the leak. This observation can be quite satisfying as you know you’re on the right track to solving the problem. Have you ever discovered something broken and felt relieved to pinpoint the issue?
Installing A New Washer
Choose a replacement washer that matches the old one in size and material. A wrong fit can lead to more leaks, so accuracy is key. Position the new washer where the old one sat, ensuring it aligns perfectly with the opening.
Secure the washer by tightening the nut back into place with your wrench. Be careful not to over-tighten, as this might damage the new washer or surrounding components. Test your work by turning the water back on and checking for leaks. Does it feel good to see your efforts result in a dry, functional sink?
Sealing With Plumber’s Tape
Sealing with plumber’s tape can fix a leaky kitchen sink drain. Wrap the tape around the threads of the pipe. This creates a tight seal, preventing water from escaping. Ensure the tape covers all threads. This simple step can save time and prevent further leaks.
Sealing with plumber’s tape is a simple solution for a leaky sink drain. This method involves wrapping the tape around threaded connections to prevent leaks. Plumber’s tape, also known as Teflon tape, is a versatile tool for any plumbing task. It is affordable and easy to use, making it a favorite among homeowners.When To Use Plumber’s Tape
Plumber’s tape is ideal for sealing threaded pipes. Use it when you see small leaks in connections. It works best on metal and plastic threads. If your kitchen sink drain leaks at the joints, try this tape. Avoid using it on damaged pipes or large leaks.Proper Application Techniques
To apply plumber’s tape, follow these steps:- Ensure the surface is clean and dry.
- Wrap the tape around the threads in a clockwise direction.
- Overlap the tape slightly to cover the threads completely.
- Use 2-3 wraps for optimal sealing.
- Press the tape firmly to secure it.
- Reconnect the pipes and test for leaks.

Credit: www.youtube.com
Applying Pipe Sealant
Applying pipe sealant can effectively fix a leaky kitchen sink drain. Clean the pipe threads thoroughly before applying the sealant. Ensure the sealant covers all threads evenly to prevent leaks.
Fixing a leaky kitchen sink drain doesn’t need to be a daunting task. With the right tools and a bit of patience, you can tackle this common household issue effectively. A crucial step in ensuring a leak-free drain is applying pipe sealant. This step creates a watertight barrier, preventing any future leaks. Let’s dive into the essentials of choosing and applying the right sealant for your kitchen sink drain.Choosing The Right Sealant
Not all sealants are created equal. Selecting the appropriate one can make a world of difference in the longevity of your fix. Silicone sealants are popular due to their flexibility and resistance to temperature changes. They adhere well to most surfaces, ensuring a robust seal. Consider the environment where the drain is located. If it’s exposed to fluctuating temperatures or constant moisture, opt for a high-quality, water-resistant sealant. Reading product reviews can offer insights into real-world performance, helping you make an informed choice.Step-by-step Application
Applying pipe sealant requires precision and a steady hand. Start by cleaning the area thoroughly; any residue can compromise the seal. Use a cloth to wipe away dirt and ensure the surface is dry. Next, cut the nozzle of your sealant tube at a 45-degree angle for better control. Apply the sealant evenly around the joint, maintaining a consistent pressure on the tube. Avoid over-applying, as excess sealant can lead to mess and ineffective sealing. After application, smooth the sealant with a finger or a sealant tool to ensure it fills all gaps. Allow the sealant to cure as per the manufacturer’s instructions, usually 24 hours. This wait time can be a test of patience, but it ensures your efforts result in a lasting fix. Have you ever noticed a persistent drip under your sink? Addressing it promptly with the right sealant can prevent further damage and save you from costly repairs. Applying pipe sealant is a straightforward task that empowers you to take control of your home’s maintenance.Testing For Leaks
A leaky kitchen sink drain can lead to water damage. Fixing it quickly is crucial. Testing for leaks helps ensure the problem is resolved. This process involves checking for any signs of water escape. By performing simple tests, you can confirm the repair. Let’s explore some effective methods for leak testing.
Running Water Test
Start by turning on the faucet. Let the water run for a few minutes. Observe the drain and pipes. Look for any water escaping. If the area stays dry, your repair might be successful. This test helps identify hidden leaks.
Inspecting For Drips
Check around the sink and pipes. Use a flashlight to spot any drips. Pay attention to pipe joints and connections. Even small drips can cause problems. Fix any issues you find immediately. A detailed inspection prevents future leaks.

Credit: www.tiktok.com
When To Call A Professional
Fixing a leaky kitchen sink drain can be straightforward. Sometimes, though, the problem is more than it seems. In these cases, you should consider calling a professional plumber. Knowing when to make that call is crucial. This ensures the issue is resolved quickly and effectively. A professional can save time and prevent further damage.
Recognizing Complex Issues
Some leaks are easy to spot. Others hide beneath the surface. If the leak persists after basic fixes, it might be complex. Multiple leaks or water stains under the sink are red flags. Strange noises or odors signal deeper issues. These signs suggest it’s time to call a plumber. They have the skills to diagnose and repair complex problems.
Finding A Reliable Plumber
Choosing the right plumber is important. Start by asking friends for recommendations. Check online reviews for local plumbers. Look for those with a good reputation and fair pricing. Make sure they are licensed and insured. A reliable plumber will offer a clear estimate and timeline. This helps ensure your leaky sink is fixed properly.
Frequently Asked Questions
How To Stop A Kitchen Drain From Dripping?
Tighten loose connections under the sink using a wrench. Replace worn-out washers or seals. Clean and clear any blockages. Check for cracks in pipes and replace if necessary. Regularly inspect to prevent future leaks.
How To Fix A Drain Pipe Leak Without Replacing?
Use waterproof tape or epoxy putty to seal the leak. Clean the pipe and apply the chosen material. Ensure it’s completely dry before testing for leaks. Regularly check for any signs of wear or additional leaks to maintain the repair.
How To Seal A Leaking Sink Drain?
Turn off the water supply. Remove the drain pipe and clean the area. Apply plumber’s putty or silicone sealant around the drain. Reattach the pipe securely. Test for leaks by running water. Repeat the process if necessary.
How Do I Fix My Kitchen Sink From Dripping?
Turn off the water supply. Replace the worn-out washer or O-ring in the faucet. Reassemble and test.
Conclusion
Fixing a leaky kitchen sink drain can seem tricky. But with patience, it’s doable. Follow the steps closely. Start by identifying the leak source. Check the pipes and connections. Tighten loose fittings. Replace worn-out washers or seals. Use plumber’s tape for added security.
Testing after repairs is crucial. Ensure there are no drips. A dry sink means success. Regular checks prevent future leaks. Keep tools handy for easy fixes. A well-maintained sink saves time and money. Remember, practice makes perfect. Your kitchen will thank you! Enjoy a leak-free space.