How to Install Backsplash in Kitchen: Step-by-Step Guide
Are you tired of staring at those plain, uninspiring kitchen walls? Installing a backsplash could be the perfect solution to breathe new life into your cooking space.
Not only does a backsplash protect your walls from stains and splatters, but it also adds a touch of style and personality. Imagine transforming your kitchen into a vibrant, modern hub where you feel inspired to create delicious meals for family and friends.
This guide is crafted to walk you through the process, making it simple and enjoyable for anyone, even if you’ve never attempted a DIY project before. Discover how you can achieve a professional look and feel in your kitchen, all while staying on budget. Keep reading to uncover the secret to a stunning kitchen makeover that you’ll be proud to show off.
Choosing The Right Backsplash Material
Choosing the right backsplash material transforms your kitchen’s look. It adds personality and flair. With many options available, make a choice that suits your style. Consider durability, maintenance, and cost for a practical decision.
Tile Options
Tiles are popular for their versatility. Ceramic and porcelain tiles offer durability. They resist water and stains. Patterns and colors vary widely, fitting any design style. Mosaic tiles add a touch of elegance. They create intricate designs and are easy to clean.
Glass And Metal Choices
Glass adds a sleek, modern feel. It reflects light, making spaces appear larger. Easy to clean, it suits busy kitchens. Metal, such as stainless steel, provides an industrial touch. It’s durable and heat-resistant, ideal near stoves. Both options offer a unique, stylish look.
Stone And Wood Alternatives
Stone offers a natural, timeless appeal. Options like marble and granite bring elegance. They are durable but may require sealing. Wood adds warmth and charm. It suits rustic and traditional kitchens. Though beautiful, wood needs regular maintenance to prevent damage.
Preparing The Kitchen Area
Clean the kitchen walls thoroughly before installing the backsplash. Ensure a smooth surface by filling any cracks or holes.
Preparing the kitchen area is a crucial step when installing a backsplash. This phase sets the foundation for a smooth and successful installation process. By taking the time to prepare properly, you can ensure a professional-looking finish that enhances your kitchen’s aesthetic appeal.Clearing The Workspace
Before you begin, make sure your kitchen area is free from clutter. Remove all appliances, utensils, and any decorative items from the countertops. A clear workspace not only helps you work efficiently but also prevents any accidental damage to your belongings. Wipe down the surfaces to get rid of dust and grease. Grease can interfere with the adhesive used for the backsplash. It’s always surprising how much grime can accumulate in those hard-to-see spots.Gathering Tools And Materials
Having everything you need within arm’s reach can save you from unnecessary frustration. Gather essential tools like a measuring tape, level, trowel, and tile cutter. Don’t forget safety gear like gloves and goggles. Organize your materials in a logical order. Keep your backsplash tiles, adhesive, and grout nearby. This organization can turn what feels like a daunting task into a manageable project. Imagine having to halt your progress to search for a missing tool—better to avoid that scenario!Measuring The Surface
Precision is key when measuring the surface for your backsplash. Start by measuring the width and height of the area you plan to cover. Use these dimensions to calculate the number of tiles you’ll need. Consider any obstacles, like outlets or switches. These will require extra attention during installation. Think about how satisfying it will be to see everything align perfectly once you’re done. Double-checking measurements now can prevent future headaches.Surface Preparation
Preparing surfaces properly is crucial for a successful backsplash installation in the kitchen. Clean the wall thoroughly to remove grease and dirt. Ensure the surface is smooth and dry for effective adhesion.
Preparing the surface is a crucial step in installing a kitchen backsplash. This sets the foundation for a smooth and durable finish. Let’s dive into each essential aspect of surface preparation to ensure your backsplash project is a success.Cleaning The Wall
Before you start, ensure the wall is impeccably clean. Grease and grime can prevent tiles from adhering properly. Use a mild detergent and a sponge to wash the walls, then rinse with clean water. It’s vital to remove all residues. A final wipe with a damp cloth will help ensure no soap remains. This step might seem tedious, but it guarantees a strong bond for your tiles.Repairing Damages
Examine the wall for any imperfections. Cracks and holes can disrupt the uniformity of your backsplash. Fill these gaps with spackle or joint compound. Once filled, sand the area until it’s smooth. Have you ever noticed how a small crack can lead to larger issues? Addressing these now prevents potential problems down the line.Applying Primer
A good primer is the secret weapon for a long-lasting backsplash. It creates an adhesive surface that tiles can grip onto. Apply a coat of primer evenly over the wall. Allow it to dry completely before proceeding. This step reinforces the wall, ensuring your tiles remain in place for years to come. Surface preparation might not be the most glamorous part of installing a backsplash, but it’s undoubtedly the most crucial. Are you ready to transform your kitchen with confidence?Cutting The Backsplash Material
Select the backsplash material and measure the space carefully. Cut with precision using a tile cutter or saw. Ensure edges are smooth for a seamless installation.
Cutting the backsplash material is a crucial step in kitchen renovation. Precision is vital to create a seamless and professional look. Before cutting, gather the necessary tools and materials. Plan each cut carefully to avoid mistakes.Measuring For Accuracy
Accurate measurements ensure a perfect fit. Start by measuring the area where the backsplash will go. Use a tape measure for precision. Double-check your measurements before marking the material. Keep a record of all measurements to avoid errors.Using Cutting Tools
Select the right tool for your material. Tile cutters work well for ceramic tiles. Use a wet saw for glass or stone tiles. If using a manual cutter, apply steady pressure. Ensure the blade is sharp for clean cuts. Practice on spare material if needed.Handling Different Materials
Different materials require different techniques. Ceramic tiles are easy to cut and handle. Glass tiles need careful handling to prevent cracks. Stone requires a strong saw and steady hand. Always wear safety goggles and gloves when cutting. Use a gentle touch for delicate materials.Applying Adhesive
Spread adhesive evenly on the wall using a notched trowel. Ensure full coverage for a secure backsplash fit. Press tiles firmly, aligning edges for a neat finish.
Applying adhesive is a crucial part of installing a kitchen backsplash. The right adhesive ensures your tiles stay secure and aligned. Let’s explore how to apply adhesive effectively for the best results.Choosing The Right Adhesive
Selecting the right adhesive is important for a lasting backsplash. Consider the type of tiles you have. For ceramic tiles, a mastic adhesive works well. Use thin-set mortar for natural stone tiles. Ensure the adhesive is suitable for kitchen environments. Check that it is water-resistant.Spreading Evenly
Proper application requires an even spread of adhesive. Use a notched trowel for this task. Scoop the adhesive onto the wall. Spread it smoothly with the flat side of the trowel. Then, use the notched side for grooves. This helps the tiles stick better. Make sure the layer is not too thick.Adhesive Setting Time
Allow the adhesive to set before adding tiles. Check the product instructions for exact timing. Usually, it takes about 15 to 30 minutes. This period lets the adhesive develop initial grip. Avoid disturbing the adhesive during this time. Ensure no gaps appear as it sets.
Credit: www.instagram.com
Installing The Backsplash
Installing the backsplash in your kitchen is an exciting step. It adds style and function to the space. This process requires patience and precision. Follow these steps to ensure a successful installation. Each stage is crucial in achieving a flawless finish.
Placing The First Tile
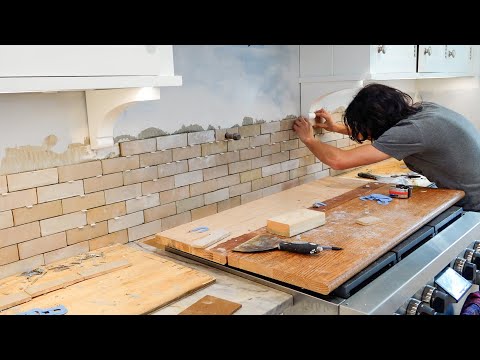
Begin by marking the center of the wall. This spot will guide your tile placement. Apply a thin layer of adhesive using a notched trowel. Press the first tile firmly onto the wall. Ensure it aligns with your center mark. Hold it in place for a few seconds. This secures the initial bond.
Ensuring Proper Alignment
Check the alignment of the first tile. Use a level to verify its straightness. Adjust the tile if necessary. This ensures the entire row stays level. A misaligned first tile affects the whole layout. Repeat this process with subsequent tiles.
Adding Spacers
Place spacers between each tile. This maintains consistent gaps for grout. Proper spacing enhances the overall appearance. It also allows for slight tile expansion. Remove spacers once the adhesive sets. This usually takes a few hours. Spacers are key to a neat installation.
Grouting The Backsplash
Grouting the backsplash ensures a clean, finished look in your kitchen. Apply grout with a float, pressing it into the spaces. Wipe excess with a damp sponge, then let it dry for a polished result.
Grouting the backsplash is a pivotal part of transforming your kitchen space. Done right, it seals and completes the look, offering both aesthetic and functional benefits. This process can be straightforward, even for a DIY novice, provided you follow a few simple steps.Mixing Grout
Start by reading the instructions on your grout package carefully. Use a clean bucket and add water as recommended, then gradually mix in the grout powder. Stir continuously until you achieve a smooth, peanut butter-like consistency. Remember, it’s essential to mix only what you can use in about 30 minutes. Grout can dry quickly, so having too much mixed at once might lead to wastage. Use a margin trowel for mixing; it makes handling easier and ensures even mixing.Applying Grout
Now that your grout is ready, grab a rubber float and apply it at a 45-degree angle. Press firmly to fill the spaces between tiles, ensuring no gaps remain. Work in small sections to maintain control and efficiency. Think about how the grout color can enhance your tile choice. A contrasting grout can make your tiles pop, while a similar shade offers a seamless look. Take your time to press the grout into every crevice for a durable finish.Cleaning Excess Grout
Once applied, it’s time to clean off the excess. Wait about 10 to 15 minutes, then use a damp sponge to wipe the tiles clean. Ensure the sponge is rinsed often to avoid smearing grout across the tiles. Have you ever noticed a haze left on tiles after grouting? This is normal. Simply buff it away with a dry cloth after the grout has set. This final step is key to achieving that polished, professional look in your kitchen. By taking these steps, you’re not just installing a backsplash—you’re adding a piece of art to your kitchen. Imagine the satisfaction of admiring a job well done every time you cook. Are you ready to tackle this rewarding project?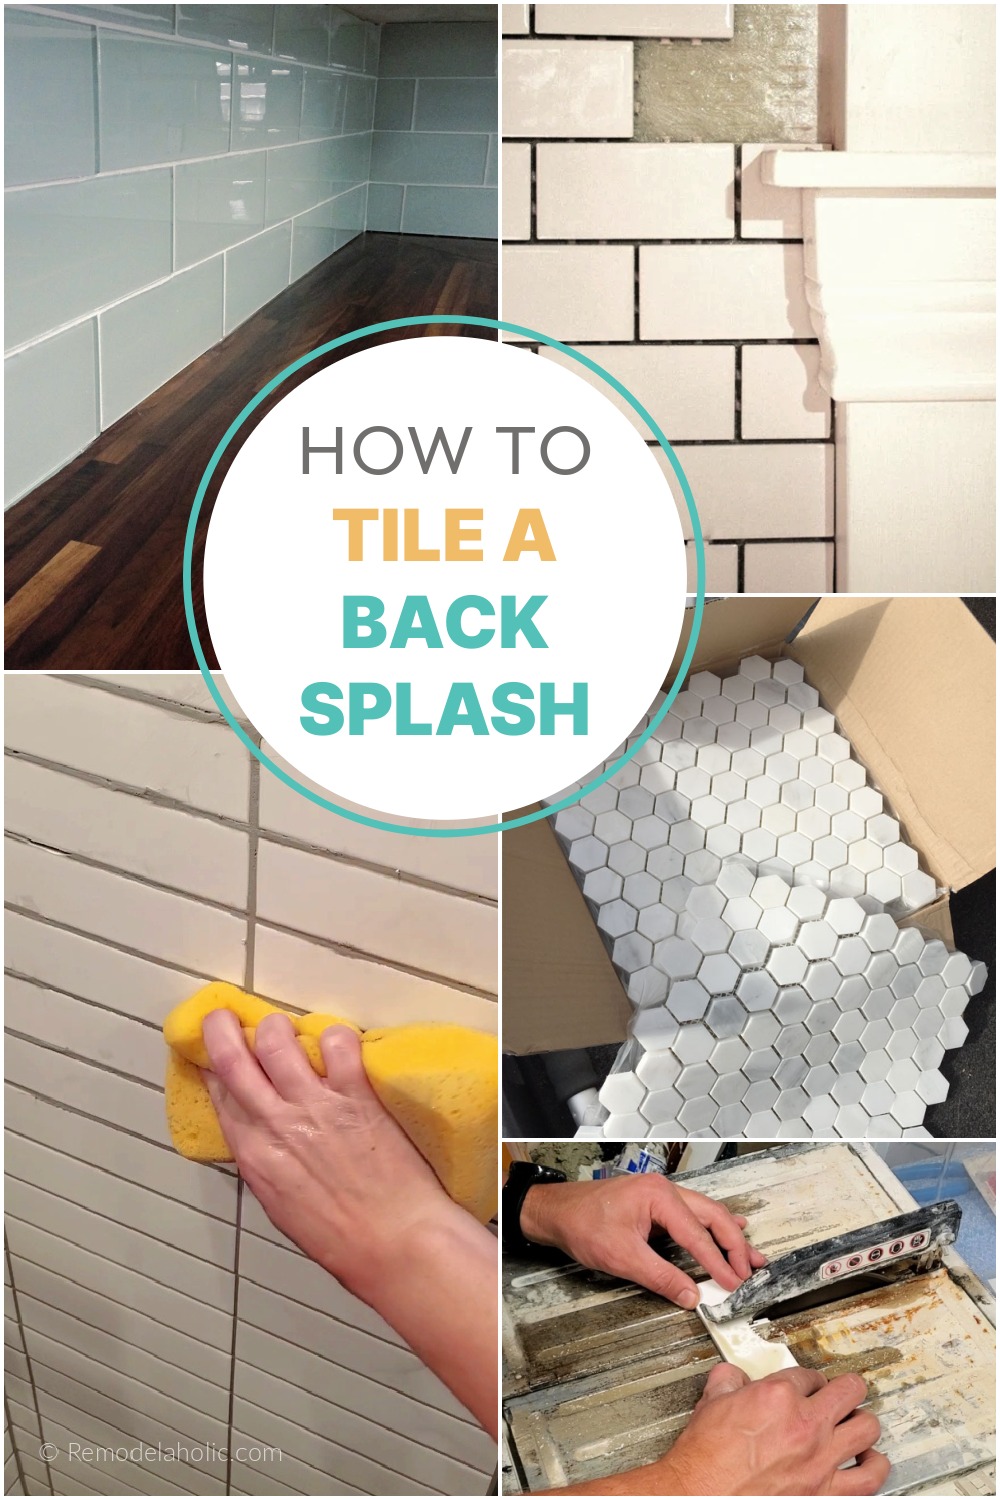
Credit: www.facebook.com
Finishing Touches
The finishing touches bring your kitchen backsplash to life. They ensure a polished, professional look. These final steps are crucial for durability. Make sure you complete them with care.
Sealing The Backsplash
Sealing helps protect the tiles from stains and moisture. Apply a high-quality sealant over the tiles. Use a brush or roller for even coverage. Let the sealant dry completely before using the kitchen. This step ensures long-lasting shine and protection.
Caulking Edges
Caulking fills gaps where the backsplash meets counters or walls. Choose a silicone-based caulk for flexibility and water resistance. Smooth the caulk with a finger or tool for a neat finish. This prevents water from seeping behind the tiles, avoiding damage.
Inspecting For Flaws
Check the tiles closely for any imperfections. Look for cracks, chips, or uneven spots. Fix these with tile adhesive or grout as needed. Ensuring flawlessness enhances the aesthetic appeal. It gives your kitchen a cohesive look.
Maintenance Tips
Installing a kitchen backsplash adds style and protection. Begin by measuring the area and cutting tiles to fit. Apply adhesive evenly, then press tiles firmly, aligning carefully.
Maintaining your kitchen backsplash is crucial for keeping it looking fresh and appealing. Proper maintenance not only preserves its aesthetic appeal but also extends its lifespan. Whether you have a ceramic, glass, or stone backsplash, regular care can prevent damage and ensure it remains a standout feature in your kitchen. Here are some practical tips to help you maintain your backsplash effectively.Regular Cleaning
Regular cleaning is your first line of defense against grime and buildup. Wipe down your backsplash weekly using a damp cloth and mild detergent. Avoid abrasive cleaners that can damage the surface.
Consider setting a reminder to clean your backsplash as part of your weekly routine. This helps maintain its shine and prevents stubborn stains from forming.
Have you ever noticed how a quick wipe can instantly brighten your kitchen? Consistent cleaning is key to preserving its beauty.
Handling Stains
Stains are inevitable, but they don’t have to be permanent. Address stains immediately using a paste of baking soda and water. Apply the paste, let it sit for a few minutes, then wipe clean.
For tougher stains, a solution of vinegar and water can be effective. Spray the solution on the stain and gently scrub with a soft brush.
What is your go-to remedy for stains? Share your tips with family and friends to spread the knowledge.
Repairing Chips
Chips can occur, especially if your backsplash is made of ceramic or glass. If you spot a chip, fill it with a matching color repair kit available at most home improvement stores.
For larger chips, consider consulting a professional to ensure a seamless repair. They can provide expertise that ensures the fix blends perfectly with the existing design.
Have you ever repaired a chip on your own? It can be a rewarding experience and saves costs if done correctly.
Maintaining your backsplash doesn’t have to be daunting. With these simple tips, you can keep it looking as good as new, ensuring it continues to enhance the charm of your kitchen.

Credit: daviemactile.com
Frequently Asked Questions
Can A Beginner Install A Kitchen Backsplash?
Yes, a beginner can install a kitchen backsplash. Use the right tools and follow step-by-step guides. Choose simple materials like peel-and-stick tiles. Watch tutorial videos for better understanding. Practice patience and precision for best results.
Can You Put A Backsplash Directly On Drywall?
Yes, you can install a backsplash directly on drywall. Ensure it’s clean, dry, and smooth for proper adhesion. Use appropriate adhesive and consider sealing grout to protect against moisture. This method is popular for kitchens and bathrooms, offering an easy and stylish update.
Do You Put In Countertops Or Backsplash First?
Install countertops first to ensure proper support and alignment. After countertops are in place, add the backsplash. This sequence helps achieve a seamless look and prevents potential measurement errors or misalignment issues.
What Holds A Backsplash To A Wall?
Tile adhesive or mastic holds a backsplash to a wall. It ensures a strong, durable bond. Use the right adhesive for your material, like mortar for tiles or construction adhesive for other surfaces. Proper installation ensures lasting stability and aesthetics for your kitchen or bathroom backsplash.
Conclusion
Installing a backsplash transforms your kitchen. It adds style and protection. Follow simple steps for a smooth process. Gather your materials first. Measure accurately. Choose tiles that match your decor. Prepare the wall surface well. Apply adhesive evenly. Place tiles carefully.
Allow drying time before grouting. Clean the tiles after installation. Enjoy your refreshed kitchen space. With patience, this DIY project can be rewarding. Feel proud of your effort. The kitchen will shine with its new look. Every meal feels special with a fresh backdrop.
Happy tiling!