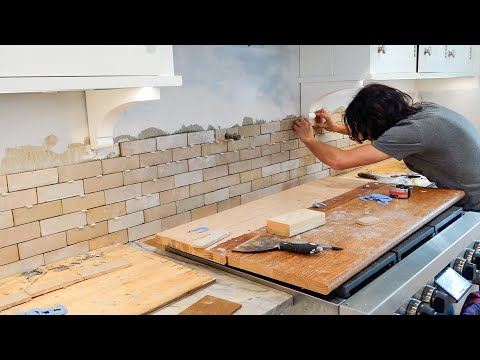
Transforming your kitchen can be as simple as installing a beautiful backsplash. Imagine giving your kitchen an instant facelift, adding style and function without breaking the bank.
That’s the magic of a well-installed backsplash. It’s not just about aesthetics; it also protects your walls from splashes and stains. Are you tired of staring at that plain wall above your countertops? Do you want to impress your guests with a stunning kitchen makeover?
You’re in the right place. This guide will walk you through the step-by-step process of installing a backsplash in your kitchen, even if you’re a DIY novice. Dive in, and discover how easy it is to make a significant impact in your kitchen. Your dream kitchen is just a backsplash away!
Choosing The Right Materials
Choosing the right materials for your kitchen backsplash is a crucial step in ensuring both functionality and aesthetic appeal. Your kitchen is a central hub of activity, and the backsplash plays a significant role in the overall look and feel. Whether you’re aiming for a sleek modern vibe or a cozy rustic atmosphere, the material you choose will be pivotal. Let’s dive into the different types of materials available, weighing their pros and cons, and considering budget implications.
Types Of Backsplash Materials
- Tile:Ceramic and porcelain tiles are a popular choice due to their wide range of colors, patterns, and finishes.
- Glass:Known for its sleek and shiny appearance, glass tiles can add a touch of modern elegance to any kitchen.
- Stone:Materials like marble, granite, and slate offer a natural and luxurious feel.
- Metal:Stainless steel or copper backsplashes provide an industrial look and are easy to clean.
- Peel-and-Stick:These are great for DIY enthusiasts looking for a quick and cost-effective solution.
Pros And Cons Of Each Material
| Material | Pros | Cons |
|---|---|---|
| Tile | Durable, versatile, and easy to clean | Grout can stain and requires maintenance |
| Glass | Reflects light, making spaces appear larger | Can be expensive and prone to scratches |
| Stone | Unique patterns and natural look | Requires sealing and can be costly |
| Metal | Heat-resistant and durable | Can dent or scratch easily |
| Peel-and-Stick | Easy to install, budget-friendly | Less durable, may not last long |
Budget Considerations
Your budget is one of the most decisive factors when choosing materials. Are you willing to splurge on luxurious stone, or does a practical tile fit better within your financial plan? Consider not only the upfront costs but also the long-term maintenance expenses.
If you’re on a tight budget, peel-and-stick options offer a quick fix that won’t break the bank. However, investing in durable materials like ceramic tile might save you money in the long run due to their longevity.
Reflect on what fits your lifestyle and your kitchen’s needs. Would you prefer to allocate funds towards other kitchen upgrades? Your backsplash choice should align with your overall kitchen renovation goals.
Choosing the right materials for your kitchen backsplash isn’t just about aesthetics—it’s about creating a space that works for you. What will make your heart sing every time you step into your kitchen? The right choice awaits!

Credit: daviemactile.com
Gathering Necessary Tools
Installing a backsplash in your kitchen can transform the space, adding both functionality and style. Before diving into this rewarding project, it’s crucial to gather all the necessary tools. Being well-prepared not only makes the process smoother but also ensures safety and efficiency. Let’s explore the essential tools you need, the safety equipment to protect yourself, and some optional tools that can make your task easier.
Essential Tools List
- Tile Cutter:Precise cuts are vital for fitting tiles snugly against walls and corners.
- Notched Trowel:This tool helps spread adhesive evenly over surfaces.
- Level:Ensures your tiles are aligned properly for a professional finish.
- Measuring Tape:Accurate measurements prevent material wastage and ensure a perfect fit.
- Grout Float:Essential for applying grout smoothly between tiles.
- Bucket and Sponge:Useful for cleaning tiles and wiping excess grout.
Safety Equipment
- Safety Glasses:Protect your eyes from tile shards and adhesive splashes.
- Gloves:Keep your hands safe from sharp edges and chemicals.
- Dust Mask:Prevent inhalation of dust particles, especially when cutting tiles.
Optional Tools For Efficiency
- Tile Spacer:Keeps tiles evenly spaced and aligned during installation.
- Wet Saw:Offers precision cuts and is ideal for larger projects.
- Laser Level:Ensures even greater accuracy than a traditional level.
Have you ever started a DIY project only to realize halfway through that you’re missing a crucial tool? Avoid this common pitfall by checking off each item on your tool list before you begin. Not only will this preparation save time, but it will also help achieve a professional-looking finish that you’ll be proud of. Happy tiling!
Preparing The Kitchen Wall
Preparing the Kitchen Wall Clean the kitchen wall thoroughly before installing the backsplash. Ensure a smooth, dry surface for best results.
Preparing your kitchen wall is vital for a successful backsplash installation. A smooth and clean wall ensures the tiles adhere properly. Let’s explore the key steps to prepare your wall.
Cleaning The Surface
Start by removing dust and grease from the wall. Use a mild detergent and warm water. Wipe the wall with a sponge or cloth. Rinse the wall and let it dry completely. This helps the adhesive stick better.
Measuring The Area
Measure the area where the backsplash will go. Use a measuring tape for accuracy. Note the height and width in inches or centimeters. Write down these measurements for later. Double-check to avoid errors.
Marking Guidelines
Use a pencil and a level to draw lines. These lines guide tile placement. Start from the center and work outward. Ensure the lines are straight and even. This ensures tiles are aligned correctly. Adjust as necessary for accuracy.

Credit: carlaaston.com
Cutting The Backsplash
Accurate measurement is key to cutting the backsplash tiles. Mark the cutting line using a pencil for precision. Use a tile cutter or wet saw to achieve clean, straight cuts.
Cutting the backsplash is an important part of the installation process. It ensures a snug fit and a neat look. Proper cutting techniques make the job easier and more efficient. Let’s explore some simple tips to help you cut your kitchen backsplash perfectly.
Measuring Tiles Or Sheets
Accurate measurements are crucial for cutting tiles. Use a tape measure for precision. Measure the area where the tile will fit. Mark the dimensions on the tile using a pencil. Double-check your measurements before cutting. Mistakes can be costly.
Using A Tile Cutter
A tile cutter is a handy tool. It scores and snaps tiles cleanly. Position the tile in the cutter. Align the marked line with the blade. Score the tile by pressing down gently. Snap it apart with a firm motion. Practice on spare tiles first.
Handling Odd Shapes And Outlets
Odd shapes require special attention. Use a tile nipper for small cuts. For outlets, measure carefully around them. Mark the cuts on the tile. Use a wet saw for precise cuts. Wear safety goggles to protect your eyes. Patience is key to achieving a perfect fit.
Applying Adhesive
Spread adhesive evenly on the wall using a trowel. This ensures tiles stick properly and securely. Always apply a thin, consistent layer for best results.
Applying adhesive is a crucial step in installing a backsplash in your kitchen. This process ensures your tiles stay securely in place, maintaining the aesthetic and functionality of your kitchen. Let’s dive into the details of choosing the right adhesive, applying it evenly, and ensuring proper coverage.
Choosing The Right Adhesive
Selecting the right adhesive can make all the difference. Consider the type of tile you’re using—ceramic, glass, or stone—as each requires a specific adhesive type. For example, thin-set mortar is ideal for ceramic and stone, while a mastic adhesive works better for glass tiles. It’s also important to think about the kitchen environment. If your kitchen sees a lot of moisture, ensure your adhesive is water-resistant. This small detail can prevent future headaches.
Applying Adhesive Evenly
Even application of adhesive is key to a successful backsplash installation. Uneven adhesive can lead to misaligned tiles and an unprofessional look. Start by using a notched trowel to spread the adhesive on the wall. The size of the notches should match the size of your tiles to ensure even application. Spread the adhesive in small sections. This way, it doesn’t dry out before you have a chance to place the tiles. Take your time to get it right; it’s worth the effort.
Ensuring Proper Coverage
Coverage is as important as evenness. Without proper coverage, tiles may not adhere well, leading to potential issues down the line. Apply enough adhesive to cover the entire back of each tile and the wall surface. You should see the adhesive come through the grooves when you press the tile down. Inspect each tile after placing it. Ensure there’s no air trapped under the tile, which can weaken the bond. Wouldn’t you want your backsplash to withstand the test of time? By following these steps, you can ensure your kitchen backsplash is both beautiful and durable. Happy tiling!
Installing The Backsplash
Measure the area to determine tile quantity. Prepare the wall by cleaning it thoroughly. Apply adhesive evenly, then press the tiles into place. Use spacers for even gaps. Allow adhesive to set before grouting. Finally, wipe off excess grout with a damp sponge.
Enjoy your new kitchen look!
Installing a backsplash can transform your kitchen. It adds style and protects walls from spills. This guide will help you install your backsplash perfectly. Follow these steps carefully for a seamless finish.
Placing The First Tile
Start with a clean surface. Apply adhesive to the wall using a trowel. Press the first tile firmly into the corner. Ensure it aligns with the counter edge. Use spacers to maintain even gaps between tiles. Check the level using a spirit level tool.
Aligning Subsequent Tiles
Continue placing tiles next to the first one. Use spacers for uniform spacing. Press each tile gently but firmly. Check alignment with the first tile. Adjust if necessary. Keep the tiles level and straight.
Adjustments And Corrections
Mistakes may happen. Remove misplaced tiles immediately. Clean off excess adhesive. Reposition tiles accurately. Use a damp cloth to wipe off adhesive. Ensure tiles remain straight and level. Double-check alignment before adhesive sets.
Grouting And Sealing
Grouting and sealing your kitchen backsplash not only enhances its appearance but also ensures it stands the test of time. This crucial step can transform your kitchen from bland to beautiful, adding a polished and professional finish. While the process might seem daunting, breaking it down into manageable tasks can make it both fun and rewarding.
Mixing Grout
Start by gathering your materials: grout powder, water, and a mixing tool. Follow the instructions on the grout package for the right water-to-powder ratio. Aim for a smooth, peanut butter-like consistency, and let it rest for about 10 minutes to ensure all particles are fully hydrated.
Applying Grout Between Tiles
Using a rubber float, spread the grout diagonally across the tiles, pressing firmly to fill the gaps. Work in small sections to prevent the grout from drying too quickly. Once filled, use a damp sponge to wipe off excess grout, cleaning the tiles without removing grout from the joints.
Sealing For Durability
After allowing the grout to cure for at least 24 hours, apply a grout sealer to protect against stains and moisture. Use a small brush or a roller for even application, ensuring all grout lines are covered. Consider a second coat for high-moisture areas, like behind the sink, to further enhance longevity.
Have you ever wondered why some backsplashes look newer than others over time? It often boils down to proper sealing and maintenance. Investing time in this step can save you from future headaches and keep your kitchen looking fresh for years to come.

Credit: www.instagram.com
Cleaning And Finishing Touches
After installing the backsplash, clean any adhesive residue and grout lines. Wipe the tiles with a damp cloth for a polished finish.
Cleaning and finishing touches are the final steps in installing a kitchen backsplash that ensure your hard work shines. After laying the tiles and letting the grout set, it’s crucial to clean and inspect your backsplash to achieve a professional look. These steps might seem small, but they make all the difference in the overall appearance and durability of your backsplash.
Removing Excess Grout
Once the grout has set, it’s time to remove any excess that might have smeared on the tiles. Use a damp sponge and gently wipe over the surface, being careful not to disturb the grout lines. Keep rinsing the sponge frequently to avoid spreading grout residue. If you notice stubborn grout haze, a commercial grout haze remover can be your best friend. Always follow the product instructions and test a small area first. Make sure to wear gloves to protect your skin during this process.
Polishing The Surface
After cleaning off the grout residue, polishing the tiles brings out their natural shine. Use a soft, dry cloth to buff the tiles, moving in circular motions. This not only enhances the tile’s appearance but also removes any lingering haze. Consider using a tile sealant for natural stone tiles to protect them from stains. Apply it following the manufacturer’s guidelines for long-lasting results.
Inspecting Final Results
Take a step back and inspect your newly installed backsplash. Look for any missed spots or grout lines that might need additional filling. This is also the time to check for any tiles that might not be securely set. Ask yourself: Does the backsplash align perfectly with the countertop and cabinets? Is the grout consistent in color and texture throughout? Address any issues now to prevent future headaches. Completing these final touches ensures your kitchen backsplash not only looks stunning but also stands up to daily use. So, take your time with this step and enjoy the transformation you’ve brought to your kitchen space!
Frequently Asked Questions
Can A Beginner Install A Kitchen Backsplash?
Yes, a beginner can install a kitchen backsplash. It requires patience, proper tools, and following step-by-step instructions. Practice makes perfect, so take your time. Watch tutorials online for guidance. Choose simple designs for easier installation. Ensure surfaces are clean and prepared before starting.
Seek help if needed for complex patterns.
Can I Put A Backsplash Directly On Drywall?
Yes, you can install a backsplash directly on drywall. Ensure the surface is clean, dry, and smooth. Use appropriate adhesive for better durability and a strong hold. Sealing the edges helps prevent water damage. Proper preparation ensures a long-lasting and attractive backsplash installation.
Do You Put In Countertops Or Backsplash First?
Install countertops before the backsplash. This ensures accurate backsplash measurement and a seamless fit. Proper sequencing prevents gaps and misalignment, enhancing the kitchen’s overall look. It’s crucial for a polished and professional finish.
Does The Backsplash Go Behind The Stove Or Sink?
Backsplashes typically go behind both the stove and sink. They protect walls from splashes and stains, enhancing kitchen aesthetics. Installing a backsplash behind these areas helps maintain cleanliness while adding style. Choose materials like tiles or glass that are easy to clean and match your kitchen’s design.
Conclusion
Installing a backsplash can transform your kitchen’s look. It adds style and protects walls. Choose materials that fit your budget. Plan your design before starting. Measure carefully for a perfect fit. Prep the wall surface well. Use the right tools for installation.
Apply adhesive evenly. Place tiles with precision. Let grout dry completely. Clean excess grout off tiles. Enjoy your refreshed kitchen space. A backsplash makes a big difference. It’s an achievable DIY project. You’ll love the results. Invite friends to see your new kitchen look.