How to Replace a Kitchen Faucet With a Single Handle: Step-by-Step Guide
Executive Chef & Lead Commercial Kitchen Specialist at Daily Kitchup Test Lab
Is your kitchen faucet leaking, outdated, or just not your style anymore? Replacing it might seem like a daunting task, but it’s more straightforward than you might think, especially if you’re upgrading to a sleek, single-handle model.
Imagine the satisfaction of transforming your kitchen with a new faucet that not only enhances its aesthetic but also improves functionality. Plus, doing it yourself can save you a significant amount of money. In this guide, you’ll discover step-by-step instructions to successfully replace your kitchen faucet, even if you’re not a DIY expert.
By the end of this article, you’ll feel empowered and confident to tackle this project, giving your kitchen a fresh, modern look. Ready to roll up your sleeves and get started? Let’s dive in!
Tools And Materials Needed
Gather essential tools like an adjustable wrench, basin wrench, and plumber’s tape. Ensure you have a new single-handle faucet, supply lines, and a bucket for catching water.
Replacing a kitchen faucet can seem challenging, but it’s manageable with the right tools and materials. Understanding what’s needed ensures a smooth process and prevents unnecessary interruptions. This section highlights essential items for replacing a single-handle faucet, ensuring you’re fully prepared before starting the project.Tools You’ll Need
Gathering the necessary tools beforehand is crucial for efficiency. Ensure you have these items:- Adjustable wrench
- Basin wrench
- Phillips screwdriver
- Flathead screwdriver
- Plumber’s tape
- Bucket or bowl
- Rags or towels
Materials Required
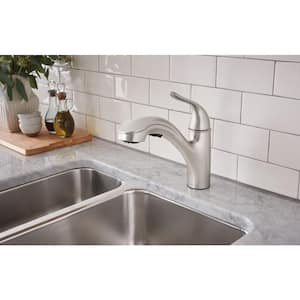
Having the right materials ensures the faucet functions properly. Gather these items:- New single-handle faucet
- Supply lines
- Sealant or plumber’s putty
Credit: www.homedepot.com
Preparation And Safety Tips
Ensure the water supply is turned off before starting. Gather tools like wrenches, plumber’s tape, and a bucket for old water. Follow manufacturer instructions to avoid leaks or damage during installation.
Before replacing your kitchen faucet with a single handle, preparation and safety are key. Ensuring a smooth and safe installation process requires careful planning. Taking the right precautions will help avoid potential mishaps. Here are some essential preparation and safety tips to follow.Gather Necessary Tools And Materials
Collect all tools before starting the project. Common tools include a wrench, pliers, and a basin wrench. Ensure you have plumber’s tape and a bucket for catching water. Having everything ready saves time and reduces stress.Turn Off The Water Supply
Locate the water valves under the sink. Turn them clockwise to shut off the water supply. This prevents leaks and water damage during installation.Check The Existing Setup
Examine the current faucet and sink setup. Identify the connection types and dimensions. This helps in selecting compatible replacement parts.Ensure Safety Measures
Wear safety goggles to protect your eyes from debris. Use gloves to prevent cuts and bruises. Ensure the area is well-lit to avoid accidents.Clear The Work Area
Remove items from under the sink. This creates space to work comfortably. It also prevents items from getting wet or damaged.Understand The Instructions
Read the faucet installation manual thoroughly. Familiarize yourself with the steps and components. This ensures a smoother installation process. Proper preparation and safety measures set the stage for a successful faucet replacement. Following these tips ensures efficiency and minimizes risks.Turning Off Water Supply
Begin by turning off the water supply to prevent leaks during faucet replacement. Locate the shut-off valves under the sink and twist them clockwise to stop the flow. Ensuring the water is off simplifies the installation process and avoids potential messes.
Replacing a kitchen faucet can breathe new life into your space. The first step is crucial: turning off the water supply. This prevents leaks and ensures a smooth process. Let’s explore how to do this effectively.Locating The Shut-off Valves
Find the valves under the sink. They are usually near the pipes. They control hot and cold water flow.Turning The Valves Off
Turn each valve clockwise. This stops the water supply. Ensure they are tightly shut.Checking For Leaks
Once off, test for leaks. Turn on the faucet. If water flows, tighten the valves further.Draining Residual Water
Open the faucet handles. Let remaining water drain out. This helps prevent mess during replacement. This step is essential for a hassle-free faucet installation. Following these ensures a smooth start to your project.
Credit: www.youtube.com
Removing The Old Faucet
Turning off the water supply is key before removing the old faucet. Use a wrench to disconnect pipes and carefully lift the faucet out. Cleaning the area ensures a smooth installation of the new single-handle faucet.
Removing the old faucet is the first step in upgrading your kitchen. It’s easier than it looks. With some patience and the right tools, you can do it yourself.Disconnecting Water Lines
Start by turning off the water supply. Usually, there are valves under the sink. Turn them clockwise to stop the water flow. Next, use a wrench to disconnect the water lines. Place a bucket underneath to catch any water left in the lines.Unscrewing Mounting Nuts
Look under the sink for the mounting nuts. These hold the faucet in place. Use a basin wrench to loosen and remove them. This tool fits into tight spaces easily. Once the nuts are off, lift the old faucet out of the sink.Cleaning The Sink Area
With the faucet removed, clean the sink area. Scrub away any grime or residue left behind. Use a mild cleaner and a soft cloth. Ensure the surface is smooth and ready for the new faucet. A clean sink ensures a better seal for the new installation.Installing The New Faucet
Replacing a kitchen faucet with a single handle involves removing the old fixture and securing the new one. Ensure proper alignment and tighten connections for a leak-free installation. Test the faucet function and check for any drips to complete the job.
Installing a new kitchen faucet can seem challenging. With some guidance, it’s manageable. This section will guide you through the essential steps. Ensure you have your tools ready and follow these steps to success.Positioning The Faucet
Begin by inserting the faucet’s tailpiece into the sink’s hole. Check the alignment from above the sink. Make sure the faucet is centered and straight. Adjust as needed for proper positioning. This step ensures the faucet functions correctly.Securing With Mounting Hardware
Once positioned, secure the faucet with mounting hardware. Slide the rubber or plastic gasket onto the tailpiece. Next, place the metal washer over it. Tighten the mounting nut by hand initially. Use a wrench to secure it firmly, ensuring the faucet doesn’t wobble.Connecting Water Supply Lines
Connect the water supply lines to the faucet. Ensure the hot and cold lines are correctly attached. Use a wrench to tighten the connections, but avoid over-tightening. Check for leaks by turning on the water supply. Adjust connections if necessary to prevent drips.Testing For Leaks
Ensure the faucet is securely installed and connections are tight. Turn on the water and check for drips. Inspect all connections and fittings to confirm they are leak-free.
Testing for leaks is crucial after installing a new kitchen faucet. A small leak can cause big problems if ignored. Ensuring a tight seal now prevents future damage. Follow these steps to check for leaks effectively.Check All Connections
Inspect every connection point carefully. Look at the joints under the sink. Make sure they are tightly secured. Loose connections often cause leaks.Turn On The Water Supply
Slowly turn on the water supply valves. Let the water run through the faucet. Observe the flow and pressure. Check for unusual behavior.Examine The Faucet Base
Feel around the base of the faucet. Use your fingers to detect moisture. Even a small wet spot indicates a potential leak.Inspect The Hoses
Check the hoses connecting the faucet to the water supply. Ensure they are free from kinks and damage. Damaged hoses need replacement to prevent leaks.Look For Drips
Watch the faucet spout for any drips. Dripping signifies an internal issue. It may require tightening or additional sealing.Test With Paper Towels
Place paper towels around connections and base. Turn the faucet on and off. Wet towels reveal hidden leaks.Make Necessary Adjustments
If leaks are found, tighten connections or replace faulty parts. Ensure all adjustments secure a leak-free installation.Finishing Touches
Secure the faucet with a wrench to ensure it stays in place. Test the handle for smooth operation and check for any leaks to complete the installation.
The final steps in replacing your kitchen faucet with a single handle are crucial to ensuring everything works perfectly and your space is left tidy. After all the hard work, these finishing touches are like the cherry on top, adding the final polish to your kitchen upgrade. This is where you make sure the faucet operates smoothly and your workspace is clean and ready to be used again.Checking Faucet Operation
Once the faucet is installed, you need to ensure it works properly. Begin by turning on the water supply and testing both hot and cold settings. Check for any leaks around the base and connections; a small drip can lead to bigger problems if overlooked. Adjust the handle to see if it moves easily and controls the water flow as expected. Does the water pressure feel right? If something seems off, a quick adjustment might be necessary.Cleaning Up Workspace
After confirming the faucet works correctly, it’s time to clean up your workspace. Gather all the tools you used and return them to their proper places. Wipe down the area around the sink and the faucet itself. This not only removes any installation residue but also gives your new faucet a sparkling start. Dispose of any packaging materials and old faucet parts responsibly. Have you considered recycling them? A clean workspace means you can enjoy your revamped kitchen without lingering clutter. These finishing touches ensure that your kitchen not only looks good but functions efficiently. Have you ever felt the satisfaction of a job well done? That’s what these steps aim to achieve!Troubleshooting Common Issues
Replacing a single-handle kitchen faucet can solve common issues like leaks and low water pressure. Begin by turning off the water supply and removing the old fixture. Ensure proper alignment of the new faucet, tightening connections securely to prevent future problems.
Replacing a kitchen faucet with a single handle can be a rewarding DIY project, but it’s not uncommon to encounter a few hiccups along the way. Troubleshooting these common issues can save you time, frustration, and possibly even a call to the plumber. By understanding the typical problems and their solutions, you’ll be better prepared to tackle any unexpected challenges.Loose Faucet Handle
A loose handle can be annoying and may lead to further complications if not fixed promptly. Check the set screw located under the handle or at the back, depending on your faucet model. Tighten it using an Allen wrench, ensuring a snug fit without over-tightening.Leaking Faucet
Leaks are often caused by worn-out washers or seals. Start by turning off the water supply and dismantling the faucet to inspect these components. Replace any damaged parts, and make sure everything is reassembled correctly to prevent future leaks.Low Water Pressure
Experiencing low water pressure can be frustrating, especially when you’re in a hurry. Inspect the aerator, which is the small screen located at the tip of the faucet. It may be clogged with mineral deposits; cleaning or replacing it should restore normal water flow.Difficulty In Removing Old Faucet
The removal process can be tricky, particularly if the old faucet is corroded or has hard-to-reach mounting nuts. Use penetrating oil to loosen stubborn connections. A basin wrench can also be a handy tool for accessing tight spaces under the sink.Incorrect Faucet Alignment
If the faucet isn’t aligned properly, it could affect both the aesthetics and functionality. Loosen the mounting nuts slightly, adjust the faucet until it’s centered, and then retighten. Ensure everything is aligned before fully securing to avoid future adjustments.Water Temperature Issues
If you’re having trouble getting the right water temperature, the problem might lie in the mixing valve. Check the valve for any blockages or misalignments. Adjust or replace the valve as needed to achieve the desired temperature balance. By anticipating these common issues and knowing how to address them, you’re more likely to enjoy a smooth and successful faucet installation experience. Have you faced any of these challenges before? Share your insights or further questions in the comments!
Credit: www.youtube.com
Frequently Asked Questions
Can You Replace A 3 Hole Faucet With A Single?
Yes, you can replace a 3 hole faucet with a single one. Use a deck plate to cover unused holes. Ensure compatibility with your sink and plumbing.
Can You Go From A Two Handle Faucet To A Single-handle?
Yes, you can switch from a two-handle faucet to a single-handle one. This requires replacing the faucet and possibly modifying the sink. Ensure compatibility with your plumbing setup. Consider hiring a professional for installation to avoid potential issues. A single-handle faucet offers a modern and convenient upgrade.
What Are The Disadvantages Of A Single-handle Faucet?
Single-handle faucets can be less precise in temperature control. They may also have limited style options. Repairs can be more challenging, and they might not suit all sink designs. Water flow might be less than dual-handle models, affecting performance.
How To Remove Single-handle Kitchen Faucet Handle?
Turn off the water supply. Remove the decorative cap on the handle. Unscrew the set screw underneath. Pull the handle off gently.
Conclusion
Replacing a kitchen faucet can be simple. A single-handle faucet makes it easier. Follow the steps carefully. Gather all necessary tools beforehand. Turn off the water supply first. Remove the old faucet gently. Clean the sink area thoroughly. Install the new faucet securely.
Tighten all connections. Check for any leaks. Fix them immediately if found. Enjoy your updated kitchen space. Save money on professional help. Improve your DIY skills. Feel accomplished with your work. Now you know how to replace a faucet. A useful skill for any homeowner.

Similar Posts