How to Fix a Leaky Kitchen Faucet 2 Handle: Easy Steps
Is the constant drip-drip-drip of your leaky kitchen faucet driving you crazy? You’re not alone.
A leaky faucet is not only annoying but can also lead to higher water bills and potential water damage if ignored. Luckily, fixing a two-handle kitchen faucet is simpler than you might think, and you don’t need to be a plumbing expert to get the job done.
Imagine the peace of mind you’ll feel once the leak is gone, and your kitchen is back to its serene, functional state. In this guide, you’ll discover step-by-step instructions to tackle this common household problem. With just a few tools and a bit of determination, you can save money, conserve water, and restore harmony to your kitchen. Let’s put an end to the drip once and for all. Read on to find out how you can fix your leaky kitchen faucet today.
Tools And Materials Needed
Gather essential tools like a wrench, screwdriver, and plumber’s tape. Ensure materials include replacement parts like washers and O-rings. These items are crucial for fixing a leaky two-handle kitchen faucet efficiently.
Fixing a leaky kitchen faucet with two handles doesn’t need to be daunting. Having the right tools and materials makes the task simpler and quicker. Before diving into the repair, gather everything you need for a smooth process.Basic Tools Required
You’ll need a few essential tools. A screwdriver is necessary to remove screws from the handles. An adjustable wrench helps to loosen nuts without damaging them. Slip-joint pliers will assist in gripping pipes securely.Specialized Plumbing Tools
Consider using a basin wrench for hard-to-reach areas. A plumber’s tape, also known as Teflon tape, ensures a tight seal on threaded connections. A faucet handle puller can make removing stuck handles easier.Replacement Parts
Have replacement washers and O-rings ready. They are crucial for stopping leaks. Ensure you have matching parts for your faucet model. You may need new handles if they are damaged.Cleaning Supplies
Keep a cloth and cleaning solution handy. These help clean the faucet components before reassembly. A bucket can catch water spills during the repair.Safety Gear
Wear safety goggles to protect your eyes. Gloves can prevent cuts and provide a better grip. Always ensure your work area is well-lit for visibility.Identifying The Leak Source
Identifying the Leak Source Inspect the handles and spout for drips or moisture. Check for loose connections or worn-out washers. Detecting the exact spot helps in effective repair.
Identifying the source of a leak is crucial for a fix. Many kitchen faucet issues stem from unnoticed leaks. By pinpointing the exact source, you can save time and effort. This step ensures you address the root problem.Check The Faucet Handles
Inspect the handles closely. Look for water pooling around their base. This often indicates worn-out seals or O-rings.Examine The Spout
Observe if water drips from the spout when turned off. A dripping spout usually means a faulty valve.Inspect Under The Sink
Look beneath the sink for leaks. Feel for moisture on supply lines or connections. These areas might have loose fittings or damaged hoses.Assess The Faucet Base
Feel the area where the faucet meets the sink. Moisture here might point to a faulty seal. Ensure the base is dry and secure.Observe Water Pressure
Turn the faucet on and off. Notice any sudden pressure changes. Inconsistent pressure could signal internal leaks or blockages.Listen For Unusual Sounds
Pay attention to any strange noises. Gurgling or whistling might suggest air in the pipes. This could be linked to leaks or blockages.Turning Off Water Supply
Turning off the water supply is essential before fixing a leaky kitchen faucet with two handles. Locate the valves under the sink and twist them clockwise to stop water flow, ensuring a safe repair process.
Turning off the water supply is crucial before fixing any faucet. It prevents water from spilling everywhere. First, locate the valves under the sink. There are usually two valves, one for hot and one for cold water.How To Locate Water Shut-off Valves
These valves are often near the back wall. They might be behind the pipes. Look closely to find them. Sometimes, they are hidden by cleaning supplies.Turning Off The Hot And Cold Water Valves
Turn the valves clockwise to shut them off. Use your hand to do this. If they are too tight, use a wrench. Make sure both valves are completely closed.Testing If Water Supply Is Properly Off
Turn on the faucet handles to check. No water should come out. If water flows, check the valves again. Ensure they are tightly closed.Disassembling The Faucet Handles
Disassembling the faucet handles reveals the source of leaks. Start by turning off the water supply. Unscrew the handles carefully, exposing the valve beneath for inspection and repair.
Disassembling the faucet handles is a crucial step in fixing a leaky kitchen faucet with two handles. This task may seem daunting, but it’s simpler than you might think. With the right tools and a bit of patience, you’ll have those handles off in no time.Gather Your Tools
Before you begin, ensure you have the necessary tools on hand. A screwdriver, an adjustable wrench, and a small container for screws are essential. These will help you dismantle the handles without losing any parts.Turn Off The Water Supply
First, find the valves under your sink and turn them clockwise to stop the water flow. This prevents any water from leaking as you work. It’s a small step that saves you from a potential mess.Remove Handle Caps
Look for the decorative caps on top of the faucet handles. Use a flathead screwdriver to gently pry them off. Be cautious, as applying too much force can damage the caps.Unscrew The Handles
Once the caps are off, you’ll see screws that hold the handles in place. Use your screwdriver to loosen and remove these screws. Keep them in a container to avoid losing them.Lift The Handles Off
With the screws removed, gently lift the handles off the faucet. If they’re stuck, wiggle them slightly to loosen. Be careful not to use excessive force, as this can damage the faucet.Inspect The Handle Components
Take a moment to examine the components beneath the handles. Check for any visible damage or wear. Identifying the problem early can save you time and effort later. By now, your faucet handles should be successfully disassembled, ready for the next steps in fixing the leak. Have you ever realized how empowering it feels to tackle such a task on your own?Replacing The Washer
Replacing the washer in a leaky kitchen faucet can stop drips effectively. First, turn off the water supply and remove the faucet handles. Then, carefully replace the worn washer with a new one. This simple fix can save water and prevent further damage.
Replacing the washer in a leaky kitchen faucet is a straightforward task that can save you from annoying drips and potential water waste. If you’ve ever been kept awake by the sound of a dripping tap, you’ll know how irritating it can be. The good news is, with just a few tools and a little bit of patience, you can fix it yourself. Here’s how to replace the washer and stop the leak once and for all.Turn Off The Water Supply
Before you begin, make sure to turn off the water supply to your faucet. Look under the sink for the shut-off valves and twist them clockwise to stop the flow of water. If your valves are stuck, try using a wrench gently.Remove The Faucet Handles
Once the water is off, remove the handles on your faucet. Most handles have a screw underneath a decorative cap. Pry off the cap with a flathead screwdriver and then unscrew the handle.Take Out The Old Washer
With the handle removed, you’ll see the stem. Remove it by turning it counterclockwise. At the base of the stem, you’ll find the washer held by a small screw. Use a screwdriver to take out the screw and remove the washer.Install The New Washer
Now that the old washer is out, replace it with a new one. Make sure the new washer matches the size and shape of the old one. Secure it with the screw you removed earlier.Reassemble The Faucet
With the new washer in place, reassemble the faucet. Insert the stem back into its place and tighten it by turning clockwise. Reattach the handles and secure them with screws.Turn On The Water And Test
Finally, turn the water supply back on by twisting the shut-off valves counterclockwise. Turn on your faucet to check for leaks. If there are no drips, you’ve successfully replaced the washer! Replacing a washer is a simple task, but it can make a big difference. Have you ever tackled a home repair that seemed daunting but turned out to be surprisingly easy?
Credit: www.tiktok.com
Installing A New Cartridge
Installing a new cartridge can stop leaks in a two-handle kitchen faucet. Turn off the water supply first. Remove the faucet handles to access and replace the old cartridge.
Installing a new cartridge in a two-handle kitchen faucet can stop leaks effectively. This task requires patience and a few basic tools. The process might seem tricky but is manageable with clear guidance. Replacing the cartridge is vital for stopping water waste and potential damage. Follow these steps to replace your cartridge and bring your faucet back to life.Gathering Necessary Tools
Start by gathering essential tools. A wrench, screwdriver, and pliers are necessary. These tools will help you remove and install the cartridge efficiently. Ensure you have a towel handy for cleaning spills.Shutting Off Water Supply
Turn off the water supply. Locate the valves under the sink and twist them clockwise. This prevents water flow while you work on the faucet. Confirm the water is off by turning on the faucet handles.Removing Faucet Handles
Remove the faucet handles carefully. Check for screws on the handles. Unscrew them using a screwdriver. Some handles might require pulling off gently. Place the screws in a safe location to avoid losing them.Extracting The Old Cartridge
Locate the old cartridge inside the faucet. Use pliers to pull it out slowly. Be cautious to avoid damaging the surrounding parts. Clean the area around the cartridge to remove debris or mineral buildup.Installing The New Cartridge
Insert the new cartridge into the faucet. Ensure it aligns properly with the existing slots. Push it gently until secure. This step is crucial for preventing leaks in the future. Use the wrench to tighten the cartridge if necessary.Reassembling Faucet Handles
Reattach the faucet handles. Align them correctly before securing with screws. Tighten the screws using a screwdriver. Double-check the alignment to ensure smooth operation of the faucet.Testing The Faucet
Turn on the water supply. Test the faucet by turning the handles. Check for any leaks around the cartridge area. Monitor the water flow to ensure smooth functioning. Adjust if necessary to fix any issues. This straightforward approach helps fix a leaky faucet efficiently. Regular maintenance can prevent future leaks and extend the faucet’s lifespan.Reassembling The Faucet
Reassembling the Faucet Begin by placing the new O-rings and washers on the faucet. Tighten the screws securely to prevent leaks. Ensure handles and spout are aligned correctly before testing the water flow.
Reassembling the kitchen faucet is a crucial step. It ensures the two handles work efficiently. After fixing the leak, proper reassembly is vital. Follow these steps carefully to avoid future leaks.Cleaning The Components
Before reassembly, clean all parts. Remove any debris or mineral buildup. This helps parts fit together properly. Use a soft brush for gentle cleaning. Ensure each piece is completely dry.Positioning The Washer
Place the washer back in its spot. Make sure it sits flat. A crooked washer can cause leaks. Double-check its placement. Proper alignment is key.Securing The Nuts And Bolts
Tighten the nuts and bolts securely. Use a wrench for a snug fit. Avoid over-tightening, which may damage parts. Ensure everything is stable and firm.Aligning The Handles
Position the handles correctly. Test their movement. They should turn smoothly. Misaligned handles can lead to issues. Adjust as needed for proper function.Testing The Faucet
Turn on the water to test. Check for any leaks. Observe handle movements. Ensure water flow is steady. If any issues arise, revisit each step.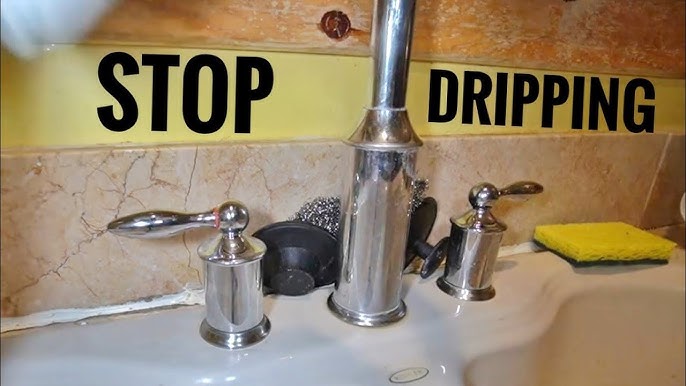
Credit: www.youtube.com
Testing For Leaks
Turn off water supply and dry the area. Check for visible leaks around the handles. Tighten or replace washers if needed.
Testing for leaks is a crucial step in ensuring your kitchen faucet repair is a success. You’ve put in the hard work to fix the leak, but how can you be sure it won’t spring a surprise on you later? This step-by-step guide will help you identify any persistent issues, giving you peace of mind that your faucet is in top shape.Ensure The Handles Are Turned Off
Before you start testing, make sure both handles are tightly turned off. This seems simple, but it’s often overlooked. A slightly open handle might give the illusion of a leak. It’s like checking if you’ve turned off the stove before leaving the house—it saves you from unnecessary worries.Turn The Water Supply Back On
Once you’re sure the handles are off, it’s time to turn the water supply back on. Do this slowly to avoid any pressure build-up that might cause your connections to loosen. If you’re like me, you’ll hold your breath a bit during this step, hoping everything stays dry.Observe The Faucet For Drips
With the water supply on, watch the faucet closely. Check for any drips from the spout or around the handles. Even a small drip can indicate a problem. Have you ever thought a small detail didn’t matter, only to find out it was key? That’s exactly what a drip is—a small but significant clue.Inspect Under The Sink
Don’t just focus on the faucet itself. Take a moment to look under the sink where the pipes are. Use a flashlight for better visibility. Sometimes, leaks hide in places you least expect, much like finding an old treasure hidden in your attic.Check For Water Pooling
Feel around the base of the faucet for any water pooling. Even if you don’t see drips, pooled water is a sign of a leak. It’s like finding evidence in a detective story—you have to look at all the clues to solve the mystery.Perform A Paper Towel Test
Place a dry paper towel around the base and handles of the faucet. Wait a few minutes and then check if the towel is damp. This simple test can reveal leaks that aren’t immediately visible. Sometimes, the simplest solutions give the clearest answers.Tighten Connections If Necessary
If you find any leaks, use a wrench to tighten connections gently. Be careful not to over-tighten, which can cause damage. It’s like adjusting a guitar string—too much tension, and it might snap.Re-test After Adjustments
After making adjustments, repeat the testing process. Ensure there are no leaks before considering the job done. It’s like proofreading your work—one last review can make all the difference. Taking the time to test for leaks ensures your repair efforts are not wasted. Are you ready to tackle your kitchen faucet with confidence?Maintenance Tips
Fixing a leaky two-handle kitchen faucet involves turning off the water supply and removing the handles. Inspect and replace worn-out washers or seals, then reassemble the faucet to stop the leak efficiently.
Maintaining a leaky kitchen faucet can extend its life and save money. Regular maintenance prevents small issues from becoming costly repairs. Follow these simple tips to keep your faucet in top shape.Inspect Regularly
Regular inspections help identify problems early. Check for any drips or leaks under the sink. Look for any corrosion or wear on the faucet handles. These signs indicate potential issues needing attention.Clean Aerator
The aerator can get clogged with mineral deposits. This affects water flow. Remove it and soak in vinegar for a few hours. Rinse and reattach for improved flow.Check O-rings
O-rings wear out over time. They cause leaks if not replaced. Examine them for cracks or damage. Replace any worn O-rings to prevent leaks.Tighten Loose Parts
Faucet handles and spout may become loose. Use a wrench to tighten any loose parts. This simple step can prevent bigger issues later on.Lubricate Moving Parts
Lubrication keeps the faucet operating smoothly. Apply plumber’s grease to the moving parts. This reduces friction and prolongs life.Replace Worn Washers
Washers degrade and cause leaks. Inspect and replace them regularly. This helps maintain a tight seal and stops leaks.Avoid Harsh Cleaners
Harsh cleaners damage faucet finishes. Use mild soap and water for cleaning. This keeps the faucet looking new.Know When To Call A Professional
Some issues require expert help. If leaks persist, contact a plumber. They can address complex problems effectively.
Credit: www.plumbingandparts.com
Frequently Asked Questions
How To Stop A 2 Handle Faucet From Dripping?
Turn off the water supply. Remove the faucet handles. Replace worn washers or seals. Reassemble the faucet.
What Is The Most Common Cause Of A Leaky Dripping Two-handle Faucet?
The most common cause of a leaky dripping two-handle faucet is worn-out washers or seals. These components can deteriorate over time, leading to water leakage. Replacing the damaged washers or seals typically resolves the issue, restoring the faucet’s proper function and preventing further drips.
How To Fix A Leaking Tap With Two Handles?
Turn off the water supply. Remove the handle covers and screws. Take out the stem and check the washer. Replace any worn washers or O-rings. Reassemble the tap and turn the water back on. Check for leaks. Make sure all parts are tightened properly.
How To Remove Cartridge From 2 Handle Faucet?
Turn off the water supply and remove the handle. Unscrew the retaining nut, then pull out the cartridge carefully.
Conclusion
Fixing a leaky kitchen faucet can be simple. Follow the steps carefully. Gather necessary tools before starting. Turn off the water supply to avoid mess. Remove the faucet handles gently. Check for worn-out washers or seals. Replace them if needed.
Reassemble the faucet parts securely. Turn on the water supply and test for leaks. Regular maintenance prevents future leaks. Saves water and money. Enjoy a drip-free kitchen! Always consult a professional for complicated issues. Your kitchen faucet should work smoothly now.
Simple repairs make a big difference. Keep your kitchen efficient and leak-free!