Do It Yourself Play Kitchen: Create Magical Moments
Imagine the joy on your child’s face as they step into their very own play kitchen, crafted with your own hands. Not only does a DIY play kitchen save money, but it also allows you to customize it in a way that perfectly matches your child’s interests and your home’s style.
This project doesn’t require a master carpenter’s skills; just a little creativity, some basic tools, and a dash of enthusiasm. You’ll create a space where your child can explore, imagine, and learn, all while having endless fun. Ready to dive into a rewarding project that sparks creativity for both you and your little chef?
Let’s get started on building a play kitchen that will be cherished for years to come.
Choosing The Right Materials
Creating a DIY play kitchen for your little ones is an exciting project. The materials you choose can make all the difference in terms of durability, safety, and environmental impact. Let’s explore the best options for building a play kitchen that is both functional and safe.
Wood Vs. Plastic
When deciding between wood and plastic, think about the longevity and aesthetic you want for your kitchen. Wood is sturdy and can be customized with paint or varnish. This material gives a classic look and can withstand rough play. But, it requires more maintenance and might be heavier.
Plastic is lightweight and easy to clean. It comes in various colors and designs, offering vibrant options for a playful kitchen. However, it might not last as long as wood, especially under heavy use. Consider the balance between ease of use and durability before making your choice.
Eco-friendly Options
If you’re concerned about the environment, there are sustainable materials to consider. Bamboo is a great alternative to traditional wood. It’s strong and grows quickly, making it an eco-friendly choice. Recycled plastics can also be an option, reducing the need for new raw materials.
Think about using non-toxic paints and finishes to ensure your kitchen is safe for your kids and the environment. You can also repurpose old furniture into a play kitchen, giving it a new life and reducing waste. How will your choices impact the planet?
Safety Considerations
Safety is paramount when creating a play kitchen. Ensure all edges are smooth and rounded to prevent injuries. Secure all parts firmly to prevent any loose pieces that could be a choking hazard.
Check materials for any harmful chemicals. Opt for non-toxic and child-friendly paints and finishes. Regularly inspect the kitchen for wear and tear to ensure it remains safe for play. How can you make sure your child’s playtime is both fun and safe?

Credit: www.tiktok.com
Design And Layout Ideas
Transform a simple corner into a lively play kitchen. Use recycled materials and colorful paint for a creative touch. Add mini shelves for utensils and hooks for pots, making a delightful space for little chefs.
Designing a DIY play kitchen can be an exciting project. It allows creativity to flow while crafting a fun, educational space for kids. The design and layout play a crucial role in maximizing both functionality and enjoyment. Here are some inspiring ideas to guide you.Space-saving Designs
Small spaces require clever solutions. Opt for a compact kitchen layout. Use modular pieces that can be easily rearranged. Wall-mounted shelves save floor space. Consider foldable tables for added utility. This keeps the area clutter-free and accessible.Incorporating Real Kitchen Features
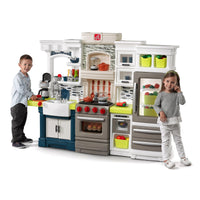
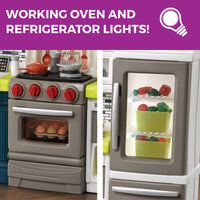
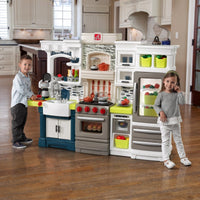
Add authenticity by mimicking real kitchen elements. Install knobs that turn and click. Use real sink fixtures for a touch of realism. Include a mini-fridge with shelves inside. This makes the play experience more engaging and educational.Personalized Touches
Customization makes the kitchen unique. Paint in your child’s favorite colors. Add their name to a signboard. Use stickers or decals for decoration. This personal touch makes the kitchen truly special and inviting.Essential Tools And Supplies
Creating a Do It Yourself (DIY) play kitchen is a rewarding project that allows you to personalize a fun and imaginative space for your child. One of the key elements to ensure success is gathering the essential tools and supplies. With the right materials, you can transform simple items into a beautiful play area that will entertain and inspire. Let’s dive into what you’ll need to get started.
Basic Tools Needed
Before you begin, make sure your toolbox is ready with these basic tools:
- Drill:A cordless drill is perfect for assembling various parts.
- Screwdriver Set:Both flat and Phillips head screwdrivers are essential for securing screws.
- Measuring Tape:Precision is key, so a reliable measuring tape will help with accurate dimensions.
- Saw:A hand saw or jigsaw can be used for cutting wooden panels.
Having these tools at your disposal will make the construction process smoother and more enjoyable.
Must-have Accessories
Transforming your DIY play kitchen into a realistic culinary world requires some must-have accessories:
- Paint:Choose non-toxic paint to ensure safety and durability.
- Handles and Knobs:Add real kitchen handles for a more authentic feel.
- Stickers or Decals:Use playful stickers to mimic stove tops and oven controls.
- Storage Baskets:These help keep play food and utensils organized.
These accessories not only enhance the aesthetic but also add functionality to your play kitchen.
Where To Source Supplies
The hunt for supplies can be as creative as the project itself. Here are some places to check:
- Local Hardware Stores:They offer a vast array of tools and wood materials.
- Online Marketplaces:Websites like Amazon provide a wide selection of accessories and tools.
- Thrift Shops:A treasure trove for unique handles and baskets at budget-friendly prices.
Shopping for supplies can be an adventure. Where will you find the hidden gems for your project?
Credit: www.step2.com
Step-by-step Construction Guide
Create a delightful DIY play kitchen with this step-by-step construction guide. Transform basic materials into a charming play space. Perfect for sparking creativity in kids.
Creating a do-it-yourself play kitchen is a rewarding project that combines creativity with practicality. Imagine the delight on your child’s face as they play with a kitchen you built with your own hands. This step-by-step construction guide will walk you through the process, making it easy and fun.Building The Frame
Start by gathering your materials. You will need plywood or MDF, screws, and a drill. Cut the wood to form the base, sides, and top of the kitchen. Assemble the pieces into a rectangular shape, ensuring everything is sturdy and secure. A solid frame will withstand hours of imaginative play. Consider the height—make sure it’s comfortable for your child to reach the countertop.Adding Functional Elements
Think about the elements that make a kitchen functional. Add shelves for storing toy dishes, and install a small sink using a plastic bowl. Use old knobs for stove burners and hang hooks for utensils. This not only makes the kitchen more realistic but also enhances your child’s play experience. Include an oven door that opens and closes easily. You can use hinges to attach it to the frame, giving your child access to their culinary creations.Painting And Finishing Touches
Choose bright, inviting colors for the final touches. Paint the frame to match your child’s personality or the decor of their play area. Add details like stove burners with black paint or fun patterns on the shelves. This is your chance to unleash your creativity and make the kitchen truly unique. Don’t forget to seal the paint with a non-toxic finish. This ensures durability and safety for your little one as they embark on their culinary adventures. Building a play kitchen is a project that allows you to bond with your child while teaching them new skills. What features will you add to make it special for your child?Incorporating Educational Elements
Incorporate educational elements in a DIY play kitchen by labeling items with words. Teach colors and shapes through kitchen accessories, fostering early learning and creativity.
Creating a DIY play kitchen is not just about crafting a fun toy; it’s an opportunity to weave in educational elements that can enhance your child’s learning experience. By thoughtfully integrating these components, you can transform a simple play kitchen into a powerful educational tool. Think of it as a way to sneak in learning while your child is busy whipping up imaginary meals.Learning Through Play
Play is a child’s natural way to learn. In a DIY play kitchen, everyday tasks can teach basic math, language skills, and social interaction. Counting the number of apples in a basket or following a recipe involves numbers, sequences, and vocabulary. Consider labeling jars with words and pictures to build reading skills. Use measuring cups to introduce concepts like fractions. Each playful interaction doubles as a stepping stone for new knowledge.Interactive Features
Interactive elements can spark curiosity and sustain engagement. Use knobs that twist, doors that open, and buttons that click to mimic a real kitchen environment. These features build fine motor skills and teach cause-and-effect relationships. Think about adding a chalkboard or whiteboard where kids can write daily specials or grocery lists. A magnetic surface with removable letters can turn the fridge door into a canvas for spelling practice. What other interactive elements could you add to make learning seamless?Encouraging Creativity
A play kitchen is a stage for endless creativity. By providing a variety of play foods and utensils, children can invent new recipes and scenarios. Encourage them to create menus and set up a restaurant, promoting imaginative play and storytelling. Let them explore by mixing different ingredients to “cook” unique dishes. You could even introduce a theme—like a cultural cuisine week—to broaden their horizons. What creative story will your child cook up next in their little kitchen?Maintaining And Updating Your Play Kitchen
Creating a DIY play kitchen involves regular maintenance to ensure safety and durability. Check for loose parts and clean surfaces to keep it inviting for play. Refresh the paint or add new features to update its look and feel, inspiring endless imaginative adventures.
Maintaining and updating your DIY play kitchen brings endless joy and creativity to your child’s playtime. Keeping it fresh and functional ensures that your little chef enjoys their culinary adventures. These practical tips and ideas help your play kitchen stay in top shape and evolve with your child’s interests.Regular Maintenance Tips
A well-kept play kitchen lasts longer and provides safer play. Regularly check the kitchen for loose parts or sharp edges. Use a damp cloth to wipe surfaces clean. This removes dust and sticky residues. Ensure all doors and drawers open smoothly. Lubricate hinges if needed to prevent squeaking. Inspect any painted areas for chips. Touch up paint to maintain a fresh look.Easy Updates And Upgrades
Simple updates breathe new life into your play kitchen. Change knobs or handles for an instant facelift. Add colorful stickers or decals for a fun touch. Use removable wallpaper to create a new backdrop. Install hooks for hanging utensils or aprons. Introduce new play food or accessories. This keeps the play experience exciting and varied.Adapting To Growing Interests
As your child grows, their interests may change. Adapt the play kitchen to reflect new hobbies. If they enjoy baking, add baking tools and pretend ingredients. Introduce a chalkboard for writing recipes or menus. Encourage imaginative play with themed accessories. Consider creating a café or restaurant setup. This keeps them engaged and sparks new ideas.Inspiration And Style Trends
Creating a DIY play kitchen can be a thrilling adventure that sparks creativity and joy. Whether you’re crafting it for your child or as a fun project, finding inspiration and staying updated with style trends is crucial. Let’s dive into some popular color schemes and themed kitchen ideas that can transform your DIY project into a captivating masterpiece. Plus, get inspired by real-life success stories that prove you can do it too.
Popular Color Schemes
Choosing the right color scheme can set the tone for your play kitchen. Soft pastels like mint green and blush pink create a calming environment, perfect for imaginative play. Bold colors such as turquoise and red can add excitement and vibrancy, encouraging active engagement. Neutral tones like white, grey, and beige offer a timeless look, providing a blank canvas for accessories and decor.
Consider combining these colors to create depth and interest. A pastel base with bold accents can make the kitchen pop. Think about the mood you want to evoke and how the colors will fit into your home’s aesthetic.
Themed Kitchen Ideas
Themed play kitchens are a fantastic way to personalize the space. A rustic farmhouse theme can be achieved with wooden textures and vintage accessories, creating a cozy, homely feel. A modern theme with sleek lines and metallic finishes can give a contemporary vibe, perfect for mimicking real-life kitchens.
Consider unique themes like a seaside kitchen with nautical elements or a whimsical fairy-tale kitchen with enchanted touches. Themes can transform simple play spaces into magical worlds. What theme would inspire your child’s imagination?
Inspiring Diy Success Stories
Personal stories can ignite your creativity and boost your confidence. Many parents have successfully crafted incredible play kitchens using recycled materials. One parent transformed an old cabinet into a vibrant kitchen with just a splash of paint and some clever additions.
Another creative mind used cardboard boxes to create a stunning play area, proving that sometimes simplicity yields the best results. These stories show that with imagination and a few resources, a magical play kitchen is within your reach. What would your DIY story look like?
Credit: www.step2.com
Frequently Asked Questions
At What Age Do Kids Stop Playing With Pretend Kitchens?
Kids usually stop playing with pretend kitchens around ages 8 to 10. Interest varies based on individual preferences. Encourage imaginative play to extend interest. Parents should observe their child’s engagement for a better understanding of their play preferences. Pretend play fosters creativity and social skills in early childhood development.
Do It Yourself Kitchen Cost?
DIY kitchen renovation costs vary widely, typically ranging from $5,000 to $15,000. This depends on the project’s size, materials, and appliances. Choosing budget-friendly materials and doing the labor yourself can significantly reduce expenses. Planning carefully and comparing prices ensures better control over costs.
What Do I Need For A Play Kitchen?
You need a play kitchen set, toy food, utensils, pots, pans, and storage bins. Add aprons, chef hats, and pretend appliances for extra fun. Ensure the space is safe and accessible. Encourage creativity with recipe cards and play menus. Choose durable materials for long-lasting play.
How To Do A Kitchen Yourself?
Plan your kitchen design carefully. Measure the space accurately. Choose durable materials and tools. Follow step-by-step guides for installation. Ensure proper plumbing and electrical work. Consider hiring professionals for complex tasks.
Conclusion
Creating a DIY play kitchen is a rewarding project. It brings joy to children and fosters creativity. Building it yourself ensures a personal touch. You save money and learn new skills. Remember to keep safety in mind. Choose materials wisely and assemble parts carefully.
Customize the kitchen to fit your child’s interests. Bright colors and fun details enhance the play experience. Share your creation with friends and family. Encourage their feedback and enjoy the compliments. With patience and effort, a play kitchen becomes a cherished childhood memory.
Dive into this project and watch your child’s imagination soar.