How to Reface Your Kitchen Cabinets: Transform Like a Pro
Are your kitchen cabinets looking tired and outdated? You don’t need to break the bank to give them a fresh, new look.
Refacing your kitchen cabinets is an affordable and effective way to transform your kitchen space without the hassle of a complete remodel. Imagine walking into your kitchen and feeling a sense of pride and satisfaction with a modern, updated atmosphere.
You’ll discover easy steps to reface your kitchen cabinets, saving time and money. We’ll guide you through the process, revealing insider tips and tricks that make this DIY project manageable, even for beginners. Get ready to be amazed by the change in your kitchen’s appearance. Stay with us, and you’ll learn how to achieve a remarkable transformation that will have your friends and family asking for your secret!
Planning Your Cabinet Refacing
Planning your cabinet refacing transforms your kitchen’s look without a full remodel. Choose materials and finishes that match your style. Consider budget and time for a smooth project experience.
Planning Your Cabinet Refacing Refacing kitchen cabinets can give your space a fresh look. Careful planning ensures a successful transformation. Start by assessing your current cabinets to understand their condition and style. Next, choose materials that fit your vision and budget. Finally, create a realistic budget to guide your project.Assessing Your Current Cabinets
Evaluate your cabinets before you begin. Look at the structure and finish. Are they sturdy? Check for signs of wear or damage. Note the style and color. This helps decide if refacing is the right choice. Inspect hinges and handles. Replacing these can enhance the final look.Choosing The Right Materials
Select materials that match your kitchen’s style. Consider veneer, laminate, or wood. Veneer offers a natural look. Laminate is durable and easy to clean. Wood provides a classic feel. Choose colors that complement your countertops and walls. Light shades can make a space feel open. Dark colors add warmth.Budgeting For The Project
Plan your budget carefully. List all potential costs. Include materials, tools, and labor. Compare prices from different suppliers. Consider DIY to save money. Factor in unexpected expenses. A well-planned budget keeps your project on track.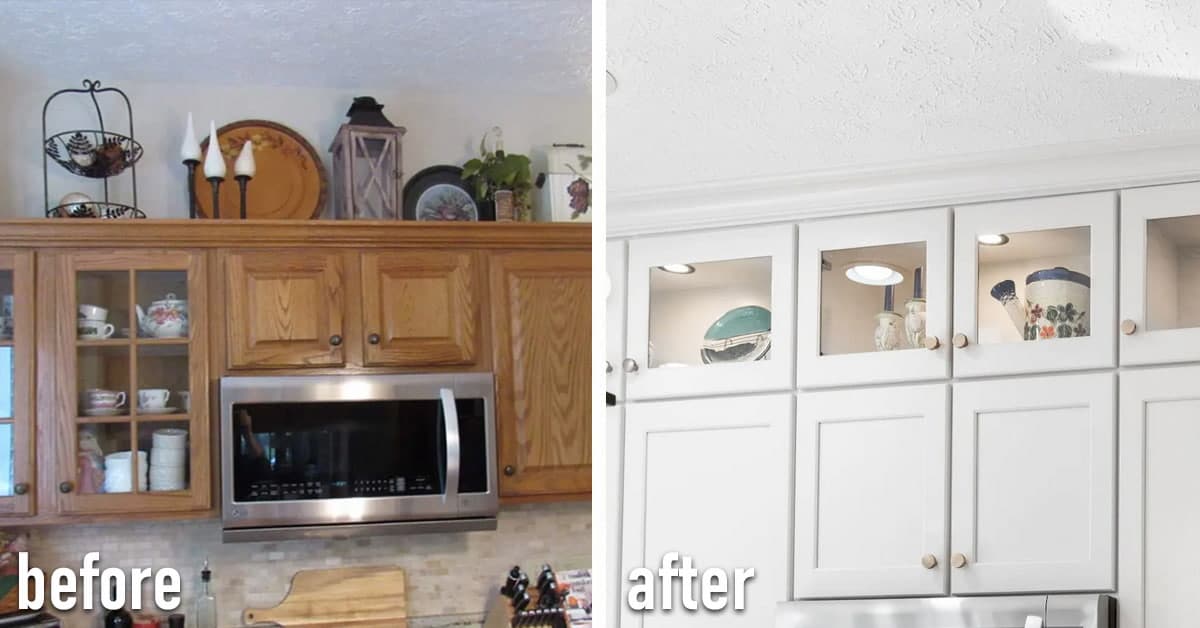
Credit: www.woodreface.com
Gathering Essential Tools
Gathering essential tools ensures a smooth cabinet refacing process. You will need a screwdriver, sandpaper, and paintbrush. Having these tools ready makes refacing kitchen cabinets easier and more efficient.
Refacing your kitchen cabinets can breathe new life into your space without the hefty price tag of a full renovation. Before you dive into this rewarding project, it’s crucial to gather the right tools. Having everything on hand not only streamlines the process but also ensures a smooth and efficient workflow. Let’s explore the essentials you’ll need to get started.Must-have Tools
Equipping yourself with the right tools is the first step to a successful cabinet refacing project. Here’s what you’ll need:- Screwdriver Set:You’ll often encounter various screws, so a set with different heads is ideal.
- Drill:For removing cabinet doors and hardware, a cordless drill saves time and effort.
- Measuring Tape:Accurate measurements are key to cutting materials to the right size.
- Utility Knife:Essential for trimming veneer or laminate precisely.
- Sandpaper or Sander:A smooth surface is crucial for adhesion; consider both coarse and fine grits.
Safety Equipment
While refacing is a DIY-friendly task, safety should always be a priority. Protecting yourself ensures you can complete your project without a hitch.- Safety Glasses:Protect your eyes from dust and debris, especially when sanding or cutting.
- Dust Mask:Prevent inhaling particles that can be harmful, particularly during sanding.
- Gloves:A sturdy pair of gloves can protect your hands from splinters and cuts.
Preparing Your Kitchen
Refacing your kitchen cabinets can breathe new life into your cooking space without the need for a costly remodel. However, before you dive into transforming those tired wooden facades, it’s crucial to properly prepare your kitchen. A little groundwork ensures that your refacing project runs smoothly and achieves that polished look you’re after.
Clearing Out The Space
Begin by removing all items from your cabinets. This includes dishes, pots, pans, and any other stored items. Consider this a great opportunity to declutter and get rid of things you no longer use. You might even find forgotten treasures tucked away in the back!
Once your cabinets are empty, take a moment to assess the space around you. Imagine how much easier your project will be without tripping over kitchen gadgets or stray utensils. Create a temporary storage solution for these items so you can easily access them during the refacing process.
Cleaning The Cabinets
With your cabinets emptied out, it’s time for a thorough cleaning. Start by wiping down the surfaces with a damp cloth to remove dust and debris. Pay special attention to corners and hinges where grime tends to accumulate.
Next, use a gentle cleanser to tackle any stubborn stains or grease marks. Remember, the cleaner your cabinets, the better the adhesive will stick during the refacing process. A spotless surface is your best ally in achieving a flawless finish.
Have you ever cleaned your cabinets and noticed the wood’s true color shining through? It’s amazing how a little elbow grease can reveal the hidden beauty of your kitchen. A clean slate sets the stage for your refacing success!
Removing Old Cabinet Surfaces
Removing old cabinet surfaces can refresh your kitchen’s look. Carefully take off the old surfaces, ensuring the underlying structure remains intact. This sets the stage for a smooth refacing process, breathing new life into your kitchen cabinets.
Refacing your kitchen cabinets can breathe new life into your space. Removing old cabinet surfaces is a crucial first step. This process involves detaching doors and drawers, followed by sanding down surfaces. These steps prepare the cabinets for a fresh look.Detaching Doors And Drawers
Start by taking off the cabinet doors. Use a screwdriver to loosen the hinges. Be gentle to avoid damage. Place screws and hinges in a safe spot. Next, slide out the drawers. Check for any clips or latches that may hold them. Keep all parts organized for easy reassembly.Sanding Down Surfaces
Once doors and drawers are removed, it’s time to sand. Choose a medium-grit sandpaper for the first pass. This removes old paint or varnish. Sand evenly to avoid rough patches. Finish with fine-grit sandpaper for a smooth surface. Vacuum or wipe off dust for a clean start. This step ensures new paint or veneer adheres well.Applying New Veneer Or Laminate
Transform kitchen cabinets by applying a new veneer or laminate. This process enhances appearance and durability, giving them a fresh, stylish look. Simple tools and precise measurements ensure a seamless finish.
Applying new veneer or laminate to your kitchen cabinets can breathe fresh life into your space without a hefty renovation budget. This process can seem daunting, but with the right approach, you’ll find it both rewarding and transformative. Imagine the satisfaction of walking into a kitchen that looks brand new, all because of your handiwork.Cutting The New Material
Before cutting, measure your cabinet surfaces accurately. Use a tape measure and jot down each dimension, ensuring you double-check to avoid mistakes. Precision is key here; even a small error can lead to unnecessary waste. Lay out your veneer or laminate on a clean, flat surface. Using a sharp utility knife or a laminate cutter, follow your measurements carefully. A straight edge or ruler will help guide your cuts for the best results. Remember to wear safety gloves to protect your hands during this process. Have you ever tried cutting something only to realize it’s slightly off? Taking your time here will save you from such frustrations.Adhering The Veneer Or Laminate
Once your pieces are cut, it’s time to adhere them to the cabinets. Start by cleaning the cabinet surfaces thoroughly to ensure the adhesive sticks properly. Dirt and grease can compromise your hard work, so don’t skip this step. Apply a high-quality adhesive suited for veneer or laminate. You can use a brush or roller for even application. Press the new material onto the cabinet, starting from one edge and smoothing it out to avoid air bubbles. Use a roller or a soft cloth to press down the veneer or laminate firmly. This step ensures a strong bond and smooth finish. Have you ever noticed tiny bubbles under a poorly applied sticker? Avoid that by taking the time to press out any air pockets. With patience and attention to detail, your kitchen cabinets will transform, showcasing your dedication and skills. The result is a personalized space that reflects your taste and effort.
Credit: www.improveitusa.com
Upgrading Cabinet Hardware
Upgrading cabinet hardware is a simple yet impactful way to breathe new life into your kitchen. By focusing on knobs and pulls, you can transform the look and feel of your cabinets without the need for a complete overhaul. Imagine walking into your kitchen and noticing how sleek and modern the space feels, just because of a thoughtful choice in hardware. This section will guide you through selecting and installing new cabinet hardware, ensuring your kitchen gets the stylish update it deserves.
Selecting Modern Knobs And Pulls
Choosing the right knobs and pulls can set the tone for your kitchen’s aesthetic. Think about the style you want to achieve—whether it’s contemporary, rustic, or classic. Visit a local hardware store or browse online to explore various designs and materials. Brass, stainless steel, and matte black are popular choices that can make a statement.
Don’t shy away from mixing finishes for a unique look. For example, pairing brushed nickel knobs with matte black pulls can create a stylish contrast. Consider the size and shape as well; larger pulls can be easier to grip and add a bold element to your cabinets. Take time to visualize how each option would complement your kitchen’s existing features.
Installing New Hardware
Once you’ve selected the perfect knobs and pulls, it’s time to install them. Start by removing the old hardware, ensuring you keep all screws and components in case you need them later. Use a screwdriver to unscrew the old knobs and pulls, taking care not to damage the cabinet surface.
Before installing the new hardware, measure the distance between the holes on your cabinets. This ensures that your new pieces fit perfectly without needing to drill additional holes. Align the new hardware with the existing holes and fasten them securely using a screwdriver. Double-check the alignment and tightness to avoid any loose fittings.
Installing new hardware is a straightforward task that can be done in an afternoon. As you complete the process, take a step back and admire the transformation. Could this simple change be the key to unlocking a fresh perspective in your kitchen?
Finishing Touches
Transform your kitchen cabinets with new finishes. Apply fresh paint or veneer for a modern look. Install new handles for a stylish update.
Transforming your kitchen cabinets with a fresh look can breathe new life into your entire space. Once you’ve prepped and reassembled, the final step is to add those finishing touches. This stage is crucial as it not only enhances the aesthetic but also ensures the longevity of your efforts. Get ready to make some creative choices that will truly define your kitchen’s personality.Painting Or Staining
Choosing between painting or staining your cabinets is like selecting the perfect outfit for a special occasion. Consider the overall vibe you want your kitchen to reflect. A splash of paint can completely alter the mood, giving a modern or classic feel. If you opt for paint, a semi-gloss or gloss finish is ideal. It’s easy to clean and reflects light beautifully. On the other hand, staining retains the natural grain of the wood, offering a warm and traditional appearance. Reflect on your daily routine—are you more inclined towards a chic, vibrant space or a cozy, rustic environment? Sometimes, a simple color change can make your kitchen feel like an entirely new room.Sealing The Surface
After selecting your finish, sealing is the protector that guards your hard work. It’s like applying sunscreen before a day out in the sun. A good sealant will protect against moisture, stains, and scratches. Polyurethane is a popular choice for its durability and ease of application. It’s available in water-based and oil-based forms, catering to different needs and preferences. Water-based polyurethane dries quickly and has minimal odor, making it a favorite for indoor projects. Think about the daily wear and tear your cabinets endure. A robust seal not only keeps them looking fresh but also makes cleaning effortless. Imagine enjoying a morning coffee without worrying about accidental spills!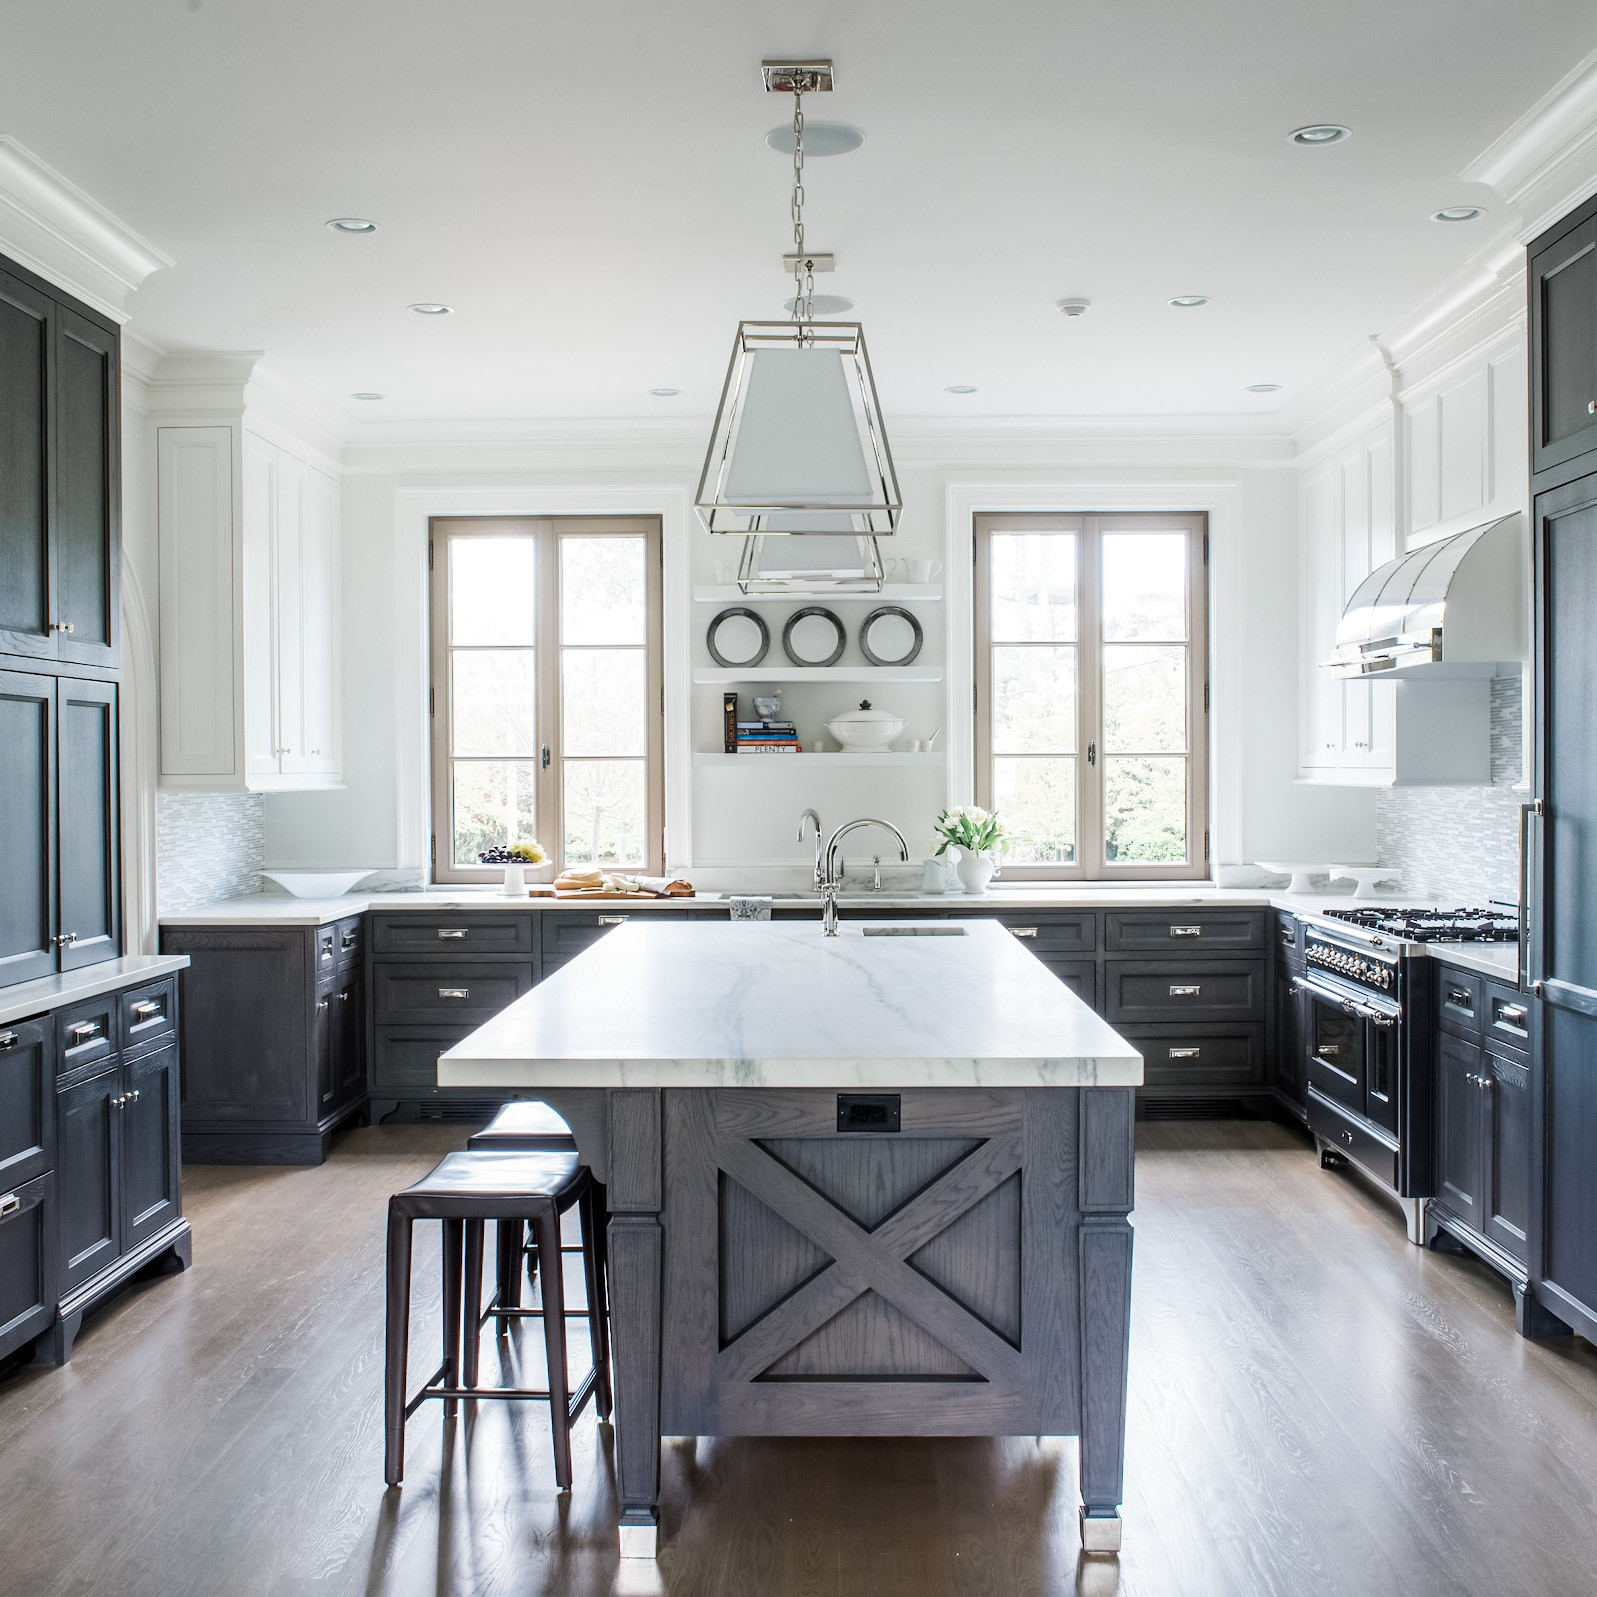
Credit: www.extraspace.com
Maintenance Tips
Refreshing kitchen cabinets can transform your space. Start by cleaning surfaces thoroughly. Apply new veneer or paint for a fresh look.
Maintaining your newly refaced kitchen cabinets ensures they stay as stunning as the day you revamped them. Simple yet effective maintenance can prolong their beauty and functionality. Let’s dive into some practical tips that will make your cabinets shine and stand the test of time.Regular Cleaning
Keeping your cabinets clean is crucial. Dust and grease can accumulate quickly in the kitchen. Use a soft cloth with a mild soap solution to wipe down the surfaces weekly. Avoid using harsh chemicals or abrasive pads that can damage the finish. A gentle touch is all you need to keep them looking fresh. Pay attention to cabinet handles and edges, as these areas often collect grime. Regular cleaning not only maintains aesthetics but also ensures hygiene.Handling Repairs
Small damages are inevitable over time. Catching them early can prevent larger problems down the road. If a hinge becomes loose or a knob gets wobbly, grab a screwdriver and tighten it. It only takes a minute but can save you from more significant repairs. For minor scratches, consider using a touch-up marker in the same color as your cabinet finish. It’s a quick fix that can make imperfections disappear. Think about it: How satisfying would it be to handle these small repairs yourself without calling in professionals? Taking control of maintenance not only saves money but also gives you a sense of accomplishment.Frequently Asked Questions
Can I Resurface My Kitchen Cabinets Myself?
Yes, you can resurface kitchen cabinets yourself. Ensure you have the right tools and materials. Follow detailed instructions for best results. Resurfacing can refresh your kitchen’s look and is cost-effective. Consider your skill level before starting.
Is It Worth It To Reface Kitchen Cabinets?
Refacing kitchen cabinets is cost-effective and enhances aesthetics. It saves time and money compared to full replacements. Ideal for updating style without major renovations, increasing home value. It’s a smart choice for a fresh look.
How Much Would It Cost To Reface Your Kitchen Cabinets?
Refacing kitchen cabinets typically costs between $1,000 and $9,000. Factors include materials, labor, and cabinet size. Custom finishes or high-end materials increase costs. Consider comparing quotes from professionals for accurate pricing.
What Is The Cheapest Way To Reface Kitchen Cabinets?
The cheapest way to reface kitchen cabinets is DIY painting. Use quality paint and brushes for best results. Sand and clean surfaces before applying primer and paint. Consider replacing handles for a fresh look. This cost-effective approach revitalizes cabinets without professional help.
Conclusion
Refacing kitchen cabinets transforms your space without much hassle. It’s cost-effective and refreshes the look instantly. Choose the right materials for a lasting finish. Ensure proper measurements before starting. Clean surfaces thoroughly for better adhesion. Use quality adhesives for durability.
Colors and designs should match your kitchen style. This project enhances your home’s value and appearance. It’s a rewarding task anyone can tackle with patience. Enjoy a fresh, modern kitchen with refaced cabinets!