How to Make Kitchen Base Cabinets: Step-by-Step Guide
Are you dreaming of a kitchen makeover that doesn’t break the bank? Imagine opening the doors to your very own custom-built kitchen base cabinets, crafted by none other than yourself.
It’s not just a project; it’s a rewarding experience that combines creativity, skill, and practicality. Whether you’re a seasoned DIY enthusiast or a curious beginner, you’re about to discover the secrets to transforming simple materials into stunning, functional kitchen base cabinets.
You might be wondering, “Can I really do this? ” Absolutely! And here’s the best part: you don’t need to be a master carpenter to achieve professional results. By the end of this guide, you’ll have the knowledge and confidence to create cabinets that not only look amazing but also serve your needs perfectly. So, roll up your sleeves, grab your tools, and let’s dive into the step-by-step process of making kitchen base cabinets that will make you proud every time you step into your kitchen.
Planning Your Cabinet Build
Planning your cabinet build is a crucial step that sets the foundation for your kitchen’s functionality and aesthetics. With a clear plan, you can create cabinets that not only fit perfectly but also enhance your kitchen’s style. Let’s dive into how you can effectively map out your cabinet project.
Choosing The Right Materials
Your choice of materials can significantly impact the durability and appearance of your cabinets. Opt for solid wood if you’re aiming for a classic look and long-term resilience. Plywood is another great option, offering strength and cost-effectiveness. Think about the finish too—laminate and veneer can add a sleek, modern touch.
Consider how each material will stand up to kitchen conditions. Will it withstand moisture and heat? Take your time exploring samples and envisioning them in your space.
Measuring Your Kitchen Space
Accurate measurements are your best friend in cabinet building. Start by measuring the height, width, and depth of the area where the cabinets will be installed. Use a tape measure and take note of any obstructions like pipes or electrical outlets.
Precision here prevents future headaches. Imagine installing your cabinets only to find they don’t fit or block a crucial area. Double-check your measurements—it’s worth it.
Designing Cabinet Layout
Visualize how you want your kitchen to flow. Will you have overhead cabinets or just base ones? Consider the balance between storage space and accessibility. Sketch your ideas or use design software to experiment with different configurations.
Think about your daily routine. Do you need easy access to pots and pans? Or perhaps a dedicated space for spices and oils? Your layout should cater to your lifestyle.
Engage with your design. Ask yourself: Does this setup make my cooking experience smoother? A thoughtful design can transform your kitchen into a haven of efficiency and style.

Credit: www.instagram.com
Gathering Essential Tools
Building kitchen base cabinets is rewarding and boosts DIY skills. Gathering the right tools ensures a smooth, efficient process. Each tool plays a vital role, making your work precise and safe.
Basic Carpentry Tools
Start with essential carpentry tools. A tape measure provides accurate dimensions for your cabinets. A hammer is needed for nailing pieces together. A handsaw or circular saw helps cut wood to the required size. Use a square to ensure corners are perfect and straight. A drill with various bits is crucial for making holes and driving screws.
Safety Equipment
Safety should be a priority in any project. Wear safety goggles to protect your eyes from dust and debris. Gloves keep your hands safe from sharp tools and splinters. Ear protection is important when using loud power tools. A dust mask prevents inhalation of wood particles. Ensure your workspace is well-ventilated for comfort and safety.
Additional Helpful Tools
There are extra tools that can ease your cabinet-building process. A level ensures your cabinets sit evenly. Clamps hold pieces together firmly as they dry or set. Sandpaper or a sanding block smoothens rough wood surfaces. A carpenter’s pencil helps mark measurements clearly. A chalk line can assist with straight, long lines on larger surfaces.
Cutting And Preparing The Wood
Cutting wood accurately is crucial for sturdy kitchen base cabinets. Measure twice and cut once to ensure precision. Properly prepare the wood by sanding and cleaning to enhance the final finish.
Cutting and preparing the wood is a crucial phase in crafting your kitchen base cabinets. This process defines the durability and aesthetics of your cabinet. It’s not just about slicing wood; it’s about choosing the right materials and ensuring each piece fits perfectly. This is where your attention to detail will pay off in creating a flawless finish. Let’s dive into how you can make the most of this step.Selecting The Wood Type
Choosing the right wood is like picking the foundation for a building. The quality of your cabinets depends significantly on the wood you select. Consider hardwoods like oak or maple for durability. They can withstand the hustle and bustle of a busy kitchen. Softwoods like pine are budget-friendly and easier to work with but may require more care. If you’re unsure, visit your local supplier. Touch and feel the samples. Imagine how they’ll look in your kitchen.Cutting Wood Panels
Precision is your ally when cutting wood panels. Invest in a good quality saw that ensures clean cuts. Measure twice, cut once. This old adage saves time and prevents waste. Lay out your wood on a stable surface before cutting. Use clamps to hold it in place. This prevents movement and ensures accuracy. Do you have a favorite tool that makes cutting easier? Share your tips with fellow DIY enthusiasts.Sanding And Smoothing Edges
Sanding is where your cabinets start to shine. Smooth edges are not just about appearance; they prevent splinters and ensure safety. Start with coarse-grit sandpaper to shape the edges. Gradually move to finer grits for a polished finish. It’s all about patience and persistence. Keep a brush handy to sweep away dust as you sand. How do you ensure your edges are perfectly smooth? A tip from experience can be invaluable to readers.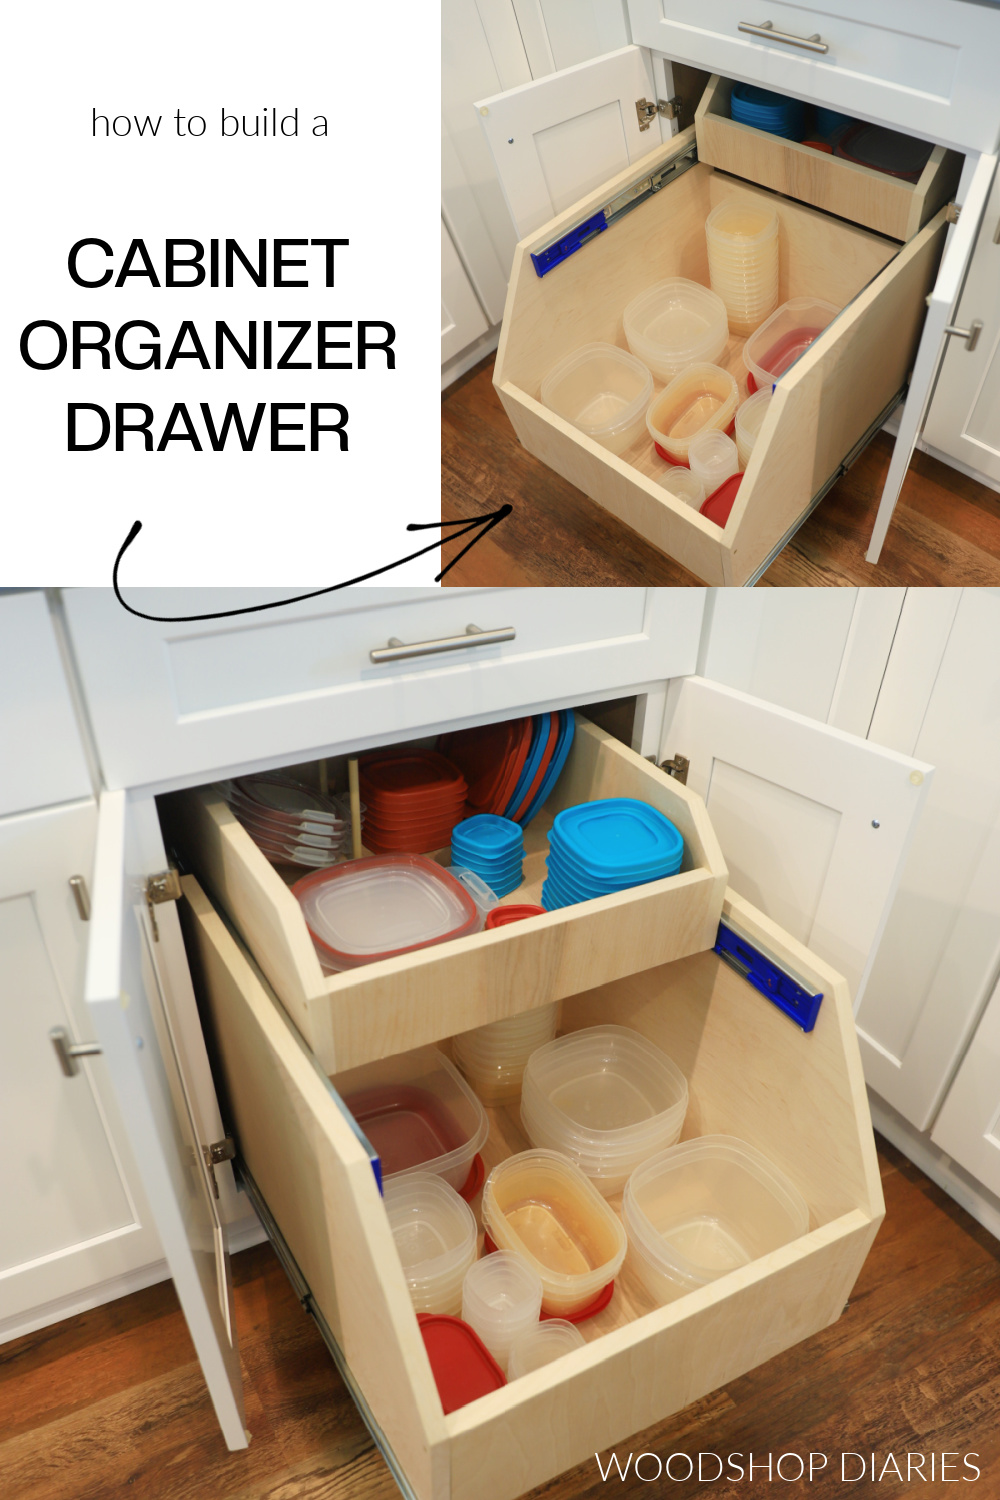
Credit: www.woodshopdiaries.com
Building The Cabinet Frame
Building the cabinet frame is a fundamental step in creating sturdy kitchen base cabinets. This process lays the groundwork for functionality and aesthetics, ensuring that your cabinets can withstand daily wear and tear while providing ample storage. Let’s dive into the key aspects of assembling the base structure, securing the frame, and maintaining stability and balance.
Assembling The Base Structure
Start by gathering your materials: plywood sheets, screws, and wood glue. Cut the plywood to match the dimensions required for your cabinet, typically including the top, bottom, sides, and back panels.
Align these pieces meticulously to form a rectangular box shape, ensuring each edge is flush. Use clamps to hold everything in place while you fasten the panels together with screws. This initial assembly sets the stage for a strong and reliable cabinet frame.
Securing The Frame With Joints
Choosing the right joints is crucial to the durability of your cabinet frame. Butt joints are simple but may require extra support for heavy loads. Consider using dovetail or mortise and tenon joints for a more robust structure.
Apply wood glue to each joint before fastening them with screws or nails. This combination enhances the frame’s strength and longevity. A well-secured frame is less prone to wobbling or damage over time.
Ensuring Stability And Balance
Stability and balance are key to preventing your cabinets from tipping or sagging. Check that the cabinet is level by using a spirit level on all sides. Adjust as needed, adding shims under the base if the floor is uneven.
Reinforce the cabinet corners with braces or additional screws to maintain its shape under heavy loads. Ask yourself, are you confident your cabinet can withstand the weight of your kitchen essentials?
Remember, taking these steps not only ensures your cabinets are functional but also boosts their lifespan. Your kitchen deserves a solid foundation, so invest time in perfecting the cabinet frame.
Installing Shelves And Dividers
Installing shelves and dividers in your kitchen base cabinets can dramatically enhance your storage efficiency and organization. Imagine opening your cabinet doors to find everything precisely where you need it, without the chaos of clutter. Whether you’re storing pots and pans, spices, or dishware, having a well-structured interior can make all the difference.
Measuring For Shelf Placement
Accurate measurements are key to maximizing space. Use a tape measure to determine the height and width of your cabinet interior. Consider the items you’ll store and allocate space accordingly. Are you a collector of large pots or do you have stacks of baking sheets? Each requires different shelf heights.
Make a sketch or diagram of your cabinet’s interior. This visual aid will help you plan where each shelf should go. Think about accessibility—will you reach for items frequently? Ensure their placement is convenient.
Cutting And Installing Shelves
Once you have your measurements, it’s time to cut your shelves. Use sturdy materials, like plywood, for durability. Cut each shelf to fit snugly within the cabinet. Double-check your measurements to avoid any mistakes.
Install the shelves using brackets or pegs. Ensure they’re level to prevent items from sliding. You might want to consider adjustable shelves for flexibility, allowing you to modify the space as your needs change.
Adding Dividers For Organization
Dividers can transform your cabinet into a masterpiece of organization. Use them to separate items, creating sections for different types of kitchenware. Consider adjustable dividers for versatility.
Think about what you use most often. You might want to dedicate sections for frequently used items, making them easily accessible. Dividers can also prevent items from toppling over, keeping your cabinet tidy.
Have you ever found yourself rummaging through cabinets in search of one elusive item? Dividers prevent this chaos, allowing you to store similar items together for quick retrieval. It’s like creating a mini filing system for your kitchen essentials.
Attaching Doors And Drawers
Attaching doors and drawers is a crucial step in making kitchen base cabinets. Proper alignment ensures smooth operation and a clean look. Use quality hinges and slides for durability and ease of use.
Attaching doors and drawers to your kitchen base cabinets is a crucial step that elevates both functionality and aesthetics. It’s where the magic happens—transforming a basic frame into a complete cabinet. Whether you’re aiming for a modern look or something more traditional, the choices you make here will define the overall style of your kitchen.Selecting Door Styles
Choosing the right door style is more than just a design decision; it’s about how you want your kitchen to feel. Do you prefer the sleek lines of slab doors, or do the classic looks of shaker doors catch your eye? Consider your kitchen’s existing elements and your lifestyle. If you love a clean, minimalist look, slab doors might be your go-to. On the other hand, shaker doors offer a timeless appeal that blends well with various kitchen themes. Whatever you choose, ensure it complements your kitchen’s theme and your personal taste.Installing Hinges And Handles
Once you’ve chosen your door style, the next step is installing hinges and handles. This part can be a bit tricky but incredibly rewarding. Start by deciding on the type of hinges: concealed hinges offer a seamless look, while exposed ones add a decorative element. When attaching the hinges, ensure they are level and aligned. Use a jig for precision if needed. As for handles, consider their placement and how they will feel in your hand. A comfortable grip can make all the difference in daily use.Fitting And Aligning Drawers
Installing drawers requires precision to ensure they operate smoothly. Begin with measuring the drawer slides and attaching them to the cabinet’s interior. Make sure they are level to prevent any wobbling. Align the drawers carefully, checking they glide effortlessly in and out. Adjustments might be necessary; use a screwdriver to tweak the alignment until perfect. A well-fitted drawer not only looks great but also enhances the cabinet’s usability. Have you considered how these small details impact your kitchen’s overall experience? By focusing on these elements, you’re not just building cabinets—you’re crafting a space that feels just right for you.Applying Finishes And Paint
Applying finishes and paint adds a protective layer and enhances the appearance of kitchen base cabinets. Choose durable paint for a lasting finish and ensure smooth application for an elegant look. Proper preparation and technique are essential for achieving professional results.
Applying the right finishes and paint to kitchen base cabinets transforms their appearance. It enhances durability and matches the decor perfectly. This crucial step elevates both aesthetic appeal and functionality. The choice of paint and stain, along with the application techniques, matters greatly. Each decision impacts the final outcome, making it essential to understand the options and processes involved.Choosing Paint And Stain
Selecting the right paint or stain sets the foundation for a stunning finish. Water-based paints offer easy cleanup and quick drying. Oil-based paints provide a durable finish, ideal for high-traffic areas. Consider the cabinet material when choosing a stain. Wood stains highlight natural grain, adding warmth and character. For a modern look, opt for a solid color paint.Techniques For A Smooth Finish
Achieving a smooth finish requires careful preparation and application. Sand the cabinet surfaces to remove imperfections. Use a primer to ensure the paint adheres well. Apply paint in thin, even coats using a brush or roller. Allow each coat to dry before adding another. This prevents drips and uneven patches. A paint sprayer can offer a flawless finish, reducing brush strokes.Protecting The Surface
Protecting the painted surface ensures longevity and resistance to wear. Apply a clear topcoat or sealant for added protection. This keeps the paint from chipping and fading. Choose a finish that suits the environment, such as satin or gloss. Regular cleaning and maintenance keep the cabinets looking fresh. Avoid harsh chemicals to preserve the finish. Proper care extends the life of the cabinets, maintaining their beauty.Final Installation In Kitchen
Crafting kitchen base cabinets involves precise measurements and sturdy materials. Assemble the frame using wood and secure with screws. Install doors and shelves, ensuring smooth operation and ample storage space.
Completing your kitchen base cabinets is like putting the last piece in a puzzle, bringing your kitchen renovation to life. The final installation phase is where precision meets creativity, ensuring everything aligns seamlessly. This is the moment to step back, admire your handiwork, and ensure it functions perfectly in your culinary space.Positioning The Cabinets
Start by positioning the cabinets in their designated spots. Use a level to ensure each cabinet sits perfectly aligned. An uneven cabinet can throw off the entire look and function of your kitchen. It’s crucial to double-check measurements and spacing. This ensures appliances and countertops fit snugly without gaps. Remember, even a small misalignment can become a big nuisance later.Securing Cabinets To Walls
Once positioned, it’s time to secure the cabinets to the walls. Use strong, high-quality screws to anchor each cabinet into the wall studs. This guarantees stability and long-term durability. Always check the strength of your anchors, especially in older homes where wall materials might be weaker. A solid attachment prevents future issues like sagging or uneven doors.Adjusting For Fit And Function
With cabinets in place, adjust for fit and function. Check the doors and drawers; they should open smoothly without catching. If adjustments are needed, most hinges and slides allow for minor tweaks. Consider how the cabinets work with your kitchen routine. Can you easily reach frequently used items? Is there enough space for large pots and pans? Adjustments now save frustration later. Finally, step back and visualize the workflow in your kitchen. Does it feel right? A well-installed cabinet should not only look good but also enhance your cooking experience. Have you thought about how these final touches can impact your daily routine? Your kitchen is more than just a space—it’s where life happens.
Credit: www.familyhandyman.com
Frequently Asked Questions
Is It Cheaper To Build Your Own Kitchen Cabinets?
Building your own kitchen cabinets can be cheaper. You save on labor costs and have control over materials. Skill level and tools availability influence savings. DIY enthusiasts often find it cost-effective. Consider time and effort investment before deciding.
What Is The Best Wood For Base Cabinets?
Solid hardwood like oak or maple is ideal for base cabinets. They offer durability and a timeless appeal. Plywood is also a top choice due to its strength and resistance to warping. These woods ensure your cabinets last long while adding a touch of elegance to your kitchen.
Can You Use 2×4 For Cabinet Base?
Yes, you can use 2x4s for a cabinet base. Ensure they are properly secured and level. This provides a sturdy foundation for your cabinets, supporting weight effectively. Using quality materials enhances durability and stability, ensuring your cabinet base lasts longer.
Can A Beginner Make Kitchen Cabinets?
Yes, beginners can make kitchen cabinets. Start with a simple design and gather necessary tools. Follow online tutorials or woodworking guides for step-by-step instructions. Practice safety and measure accurately. With patience and attention to detail, creating kitchen cabinets can be a rewarding DIY project.
Conclusion
Building kitchen base cabinets can be a rewarding project. You gain control over style and size. Start with a solid plan. Choose quality materials for durability. Follow step-by-step instructions carefully. Measure twice, cut once. Ensure safety with proper tools and gear.
Painting or staining adds personal flair. Enjoy the satisfaction of your handiwork. Practical and functional cabinets enhance kitchen efficiency. Personal touches make your kitchen unique. Share your project with friends. Inspire others to try. With patience and effort, you create beautiful cabinets.
Transform your kitchen space with skill and creativity.