Have you ever opened your kitchen drawer only to find it stuck, sagging, or refusing to close properly? It’s a common problem that can quickly turn your cooking space into a frustration zone.
But don’t worry, you’re not alone! The good news is, fixing a kitchen drawer is easier than you might think, and you can do it yourself without having to call a handyman. Imagine the satisfaction of pulling open a perfectly aligned, smoothly sliding drawer every time you need that spatula or measuring spoon.
In this guide, we’ll walk you through simple, step-by-step solutions to get your kitchen drawers back in top shape. Whether it’s a misaligned track or a worn-out roller, we’ve got you covered. Ready to reclaim your kitchen’s harmony? Let’s dive into the fixes that will make your drawers work like new.
Tools And Materials Needed
Essential tools for fixing a kitchen drawer include a screwdriver, a hammer, and a measuring tape. Gather materials like wood glue, replacement screws, and drawer slides. Ensure all items are within reach to make the repair process smooth and efficient.
Fixing a kitchen drawer can be a straightforward task if you have the right tools and materials at hand. Often, a little preparation can save you from unnecessary frustration. Remember that a well-equipped toolkit makes the process smoother and more efficient. Here’s what you’ll need before you start:Essential Tools For Fixing A Kitchen Drawer
- Screwdriver Set:Most drawers are held together with screws that may require different head types. A set with various sizes ensures you’re covered for any screw type.
- Hammer:Helpful for gently tapping misaligned parts back into place.
- Measuring Tape:Accuracy is key. Measure twice, fix once to avoid redoing your work.
- Drill:If screws are stripped or missing, a drill can help you create new holes for a secure fit.
Materials To Keep Handy
- Replacement Screws:Screws can wear out, so having a few spares can be a lifesaver.
- Wood Glue:Useful for reinforcing joints or fixing cracks. It provides additional support where needed.
- Sandpaper:To smooth out any rough edges or surfaces that might hinder the drawer’s operation.
- Lubricant Spray:If your drawer is sticking, a quick spray can make it glide effortlessly.
Unexpected Items That Might Come In Handy
- Old Towels or Cloths:Protect surfaces while working and use them to clean up any debris.
- Flashlight:Drawers often have dark corners; a flashlight helps you see what you’re doing.
- Rubber Mallet:If you’re concerned about damaging delicate parts, a rubber mallet can gently persuade stubborn pieces into position.

Credit: www.clickorlando.com
Assessing The Problem
Before diving into the repair of a stubborn kitchen drawer, it’s crucial to first assess the problem. Understanding what needs fixing can save you time and prevent unnecessary frustration. Let’s take a closer look at how you can effectively diagnose the issue with your kitchen drawer.
Identify Common Issues
Kitchen drawers can face a variety of problems. They might be stuck, uneven, or simply not closing properly. Sometimes, the issue can be as simple as misalignment or as complex as broken components. Recognizing the common issues that drawers face can help you pinpoint the exact problem. Have you ever noticed a drawer that seems to close but doesn’t quite fit flush with the cabinet? That could be an indication of misalignment. Or perhaps a drawer feels stiff while opening; this might signal a problem with the slides.
Check For Loose Screws
Loose screws are a frequent culprit behind a malfunctioning drawer. Over time, screws may loosen due to constant use and movement. Make sure to check the screws on the drawer face, handle, and any brackets or supports. Are the screws tightly secured? A simple tightening might be all it takes to bring your drawer back to working order. Have you ever thought about how a tiny screw could cause such a big issue? It’s often the smallest details that make the biggest difference.
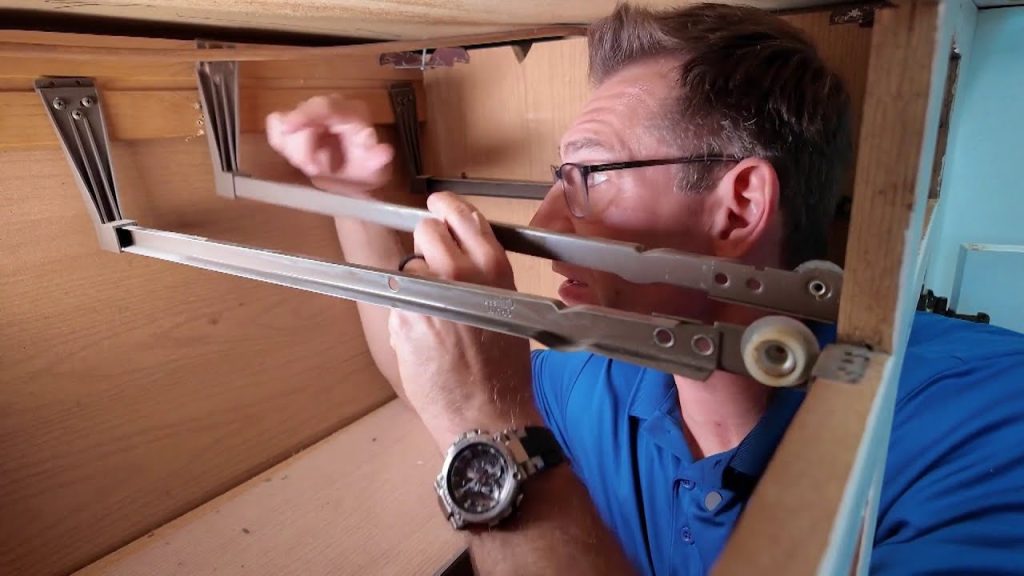
Inspect Drawer Slides
Drawer slides are integral to the smooth operation of your kitchen drawer. If your drawer is not gliding effortlessly, it might be time to examine the slides. Look for any obstructions or damage. Is there debris caught in the slides or are they bent? Consider whether the slides need lubrication or replacement. Have you ever wondered why drawers glide smoothly one day and become stuck the next? It’s usually the slides that dictate this ease of movement.
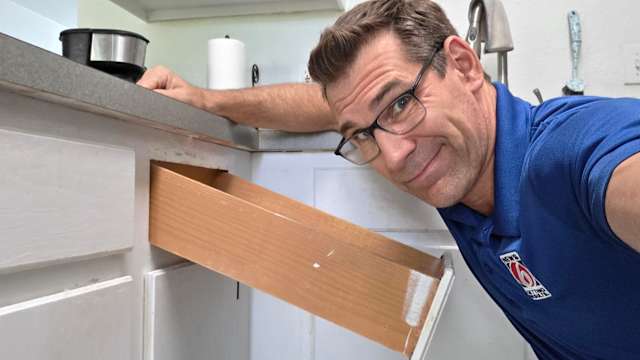
Removing The Drawer
Removing the drawer involves pulling it out until it stops. Lift the front slightly to release it from the tracks. Make sure to support the drawer to prevent dropping it.
Removing a kitchen drawer might seem like a daunting task, but with a few simple steps, you can have it out in no time. Whether you’re fixing a stuck drawer or replacing a broken one, knowing how to efficiently remove it can save you a lot of hassle. Let’s walk through the process, ensuring you have a smooth experience.Clear The Contents
Before you start, make sure to empty your drawer completely. You don’t want anything falling out or getting damaged during the process. Removing the contents also makes the drawer lighter and easier to handle. Take this opportunity to declutter. Ask yourself if you really need everything that’s in there.Detach The Drawer
Begin by pulling the drawer out as far as it will go. You might feel some resistance, but that’s normal. Check for any latches or tabs on the sides or bottom of the drawer. Many modern drawers have these to prevent them from being pulled out too far. Gently press the tabs or lift the latches, and then carefully pull the drawer out. If it seems stuck, double-check for any additional fasteners that might be holding it in place. Remember, patience is key. Forcing it can lead to damage, so proceed with care.Fixing Loose Screws
Loose screws in kitchen drawers can be frustrating. They make drawers wobble and hard to use. Fixing them is simple and can save time and effort. You just need a few tools and a bit of patience.
Tighten Existing Screws
Start by examining the drawer. Find the screws that need tightening. Use a screwdriver that matches the screw head. Turn the screwdriver clockwise to tighten the screws. Ensure the screws are snug but not overly tight. Over-tightening can damage the wood.
If the screw keeps spinning, it might be stripped. Sometimes adding a small piece of wood or toothpick inside the hole helps. This gives the screw more material to grip. Try screwing it again. This often solves minor loose screw issues.
Replace Stripped Screws
If tightening doesn’t work, the screws might be stripped. Remove the old screws carefully. Check the size and type of the screw. Visit a hardware store for new screws that match. Choose screws that are slightly longer if possible. This provides extra hold and security.
Prepare the hole by cleaning it. Use a drill if needed to make a new hole. Insert the new screw and tighten it securely. Test the drawer by opening and closing it. It should move smoothly without wobbling.
Repairing Or Replacing Slides
Repairing or replacing slides can solve a stuck kitchen drawer issue. First, check for any visible damage or loose screws. If the slides are worn out, consider replacing them with new ones for smoother operation.
Repairing or replacing slides is a crucial step in fixing a kitchen drawer. Slides help the drawer move smoothly. Damaged or worn-out slides can make opening the drawer difficult. This section will guide you through the process of repairing or replacing these slides for optimal performance.Lubricate Slides
Start by cleaning the slides with a damp cloth. Remove any debris or dust. Once clean, apply a silicone-based lubricant. Spray it evenly along the slide tracks. This reduces friction and ensures smoother movement. Test the drawer by sliding it in and out. The lubrication should make a noticeable difference. If the drawer still sticks, consider replacing the slides.Install New Slides
Begin by removing the drawer from the cabinet. Unscrew the old slides using a screwdriver. Keep the screws for the new slides. Measure the length of the old slides. Purchase new slides of the same length. Attach the new slides to the drawer sides. Use the screws saved earlier. Ensure they are aligned properly. Slide the drawer back into the cabinet. Test it to ensure smooth operation. If installed correctly, your drawer should function like new.Reassembling The Drawer
Fixing a kitchen drawer involves checking the tracks and runners for damage. Ensure screws are tight and replace any broken parts. Align the drawer properly to ensure smooth sliding and functionality.
Reassembling a kitchen drawer might seem like a daunting task, but with a bit of patience and attention to detail, you can do it yourself and save both time and money. The key is to ensure that all components are correctly aligned and securely attached. As you begin reassembling, you might even find it a meditative process—one that rewards careful observation and steady hands. Ready to roll up your sleeves?Reattach The Drawer
Once you’ve ensured all parts are intact, it’s time to reattach the drawer. Begin by aligning the glides or runners with the tracks inside the cabinet. Make sure they are parallel and securely fastened. Loose screws can cause the drawer to wobble or fall off-track, so tighten them properly. Next, slide the drawer back into its slot, ensuring that it glides smoothly along the tracks. If it doesn’t, check for any obstructions or misalignments in the rails. Sometimes, a slight adjustment can make a world of difference in how well the drawer operates.Test The Functionality
Now, give your drawer a thorough test run. Open and close it several times, paying attention to how it moves. Is it smooth and easy to operate? Are there any unusual sounds or resistance as you pull it out? Consider the effort it takes to open and close the drawer. Does it require a gentle push or a bit of force? If you find yourself exerting more effort than expected, double-check the alignment and ensure that all screws are properly tightened. A functional drawer should glide seamlessly without much effort. If yours does, take a moment to appreciate your handiwork. If not, don’t be discouraged; sometimes, small tweaks are all that’s needed to achieve perfection. Why not share your experience with others who might be facing similar issues? Your insights could help someone tackle their own drawer problems with newfound confidence.Preventive Maintenance Tips
Taking care of your kitchen drawers before they break can save you time and hassle. Regular preventive maintenance is key to ensuring your drawers slide smoothly and last longer. If you’ve ever struggled with a stuck or unaligned drawer, you know how irritating it can be. By following some simple tips, you can keep your drawers in top shape and avoid frequent repairs.
Regular Inspections
Set a reminder to check your kitchen drawers every few months. Look for any signs of wear and tear, such as loose screws or misaligned tracks. This proactive approach helps you catch minor issues before they become major problems.
Consider the last time you found a loose screw or a wobbly drawer. Catching these issues early means you can tighten screws or adjust tracks before they lead to more serious damage.
Regular inspections not only keep your drawers functioning well but also extend their lifespan. Are there any drawers you’ve been meaning to check?
Proper Use And Handling
How you use your kitchen drawers can significantly impact their condition. Avoid overloading them with heavy items, as this can strain the tracks and cause them to misalign.
Handle your drawers gently. Slamming them shut may seem trivial, but it can lead to wear and tear over time. Think about how you open and close your drawers. Are you being gentle enough?
Educate everyone in your household about proper drawer use. If your drawer is sticking, check if it’s due to overloading or improper handling. Small changes in habits can lead to big improvements in drawer longevity.
Credit: www.clickorlando.com

Credit: m.youtube.com
Frequently Asked Questions
Can Kitchen Drawers Be Fixed?
Yes, kitchen drawers can be fixed. Common issues include misaligned tracks, loose handles, or stuck drawers. Tighten screws, adjust tracks, or lubricate. If damaged, replacement parts may be needed. DIY kits and tutorials are available for guidance. Regular maintenance helps prevent future problems.
How To Fix A Kitchen Drawer That Has Dropped?
Tighten screws on the drawer’s front and sides. Replace worn-out tracks or rollers. Check and adjust the alignment. Apply lubricant to smoothen the glide. Consider installing new hardware if needed.
How To Fix Crumbling Particle Board?
Remove loose particles and clean the area. Apply wood hardener for stability. Fill gaps with wood filler. Sand the surface smoothly after drying. Seal or paint for protection.
How To Fix A Stripped Drawer Pull?
Use a toothpick or wooden dowel to fill the hole. Apply wood glue for extra strength. Reinsert the screw carefully.
Conclusion
Fixing a kitchen drawer is easy with the right steps. Start by checking the slides and screws. Tighten or replace them if needed. Ensure the drawer is not overloaded. This helps prevent future issues. Regular maintenance can keep your drawers smooth and functional.
Remember, solving small problems early prevents bigger ones later. Keep tools handy for quick fixes. With these tips, your kitchen drawers will work smoothly. Enjoy a hassle-free kitchen experience with properly maintained drawers. Happy fixing!