How to Put Up Backsplash in Kitchen: Step-by-Step Guide
Do you dream of a kitchen that reflects your style and adds a splash of personality? Installing a backsplash can be the perfect solution.
It’s a simple yet effective way to transform the look of your cooking space. Whether you’re aiming for a modern, sleek design or a cozy, rustic vibe, a backsplash can make it happen. You might think that putting up a backsplash is a daunting task best left to professionals.
But what if you could do it yourself, saving money and adding a personal touch? You’ll discover the step-by-step process to easily install a backsplash in your kitchen, turning your vision into reality. Get ready to roll up your sleeves and create a kitchen that not only looks great but feels truly yours. Stay with us, and you’ll soon see how straightforward and rewarding this DIY project can be!

Credit: daviemactile.com
Choosing The Right Backsplash Material
Selecting the right backsplash material enhances both style and functionality. Consider options like ceramic, glass, or stone tiles. Each offers unique benefits, like easy cleaning or natural beauty, to match your kitchen’s needs.
Choosing the right backsplash material can transform your kitchen’s look. It’s not just about aesthetics; durability and maintenance are key. Consider your lifestyle and design preferences. Let’s explore some popular options for backsplash materials.Tile Options
Tiles are classic and versatile. Ceramic tiles offer affordability and variety. Porcelain tiles are dense and durable, perfect for moisture-prone areas. Mosaic tiles add a splash of color and pattern. Subway tiles provide timeless elegance with minimal effort. Each type has unique benefits, making tiles a popular choice.Glass Choices
Glass backsplashes create a sleek, modern vibe. They reflect light beautifully, brightening your kitchen. Easy to clean and maintain, glass suits busy households. Consider colored glass for a bold statement. Frosted glass offers a subtle, sophisticated look. With glass, you get both style and practicality.Metal Alternatives
Metal backsplashes bring a contemporary flair. Stainless steel is durable and resistant to heat. Copper adds warmth and character, evolving with time. Tin tiles offer vintage charm, perfect for rustic kitchens. Metal choices are functional and stylish, ideal for modern spaces.Natural Stone Varieties
Natural stone exudes luxury and richness. Granite provides strength and a unique appearance. Marble is elegant but requires careful maintenance. Slate offers earthy tones, adding depth to your decor. Each stone type brings its own character, enhancing your kitchen’s appeal.Gathering Necessary Tools And Supplies
Gathering Necessary Tools and Supplies Collect essential tools like a level, tape measure, and tile cutter. Ensure you have adhesive, grout, and tiles ready.
Gathering the right tools and supplies is a crucial first step before you start installing a backsplash in your kitchen. Skipping this step can lead to unnecessary trips to the hardware store mid-project, causing delays and frustration. By preparing everything ahead of time, you can dive into the installation process with confidence and keep the momentum going.Essential Tools
- Measuring Tape:Accuracy is key. Measure twice to ensure you have the right amount of materials.
- Level:Keep your tiles straight and aligned. A little tilt can become a big eyesore.
- Trowel:Choose a notched trowel for applying adhesive evenly.
- Tile Cutter:You’ll need this to fit tiles into tight spaces or around outlets.
- Rubber Grout Float:Essential for applying grout between tiles.
- Sponge and Bucket:Use these to clean excess grout and adhesive.
Additional Supplies
- Tile Adhesive:Choose a quality adhesive that suits your tile type and kitchen conditions.
- Grout:Available in various colors. Consider a shade that complements your tile.
- Tile Spacers:These ensure uniform spacing between tiles, giving a professional finish.
- Sealant:Protect your grout and tiles from moisture and staining.
- Protective Gear:Safety goggles and gloves can prevent accidents and injuries.
Preparing The Kitchen Area
Clear countertops and remove wall decorations. Ensure the surface is clean and dry before installing the backsplash. Prepare necessary tools and materials for a smooth installation process.
Preparing your kitchen area is crucial for a smooth backsplash installation. A well-prepared space ensures the process is efficient and hassle-free. Before starting, take time to organize and ready the area. This makes the task easier and more enjoyable.Clearing The Workspace
Remove all items from countertops. This includes small appliances and decorative pieces. Store them safely to avoid damage. Emptying the workspace creates more room to move around. It also ensures nothing gets in your way while working. Check cabinets and drawers near the workspace. Close them securely to prevent accidents.Protecting Surfaces
Cover surfaces with drop cloths or plastic sheets. This prevents spills and scratches. Secure the covers with tape to keep them in place. Pay special attention to nearby appliances and flooring. Protect them from adhesive and tile dust. This step saves time in cleaning later.Measuring And Marking
Use a tape measure to determine the area size. Measure both width and height accurately. Write down measurements for reference. Mark the starting point with a pencil. Draw a level line for guidance. This ensures tiles are straight and even. Double-check measurements to avoid mistakes.Installing The Backsplash
Transform your kitchen with a stylish backsplash. Begin by cleaning the wall surface thoroughly. Carefully apply adhesive and press the tiles into place, ensuring alignment. Seal edges with grout for a polished finish. Enjoy your refreshed kitchen space.
Installing the backsplash in your kitchen can be a fun project. It enhances the look and adds value to your home. Follow these simple steps to make your kitchen stand out.Applying Adhesive
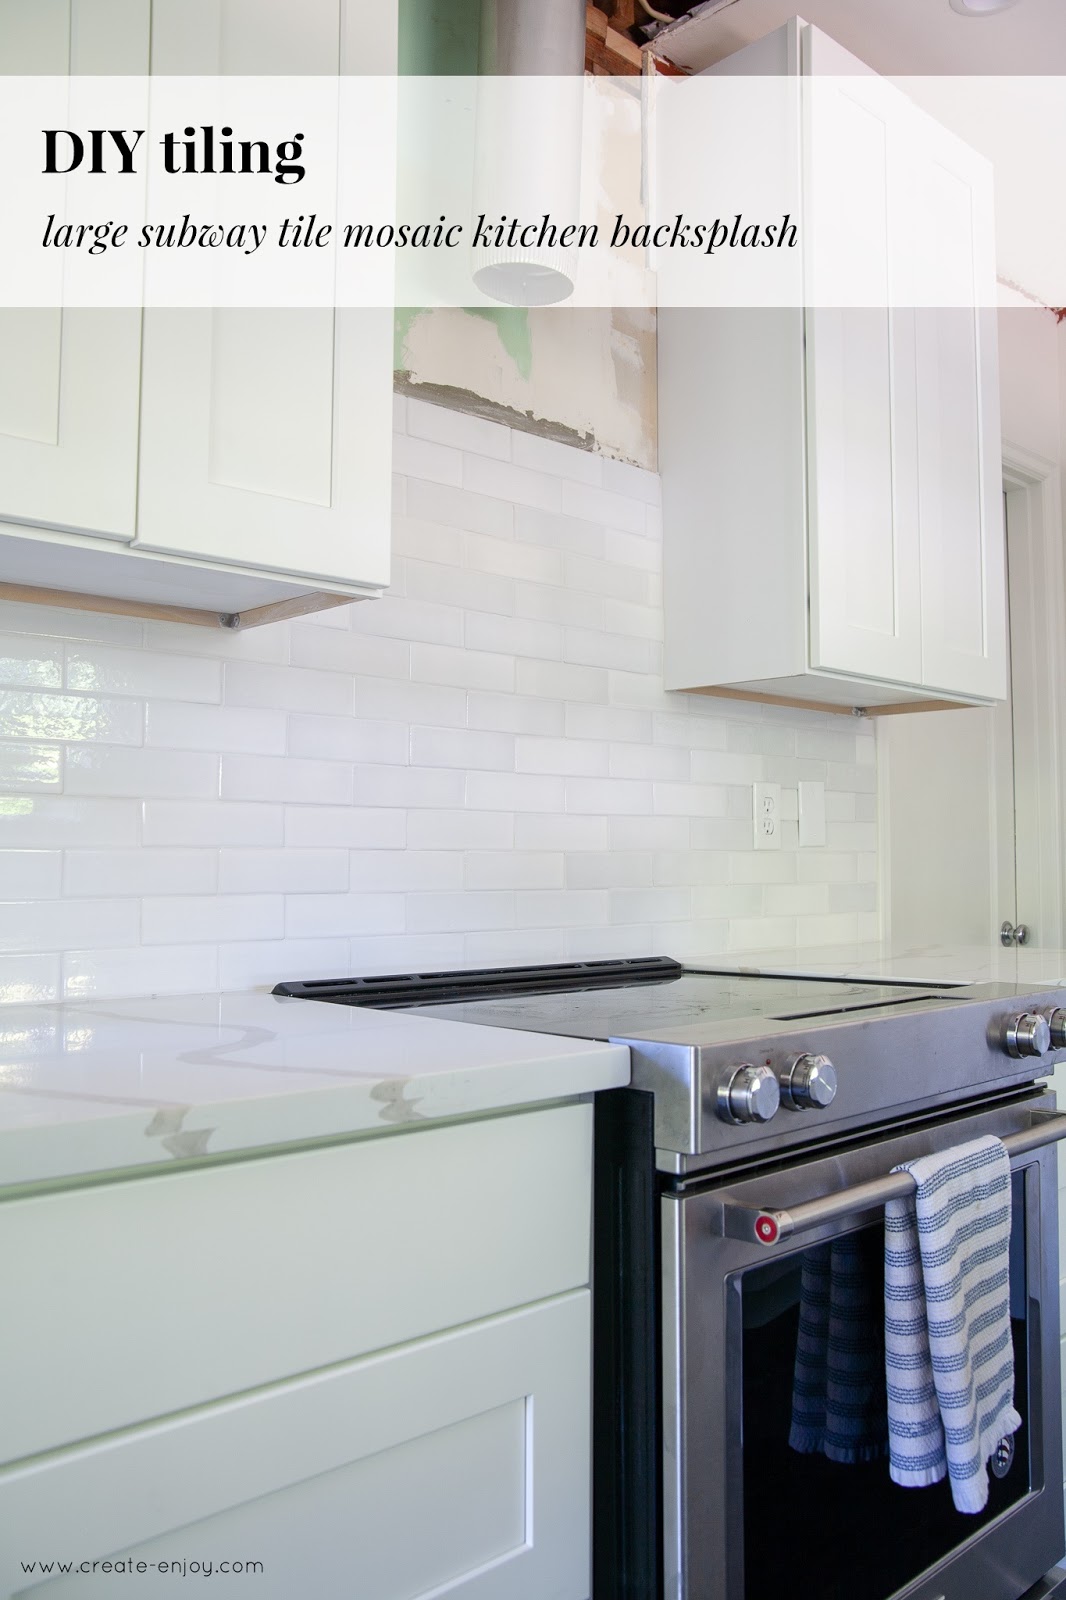
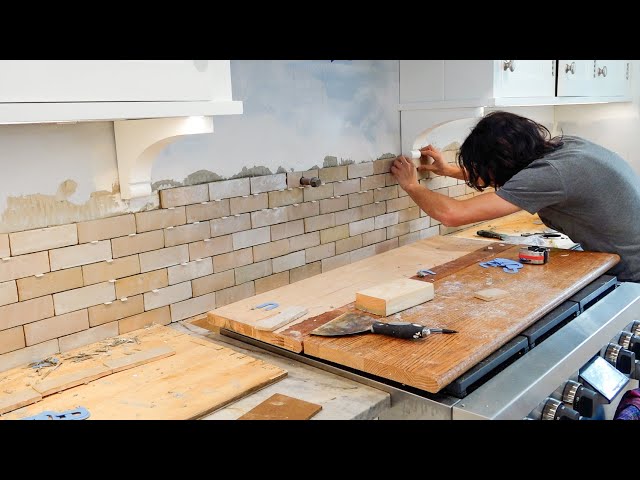
Choose the right adhesive for your tiles. Use a notched trowel to spread it evenly on the wall. Work in small sections to prevent drying before tile placement. Apply a thin, even layer to ensure tiles stick properly.Placing The Tiles
Start at the bottom center of your wall. Press each tile firmly into the adhesive. Use spacers to ensure even gaps between tiles. Check for alignment regularly as you work. Adjust tiles slightly if needed for a neat finish.Cutting Tiles To Fit
Measure areas needing smaller tiles accurately. Mark tiles for cutting with a pencil. Use a tile cutter or wet saw for precise cuts. Wear safety goggles when cutting tiles. Test fit the cut tiles before applying adhesive.Grouting And Sealing
Grouting and sealing enhance kitchen backsplash installation. Ensure tiles are securely placed and protected from moisture. Proper sealing prevents stains and maintains the surface’s clean appearance.
Grouting and sealing are the final touches that transform your kitchen backsplash from a collection of tiles into a cohesive and durable masterpiece. This phase is crucial in ensuring the longevity and aesthetic appeal of your work. Let’s explore how to tackle this task with ease and precision.Choosing The Right Grout
Selecting the right grout is the foundation of a successful backsplash project. The type of grout you choose can impact both the look and the durability of your backsplash. Consider the color: a contrasting grout can make your tiles pop, while a matching color creates a seamless look. Think about the area: is it prone to moisture? If so, consider epoxy grout for its water-resistant properties. Have you ever thought about how grout texture can impact cleaning? A smoother grout is easier to wipe down, making it ideal for busy kitchens.Applying Grout
Before you start, ensure that the tiles are firmly set and clean. A grout float is your best friend here. Apply a generous amount of grout to the tiles, pressing it into the joints firmly. Use a diagonal motion to prevent the grout from being pulled out of the spaces. Once applied, let it sit for a few minutes, then wipe the excess with a damp sponge. Be gentle to avoid removing grout from between the tiles. Wondering how to achieve those crisp, clean lines? Patience is key—allow the grout to set slightly before your final wipe down.Sealing The Backsplash
Sealing is your armor against stains and moisture. It’s a step that many overlook but it’s essential for maintaining your backsplash’s beauty and functionality. Choose a high-quality sealer that matches your grout type. Apply it with a small brush or roller, ensuring that you cover all grout lines evenly. Let it dry completely before using the kitchen. Some sealers may require multiple coats for optimum protection. Ever considered how often you should reseal? A simple water test—droplets should bead on the surface—is a quick way to check if it’s time to reapply. By taking these steps, you ensure that your kitchen backsplash not only looks stunning but also stands the test of time.Final Touches And Clean-up
Apply grout carefully between tiles and wipe away excess. Polish tiles for a spotless finish. Ensure edges are smooth and clean.
The backsplash installation is complete. Now, it’s time for the final touches and clean-up. This stage ensures your kitchen looks polished and tidy. You’ll tackle cleaning excess grout, polishing the surface, and replacing fixtures. Each task plays a role in achieving a clean and stylish finish. Let’s dive into these important steps.Cleaning Excess Grout
Excess grout can dull the beauty of your tiles. Use a damp sponge to wipe away grout residue. Be gentle to avoid displacing the grout between tiles. Rinse the sponge frequently to keep it effective. For stubborn spots, use a grout haze remover. Follow the instructions on the product label carefully. Once clean, let the grout dry fully before proceeding.Polishing The Surface
A sparkling finish makes the backsplash stand out. Use a soft cloth to polish the tiles. Circular motions help achieve a uniform shine. For glass or glossy tiles, use a specialized tile cleaner. This enhances the tile’s natural shine and keeps it looking fresh. Avoid abrasive cleaners that can scratch the surface.Replacing Fixtures
With the tiles set, reattach any removed fixtures. This includes outlet covers and light switches. Ensure fixtures fit snugly against the new backsplash. Tighten screws to secure them properly. Check for any gaps or misalignment. Adjust as needed for a seamless look. This completes the backsplash installation, leaving your kitchen looking revitalized and chic.Maintenance Tips
Preparing surfaces is key for a successful backsplash installation. Clean walls thoroughly and ensure they are dry. Measure the area carefully before cutting tiles to fit.
Maintaining your kitchen backsplash ensures it stays beautiful and functional. With proper care, your backsplash can last for years. Regular cleaning, timely repairs, and long-term care are essential. These steps will help keep your backsplash in top condition.Regular Cleaning
Clean the backsplash weekly to prevent buildup. Use a mild detergent and warm water. Avoid abrasive cleaners to protect the surface. Gently scrub with a soft cloth or sponge. Rinse thoroughly and dry with a clean towel. For stubborn stains, use a paste of baking soda and water. Apply, let sit, then wipe away for a fresh look.Repairing Damages
Act quickly to fix chips or cracks in the backsplash. Use matching grout or adhesive for minor repairs. Apply with a small tool, filling the damaged area. For larger damages, consider replacing affected tiles. Carefully remove broken pieces, and install new ones. Ensure the new tiles match in color and size. This keeps the backsplash looking seamless.Long-term Care
Seal the grout annually to protect against moisture. Use a high-quality grout sealer for best results. Apply evenly and let it dry completely. Inspect the backsplash for any signs of wear. Address any issues immediately to prevent further damage. Keep the area around the backsplash dry. This prevents mold and extends the life of your backsplash.
Credit: m.youtube.com
Credit: www.youtube.com
Frequently Asked Questions
Can A Beginner Install A Kitchen Backsplash?
Yes, a beginner can install a kitchen backsplash. Start with simple materials like peel-and-stick tiles. Follow online tutorials and use the right tools for better results. Take precise measurements and ensure surfaces are clean. With patience and attention to detail, a beginner can successfully complete the installation.
How To Attach A Backsplash To A Kitchen Wall?
Clean and level the wall surface. Apply adhesive evenly. Press the backsplash firmly into place. Ensure alignment and remove excess adhesive. Allow it to dry fully before use.
When Installing A Backsplash, Where Do You Start?
Begin backsplash installation at the center of the focal wall. Ensure symmetry and balance by working outward. Use a level for alignment. This approach highlights design features and provides visual appeal. Consider electrical outlets or cabinets for consistent spacing. Always double-check measurements before applying adhesive.
Do You Put Backsplash Directly On Drywall?
Yes, you can install a backsplash directly on drywall. Ensure the wall is clean, dry, and smooth. Use appropriate adhesive for the material, such as tile or glass. Proper sealing helps prevent moisture damage. Always follow manufacturer guidelines for the best results and longevity of your backsplash.
Conclusion
Putting up a kitchen backsplash is a rewarding project. It adds style and protection. Your kitchen becomes more functional and attractive. Follow the steps carefully for a seamless installation. Choose materials that match your kitchen’s design. Keep tools organized and handy.
Measure accurately to avoid mistakes. With patience, your backsplash will transform your space. Enjoy the new look and feel of your kitchen. A well-done backsplash makes cooking more enjoyable. It reflects your personal taste and creativity. Start your project today and bring new life to your kitchen.