How to Make Kitchen Mittens: DIY Crafting Guide
Imagine pulling a steaming-hot dish out of the oven with confidence, knowing your hands are safe and stylishly wrapped in mittens you crafted yourself. Sounds delightful, right?
If you’ve ever been frustrated by store-bought kitchen mittens that don’t quite fit or lack that personal touch, you’re in the right place. This guide is your ticket to creating custom kitchen mittens that reflect your style and meet your functional needs.
Whether you’re a seasoned DIY enthusiast or a curious beginner, this step-by-step tutorial is designed with you in mind. Get ready to transform fabric into your kitchen’s new best friend, and discover the joy of combining creativity with practicality. Keep reading to unlock the secrets of making kitchen mittens that are as unique as you are.
Materials And Tools
Gather fabric, quilt batting, and heat-resistant material for the mittens. Sewing machine, scissors, and pins are essential tools. Select colorful fabric for a unique look and ensure durability with quality threads.
Making kitchen mittens is a fun and practical craft project. Before diving into the sewing process, gathering the right materials and tools is essential. Having everything ready not only makes the process smoother but also ensures your mittens are durable and effective. Imagine the satisfaction of pulling a hot tray from the oven with mittens you’ve crafted yourself!Fabric Selection
Choosing the right fabric is crucial. Opt for thick, heat-resistant materials like cotton or wool. These fabrics offer the necessary protection and are easy to work with. Look for fun patterns or colors to personalize your kitchen mittens.Insulating Material
An insulating layer is a must-have. Consider using quilt batting or thermal fabric. These materials provide extra protection against heat. Ensure it’s washable to maintain hygiene.Thread And Needles
Select a sturdy thread that matches your fabric. Polyester or cotton threads are ideal. Have a set of needles, both hand sewing and machine sewing, ready to tackle different parts of the project.Scissors And Cutting Tools
Sharp scissors are a crafter’s best friend. Invest in a pair specifically for fabric to ensure clean cuts. A rotary cutter can also be handy for precise, straight lines.Measuring Tools
Accurate measurements prevent mishaps. Keep a tape measure or a ruler nearby to ensure your fabric pieces fit perfectly. Double-check dimensions for the perfect fit.Sewing Machine
While hand sewing is possible, a sewing machine speeds up the process. It provides strong, consistent stitches. If you have one, make sure it’s set up and functioning well.Pins And Clips
These small tools hold your fabric in place as you sew. They’re indispensable for maintaining precision. Choose clips over pins for thicker materials to avoid unnecessary holes.Pattern Templates
Using a pattern template simplifies the process. You can find templates online or create your own. This ensures uniformity and symmetry in your mittens. Are you ready to transform basic materials into functional kitchen mittens? Gathering these essentials is your first step towards crafting a pair that you’ll love using every day.
Credit: www.youtube.com
Choosing Fabric
Selecting fabric is crucial for making kitchen mittens. Opt for heat-resistant materials like cotton or silicone. Ensure durability and comfort by choosing fabrics with good thickness and flexibility.
Choosing the right fabric for your kitchen mittens is crucial. It can make the difference between a delightful crafting experience and a frustrating one. The fabric you choose will affect not only the mittens’ functionality but also their aesthetic appeal.Heat-resistant Options
When selecting fabric, prioritize heat resistance. Your kitchen mittens must protect your hands from hot pots and pans. Cotton and wool are excellent choices due to their natural insulation properties. For added protection, consider fabrics with a silicone or Teflon coating. These materials offer superior heat resistance, ensuring your safety while cooking. Have you ever thought about repurposing old denim? It’s durable and provides a surprising amount of heat resistance.Color And Pattern Selection
Now, let’s talk about aesthetics. While functionality is paramount, style shouldn’t take a backseat. Choose colors that complement your kitchen’s decor. Patterns are a fantastic way to add personality to your mittens. From classic stripes to quirky polka dots, the choice is yours. Are you a fan of seasonal themes? Consider fabric with holiday motifs for a festive touch. The fabric you choose for your kitchen mittens can turn a utilitarian item into a charming kitchen accessory. What colors and patterns speak to you?Creating A Pattern
Creating a pattern for kitchen mittens involves tracing your hand’s outline onto paper. Next, add an extra inch for seam allowance, ensuring a snug fit. Use this pattern to cut fabric pieces, preparing them for sewing into protective mittens.
Creating a pattern is a crucial step in making kitchen mittens. A well-fitted mitten not only offers protection but also enhances comfort. To create a perfect pattern, start by measuring your hand precisely. This ensures the mitten fits snugly and performs its role effectively.Measuring Your Hand
Begin with a tape measure. Measure the circumference around the widest part of your hand. Don’t include your thumb. Record this measurement. Now, measure from the base of your palm to the tip of your middle finger. This gives you the length. Note this down too. These two measurements are key to a well-fitted mitten.Drawing The Template
Use a piece of paper. Trace your hand, keeping fingers slightly spread. Leave extra space around the outline. This accounts for seam allowance. Mark the thumb separately. Draw a rectangle on the side for the thumb. Adjust the shape to ensure comfort and flexibility. Once happy with the shape, cut out the template. You now have the base for your kitchen mitten.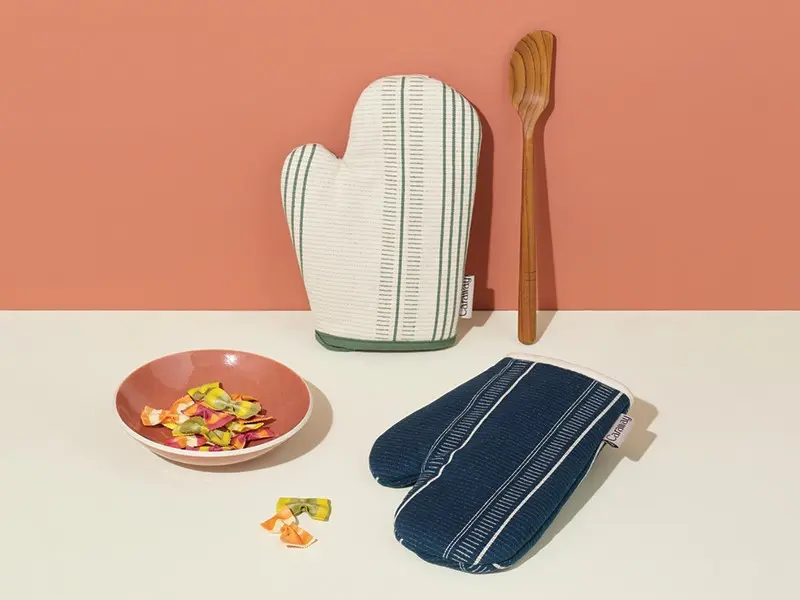
Credit: www.carawayhome.com
Cutting The Fabric
Start by laying the fabric flat on a cutting surface. Mark the mitten pattern with chalk or fabric pencil. Carefully cut along the outlines, ensuring smooth edges for easy sewing.
Cutting the fabric is a crucial step in making kitchen mittens. It determines the fit and comfort of the final product. Choosing the right fabric ensures durability. Begin by selecting a fabric that’s heat-resistant and easy to clean. Cotton or quilted fabric is ideal for kitchen mittens. Ensure you have enough fabric to cover both sides of the mittens. Accurate cutting leads to a perfect fit.Layering For Insulation
For effective insulation, layering is key. Use multiple fabric layers to enhance heat resistance. Start with the outer layer, selecting a durable fabric. Add a middle layer of batting for padding. This layer provides comfort and protects against heat. Finally, choose a soft inner layer for ease of use. This ensures the mittens are not only functional but also comfortable.Precision Cutting Tips
Precision is important when cutting the fabric. Use sharp scissors to ensure clean edges. Lay the fabric flat on a cutting surface. Pin the template securely to avoid shifting. Cut slowly along the template lines. This ensures symmetry and accuracy. Double-check measurements before cutting to prevent errors. Accurate cutting saves time and fabric.Sewing Techniques
Creating kitchen mittens involves cutting fabric into the desired shape and sewing carefully for heat protection. Use thick materials and secure stitches to ensure durability. Personalize with colors and patterns for a touch of creativity in your kitchen.
Sewing Techniques Creating your own kitchen mittens can be a rewarding experience. Not only do you get to personalize them to match your kitchen décor, but you also gain a deeper appreciation for the sewing craft. Let’s dive into the crucial sewing techniques needed to ensure your mittens are not just stylish, but functional and durable.Stitching Basics
Mastering stitching is the first step in sewing your kitchen mittens. Begin with a simple straight stitch, which is the foundation for most sewing projects. This stitch is ideal for joining fabric pieces together neatly. A zigzag stitch can be your best friend for reinforcing seams, preventing fraying edges, and adding flexibility to your mittens. Practice on scrap fabric to get comfortable with your sewing machine’s settings. Remember, the choice of thread is crucial. Opt for cotton or polyester thread as they offer durability and strength, keeping your mittens intact through countless uses.Attaching Layers
A key aspect of creating kitchen mittens is layering. Typically, you will need three layers: the outer fabric, the inner padding, and the lining. The padding provides heat resistance, ensuring your hands stay safe while handling hot items. Start by cutting each layer to match your mitten template. Pin them together securely to prevent shifting while sewing. Consider quilting the layers together. This technique not only adds texture but also ensures that the layers stay intact. You could create diagonal lines or a grid pattern, depending on your style preference. Take your time when sewing around curves, as this is where mittens often lose their shape. Trim excess fabric from the seams to reduce bulk and allow for a smooth finish. With patience and practice, you’ll find attaching layers becomes easier, and the end result is a mitten that’s both beautiful and functional. Have you ever thought about what colors and patterns would make your mittens truly unique?Adding A Lining
Adding a lining to kitchen mittens provides extra protection against heat. Choose a soft, heat-resistant fabric for comfort. Secure the lining inside the mittens with neat stitching to ensure durability and safety while cooking.
Adding a lining to your kitchen mittens not only enhances their durability but also increases comfort and heat resistance. It’s the secret ingredient that transforms your mittens from a simple craft project into a practical kitchen tool. Whether you’re a seasoned sewing enthusiast or a beginner, understanding how to properly add a lining can make all the difference.Choosing Lining Material
When selecting the lining material, think about comfort and functionality. Cotton is a popular choice due to its softness and breathability. It’s perfect for those who want a natural feel. If you’re looking for extra heat protection, consider insulated batting. This material is specifically designed to withstand higher temperatures, making it ideal for frequent bakers. You could also explore using fleece for a plush feel that adds an extra layer of comfort. Think about how often you’ll use the mittens and choose a lining that matches your needs.Sewing The Lining
Begin by cutting your chosen lining material to the same size as your outer fabric. This ensures a snug fit and prevents any awkward bunching. Pin the lining to the outer fabric, making sure to align the edges perfectly. This step is crucial for a seamless finish. Sew the lining to the outer fabric with a simple straight stitch. Take your time and sew slowly to avoid mistakes. Once stitched, turn the mitten inside out, and voila! You have a beautifully lined mitten ready to tackle the hottest of pans. Have you ever considered how a small detail like lining can enhance your kitchen experience?Final Assembly
The final assembly is where your kitchen mittens come to life. Carefully join each piece to create a functional and stylish mitt. This stage ensures the mittens are ready for use, providing safety and comfort. Follow these steps for a successful final assembly.
Aligning The Pieces
Start by aligning the fabric pieces correctly. Ensure the right sides face each other. This step is crucial for a neat finish. Use pins to hold the pieces in place. Double-check the alignment before proceeding. This avoids uneven seams.
Next, align the inner lining with the outer fabric. Ensure they match perfectly. The thumb section should be aligned well. This ensures comfort during use. Ensure all edges are even. This will help during the seam finishing process.
Finishing Seams
Sew along the edges using a straight stitch. This secures the fabric pieces together. Keep the stitch line consistent. This ensures durability and a neat appearance. Trim any excess fabric along the edges. This reduces bulk and makes turning easier.
Turn the mittens right side out. Press the seams with an iron for a clean finish. This step enhances the mittens’ appearance. Check for any loose threads. Trim them to prevent unraveling. Your mittens are now ready for use in the kitchen.
Decorative Touches
Crafting kitchen mittens adds a cozy touch to your space. Choose colorful fabrics to match your kitchen theme. Simple stitching techniques can personalize these useful items, making them both practical and decorative.
Decorative touches transform plain kitchen mittens into delightful works of art. These enhancements add personality and charm to your creations. Let’s explore some ideas that elevate your mittens and make them unique.Embroidery Ideas
Embroidery brings elegance to kitchen mittens. Choose simple designs like flowers or stars. Use colorful threads to make patterns pop. Personalize with initials or names for a special touch. Try cross-stitch for a classic look. Experiment with different stitches and textures. Embroidery adds depth and interest.Adding Trims
Trims give mittens a finished look. Use lace for a delicate appearance. Add ribbon for a touch of color. Fringe creates a playful vibe. Consider pom-poms for whimsy. Choose trims that match your kitchen theme. Attaching trims is simple with basic sewing skills. Trims enhance both style and functionality.Care And Maintenance
Kitchen mittens are essential tools for safe cooking. Proper care and maintenance extend their lifespan. Keeping them clean and in good shape is crucial. This section will guide you through cleaning and repairing kitchen mittens.
Cleaning Tips
Regular cleaning prevents stains and odors. Use mild soap and warm water. Gently scrub the mittens. Avoid harsh chemicals; they can damage fabric. Rinse thoroughly and air dry. Machine washing may be suitable for some mittens. Check the label for instructions. Spot cleaning helps remove stubborn stains. Baking soda and water make an effective paste. Apply, let sit, then rinse.
Repairing Damages
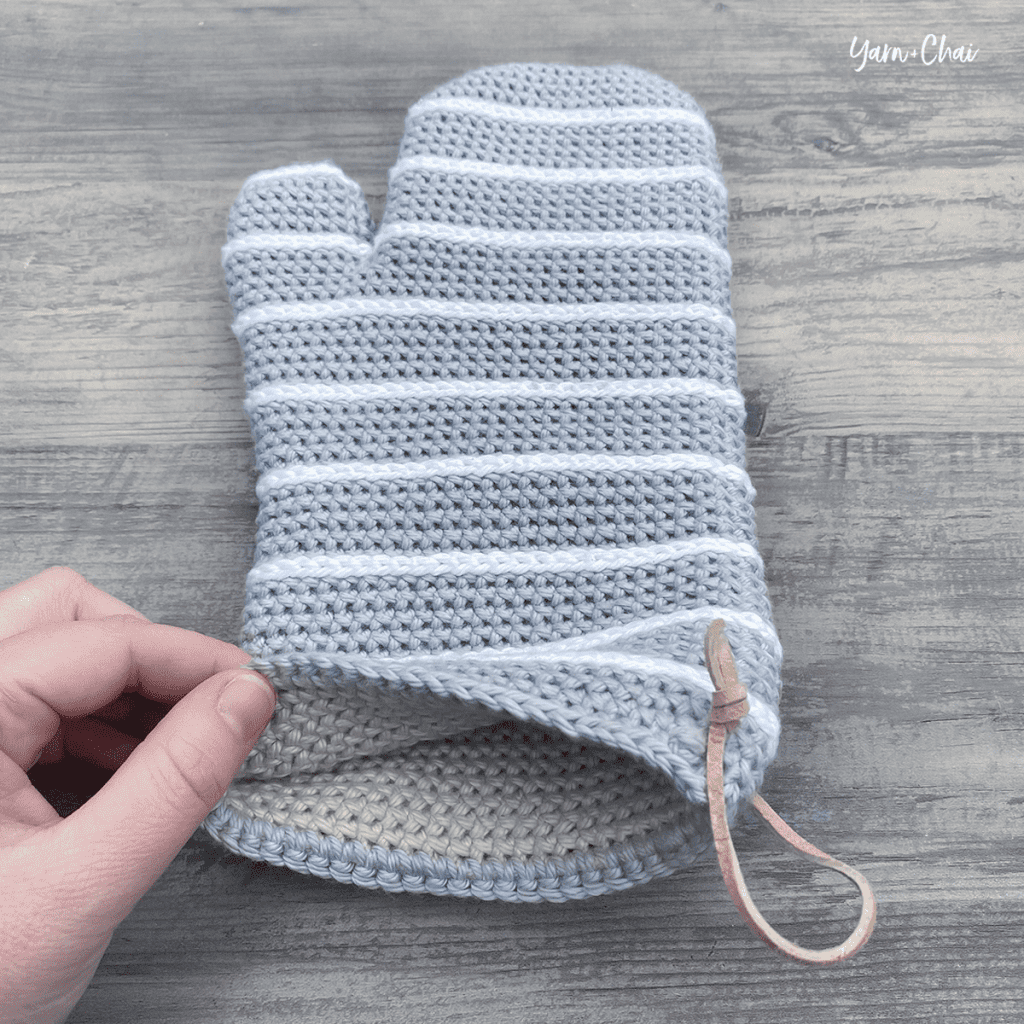
Minor damages are easily fixed. Small tears can be sewn by hand. Use a needle and strong thread. Match the thread color to the mittens. Reinforce seams to prevent future damage. Patching works for larger holes. Cut fabric patches to size. Attach with fabric glue or sew them on. Check for loose or frayed edges. Trim frayed edges to keep mittens tidy.
Credit: yarnandchai.com
Frequently Asked Questions
What Kind Of Batting Do You Use For Oven Mitts?
Oven mitts typically use heat-resistant batting like Insul-Bright. This material reflects heat, ensuring protection. Cotton batting can also be layered for added insulation. Always choose materials that withstand high temperatures to ensure safety and durability.
What Do Chefs Use Instead Of Oven Mitts?
Chefs often use side towels or kitchen towels instead of oven mitts. These towels offer flexibility and grip. They can be folded or layered for added protection. Chefs prefer them for their versatility and convenience in handling hot pots and pans.
Can You Make Your Own Oven Mitts?
Yes, you can make your own oven mitts. Use heat-resistant fabric and follow a simple sewing pattern. Personalize with colors and designs. Ensure proper insulation for safety. Crafting your own oven mitts can be a fun and rewarding DIY project.
What Are Oven Mitts Filled With?
Oven mitts are typically filled with heat-resistant materials like cotton, polyester, or silicone. These materials provide insulation and protect hands from burns. Some mitts may also contain a layer of terry cloth for added comfort and heat resistance. Choose quality mitts for optimal safety in the kitchen.
Conclusion
Creating kitchen mittens is a simple, rewarding task. You now have a practical skill. Homemade mittens add a personal touch to cooking. Plus, they make great gifts. Sewing them is easy and fun. Choose fabrics that inspire you. Experiment with different designs.
Enjoy the process and its results. Your kitchen will feel more inviting. Family and friends will appreciate your effort. Keep practicing to improve your skills. Crafting mittens is a delightful hobby. It’s both creative and useful. You can protect your hands in style.
Try making a pair today. Your kitchen adventures await!