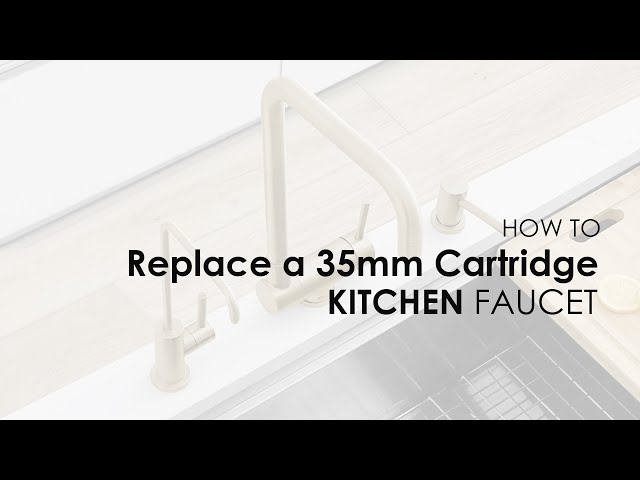
How to Change Kitchen Faucet Cartridge: Easy DIY Guide
Are you tired of that leaky kitchen faucet that just won’t stop dripping? Or perhaps you’ve noticed a decline in water pressure, and it’s driving you up the wall?
You’re not alone. Many homeowners face these frustrating issues, but the good news is that they can often be solved by changing the kitchen faucet cartridge. Yes, you read that right! You don’t need to call a plumber or spend a fortune on a new faucet.
With just a few tools and a little bit of guidance, you can tackle this fix on your own. Imagine the satisfaction of turning that handle and seeing a steady, perfect stream of water flowing—no leaks, no fuss. Intrigued? Read on to discover how you can effortlessly restore your faucet to its former glory.
Tools And Materials Needed
Gathering the right tools and materials is essential. You’ll need a wrench, screwdriver, and a replacement cartridge. Have plumber’s tape and a towel handy to prevent leaks and spills.
Changing a kitchen faucet cartridge might seem daunting, but with the right tools, it’s manageable. Having the necessary tools and materials makes the process smooth. Gather everything beforehand to save time.Tools You Will Need
- Screwdriver: A flathead or Phillips depending on your faucet’s screws.
- Adjustable Wrench: Useful for loosening nuts and bolts.
- Allen Wrench: Often needed for removing handles.
Materials Required
- Replacement Cartridge: Ensure it matches your faucet model.
- Plumber’s Tape: Helps prevent leaks after installation.
- Cleaning Cloth: Wipe away any dirt or residue.
Optional Items
- Bowl or Bucket: Catch any water that may spill.
- Lubricant: Ease the removal of stubborn parts.

Credit: www.youtube.com
Identifying Faucet Type
Begin by identifying your faucet type. This helps you find the right cartridge for replacement. Check for brand markings or design features.
Identifying the type of faucet you have is a crucial first step in changing its cartridge. Not all faucets are created equal, and understanding the unique features of your kitchen faucet can save you time and frustration. Before you rush to the hardware store, take a moment to inspect your faucet closely.Single-handle Faucets
Single-handle faucets are popular for their sleek design and ease of use. They control both hot and cold water with one lever. If your faucet has just one lever, you likely have a single-handle faucet, often found in modern kitchens.Double-handle Faucets
Double-handle faucets, featuring separate handles for hot and cold water, are classic choices. These faucets are easily identified by their two distinct handles. They’re often found in older homes or those with a vintage style.Pull-out And Pull-down Faucets
These faucets come with a spray head that you can pull out or down, making them versatile for cleaning large pots or pans. If your faucet has a detachable spray head, it’s either a pull-out or pull-down faucet, commonly seen in contemporary kitchens.Compression Faucets
Compression faucets are less common but still present in some households. They use rubber washers to seal against water flow. If your faucet requires you to twist the handle tightly to stop water flow, you might have a compression faucet.Ball-type Faucets
Ball-type faucets have a single handle that moves over a round ball, controlling water flow and temperature. These are identified by their unique mechanism and are often used in budget-friendly kitchen designs.Cartridge Faucets
Cartridge faucets are known for their smooth operation and durability. They can have either one or two handles. If your faucet operates smoothly without requiring much force, it might be a cartridge faucet. Knowing your faucet type helps you purchase the right cartridge replacement. Have you ever mistakenly bought the wrong part? Avoiding this common pitfall is easier when you know exactly what you have.Turning Off Water Supply
Turning off the water supply is essential before changing a kitchen faucet cartridge. Locate the valves under the sink and twist them clockwise to stop water flow. Ensuring the water is off prevents leaks and allows for a smooth replacement process.
Turning off the water supply is an essential step before tackling the replacement of your kitchen faucet cartridge. It ensures that you avoid any unnecessary mess and water damage. Even if you think you’ve turned off the right valve, it’s worth double-checking to prevent a mini-flood.Locate The Shut-off Valves
Start by finding the shut-off valves, usually located under the sink. These valves are connected to the water supply lines leading to your faucet.Identify Hot And Cold Water Lines
Look closely at the valves and identify which controls the hot and cold water. They might be marked with red and blue colors or labeled with ‘H’ and ‘C’.Turn Valves Off
Turn the valves clockwise to shut off the water supply. If they’re too tight, use a wrench, but be gentle to avoid damaging the valve.Check For Leaks
After turning off the valves, check the faucet to ensure no water flows when you turn it on. This confirms the water supply is properly shut off.Consider The Main Water Supply
If the shut-off valves are not working, you might need to turn off the main water supply to your home. This valve is typically located near your water meter or where the water line enters your home. Turning off the water supply might seem trivial, but it’s a critical step in avoiding a wet surprise. Have you ever faced a situation where you thought the water was off, only to be proven wrong? Share your experience!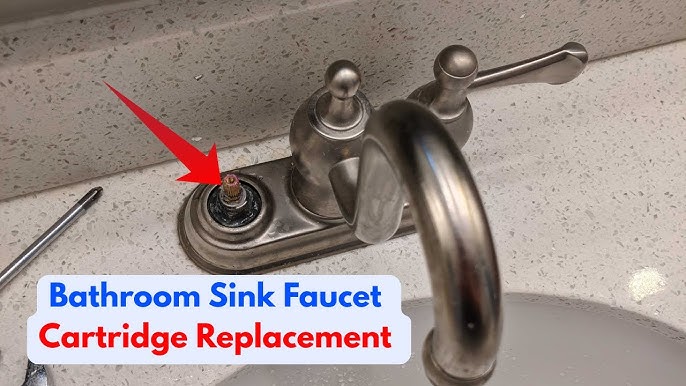
Credit: www.youtube.com
Removing Faucet Handle
Begin by turning off the water supply under the sink. Carefully remove the faucet handle using a screwdriver to access the cartridge.
Removing the faucet handle is the first step in changing the cartridge. This process can seem tricky, but with patience, you can do it. Before you start, gather the right tools. You will need a screwdriver, an Allen wrench, and possibly pliers. These tools help in safely removing the handle without damage.Turn Off The Water Supply
First, turn off the water supply. This prevents any water spills. Locate the valves under the sink. Turn them clockwise to stop the water flow.Locate The Handle Screws
Next, find the screws on the faucet handle. They are often hidden under a decorative cap. Use a flathead screwdriver to gently pry off the cap.Unscrew And Remove The Handle
Once you locate the screws, use a screwdriver or Allen wrench to remove them. Turn the screws counterclockwise. Keep the screws in a safe place to avoid losing them.Lift The Handle Off
Carefully lift the handle off the faucet. If it sticks, wiggle it gently. Do not use force to avoid damaging the handle.Extracting Old Cartridge
Extracting the old cartridge is a crucial step in changing a kitchen faucet. Begin by turning off the water supply and draining excess water from the faucet. Carefully remove the handle and use pliers to extract the old cartridge, ensuring a clean removal for seamless replacement.
Extracting the old cartridge from your kitchen faucet is a crucial task. This step ensures smooth water flow and prevents leaks. With the right tools and a little patience, you can do it yourself. Let’s dive into the detailed process.Turn Off The Water Supply
Start by shutting off the water supply. Find the valves under your sink. Turn them clockwise until they stop. This prevents water from gushing out when you open the faucet.Open The Faucet To Drain Remaining Water
Turn on the faucet to release any trapped water. This step helps relieve pressure. It also ensures no water remains in the pipes.Remove The Handle
Locate the screw securing the handle. It might be hidden under a decorative cap. Use a screwdriver to remove it. Gently lift the handle off the faucet.Detach The Retaining Nut
Use a wrench to loosen the retaining nut. This nut holds the cartridge in place. Turn it counterclockwise until it comes off.Pull Out The Old Cartridge
Grasp the cartridge with pliers. Pull it straight out of the faucet body. Be careful not to damage the faucet. Note its orientation for easy replacement.
Credit: m.youtube.com
Installing New Cartridge
Installing a new kitchen faucet cartridge is simple. Turn off the water supply and remove the handle. Take out the old cartridge and replace it with a new one. Ensure everything is secure before turning the water back on. Enjoy a leak-free kitchen faucet.
Installing a new kitchen faucet cartridge can seem daunting, but with the right guidance, it’s a straightforward task. You might find it surprisingly satisfying to fix this common household issue on your own. Changing the cartridge not only ensures a leak-free faucet but also enhances water flow and efficiency. Here’s how you can tackle this DIY project with ease.Gather Your Tools And Materials
Before diving in, ensure you have all the necessary tools on hand. Common items include a wrench, screwdriver, and a replacement cartridge. A small flashlight can also be handy for better visibility.Remove The Old Cartridge
Once you’ve turned off the water supply, it’s time to remove the old cartridge. Use a screwdriver to take off the handle and any cover plates. Then, gently pull out the cartridge using pliers. Remember to note its orientation for easy installation of the new one.Insert The New Cartridge
With the old cartridge out, it’s time to install the new one. Align it in the same position as the old one. Make sure it’s seated properly to prevent leaks. Gently press it into place until it clicks.Reassemble The Faucet
Now, reattach the handle and any cover plates you removed. Tighten screws securely but avoid over-tightening, which can cause damage. Double-check that everything is aligned correctly.Test For Leaks
Turn the water supply back on and test the faucet. Run water to ensure there are no leaks and that the handle moves smoothly. If everything works well, you’ve successfully installed your new cartridge. Changing a faucet cartridge isn’t just about fixing a leak—it’s about building confidence in your DIY skills. Why not share your experience and help others tackle their home improvement projects?Reassembling Faucet Parts
Reassembling faucet parts involves changing the kitchen faucet cartridge with care. First, turn off the water supply. Then, remove the handle and old cartridge. Install the new cartridge securely. Finally, reattach the handle and check for leaks.
Reassembling your kitchen faucet parts might seem daunting at first, but it’s actually a straightforward process that can save you from calling in professional help. The satisfaction of completing the task yourself is unmatched. Plus, you’ll gain valuable insights into how your faucet operates, making future repairs easier.Aligning The Cartridge Correctly
Begin by ensuring the cartridge fits snugly into its housing. It’s crucial to align it perfectly; otherwise, the faucet may leak or function improperly. If you’re unsure, check the manufacturer’s instructions. They often provide diagrams that can help with alignment.Securing The Retaining Nut
Once the cartridge is in place, secure it with the retaining nut. Use a wrench to tighten it gently. Too much force can damage the cartridge or threads, while too little might lead to leaks. A firm but careful hand ensures everything stays watertight.Attaching The Handle
Next, attach the faucet handle. Slide it over the cartridge stem and fasten it with the screw provided. If your handle is a bit loose, check if the screw needs further tightening. A solid handle gives you better control over water flow and temperature. Before wrapping up, turn on the water supply to check for leaks. Let the water run for a few minutes and observe the faucet closely. If you spot any leaks, revisit the cartridge and nut for adjustments. A leak-free faucet is the ultimate sign of success.Final Touches
Finally, replace any decorative caps or covers that were removed. These small parts can make a big difference in the faucet’s appearance. Take a step back and admire your handiwork. Doesn’t it feel great to tackle a household task on your own?Testing For Leaks
Check for leaks by running water through the faucet. Observe any drips or moisture around the cartridge area. Tighten connections if necessary to ensure a proper seal and prevent future leaks.
Testing for leaks is a crucial step after replacing your kitchen faucet cartridge. It ensures your hard work doesn’t go down the drain, quite literally. A leak-free faucet not only conserves water but also saves you from potential water damage.Turn On The Water Supply
Begin by slowly turning on the water supply. This gradual approach prevents any sudden pressure that could cause leaks. Listen for unusual noises that might indicate a problem.Inspect The Faucet Connections
Check the connections under the sink where the cartridge meets the water lines. Use a flashlight for better visibility. If you spot any drips, tighten the connections with a wrench.Observe The Faucet Performance
Turn on the faucet to test its performance. Ensure both hot and cold water flow smoothly. Any inconsistent flow might suggest an incorrectly installed cartridge.Check For Drips At The Spout
Look for drips at the faucet spout after turning off the water. A persistent drip could indicate a misaligned cartridge. Re-adjust the cartridge if necessary.Monitor Over Time
Keep an eye on the faucet over a few days. Sometimes leaks appear after the initial test. Regular checks help catch these delayed leaks early on. Testing for leaks is like quality assurance for your DIY project. What would you do if you find a leak? Don’t panic; just tighten, adjust, or repeat as needed. Your kitchen deserves a faucet that works flawlessly!Tips For Maintenance
Changing a kitchen faucet cartridge is simple. Turn off the water supply and unscrew the handle. Remove the old cartridge and insert the new one. Reassemble the parts and check for leaks. This basic maintenance can prevent drips and extend the faucet’s life.
Maintaining your kitchen faucet cartridge ensures smooth operation and extends its lifespan. Regular upkeep helps prevent leaks and costly repairs. Follow these tips to keep your faucet in top shape.Regular Cleaning
Keep the cartridge clean to avoid mineral build-up. Use vinegar to dissolve deposits. A soft brush works well for scrubbing.Check For Leaks
Inspect the faucet regularly for leaks. Early detection prevents water damage. Tighten loose parts immediately.Lubricate Moving Parts
Apply plumber’s grease on moving parts. It reduces friction and wear. Lubrication keeps the faucet smooth.Replace Worn-out Seals
Check seals for cracks or wear. Replace them if needed. New seals prevent leaks and save water.Inspect Water Pressure
Ensure water pressure is not too high. High pressure can damage the cartridge. Adjust if necessary to prolong life.Use Quality Water
Consider installing a water filter. Clean water reduces mineral deposits. It keeps the cartridge in good condition.Schedule Regular Inspections
Plan yearly inspections by a plumber. Professional checks ensure everything is working. They identify potential problems early.Frequently Asked Questions
How Do You Change The Cartridge On A Kitchen Faucet?
Turn off the water supply. Remove the faucet handle using a screwdriver. Pull out the cartridge with pliers. Insert the new cartridge. Reassemble the handle and turn the water back on.
Can You Remove A Faucet Cartridge Without Turning Off Water?
No, you can’t remove a faucet cartridge without turning off the water. Turning off water prevents leaks or damage. Always ensure water supply is off before starting any plumbing repairs to avoid potential flooding or mess. This simple step ensures a smooth and safe cartridge replacement process.
How To Know If A Faucet Cartridge Is Bad?
Check for leaks, low water pressure, or irregular temperature control. A worn-out cartridge often causes these issues. Inspect the cartridge for visible damage or mineral buildup. Replace if necessary to restore faucet functionality. Regular maintenance prevents further damage.
How To Replace A Faucet Cartridge Single Handle Delta?
Turn off the water supply. Remove the handle using a screwdriver. Pull out the old cartridge. Insert the new cartridge, ensuring proper alignment. Reattach the handle and turn the water supply back on. Test the faucet for leaks and functionality.
Conclusion
Changing a kitchen faucet cartridge is manageable. Just follow each step carefully. Gather all necessary tools beforehand. This saves time and effort. Turn off the water supply first. Remember to keep the area clean. Handle parts with care to avoid damage.
Double-check your work before testing. This ensures everything works smoothly. Regular maintenance prevents future problems. Keep instructions handy for next time. With practice, this task becomes easier. Enjoy a drip-free kitchen faucet now. Feel confident in your skills. Small home fixes make a big difference.
Your kitchen will thank you!