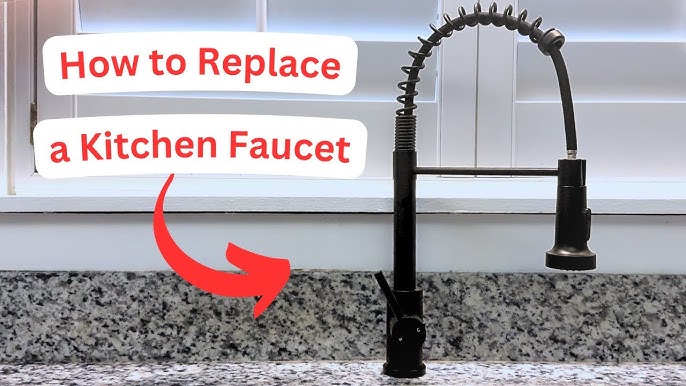
How to Change the Kitchen Faucet: Step-by-Step Guide
Are you tired of that constant drip or outdated look of your kitchen faucet? Changing it might sound daunting, but it doesn’t have to be!
Imagine the satisfaction of turning on a sleek, new faucet that you installed yourself. Not only does it refresh the heart of your home, but it also gives you a sense of accomplishment. In this guide, we’ll walk you through each step of replacing your kitchen faucet, making it as simple as possible.
Whether you’re a seasoned DIY enthusiast or a complete beginner, you’ll find this process easier than you think. So, roll up your sleeves, gather your tools, and let’s transform your kitchen together!

Credit: www.youtube.com
Tools And Materials Needed
Gather essential tools like a wrench, basin wrench, and screwdriver. Have materials such as plumber’s tape and a new faucet. These items ensure a smooth faucet replacement process.
Changing a kitchen faucet can seem daunting. The right tools and materials simplify the process. Gather everything before you start. This prevents interruptions and ensures smooth progress. Below, you’ll find the essential items needed.Wrench Set
A wrench is crucial for loosening bolts. Adjustable wrenches offer versatility. They fit various sizes, making them ideal for this task.Plumber’s Tape
Plumber’s tape helps prevent leaks. Wrap it around threads before connecting pipes. It’s an inexpensive but vital material.Basin Wrench
A basin wrench reaches tight spaces. It’s perfect for faucets with hard-to-reach nuts. This tool ensures a secure and easy installation.Bucket
A bucket catches any water left in pipes. Place it under the sink before removing the old faucet. This keeps the area clean and dry.Towels Or Cloths
Towels protect the sink surface. They also absorb any spills or drips. Keep a few handy during the installation.New Faucet
Choose a faucet that fits your sink and style. Consider the installation type: single-hole or multiple-hole. Ensure it comes with all necessary parts.Safety Glasses
Safety glasses protect your eyes. Small particles can fall when removing the old faucet. Safety is always a priority.Screwdriver
A screwdriver might be needed for removing screws. Check the faucet type for specific screw requirements. A standard set usually suffices.Rubber Gasket
Rubber gaskets seal connections. They prevent leaks between the faucet and sink. Ensure you have the correct size for your faucet.Cleaning Supplies
Have cleaning supplies ready. Once the old faucet is removed, clean the area. This ensures a neat installation of the new faucet. Prepare each item listed. Having them ready makes the process seamless. You’ll save time and reduce stress. Happy faucet changing!Preparation Steps
Turn off the water supply under the sink and gather necessary tools like a wrench and basin wrench. Clear out the cabinet area for easy access. Ensure you have a bucket to catch any water drips.
Preparing to change your kitchen faucet is crucial. Proper preparation ensures a smooth and successful installation. Start by gathering all necessary tools and materials. This will save time and prevent unnecessary trips to the store. With everything ready, focus on these essential preparation steps.Turn Off Water Supply
Begin by turning off the water supply. Look for the shut-off valves under the sink. Turn them clockwise until tight. This stops water from flowing when you remove the old faucet. If the valves are stuck or don’t work, turn off the main water supply. This prevents leaks and potential water damage.Clear The Under-sink Area
Next, clear the under-sink area. Remove items stored there to give yourself room to work. Having a clear space helps you access plumbing easily. It also reduces the risk of damaging stored items. Use a flashlight if the area is dark. Good lighting makes it easier to see and work on connections.Removing The Old Faucet
Begin by shutting off water supply lines under the sink. Next, disconnect the old faucet from the pipes. Carefully remove any mounting hardware and lift the faucet from its position.
Removing the old faucet is a vital step in transforming your kitchen space. If you’ve ever felt frustrated by a drippy faucet or outdated design, it’s time for a change. Dismantling the old fixture might seem daunting, but with a clear plan, you’ll find it surprisingly straightforward. Imagine the satisfaction of watching your kitchen evolve with your efforts. Ready to dive in and tackle this task?Disconnect Water Lines
Begin by turning off the water supply to your kitchen sink. You’ll typically find the valves under the sink—give them a firm twist to shut off the flow. Next, use an adjustable wrench to disconnect the water lines connected to your faucet. Keep a towel handy to catch any residual water that might escape.Loosen Mounting Nuts
Grab a basin wrench and crawl under the sink to locate the mounting nuts. These nuts secure the faucet to the sink and must be loosened before removal. As you twist the wrench, feel the tension ease, signaling your progress. Remember, patience is your ally here—those nuts may have been there for years!Lift Out The Old Faucet
Once the mounting nuts are loosened, it’s time to lift the old faucet out. Gently wiggle the faucet to free it from any sealant or grime. Pull it up with a steady hand, and voilà—your old faucet is out! Take a moment to clean the area, preparing it for the new installation. Can you feel the excitement building? Your kitchen transformation is underway!
Credit: www.youtube.com
Installing The New Faucet
Replacing a kitchen faucet involves removing the old fixture and securing the new one. Begin by turning off the water supply and disconnecting hoses. Install the new faucet by following the manufacturer’s instructions, ensuring all connections are tight to prevent leaks.
Installing the new faucet can seem daunting. But it’s a straightforward task. You just need patience and the right tools. With this guide, your installation will go smoothly.Insert Faucet Into Holes
Align the faucet with the sinkholes. Ensure it fits snugly. If there are extra holes, use a deck plate. This covers unused holes. Gently insert the faucet. Make sure it’s stable and straight. Check from underneath the sink. Confirm all parts are aligned.Secure With Mounting Nuts
Find the mounting nuts in your kit. Slide them onto the faucet shanks. Use a wrench to tighten. But don’t overtighten. You risk damaging the sink. The faucet should feel firm. Check for any wobbling. Adjust if needed.Connect Water Lines
Locate the hot and cold water lines. Attach them to the faucet connectors. Hand-tighten first. Then use a wrench for a secure fit. Avoid over-tightening to prevent leaks. Turn the water supply back on. Check for leaks at all connections. If leaks occur, tighten slightly more.Testing And Final Adjustments
Testing and Final Adjustments Ensure the faucet works by turning on the water supply. Check for leaks at connections. Adjust the handle for smooth operation. Make sure water flows evenly and at desired temperature. Test each function, including spray and stream, to confirm everything is in order.
Testing and final adjustments are crucial steps to ensure your kitchen faucet functions smoothly and efficiently. After all the hard work of installing your new faucet, you want to ensure everything is perfect before you call the job done. This phase involves checking for leaks, adjusting the water flow, and ensuring the water supply is correctly reconnected.Turn On Water Supply
Begin by turning on the water supply. This might seem straightforward, but it’s a vital step. Locate the shut-off valves under your sink and turn them counterclockwise to open. Once opened, listen for any unusual sounds. A steady flow indicates the water is reaching the faucet without obstruction.Check For Leaks
With the water supply restored, it’s time to check for leaks. This can be the trickiest part, but also the most rewarding when done correctly. Take a flashlight and inspect all connections. Pay special attention to the base of the faucet and the connections under the sink. If you notice any drips, tighten the connections using an adjustable wrench. A small drip now can become a big problem later.Adjust Water Flow
The final step is to adjust the water flow. Turn on the faucet and let the water run for a few minutes. This helps clear any debris or air pockets in the lines. Observe the water pressure and temperature. If the flow is too weak or too strong, adjust the valves accordingly. Ask yourself, does the water flow meet your expectations for both hot and cold settings? It’s essential to ensure comfort and efficiency in your kitchen tasks. By completing these steps, you’re not just installing a faucet; you’re enhancing your kitchen’s functionality and reliability. Enjoy the satisfaction of a job well done!Maintenance Tips
Maintaining your kitchen faucet is essential for its longevity and functionality. Regular upkeep not only prevents annoying drips but also ensures your faucet remains a sparkling centerpiece in your kitchen. With a few simple maintenance tips, you can keep your faucet in top shape without much hassle.
Regular Cleaning
Keeping your kitchen faucet clean is crucial for both hygiene and appearance. Use a gentle cleaner and a soft cloth to wipe down the faucet regularly. Avoid harsh chemicals that can damage the finish.
Pay special attention to the areas around the base and the handles where grime tends to accumulate. A toothbrush can be handy for scrubbing hard-to-reach spots.
Wondering if water spots are a problem? Try using a mixture of vinegar and water to remove them and keep your faucet gleaming.
Preventing Leaks
Leaks can be a major nuisance and can cause water wastage. Regularly check for leaks around the base and handles. Tighten any loose connections with a wrench.
Replace worn-out washers or O-rings promptly to avoid further damage. These small parts can wear out over time but are inexpensive to replace.
Do you notice a drop in water pressure? This might indicate a clog or leak that needs immediate attention. Regular inspection can help you catch issues early before they escalate.

Credit: www.youtube.com
Frequently Asked Questions
Can I Replace My Kitchen Faucet Myself?
Yes, you can replace your kitchen faucet yourself. Ensure you have basic plumbing skills and necessary tools. Turn off the water supply before starting. Follow the manufacturer’s instructions for a smooth installation. If unsure, consult a professional plumber to avoid potential issues.
Do You Have To Turn The Water Off To Change A Kitchen Faucet?
Yes, turn off the water before changing a kitchen faucet to prevent leaks and water damage. Locate the shut-off valves under the sink and turn them clockwise to stop the water flow. This ensures a safe and efficient replacement process.
Can You Replace A Kitchen Tap Yourself?
Yes, you can replace a kitchen tap yourself with basic plumbing skills. Turn off the water supply first. Use tools like a wrench and basin spanner. Follow the tap manufacturer’s instructions closely. Ensure proper sealing to prevent leaks. If unsure, consult a professional plumber for assistance.
Can I Change A Faucet Without A Plumber?
Yes, you can change a faucet yourself. Gather tools like a wrench and plumber’s tape. Follow online guides or instructions. Ensure water supply is off before starting. Check connections for leaks after installation. If unsure, consult a professional. It’s a DIY-friendly task but requires caution.
Conclusion
Changing a kitchen faucet might seem daunting at first. With basic tools and patience, it becomes manageable. Start by gathering your supplies and following each step carefully. Take time to ensure every connection is secure. This prevents leaks and future problems.
Once installed, test the faucet thoroughly. Check for smooth operation and no drips. A new faucet can update your kitchen’s look. It also improves functionality. Feel accomplished with your successful installation. Remember, practice makes perfect. Next time, it will be even easier.
Enjoy your refreshed kitchen space and the satisfaction of a job well done.