How to Clean Kitchen Faucet Aerator: Step-by-Step Guide
Have you noticed your kitchen faucet losing its sparkle or water flow not being as smooth as it used to be? You might be dealing with a clogged aerator.
This small, often overlooked part of your faucet plays a crucial role in regulating water pressure and maintaining a steady stream. When it’s blocked, it can lead to reduced efficiency and a less enjoyable kitchen experience. But don’t worry—cleaning a faucet aerator is easier than you think, and you don’t need to call in a professional.
Imagine transforming your kitchen faucet back to its original glory with just a few simple steps. By understanding the process, not only do you save money, but you also gain control over your kitchen’s functionality. You’ll discover a straightforward guide to cleaning your kitchen faucet aerator, ensuring your water flows freely and your kitchen remains a pleasant space. Get ready to unlock the secrets of a perfectly functioning faucet! Keep reading to find out how you can effortlessly restore your kitchen’s charm and efficiency.

Credit: www.youtube.com
Tools And Materials Needed
Gather a wrench, vinegar, a bowl, and a toothbrush for cleaning. These tools help remove debris and mineral buildup. A clean rag is also essential for wiping the faucet aerator.
Cleaning a kitchen faucet aerator requires a few essential tools and materials. Gathering these items before starting will make the task easier and more efficient. You don’t need anything fancy, just some basic supplies that are usually available at home or easy to find in local stores.Tools Required
- Adjustable wrench: Helps to loosen and tighten the aerator.
- Needle-nose pliers: Useful for gripping small parts securely.
- Old toothbrush: Perfect for scrubbing the aerator clean.
- Small bowl: To soak parts and catch debris.
Materials Needed
- White vinegar: Dissolves mineral deposits effectively.
- Baking soda: Enhances the cleaning process.
- Soft cloth: For wiping and polishing the faucet.
- Rubber gloves: Protects your hands during cleaning.

Credit: www.yahoo.com
Identifying The Aerator
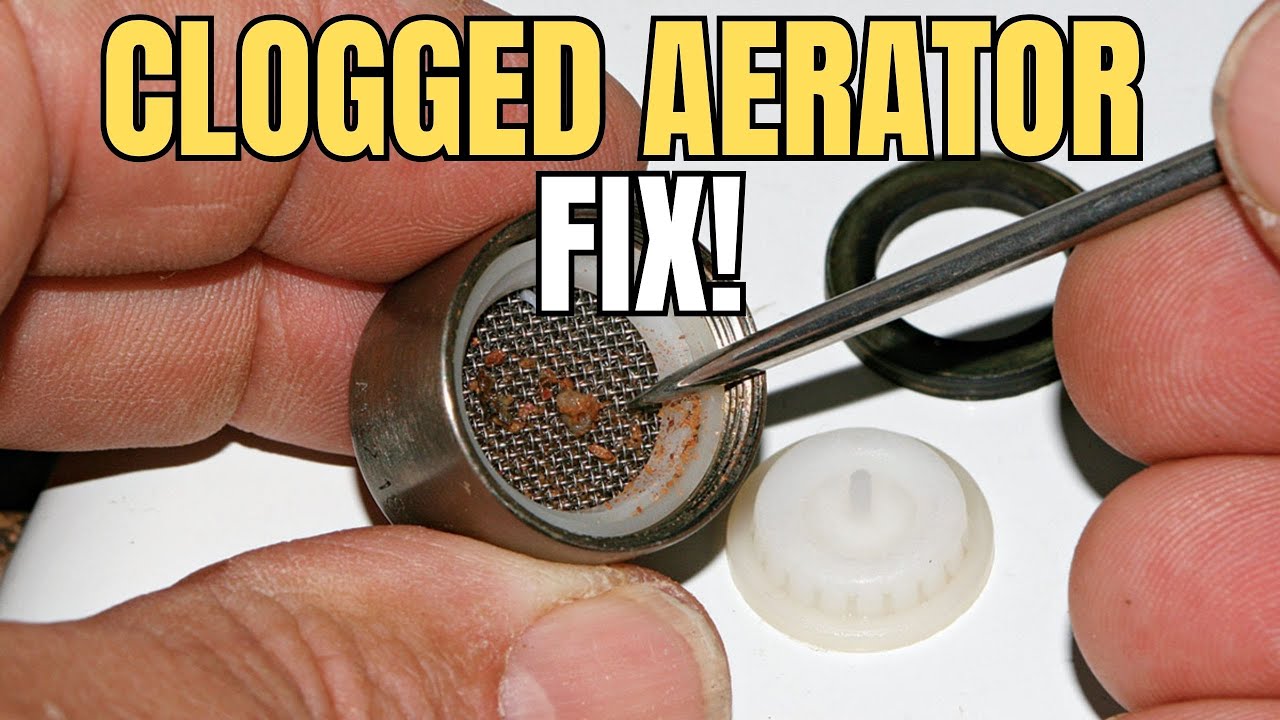
Identifying the aerator involves locating the small screen at the faucet tip. Often, it’s a round, mesh-like piece. This component mixes air with water, controlling flow and reducing splashes.
Identifying the aerator on your kitchen faucet might sound like a daunting task, but it’s easier than you might think. This small device plays a big role in water flow and efficiency, yet it often goes unnoticed. Recognizing it is the first step towards giving your kitchen faucet a thorough cleaning.What Does An Aerator Look Like?
The aerator is typically a small, round piece screwed onto the tip of your faucet. It may have a mesh screen or tiny holes. Next time you’re washing dishes, take a closer look at the end of your faucet. Do you see a circular piece that looks like it can be unscrewed? That’s your aerator!Why Is Identifying The Aerator Important?
Knowing where your aerator is helps you address water flow issues effectively. If your water pressure seems off or the stream is uneven, the aerator might be clogged. Identifying it means you can clean it promptly, saving you from bigger plumbing headaches down the line.Common Locations On Different Faucet Types
Most faucets have the aerator at the very tip, but some designs might hide it slightly recessed inside. Pull-out spray faucets may require a bit more investigation, as the aerator can be integrated into the spray head. Keep your eyes peeled for any removable parts at the end of the faucet.Materials And Tools For Identification
You don’t need a toolbox full of fancy gadgets. A simple magnifying glass can help you see the tiny threads or screen of the aerator more clearly. A flashlight can also illuminate any hidden features, especially if your kitchen lighting isn’t ideal.Personal Insight: Recognizing My Own Aerator
I once mistook my faucet’s aerator for a decorative piece. The moment I identified it correctly, I realized how it was affecting my water pressure. This small discovery made a big difference in maintaining my kitchen’s functionality. Have you ever overlooked something small that turned out to be crucial?Removing The Aerator
The kitchen faucet aerator is a small device at the tip of the spout. It mixes air with water to reduce water flow without affecting pressure. Over time, the aerator can get clogged with minerals and debris. Cleaning it is essential for maintaining good water flow. The first step is removing the aerator. Here’s how to do it effectively.
Loosening With Hands
Start by checking if the aerator can be turned by hand. Grip it firmly and twist counterclockwise. If it turns easily, continue twisting until it comes off. Ensure your grip is steady to avoid slipping. If it doesn’t budge, try using a rubber glove for a better grip.
Using A Wrench Or Pliers
If the aerator is stuck, use a wrench or pliers. Wrap the aerator with a cloth to protect it from scratches. Then, gently grip it with the tool and twist counterclockwise. Be careful not to apply too much force. Excessive force can damage the faucet. If it still won’t move, apply penetrating oil and wait a few minutes. Then, try again with the wrench or pliers.
Disassembling The Aerator
Disassembling the aerator lets you clean it thoroughly. Begin by unscrewing the aerator from the faucet tip. Use a wrench or pliers if needed. Once removed, separate the parts and rinse them under running water to remove debris.
Disassembling the aerator is an essential step in ensuring your kitchen faucet functions efficiently. This small device, often overlooked, can accumulate mineral deposits and debris over time, affecting water flow. You’ll need to get your hands a little dirty, but the result is worth it—improved water pressure and cleaner water. Have you ever noticed your faucet’s water flow weakening? It might be time to disassemble the aerator and give it a thorough cleaning. Here’s how to do it:Gather Your Tools
Before you start, make sure you have the necessary tools on hand. You will need a wrench or pliers, a small brush, and possibly a toothpick. It’s surprising how these simple tools can solve a frustrating problem.Turn Off The Water
Ensure you turn off the water supply to avoid any messy surprises. It’s a simple step, but crucial to prevent any unwanted splashes. Just imagine the chaos of water gushing everywhere!Unscrew The Aerator
Use a wrench or pliers to gently unscrew the aerator from the faucet. Be cautious with your grip to prevent damaging the threads. Have you ever wondered why your faucet has those grooves? They’re designed to make this process easier.Inspect And Remove Parts
Once unscrewed, take apart the individual components carefully. Pay attention to the washers and screens, as they can easily slip away. This is where your toothpick comes in handy—to help nudge out stubborn bits of debris.Note The Order
It’s important to note the order of the parts for reassembly. A small mistake here can lead to leaks or reduced functionality. Imagine putting together a puzzle; each piece has its exact place.Clean Each Component
With the aerator disassembled, clean each part thoroughly. Use the brush to scrub away any mineral deposits. This step is crucial, as clean components ensure optimal performance once reassembled.Check For Damage
While cleaning, inspect each part for any wear or damage. If you find any compromised components, consider replacing them to maintain efficiency. It’s like replacing a worn-out tire—essential for smooth operation. Disassembling the aerator doesn’t require a professional. With a little time and effort, you can ensure your kitchen faucet runs smoothly, saving you from frustrating drips and poor water flow. Wouldn’t you want your kitchen to be a place of ease and convenience?Cleaning The Components
Cleaning the components of your kitchen faucet aerator ensures optimal water flow. It removes mineral deposits and debris, improving water pressure. Regular maintenance prolongs the life of your faucet, keeping it efficient.
Soaking In Vinegar
Vinegar is a natural cleaning agent. It dissolves mineral deposits effectively. Begin by dismantling the aerator from the faucet. Place the components in a bowl filled with vinegar. Ensure they are fully submerged. Let them soak for at least 30 minutes. This will loosen any stubborn buildup. Vinegar is safe and eco-friendly. It’s perfect for cleaning delicate parts.
Scrubbing With A Brush
After soaking, scrub the components with a brush. Use a soft-bristled toothbrush for best results. Gently brush away loosened particles. Focus on the mesh screen and rubber washer. These areas collect most debris. Ensure you reach small crevices. Rinse each part with water after scrubbing. This removes any remaining vinegar and debris.
Reassembling The Aerator
Reassemble the aerator carefully after cleaning to ensure it functions smoothly. Align parts precisely to avoid leaks. Tighten securely for proper water flow.
Reassembling the aerator might seem like a minor task, but it holds the key to ensuring your kitchen faucet functions seamlessly. After cleaning, you might be eager to put everything back together. But how can you ensure you’re doing it correctly? Here’s a step-by-step guide that will help you reassemble your aerator with ease.Check All Components
Before you start reassembling, lay out all the pieces you removed. This includes the screen, washer, and housing. Make sure each part is clean and undamaged.Reassemble In Order
Start by placing the screen back into the housing. It should fit snugly and sit evenly across the bottom. Next, add the washer on top of the screen, ensuring it is correctly aligned.Secure The Aerator
Screw the aerator back onto the faucet by hand. Avoid using tools initially to prevent overtightening. A gentle hand-tightening is usually sufficient.Test For Leaks
Once reassembled, run the water to check for any leaks. If you notice dripping, gently tighten the aerator a bit more. A leak-free faucet indicates a successful reassembly.Final Adjustments
If the water flow seems uneven, consider readjusting the screen and washer. Sometimes a slight shift can make a big difference. Your goal is a smooth, consistent stream of water. Reassembling an aerator can be a simple task when you follow these steps. Have you ever encountered challenges while doing this? Share your experiences to help others in the comments below!Reattaching To The Faucet
Reattach the faucet aerator by twisting it back onto the spout after cleaning. Ensure a snug fit to prevent leaks. Hand-tightening is usually sufficient for a secure attachment.
Reattaching the kitchen faucet aerator can feel like putting the final piece of a puzzle back in place. It’s the rewarding moment where your efforts pay off and your faucet is ready to provide a smooth stream of water once again. But how do you ensure everything is perfectly aligned and secure for optimal performance?Align The Threads
Begin by inspecting the threads on both the faucet and the aerator. Dirt or debris in the threads can prevent a snug fit. Hold the aerator up to the faucet and gently twist it clockwise to engage the threads.Hand Tighten The Aerator
Use your fingers to tighten the aerator onto the faucet. Avoid using tools at this stage to prevent over-tightening, which can damage the threads. A firm hand-tightening usually suffices for a good seal.Check For Leaks
Turn on the faucet slowly and observe the aerator. Look for any drips or leaks around the connection. If you notice water escaping, it might need a slight adjustment.Use A Wrench If Necessary
If hand-tightening doesn’t stop leaks, a wrench can be used carefully. Wrap a cloth around the aerator to protect it from scratches. Gently tighten with the wrench, making sure not to apply too much force.Test The Water Flow
Once the aerator is reattached, test the water flow. The water should stream smoothly and evenly. If you notice any irregularities, it may indicate an issue with the aerator placement.Adjust As Needed
If the flow isn’t right, unscrew the aerator and check for any misalignment. Reposition and retighten until you achieve a steady stream. Patience and precision are your best tools here. Reattaching the aerator is a straightforward task with the right approach. By following these steps, you ensure that your kitchen faucet functions efficiently, providing you with the reliable water flow you need every day.Testing For Proper Flow
Testing for Proper Flow Check for steady water flow after cleaning the kitchen faucet aerator. Reassemble the parts tightly. Ensure no leaks for smooth performance.
Testing the flow of your kitchen faucet aerator ensures efficient water usage. After cleaning, you want to make sure it works perfectly. A clean aerator should provide a smooth, consistent flow. Follow these steps to test the proper flow of your kitchen faucet aerator.Check For Smooth Water Flow
Turn on the faucet and observe the water stream. The flow should be even and consistent. If you notice sputtering or uneven flow, the aerator might need further cleaning or adjustment.Adjust Water Pressure
Try adjusting the water pressure. Low pressure can indicate blockages in the aerator. Increase the pressure slightly to see if the flow improves. If the pressure remains weak, consider checking for blockages again.Inspect For Leaks
Examine the faucet and aerator for any leaks. Leaks can affect water flow. Tighten any loose parts to prevent water wastage. Ensuring a tight fit helps maintain proper flow and prevents unnecessary drips.Evaluate Water Quality
Assess the clarity of the water. Cloudy or discolored water might suggest sediment in the aerator. Clean the aerator again if the water quality is poor. Clear water indicates that the aerator is functioning correctly.Use A Flow Rate Test
Measure the flow rate using a container. Fill the container for a specific time and measure the water volume. Compare it to standard flow rates. If below average, the aerator may need replacement or further cleaning.Listen For Unusual Noises
Pay attention to any strange noises from the faucet. Gurgling or whistling sounds can signal issues with the aerator. These noises often mean air is trapped or blockages exist. Address any issues to ensure proper flow.Tips For Maintenance
Remove the aerator from the faucet using a wrench. Soak it in vinegar to dissolve mineral deposits. Scrub gently with a toothbrush, rinse, and reattach for improved water flow.
Maintaining your kitchen faucet aerator is crucial for ensuring a steady flow of water and preventing unwanted blockages. Regular maintenance not only extends the life of your faucet but also keeps your water flow efficient and clean. But how often do we really think about cleaning this tiny but vital component? Here’s how you can keep your aerator in top shape with some simple maintenance tips.Regular Inspection
Make it a habit to check your faucet aerator every few months. Look for signs of mineral buildup or debris that might be affecting water flow. A quick glance can save you from bigger issues down the line.Use Vinegar For Cleaning
Vinegar is a natural cleaner and works wonders on mineral deposits. Soak the aerator in vinegar for about 30 minutes. This will help dissolve hard water deposits, making it easier to scrub them away with a brush.Avoid Harsh Chemicals
While it might be tempting to use strong cleaners, they can damage the metal or plastic parts of your aerator. Stick to gentle cleaning solutions like dish soap or vinegar.Reassemble Carefully
After cleaning, ensure you reassemble the aerator correctly. Each part has its place, and a poorly assembled aerator can lead to leaks. Consider taking a photo before disassembly to guide you during reassembly.Replace When Necessary
Sometimes, cleaning just isn’t enough. If you notice persistent issues with water flow or leakage, it might be time for a replacement. Investing in a new aerator can save you from bigger plumbing problems later on.Keep Tools Handy
Having the right tools makes maintenance a breeze. Keep a small wrench and a soft brush in your kitchen drawer for quick fixes and regular cleanings. Being prepared can make the task less of a chore. By incorporating these simple maintenance habits, you can ensure your kitchen faucet aerator remains clean and functional. How often do you think about your faucet’s health? Perhaps now is a good time to start.
Credit: www.yahoo.com
Frequently Asked Questions
How To Clean Out A Kitchen Faucet Aerator?
Unscrew the aerator from the faucet tip. Soak it in vinegar for 30 minutes to dissolve debris. Scrub gently with a toothbrush to remove buildup. Rinse thoroughly with water. Reattach the aerator to the faucet.
Can I Clean A Faucet Aerator Without Removing It?
Yes, you can clean a faucet aerator without removing it. Soak it in vinegar using a plastic bag. Secure with a rubber band, and let it sit for a few hours. Rinse thoroughly with water afterwards. This method helps remove mineral deposits effectively.
How Long Should I Let A Sink Aerator Soak In Vinegar?
Soak the sink aerator in vinegar for 15-30 minutes. This helps dissolve mineral deposits effectively. Rinse thoroughly with water after soaking to ensure all residues are removed. Regular cleaning can prevent buildup and maintain water flow.
How Do You Remove Mineral Deposits From A Faucet Aerator?
Remove the faucet aerator and soak it in vinegar for 30 minutes. Scrub with a toothbrush to loosen deposits. Rinse thoroughly with water before reattaching. This method effectively cleans mineral buildup, ensuring a smooth water flow from your faucet.
Conclusion
Cleaning a kitchen faucet aerator is simple and important. Regular cleaning keeps water flow smooth. It prevents buildup of minerals and debris. Start by unscrewing the aerator. Soak it in vinegar for a few hours. Gently scrub with a toothbrush.
Rinse thoroughly with water. Reattach it to the faucet. This routine ensures clean water and better pressure. Remember, regular maintenance saves time and money. Enjoy a clean kitchen and efficient faucet. Keep your kitchen running smoothly with these easy steps.
Happy cleaning!