How to Do Kitchen Backsplash: Step-by-Step Guide
Are you tired of staring at plain, uninspiring kitchen walls? Imagine transforming your cooking space into a vibrant and stylish haven, all with a simple addition.
A kitchen backsplash isn’t just about aesthetics; it’s a canvas for your creativity and a shield against stains and spills. But how do you start this transformation? The idea might seem daunting, but with the right guidance, you can master the art of installing a kitchen backsplash on your own.
You’ll discover step-by-step instructions that make the process as easy as pie. Get ready to unleash your inner designer and turn your kitchen into a masterpiece. Stay with us, and by the end, you’ll feel confident and excited to tackle your new home project!
Choosing Materials
Selecting the right materials for your kitchen backsplash is key to achieving the perfect look. Consider options like ceramic, glass, or stone tiles for durability and style. Factor in ease of cleaning and maintenance to make a practical choice.
Choosing the right materials for your kitchen backsplash is crucial. It sets the tone and can transform the space. The options are endless, but understanding them helps narrow choices. Consider durability, cost, and maintenance. These factors ensure your backsplash suits your needs and style.Tile Options
Tiles are a popular choice for kitchen backsplashes. They offer variety and versatility. Ceramic tiles are affordable and easy to clean. Porcelain tiles are durable and water-resistant. Glass tiles add a modern touch and reflect light beautifully. Stone tiles provide a natural look with rustic charm. Each type offers unique benefits and aesthetics.Color And Texture
Color and texture play a major role in backsplash design. Light colors make small kitchens feel larger. Dark colors add depth and sophistication. Bold colors create a focal point and energize the space. Textures can vary from smooth to rough. Smooth textures are easy to clean, while textured tiles add dimension. Mix and match colors and textures for a personalized look.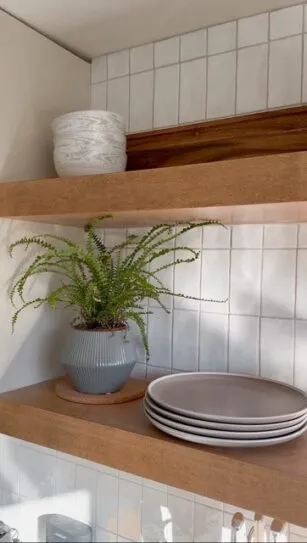
Credit: www.megandauphineeliving.com
Gathering Tools
Gather essential tools like measuring tape, tile cutter, and adhesive to prepare for installing a kitchen backsplash. Ensure you have grout, spacers, and a level for a smooth and professional finish. Proper tools make the installation process easier and more efficient.
Gathering tools for your kitchen backsplash project is crucial. Proper equipment ensures smooth installation and a polished look. Before starting, gather all necessary items. This prevents delays and keeps the project on track.Essential Equipment
For a successful backsplash, you’ll need specific tools. A tape measure helps determine the area size accurately. Tile spacers ensure even gaps between tiles. You’ll also need a tile cutter for precise cuts. A level keeps tiles straight and aligned. Adhesive spreaders and grout floats are key for applying materials. Don’t forget a sponge for cleaning excess grout. Ensure all tools are in good condition.Safety Gear
Safety should always be a priority. Protect your eyes with goggles to prevent debris damage. Wear gloves to shield hands from sharp edges and chemicals. A dust mask is useful when cutting tiles. Ensure safe handling with sturdy footwear. Proper attire prevents accidents. Keep a first-aid kit nearby for emergencies. Safety gear minimizes risks and ensures a smooth process.Preparing The Surface
Clean the kitchen wall thoroughly to remove grease and dirt. Dry the surface completely to ensure tile adhesion. Fill any holes or gaps with spackle for a smooth finish.
Preparing the surface for your kitchen backsplash can be a straightforward but crucial task. It sets the foundation for a smooth and durable finish. A well-prepared wall ensures that the tiles adhere properly and remain intact for years to come.Cleaning The Wall
Start by ensuring that your wall is squeaky clean. Remove any grease, dust, or debris that might affect the adhesive’s grip. A simple solution of warm water and dish soap can work wonders. Use a sponge or a cloth to scrub the surface gently, focusing on areas that might have stubborn grime. Once the wall is clean, wipe it dry with a clean towel. This ensures no moisture remains, which could interfere with the adhesive later. Have you ever noticed how a slightly damp surface just doesn’t hold as well? That’s exactly what you’re preventing here.Measuring The Area
Accurate measurements are your best friend in this project. Use a tape measure to determine the width and height of the backsplash area. Note these measurements down; they’ll guide you in purchasing the right amount of tiles. Consider any obstacles like outlets or cabinets. You might need to make special cuts, so having precise dimensions is crucial. Wouldn’t it be frustrating to run out of tiles midway because of a miscalculation? Properly measuring and cleaning are not just steps; they are investments in the longevity of your backsplash. Take the time, get it right, and your future self will thank you.Planning The Layout
Planning the layout of your kitchen backsplash is crucial. A well-thought-out design not only enhances the beauty but also ensures practicality. Begin by measuring the area. Accurate measurements help in purchasing the right amount of materials. Consider the overall theme of your kitchen. The backsplash should complement the cabinets and countertops. Visualize the pattern. Decide whether you prefer a simple or intricate design. Sketch the layout on paper or use design software. This gives a clear picture before installation. Ensure you have all necessary tools and materials ready. This prevents delays and keeps the process smooth.
Design Patterns
Choosing the right design pattern can transform your kitchen space. Subway tiles offer a classic look with clean lines. They are popular for their simplicity. For a modern touch, consider herringbone or chevron patterns. They add visual interest and depth. Mosaic tiles provide a splash of color and artistic flair. Mix and match different styles for a unique look. Ensure the chosen pattern aligns with the kitchen’s overall design theme. Experiment with different layouts before finalizing. This helps in finding the most appealing arrangement.
Cutting Tiles
Cutting tiles is an essential skill for a perfect fit. Start by marking the tiles where cuts are needed. Use a pencil for accuracy. Invest in a quality tile cutter. This tool ensures clean, precise cuts. For intricate shapes, a wet saw is recommended. It handles curves and angles well. Practice on spare tiles before cutting the main ones. This builds confidence and reduces mistakes. Safety is vital. Wear gloves and goggles to protect from sharp edges. Ensure the workspace is tidy. This prevents accidents and keeps the process efficient.
Applying Adhesive
Spread adhesive evenly on the wall with a notched trowel. Ensure full coverage for better tile adhesion.
Applying adhesive is a crucial step in installing a kitchen backsplash, ensuring your tiles stay securely in place for years to come. Whether you’re a seasoned DIY enthusiast or a first-timer, mastering this stage can elevate your kitchen’s aesthetic appeal and functionality. But how do you get it just right? Let’s dive into the specifics of applying adhesive effectively and efficiently.Mixing Adhesive
To start, you’ll need to prepare your adhesive properly. Most options come as a powder that requires mixing with water. Always follow the manufacturer’s instructions on the package for the correct ratio. Using a paddle mixer attached to a drill can make the process smoother. Mix until you achieve a creamy consistency without lumps. It’s similar to mixing pancake batter—smooth and ready to spread. Remember, only mix what you can use in 30 minutes. Adhesive that sits too long can harden, leading to wastage and frustration.Spreading Techniques
Once your adhesive is mixed, it’s time to spread it on the wall. Use a notched trowel for this task. The size of the notches depends on the size of your tiles; larger tiles require larger notches. Hold the trowel at a 45-degree angle to apply the adhesive evenly. This technique ensures that you create grooves, which help the tiles adhere better. Work in small sections. Apply adhesive to an area about the size of four tiles. This prevents the adhesive from drying out before you place your tiles. Have you ever tried spreading peanut butter on toast, only to find it clumping in one area? The same principle applies here. Smooth, even coverage is key to achieving a flawless finish. In every project, details matter. Paying attention to how you mix and spread adhesive can make all the difference in your backsplash installation. Ready to transform your kitchen? Let’s get those tiles up and shining!
Credit: carlaaston.com
Installing Tiles
Installing tiles for a kitchen backsplash can transform your cooking space. Begin by cleaning the wall surface thoroughly. Measure and cut tiles carefully to fit the area.
Installing tiles for your kitchen backsplash can transform the space, adding both character and function. It’s more than just a design choice; it’s a practical solution to keep your kitchen walls clean and protected. Whether you’re a DIY enthusiast or a first-timer, laying tiles might seem daunting. But with the right approach, it can be an enjoyable and rewarding project.Placing The First Tile
The first tile sets the tone for the entire project. Begin by identifying the center of your backsplash area. This is where you’ll place your first tile, ensuring symmetry and balance. Apply a thin layer of tile adhesive on the wall using a notched trowel. Place the tile firmly onto the adhesive, giving it a gentle press. Make sure it aligns perfectly with your marked center point. Check if the tile is level using a spirit level. A little adjustment might be needed before the adhesive sets.Using Spacers
Spacers are small yet essential tools that help maintain consistent gaps between tiles. This ensures uniform grout lines and a professional finish. Insert spacers at the corners of the tile after placing it. This keeps the tiles evenly spaced and helps guide you as you continue tiling. Consider the size of the spacers based on your grout line preference. Typically, a 1/8-inch or 1/16-inch spacer works well for most kitchen backsplashes. Have you ever noticed how uneven grout lines can make even the most beautiful tiles look messy? Using spacers prevents this common mishap. Remember, patience is key. It’s better to take your time and ensure each tile is perfectly placed rather than rushing through the job.Grouting The Tiles
Grouting the tiles on a kitchen backsplash ensures a polished and durable finish. Spread grout evenly with a rubber float, pressing it into the gaps. Wipe off excess grout with a damp sponge, revealing clean, beautiful lines.
Grouting the tiles is a crucial step in creating a stunning kitchen backsplash. This process not only fills the gaps between tiles but also ensures they are secure and durable. Proper grouting enhances the overall look and protects the tiles from moisture damage. Let’s explore how to mix and apply grout effectively.Mixing Grout
Start with a clean bucket. Pour the grout powder into the bucket. Slowly add water, mixing with a trowel. Aim for a smooth consistency, like thick cake batter. Avoid lumps for an even spread. Let the mixture sit for a few minutes. This helps the grout fully hydrate. Mix again briefly before applying.Applying Grout
Use a rubber grout float. Scoop a generous amount of grout onto the float. Spread it across the tiles at a 45-degree angle. Press firmly to fill gaps between tiles. Work in small sections for accuracy. Remove excess grout with the float. Hold the float at a sharp angle. Ensure tiles are well-covered but not overloaded.Sealing The Backsplash
Sealing the backsplash protects against water damage and stains. Apply a high-quality sealer for long-lasting protection. Ensure the surface is clean and dry before sealing for the best results.
Sealing the backsplash is a crucial step in ensuring the longevity and appearance of your kitchen’s latest makeover. This process not only protects the material from moisture and stains but also enhances its aesthetic appeal. Imagine admiring your newly installed backsplash, knowing it’s safeguarded against spills and splashes.Choosing A Sealant
Selecting the right sealant is pivotal for an effective seal. Different materials require specific types of sealants, so knowing your backsplash material is essential. For example, a natural stone backsplash might need a penetrating sealer, while ceramic tiles often work well with a topical sealer. Consider the sealant’s finish too. Do you prefer a glossy look or a matte finish? This choice can significantly impact the overall vibe of your kitchen. Always read the label for compatibility and durability.Application Process
Before starting, ensure the backsplash is clean and dry. Dust and moisture can prevent the sealant from adhering properly. Have you ever tried sticking tape to a dusty surface? It’s frustrating and ineffective. Apply the sealant in small sections. Use a brush or roller for even coverage, and wipe away any excess immediately with a clean cloth. Uneven application can result in unsightly streaks or bubbles. Once applied, let the sealant dry completely. This step is vital, as premature use can compromise the seal. Patience here pays off with a beautifully protected backsplash. Sealing your kitchen backsplash might seem like a small detail, but it can make a world of difference in maintaining its beauty and functionality. Are you ready to give your kitchen that extra layer of protection?Cleaning And Maintenance
Cleaning and maintaining your kitchen backsplash not only ensures its longevity but also keeps your kitchen looking fresh and inviting. Proper care can prevent stains and grime buildup, making it easier to enjoy cooking without the hassle of constant deep cleaning. Let’s dive into simple routines you can adopt for daily cleaning and periodic maintenance to keep your backsplash sparkling.
Daily Cleaning
Keeping your kitchen backsplash clean on a daily basis doesn’t have to be a chore. Start by wiping down the surface with a damp cloth or sponge after each cooking session. This simple habit prevents food splatters from hardening.
Use mild dish soap mixed with warm water for a gentle clean. Avoid harsh chemicals that might damage the material or dull the finish. If you notice any sticky spots, a little baking soda on your sponge can work wonders.
Think of daily cleaning as a way to maintain the beauty of your backsplash while saving time in the long run. Wouldn’t you prefer a quick wipe to an arduous scrub?
Periodic Maintenance
Periodic maintenance involves checking for grout discoloration or tile damage. Assess these areas monthly to catch issues before they escalate. A simple grout cleaner can help in refreshing those spaces.
Consider resealing your backsplash if it’s made of porous materials like natural stone. This provides an extra layer of protection against stains. A sealant application every six months can keep the surface pristine.
Have you ever noticed how small touch-ups can prevent bigger problems later? Regular checks and maintenance ensure your backsplash remains a stunning focal point in your kitchen.

Credit: www.reddit.com
Frequently Asked Questions
Can A Beginner Install A Kitchen Backsplash?
Yes, a beginner can install a kitchen backsplash. It requires patience, basic tools, and clear instructions. Online tutorials and DIY guides can help. Start with simple designs to build confidence. Proper preparation and measurements are crucial for success. Always double-check your work for a professional finish.
When Tiling A Backsplash, Where Do You Start?
Start tiling a backsplash at the center of the wall. Align tiles symmetrically for a balanced look. Work outwards towards edges. Make sure to measure and cut tiles as needed for a perfect fit. This ensures a neat and professional finish.
Do You Put Backsplash Directly On Drywall?
You can install backsplash directly on drywall if it’s clean and flat. Ensure proper adhesion by using suitable adhesive. Avoid installing in areas with moisture exposure, like bathrooms, without waterproofing. Proper installation ensures durability and aesthetic appeal. Always follow manufacturer guidelines for best results.
What Is The Rule For A Kitchen Backsplash?
A kitchen backsplash should be durable, easy to clean, and complement the kitchen’s style. Use water-resistant materials like tiles. Align it with countertops and cabinets for a cohesive look. Ensure it’s properly sealed to prevent moisture damage. Consider height and design to enhance the kitchen’s aesthetic appeal.
Conclusion
Completing your kitchen backsplash is within reach. Gather your tools and materials. Follow the steps carefully. Double-check measurements for accuracy. Take your time with each tile placement. Clean off any excess grout. Admire your hard work and new backsplash. It adds charm and function to your kitchen.
Share your project success with friends and family. Enjoy cooking in your refreshed space. Practice makes perfect, so don’t rush. Your kitchen will look amazing. Start planning your next project. Your DIY skills will grow with each task. Keep learning and exploring new ideas.
Your kitchen will thank you.