How to Install a Moen Kitchen Faucet: Step-by-Step Guide
Executive Chef & Lead Commercial Kitchen Specialist at Daily Kitchup Test Lab
Are you ready to upgrade your kitchen with a touch of elegance and functionality? Installing a Moen kitchen faucet might seem like a daunting task, but it’s easier than you think.
Imagine the sleek design and reliable performance transforming your daily kitchen routine. With just a few simple steps, you can achieve this transformation yourself. Don’t let the fear of a complicated installation hold you back. You’ll soon discover that the process is straightforward and satisfying, giving you both confidence and a stylish new faucet.
Let’s dive in and turn this task into a rewarding DIY project that enhances your kitchen experience.
Tools And Materials Needed
Gather a wrench, screwdriver, and pliers for installing your Moen kitchen faucet. Also, have plumber’s tape and sealant handy. Keep the new faucet and its instructions nearby for reference.
Installing a Moen kitchen faucet can be a satisfying DIY project if you have the right tools and materials. Gathering everything you need beforehand saves time and prevents frustration. This is crucial for ensuring a smooth installation process. Imagine starting the installation only to realize you’re missing a key tool—it’s the kind of hiccup you’d want to avoid. So, let’s dive into the essentials you’ll need to have on hand.Tools You’ll Need
- Adjustable Wrench:Essential for tightening and loosening nuts. It’s the backbone of your tool kit.
- Phillips Screwdriver:Perfect for securing screws and other fasteners. A must-have for precise adjustments.
- Plumber’s Tape:Also known as Teflon tape, it ensures leak-proof seals on threaded connections.
- Bucket:Handy for catching water that may drip during the installation.
- Flashlight:Helps illuminate dark areas under the sink where visibility is limited.
Materials Required
- Moen Kitchen Faucet Kit:Ensure you have the complete kit with all parts included.
- Water Supply Lines:Check if these are part of your kit or if you need to purchase them separately.
- Silicone Sealant:Useful for sealing around the base to prevent water seepage.
Safety Gear
- Safety Glasses:Protect your eyes from debris or splashes.
- Gloves:Safeguard your hands against sharp edges and improve grip.

Credit: www.youtube.com
Preparing For Installation
Gather essential tools like a wrench and screwdriver before starting. Ensure water supply is turned off to prevent leaks. Clear workspace for easy access to the sink area.
Preparing for Installation is a crucial step in setting up your Moen kitchen faucet. A smooth installation process relies on careful preparation. It ensures everything is in place and avoids potential mishaps. Let’s go through the essential steps to get started.Turning Off Water Supply
Begin by shutting off the water supply. Locate the shut-off valves under the sink. Turn them clockwise to stop the water flow. If you can’t find them, shut off the main water valve. This step prevents leaks and water damage during installation.Clearing The Workspace
Clear the area under your sink. Remove any cleaning supplies or stored items. This provides easy access to plumbing components. A tidy workspace helps avoid unnecessary complications. Ensure you have adequate lighting in the area. Good visibility is key for a successful installation.Removing The Old Faucet
Turn off the water supply to the faucet. Use a wrench to loosen and remove the mounting nuts. Carefully lift out the old faucet to make space for your new Moen kitchen faucet.
Removing the old faucet is the first step in upgrading your kitchen to a sleek Moen faucet. It’s like clearing the stage for a new star performer. If you’ve ever been daunted by this task, don’t worry—it’s more straightforward than you might think. With the right tools and a bit of patience, you can handle it like a pro.Disconnecting Water Lines
Start by turning off the water supply valves under your sink. If your kitchen doesn’t have individual shut-off valves, you’ll need to turn off the main water supply. Then, use an adjustable wrench to disconnect the water supply lines from the faucet. Have a small bucket or towel handy to catch any residual water that may drip out.Unscrewing Mounting Nuts
Grab a basin wrench and reach up to unscrew the mounting nuts that secure the faucet to the sink. These are typically located underneath the sink, and they may be a little stubborn due to corrosion or tight spaces. If they don’t budge, spray a bit of penetrating oil and give it a few minutes before trying again. Remember, a little patience goes a long way.Lifting Out The Old Faucet
Once the nuts are off, gently lift the old faucet out from the top of the sink. You may need to wiggle it a bit to break any sealant that’s holding it in place. If you’ve ever removed a stubborn sticker, you know the feeling! Take a moment to clean around the sink hole, removing any old putty or grime. This ensures a clean slate for your new Moen faucet. Taking these steps not only prepares your sink for a new faucet but also boosts your DIY confidence. Have you ever tackled a project that seemed daunting at first but turned out to be easier than expected? This might just be one of those moments.Installing The New Moen Faucet
Prepare to install a Moen kitchen faucet by gathering necessary tools. Follow the included instructions carefully for a smooth installation. Ensure all connections are tight to prevent leaks, and test the faucet once installed.
Installing the New Moen Faucet can transform your kitchen space. It combines style with functionality. Whether you’re upgrading or replacing an old faucet, Moen offers reliable options. The installation is straightforward, even for beginners. With patience and attention to detail, you can complete this task. Follow these steps to ensure a successful installation.Positioning The Faucet
Place the faucet through the designated hole in the sink. Ensure it’s centered for proper alignment. The faucet should sit securely without wobbling. Double-check that the spout faces the sink basin. This prevents water splash during use. Confirm that the handle moves freely. Proper positioning is crucial for efficient operation.Securing The Mounting Hardware
Fasten the faucet to the sink using the mounting hardware. Use a wrench to tighten the nuts securely. Ensure the base plate is flush with the sink surface. This prevents leaks and wobbling. Verify that all connections are tight. Loose fittings can cause future issues. Secure mounting guarantees stability.Connecting Water Lines
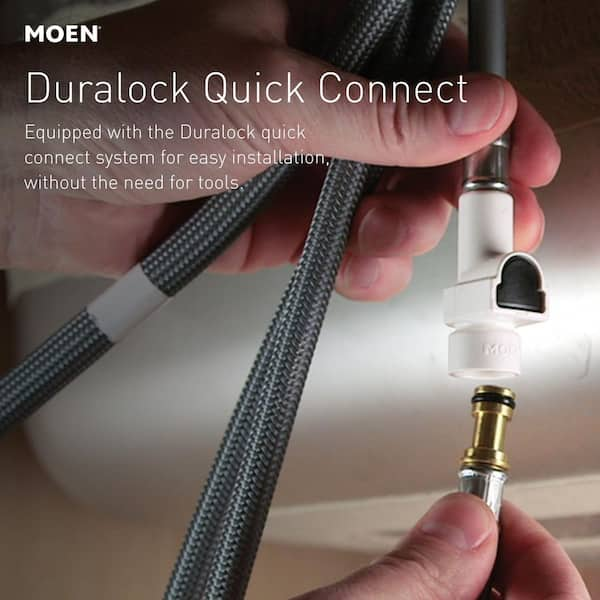
Attach the water supply lines to the faucet. Connect the hot and cold lines correctly. Check for matching color indicators. Use pliers to ensure a snug fit. Inspect for leaks by turning on the water. Tighten any loose connections immediately. Proper connection ensures smooth water flow.Testing The Installation
Testing the installation involves turning on the water supply to check for leaks. Ensure the faucet handles operate smoothly. Confirm the water flows freely from both hot and cold lines.
Testing the installation of your Moen kitchen faucet is crucial. This ensures everything functions well and prevents future issues. Before testing, ensure all tools are put away and the area is clean. Now, let’s dive into the essential steps for testing your new faucet installation.Turning On Water Supply
Turn on the water supply valves under the sink. Rotate them counterclockwise to open fully. This allows water to flow through the new faucet. Listen for any unusual sounds. If you hear hissing or gurgling, there might be trapped air. Let the water run for a minute to clear it.Checking For Leaks
Inspect all connections under the sink. Look for any drips or moisture. Use a dry cloth to touch around joints and hoses. Even a small wet spot means a leak. Tighten connections if needed. Ensure the faucet base is dry and secure.Adjusting Water Flow
Test the water flow by turning on the faucet. Start with a gentle stream. Gradually increase to full pressure. Check if the water flows smoothly. Adjust the handle to test hot and cold settings. Make sure the temperature is correct and changes instantly.Troubleshooting Common Issues
Installing a Moen kitchen faucet can face common issues like leaks or low water pressure. Ensure tight connections and check valves for smooth operation. Proper alignment of components helps prevent installation errors.
Installing a Moen kitchen faucet can be a rewarding DIY project, but sometimes things don’t go as planned. It’s not uncommon to encounter issues during or after installation. Understanding how to troubleshoot these common problems can save you time and frustration. Below, we’ll explore some frequent challenges and provide practical solutions to help you achieve a perfect installation.Addressing Leaks
Leaks can be a nuisance and may occur at various points, such as the base of the faucet or around the connections. Start by checking all connections for tightness. A loose nut or fitting can cause leaks, so ensure everything is snug. If leaks persist, inspect the O-rings and seals. These components can wear out over time or be damaged during installation. Replacing them is usually straightforward and can solve the problem. Sometimes, debris can obstruct the seals. Cleaning the affected area and reseating the components might be all you need to stop the leak. Have you checked for any visible damage or obstructions?Fixing Low Water Pressure
Low water pressure can turn a quick task into a tedious chore. First, check the aerator, which can become clogged with mineral deposits. Unscrew the aerator from the faucet, clean it thoroughly, and reattach it. Another cause might be the supply lines. Ensure they’re free from kinks or blockages. If your home has hard water, consider installing a water softener to prevent future build-up in the lines. Finally, inspect the valve cartridge inside the faucet. A faulty cartridge can restrict water flow. Replacing it might restore your water pressure to its full potential. Are your supply lines clear and functioning properly? By addressing these common issues, you can ensure your Moen kitchen faucet performs beautifully, enhancing your kitchen experience. Remember, a little troubleshooting can go a long way in maintaining a functional and efficient faucet.Maintenance Tips
Installing a Moen kitchen faucet requires basic tools and careful attention. Begin by turning off water supply lines. Position the faucet, securing it with mounting nuts, and connect water lines. Ensure all connections are tight to prevent leaks. Finish by testing the faucet for proper flow and function.
Installing a Moen kitchen faucet can transform the look of your kitchen, but maintaining it ensures it functions smoothly for years. Let’s delve into some essential maintenance tips to keep your faucet in top condition. Whether it’s cleaning or preventing future issues, these easy steps will make a difference.Cleaning The Faucet
Regular cleaning is the first step to maintaining your Moen kitchen faucet. Use a mild soap and water solution to wipe down the faucet, focusing on areas prone to buildup like the spout and handles. Avoid abrasive cleaners that can scratch the finish. Consider using a toothbrush to scrub hard-to-reach areas gently. This is especially helpful if you notice mineral deposits forming. Rinsing thoroughly and drying with a soft cloth will keep your faucet shiny and prevent water spots. Remember, a clean faucet is not just about aesthetics; it ensures optimal functionality.Preventing Future Issues
Taking proactive steps can save you from headaches down the road. Regularly check for leaks or drips—an early detection can prevent bigger problems later. Tighten any loose parts to keep the faucet sturdy. Consider installing a water softener if you have hard water; this can minimize mineral deposits that affect performance. Inspect the aerator regularly. Cleaning it ensures a smooth water flow and prevents clogging. A little attention can prevent costly repairs and extend the life of your faucet. Have you ever thought about how much maintenance can reduce stress? A well-maintained faucet can be one less thing to worry about in your busy kitchen.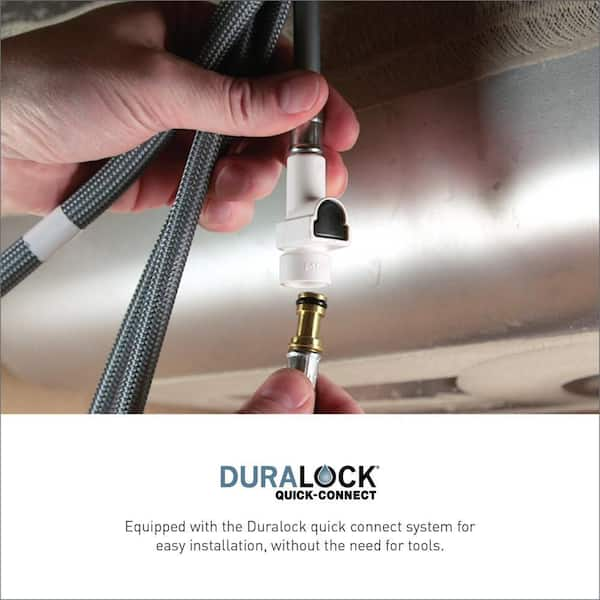
Credit: www.homedepot.com
Credit: www.homedepot.com
Frequently Asked Questions
How To Secure A Moen Kitchen Faucet?
Tighten the mounting nut under the sink using a basin wrench to secure the Moen kitchen faucet. Ensure the faucet is aligned correctly. Check connections for leaks. If necessary, adjust the handle and spout. Regularly inspect and maintain to keep it secure.
Is Plumber’s Putty Necessary For A Kitchen Faucet?
Plumber’s putty is often unnecessary for kitchen faucets with rubber or plastic gaskets. It prevents leaks and ensures a watertight seal. Check the faucet’s installation instructions for specific requirements. Some faucets might need plumber’s putty for extra protection. Always verify the manufacturer’s recommendations before deciding.
Can I Install A Kitchen Faucet By Myself?
Yes, you can install a kitchen faucet yourself. Follow the manufacturer’s instructions carefully. Basic tools like a wrench, screwdriver, and plumber’s tape are needed. Ensure water is turned off before starting. If unsure, consult a professional plumber.
How To Identify A Moen Kitchen Faucet Model?
Locate the model number on the Moen faucet’s box or manual. Check underneath the spout or handle for a label. Visit Moen’s website or contact customer support with a description or photo for assistance.
Conclusion
Installing a Moen kitchen faucet is straightforward with the right steps. You now have the skills to tackle this task. Save time and effort by following the guide closely. Feel proud of your new faucet and the fresh look it brings.
A simple upgrade can make daily chores more enjoyable. Remember to check for leaks after installation. This ensures everything is secure and working properly. Feel free to share your experience with others. Your kitchen will look great, and you’ll feel accomplished.
Enjoy your new Moen faucet and the improved kitchen experience!

Similar Posts