How to Install Kitchen Hood: Step-by-Step Guide
Executive Chef & Lead Commercial Kitchen Specialist at Daily Kitchup Test Lab
Are you tired of lingering food odors and smoky kitchens after preparing meals? Installing a kitchen hood could be your game-changer.
Picture this: a fresh, clean kitchen environment where you can cook with ease and confidence. Imagine savoring the aroma of your delicious dishes without worrying about smoke or grease. In this guide, you’ll discover how to install a kitchen hood efficiently, ensuring optimal ventilation for your cooking space.
Whether you’re a seasoned DIY enthusiast or a first-timer, this step-by-step approach is designed to make the installation process straightforward and stress-free. Ready to transform your kitchen into a more enjoyable space? Let’s dive in and get started!
Choosing The Right Kitchen Hood
Installing a kitchen hood enhances your cooking space. It keeps your kitchen fresh and clean. Choosing the right kitchen hood is crucial for efficiency and style.
Types Of Kitchen Hoods
Kitchen hoods come in several types. Wall-mounted hoods attach to the wall above your stove. Island hoods hang from the ceiling over a cooktop. Under-cabinet hoods fit beneath your kitchen cabinets. Each type suits different kitchen layouts and needs.
Size And Capacity Considerations
Size and capacity are important for a kitchen hood. Measure your cooking area carefully. Ensure the hood is wide enough to cover the stove. Consider the hood’s airflow capacity. Higher capacity means better ventilation.
Budget And Brand Options
Your budget affects your choice. Look for brands offering good warranties and customer support. Compare features and prices. Choose a kitchen hood that fits your budget and needs. Popular brands often provide reliable products.
Credit: prolinerangehoods.com
Gathering Necessary Tools
Installing a kitchen hood begins with gathering the necessary tools. Proper preparation ensures a smooth installation process. You will need specific tools and safety equipment. This section outlines the essential tools required for the task.
Essential Tools Checklist
Having the right tools is crucial for installing a kitchen hood effectively. Below is a checklist of the essential tools you will need:
- Drill with drill bits suitable for metal and wood.
- Screwdriver set for various screw types.
- Measuring tape to ensure accurate measurements.
- Level to maintain perfect alignment.
- Pencil or marker for marking positions.
- Adjustable wrench for tightening bolts.
- Wire stripper for electrical connections.
- Utility knife for trimming materials.
Safety Equipment
Safety should be your top priority during installation. Equip yourself with the following safety gear:
- Safety goggles to protect your eyes from dust and debris.
- Work gloves for hand protection.
- Face mask to avoid inhaling dust particles.
- Ear protection if working in noisy conditions.
- Non-slip shoes to prevent accidents.
Ensure all equipment is in good condition. This minimizes risks and promotes a safe working environment.
Preparing The Installation Area
Preparing the installation area for a kitchen hood involves clearing the space and ensuring all tools are ready. Measure the wall space accurately for a proper fit. Confirm that electrical outlets are accessible and functioning before beginning the installation process.
Preparing the installation area for your kitchen hood is crucial. This step ensures a smooth and efficient setup. Proper preparation minimizes issues during installation. Follow these essential guidelines to get started.Measuring The Space
Accurate measurements prevent fitting problems. Use a tape measure to determine the hood dimensions. Consider both width and height of the available area. Verify the hood aligns with your cooking space. Leave enough room for easy access and maintenance. Double-check your numbers before purchasing the hood.Clearing The Area
Remove all items from the installation zone. This includes pots, pans, and other kitchen essentials. Make sure the countertop is free of clutter. This clears the way for tools and materials. A tidy workspace reduces installation time. It also prevents damage to your kitchen items.Ensuring Ventilation Path
Check the ventilation path for obstructions. Ensure it leads to an exterior opening. This helps in expelling smoke and odors. Examine the duct system for blockages. A clear path guarantees efficient airflow. Use a flashlight to inspect dark areas. Make adjustments if needed for optimal performance.
Credit: alturascontractors.com
Installing The Vent System
Installing the vent system for a kitchen hood requires precise measurements and proper alignment. Ensure the ductwork is securely connected to remove smoke and odors efficiently. Make sure the hood is mounted at a safe height above the stovetop for optimal performance.
Installing the vent system for your kitchen hood is a crucial step to ensure proper airflow and to keep your kitchen free from smoke, steam, and unwanted odors. This part of the installation might seem daunting, but with careful planning and precise execution, you can achieve a functional and efficient system. Let’s dive into the essential steps for setting up your vent system.Locating The Vent Outlet
First, you need to determine the best location for your vent outlet. This is typically on an exterior wall or the roof. Consider the shortest and most direct path for the ductwork. You want to minimize turns and bends as these can reduce the efficiency of airflow. Think about your kitchen layout and any structural elements that might obstruct the vent path. Have you considered how this will impact your kitchen aesthetics? It’s also important to check for any existing electrical or plumbing lines that might be in the way.Connecting The Ductwork
Once you’ve located the vent outlet, the next step is connecting the ductwork. Make sure to use the right size duct that matches your hood’s requirements to avoid any performance issues. Measure twice and cut once, ensuring each piece fits snugly and securely. You’ll want to avoid any gaps or leaks that can compromise the system’s effectiveness. Consider using metal tape or duct sealant to secure connections and prevent air leaks.Securing The Vent Cap
Finally, secure the vent cap on the exterior of your home. This cap prevents rain, debris, and pests from entering the ductwork while allowing air to escape efficiently. Ensure the cap is fitted tightly and properly sealed against the wall or roof surface. This might be a good time to ask yourself: is this cap durable enough to withstand the elements? Regular maintenance checks are essential to ensure long-term performance and to catch any potential issues early. By focusing on these critical steps, you can ensure your kitchen hood’s vent system is installed effectively, providing optimal airflow and enhancing your cooking experience.Mounting The Kitchen Hood
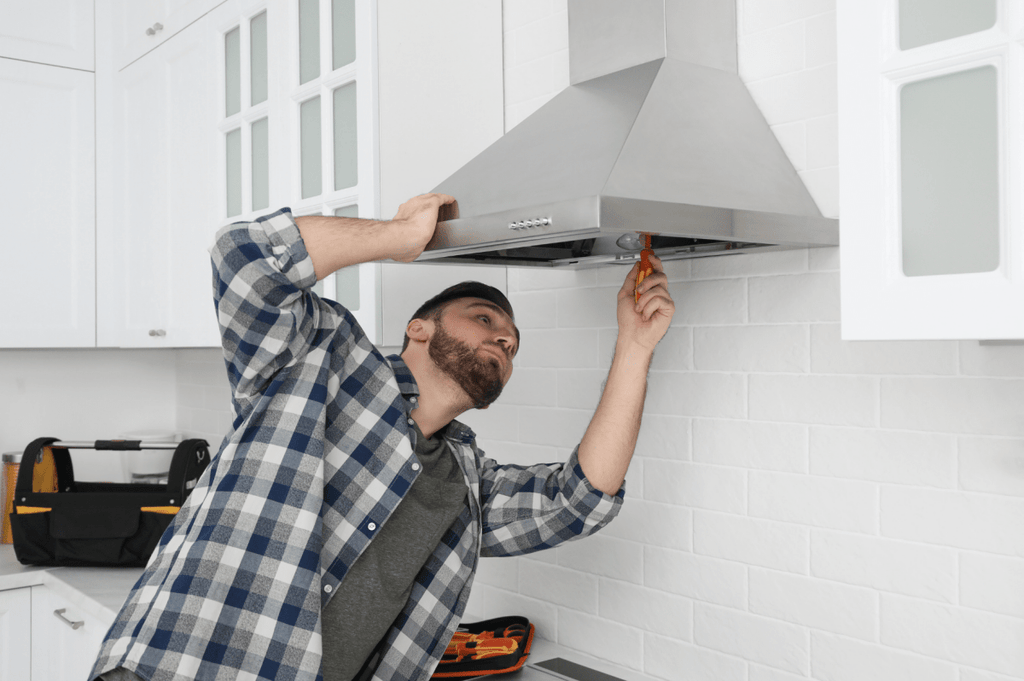
Mounting a kitchen hood involves securing it to the wall, connecting the ventilation, and ensuring proper electrical wiring. Follow the manufacturer’s instructions for the best results. Make sure to use the correct tools for a secure installation.
Mounting the kitchen hood is a crucial step in ensuring your kitchen remains smoke-free and fresh. A correctly mounted hood improves ventilation and enhances your cooking environment. Whether you’re a DIY enthusiast or tackling this for the first time, following these steps will guide you to a successful installation.Positioning The Hood
Before you begin, decide on the optimal height for your hood. Typically, it should be 24 to 30 inches above the cooking surface. This ensures efficient smoke capture without hindering your cooking space. Mark the spots on the wall where the hood will be mounted. Use a pencil for easy adjustments. Make sure everything is level to avoid a lopsided installation.Drilling Pilot Holes
Once you have your spots marked, it’s time to drill pilot holes. These small holes guide the screws and prevent the wall from splitting. Use a drill bit slightly smaller than your screws for the best results. Double-check your marks before drilling. A misplaced hole can lead to unnecessary patchwork and delays.Securing With Screws
With the pilot holes ready, grab your screws and a screwdriver. Secure the hood to the wall, ensuring each screw is tight and the hood is stable. Don’t rush this part; a loose hood can be a safety hazard. Consider using a power drill to save time and ensure the screws are tightly fastened. Once mounted, give the hood a gentle tug to confirm its stability. Is everything secure and level? Congratulations, you’ve successfully mounted your kitchen hood!Electrical Connections
Connecting the electrical components of your kitchen hood is crucial for ensuring its functionality and safety. This process might seem intimidating, but with a clear understanding, you can tackle it confidently. Let’s walk through the essential steps to make sure your kitchen hood is wired correctly.
Turning Off Power
Safety first! Before you begin, make sure to turn off the power to the kitchen area where you’ll be working. Locate your circuit breaker panel and switch off the specific breaker that controls the power to your kitchen. This precaution prevents any accidental shocks.
If you’re unsure which breaker to turn off, test it by switching off one at a time and checking if the power is cut in the kitchen. Always double-check by flipping the wall switch to ensure the power is indeed off.
Connecting The Wires
Now that the power is off, it’s time to connect the wires. You’ll find three main wires: black, white, and green or bare copper. The black wire is the hot wire, the white is neutral, and the green or bare copper is the ground.
Connect the black wire from the hood to the black wire from the wall, the white wire to the white, and the green or bare copper to the ground screw or wire. Use wire nuts to secure the connections and electrical tape to cover any exposed parts.
These connections ensure your hood operates effectively. If you’re unsure about any step, consult an electrician. It’s better to be safe than sorry.
Testing The Electrical Setup
Once all wires are connected, it’s time to test your setup. Turn the circuit breaker back on and switch on the kitchen hood. Check if the lights and fan are operational. If everything works, congratulations, you’ve successfully completed the electrical connections!
If something doesn’t work, don’t panic. Double-check each connection, ensuring there are no loose wires or missing connections. Sometimes a small oversight can be the cause.
What’s your experience with electrical work? Did this guide help you feel more confident in connecting your kitchen hood?
Final Adjustments
Congratulations, you’ve almost completed your kitchen hood installation! The final adjustments are crucial for ensuring everything is perfectly set up. This stage involves checking the alignment, ensuring the hood functions properly, and tidying up the installation area. These steps will ensure your kitchen hood is not just functional but also aesthetically pleasing.
Checking Hood Alignment
Your kitchen hood needs to be perfectly aligned for optimal performance. Misalignment can lead to inefficient air extraction and an unbalanced look. Use a level tool to verify that the hood is parallel to the countertop. If it’s slightly off, adjust the mounting brackets accordingly. A well-aligned hood doesn’t just work better; it adds to your kitchen’s visual harmony.
Ensuring Proper Function
Turn on your kitchen hood and test its functions. Check the fan speed settings to ensure they change smoothly. Listen for unusual noises which could indicate a loose part or installation error. Also, test the lighting if your hood has built-in lights. Ensuring everything works perfectly means your kitchen hood is ready to tackle any cooking challenge.
Cleaning The Installation Area
A clean installation area is essential for both aesthetics and safety. Wipe down the hood and surrounding surfaces to remove dust or fingerprints. Sweep or vacuum the floor to clear any debris. A clean kitchen not only looks inviting but also prevents slipping hazards. Have you considered how a tidy space enhances your cooking experience?
Maintenance Tips
Installing a kitchen hood enhances air quality and removes odors effectively. Begin by measuring the space above your stove. Then, securely mount the hood, ensuring proper alignment with the vent. Connect it to the power supply for optimal performance. Regular maintenance will keep it functioning efficiently.
Maintaining your kitchen hood is essential for a clean and efficient kitchen. Regular maintenance ensures your hood performs optimally. It also prolongs the lifespan of the appliance. Let’s explore some simple maintenance tips to keep your kitchen hood in top shape.Cleaning The Filters
Clean the filters every month. This prevents grease build-up and ensures proper airflow. Remove the filters carefully. Soak them in warm, soapy water for 15 minutes. Use a brush to scrub away any grease. Rinse thoroughly and let them dry before reinstalling. For metal filters, you can use a dishwasher. Avoid harsh chemicals as they may damage the filters.Inspecting For Leaks
Regularly inspect your kitchen hood for any leaks. Check the ductwork connections for gaps. Use a flashlight to spot any potential issues. Listen for unusual sounds when the hood is on. If you notice any leaks, seal them with duct tape or a sealant. Addressing leaks promptly can prevent further damage.Regular Maintenance Schedule
Create a regular maintenance schedule. Mark your calendar for monthly filter cleaning. Check for leaks and unusual noises every three months. Also, inspect the fan and motor annually. Regular checks will keep your hood running smoothly. This proactive approach saves time and money in the long run. Prioritize these tasks to ensure a safe kitchen environment.
Credit: www.familyhandyman.com
Frequently Asked Questions
Can You Install A Kitchen Hood Yourself?
Yes, you can install a kitchen hood yourself. Ensure you follow the manufacturer’s instructions carefully. Use necessary tools and safety precautions for installation. Check local building codes for compliance. Hiring a professional may be advisable for complex installations.
How Difficult Is It To Install A Kitchen Hood?
Installing a kitchen hood can be moderately difficult. Basic DIY skills are required. Ensure proper measurements and electrical connections. Follow manufacturer instructions carefully. For complex installations, hiring a professional is recommended. With preparation, the task can be manageable and rewarding.
Do Stove Hoods Have To Be Vented Outside?
Stove hoods can be vented outside or use a recirculating system. Venting outside removes smoke and odors effectively. Recirculating hoods use filters to clean the air and are easier to install. Your choice depends on kitchen design and preferences. Consider efficiency, installation, and maintenance for the best option.
Do I Need An Electrician To Install A Cooker Hood?
You should hire an electrician for cooker hood installation. They ensure safe electrical connections and compliance with regulations. Electricians have the necessary skills and tools for proper installation, reducing risks of hazards. Always prioritize safety by hiring a qualified professional for your kitchen appliances.
Conclusion
Installing a kitchen hood can be simple and rewarding. Follow each step carefully. Ensure proper measurements and secure fittings. Safety is crucial. Double-check electrical connections and ventilation. A well-installed hood enhances kitchen functionality. It improves air quality and cooking comfort.
Regular maintenance keeps your hood efficient. Clean filters and surfaces routinely. Enjoy a fresh and pleasant kitchen environment. Share your installation success with friends. Inspire them to upgrade their kitchens too. A kitchen hood adds style and practicality. Ready to transform your cooking space?
Start today!

Similar Posts