How to Plumb a Double Kitchen Sink: Step-by-Step Guide
Executive Chef & Lead Commercial Kitchen Specialist at Daily Kitchup Test Lab
Are you ready to tackle a home project that can elevate both your kitchen’s functionality and your DIY skills? Learning how to plumb a double kitchen sink might just be the perfect task for you.
Imagine the convenience of having two basins at your disposal—one for washing and another for rinsing, or perhaps a dedicated space for prepping food. The benefits are clear, but the thought of plumbing might seem intimidating. Fear not! In this guide, you’ll discover straightforward steps to achieve this without the need for professional help.
By the end, you’ll not only save money but also gain the satisfaction of having done it yourself. Curious about how you can transform your kitchen into a more efficient space? Keep reading to find out how simple it can be.
Tools And Materials Needed
Pipe wrench, plumber’s tape, and PVC pipes are essential for plumbing a double kitchen sink. Gather fittings, washers, and sealants to ensure a secure connection.
Plumbing a double kitchen sink can seem daunting, but with the right tools and materials, it’s a task well within your reach. Having the appropriate equipment not only makes the job easier but also prevents potential mishaps. You might be surprised at how a little preparation can turn a seemingly complex project into a manageable one. Ready to get started? Let’s gather what you need.Tools Required
Before diving into the project, ensure you have these tools ready. They are essential for a smooth and efficient plumbing process. – Pipe Wrench: This adjustable tool is key for gripping and turning pipes. – Plumber’s Tape: Ideal for sealing pipe threads to prevent leaks. – Bucket and Towels: Handy for catching any water spills and keeping your workspace tidy. – Hacksaw: Useful for cutting through tough PVC pipes. – Screwdriver Set: Ensures you can tackle any screws you encounter.Materials Needed
The right materials are just as important as the tools. They ensure your double sink is connected properly and functions without issues. – PVC Pipes and Fittings: These form the backbone of your sink’s drainage system. – Tailpieces: Connects the sink’s drain to the main plumbing line. – Drain Kit: Typically includes the essential components needed for sink installation, like strainers and nuts. – Plumbers Putty: Perfect for creating watertight seals around the sink’s drain. – Flexible Water Supply Lines: These connect your sink to the home’s water supply.Personal Insights
From personal experience, the importance of having a comprehensive checklist cannot be overstated. On one occasion, a missing pipe fitting halted my progress. It was a simple oversight, but it taught me the value of double-checking my inventory before starting. Do you have everything you need? Taking the time to gather all tools and materials upfront can save you time and frustration. Plus, it provides the confidence that you’re fully prepared to handle any surprises along the way. Getting these tools and materials ready is your first step towards a successful plumbing project. Are you excited to see your double kitchen sink come to life?Credit: www.dexdecor.com
Preparing The Workspace
Preparing the Workspace Clear the area under the sink to make room for tools and plumbing parts. Ensure you have ample lighting to see the connections clearly. Organize tools like wrenches, pipe cutters, and sealant within easy reach.
Preparing the workspace before plumbing a double kitchen sink is crucial for a smooth and efficient process. This step ensures that you have everything in order, minimizing frustration and potential mishaps. A well-prepared workspace will save you time and effort, allowing you to focus on the task at hand without unnecessary distractions.Clearing The Area
First, clear the area beneath your sink. Remove any cleaning supplies, trash bins, or stored items. This not only gives you ample space to work but also prevents any accidental damage to your belongings. Keep the space organized. A clutter-free area reduces stress and helps you concentrate on the plumbing task. Think of it as setting the stage for a successful project.Gathering Supplies
Next, gather all necessary supplies before starting. Here’s a simple checklist to keep handy:- Wrenches and pliers
- Pipe tape
- Bucket or pan
- New drainpipes and fittings
- Cleaning cloths
Removing The Old Sink
Removing the old sink is a crucial step in installing your new double kitchen sink. This process might seem daunting, but with a bit of patience and the right tools, you can tackle it like a pro. Not only will you clear the way for your new sink, but you’ll also gain a sense of accomplishment. Ready to roll up your sleeves and get started?
Disconnecting The Plumbing
Begin by shutting off the water supply to avoid any flooding mishaps. Locate the valves under the sink and twist them clockwise. Use a wrench to disconnect the water supply lines from the faucet. If you’ve ever felt like you’re wrestling with stubborn pipes, you’re not alone! Just make sure to have a bucket handy to catch any residual water.
Next, detach the drainpipes. Loosen the nuts connecting the pipes to the drain using a slip-joint plier. Take note of how each pipe connects; a quick photo can be a lifesaver when reassembling. Have you ever thought about how much the maze of pipes resembles a puzzle? Once disconnected, you can remove the old pipes and set them aside.
Taking Out The Sink
With the plumbing disconnected, it’s time to remove the sink itself. Check for any clips or screws securing the sink to the countertop. Use a screwdriver to unscrew these fasteners. You might feel like a detective uncovering hidden treasures as you search for all the attachments.
Once unfastened, carefully lift the sink out. It’s a two-person job if the sink is heavy. Avoid damaging your countertop during this step. Do you have a friend who owes you a favor? Now might be the perfect time to call them for help.
After removal, clean the area thoroughly. Inspect the countertop for any damage and take the opportunity to repair it. Have you noticed how a clean slate sparks creativity? This pristine space is now ready for your new double kitchen sink.
Installing The New Sink
Installing a new double kitchen sink can be a transformative project for your kitchen space. It’s not just about the aesthetics; it’s also about functionality. A well-installed sink can make your daily chores more efficient and seamless. But how do you position and secure the sink effectively? Let’s dive into the details.
Positioning The Sink
Start by aligning the sink with the cut-out on your countertop. Ensure that it sits flush without any gaps. This prevents water from seeping into the cabinet below.
Consider how you use your sink. Do you prefer one side for washing and the other for rinsing? Position the sink so it complements your workflow.
If you’ve ever struggled with a cramped workspace, you’ll appreciate this thoughtful arrangement. You’ll find your kitchen tasks smoother and more enjoyable.
Securing The Sink
Once positioned, securing the sink is the next crucial step. Use the mounting clips that come with the sink to fasten it to the countertop.
Ensure each clip is tightened evenly. This prevents any wobbling or shifting during use.
Have you ever noticed a slight movement while scrubbing heavy pots? That’s a sign of improper securing. Properly secured sinks stay put, enhancing your kitchen experience.
With these steps, your double kitchen sink becomes a reliable ally in your culinary adventures. Are you ready to enjoy the enhanced functionality of your kitchen? Your new sink awaits!
Setting Up The Drain System
Setting up the drain system for a double kitchen sink is crucial. It ensures smooth water flow and prevents leaks. This process involves installing strainers and connecting drain pipes. Both tasks require attention to detail and careful handling. Let’s explore each step in setting up the drain system.
Installing The Strainer
Begin by choosing the right sink strainer for your kitchen. It should match the sink hole size. Place a small amount of plumber’s putty around the strainer’s edge. Insert the strainer into the sink hole with gentle pressure. Ensure it sits firmly and evenly.
From underneath, attach the strainer locknut. Tighten it carefully with a wrench. This secures the strainer in place. Remove any excess putty squeezed out. A well-installed strainer prevents debris from entering the drain.
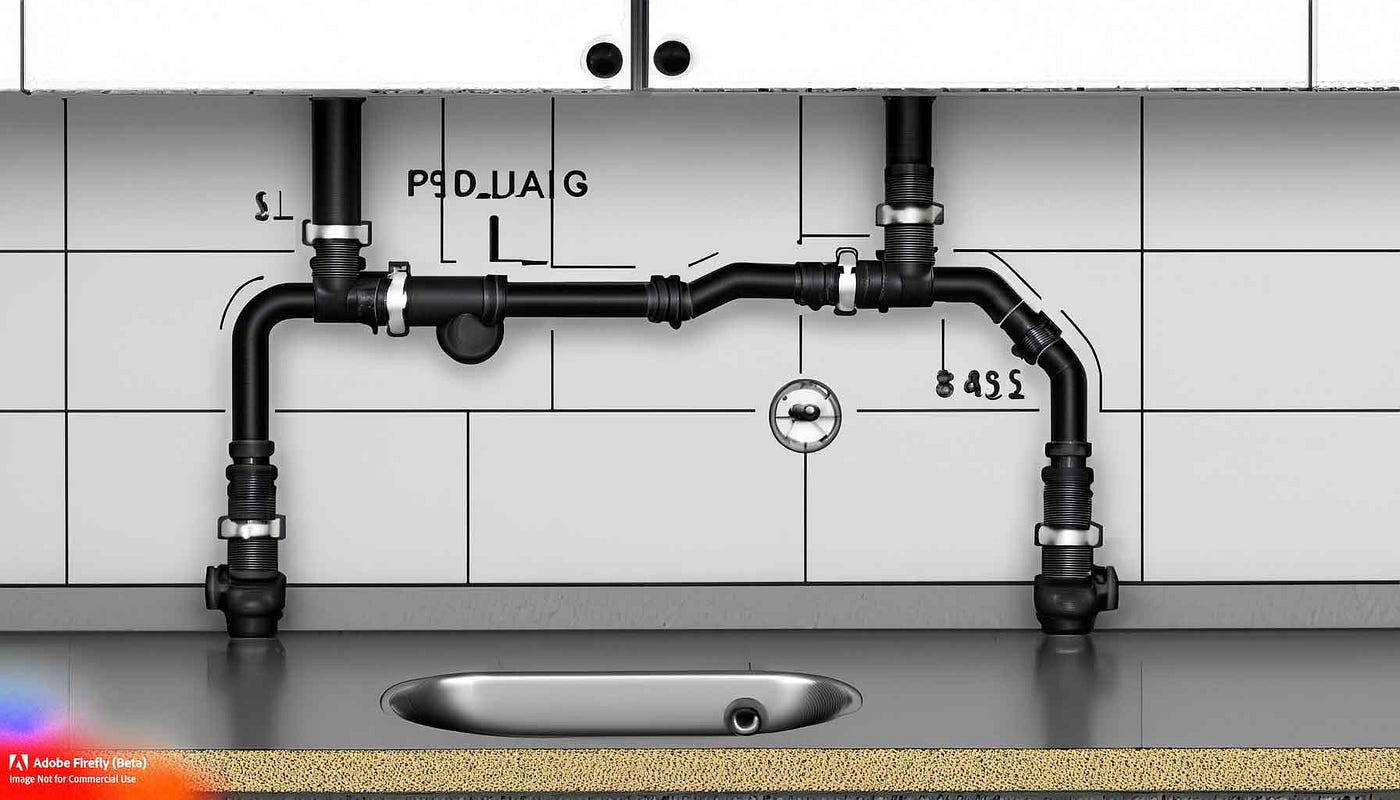
Connecting The Drain Pipes
Next, gather the necessary drain pipes and fittings. Start with the tailpiece, which connects directly to the strainer. Use slip nuts and washers to secure the connection. Ensure they are tight but not overly so.
Now, connect the P-trap to the tailpiece. This trap prevents sewer gases from entering the kitchen. Align it properly with the wall drain. Tighten all connections using slip nuts. Verify there are no leaks by running water through the system.
Finally, check the alignment of all pipes. Adjust if necessary to ensure a smooth flow. A well-connected drain system keeps your kitchen sink functional and efficient.
Credit: medium.com
Connecting The Water Supply
Connect the water supply by attaching pipes to the sink’s faucets. Ensure tight fittings to avoid leaks. Test for proper flow by turning on the taps, checking for smooth water movement.
Connecting the water supply is an essential part of plumbing a double kitchen sink. Ensuring proper connections is key to a smooth water flow. Follow these steps to attach the faucets and connect the water lines effectively.Attaching The Faucets
Start by securing the faucets on the sink. Position each faucet over its designated hole. Ensure they align perfectly with the sink’s design. Use a basin wrench to tighten the nuts underneath. This tool helps reach difficult areas easily. Double-check the alignment and ensure a snug fit. A secure faucet prevents leaks and ensures durability.Connecting The Water Lines
Locate the hot and cold water lines under the sink. Connect each line to its corresponding faucet. Use flexible supply lines for easy handling. Align the ends with the faucet inlets. Tighten the connections using an adjustable wrench. Ensure each line is securely attached to avoid leaks. Test the connections by turning on the water. Check for any drips or loose fittings. Adjust as necessary for a perfect fit. Proper connection ensures efficient water flow to the sink.Testing For Leaks
Inspect connections and seals for any moisture. Check pipes and fittings under the sink. Ensure no drips or puddles are present.
Testing for leaks is a crucial step in plumbing a double kitchen sink. It ensures your work is watertight and ready for daily use. Even the smallest leak can lead to bigger problems if not addressed promptly.Running Water Check
Turn on the faucet and let the water run for a few minutes. Keep an eye on the water flow, ensuring it moves smoothly through both sink basins. Listen for unusual sounds, like gurgling, which might indicate a blockage or misalignment. Check underneath the sink as well. Look for any drips or puddles forming beneath the pipes. Water should flow seamlessly from the drain with no signs of leakage.Inspecting The Connections
Feel the pipes with your hands to detect any moisture. Pay close attention to the joints and connection points, as these are common areas for leaks. Tighten any loose connections using a wrench. Be careful not to over-tighten, as this could damage the fittings. Finally, consider using a flashlight to inspect hard-to-see areas. Sometimes leaks can be sneaky, hiding in shadows or crevices. Seeing every angle can make all the difference in ensuring your plumbing is solid. Have you ever thought about how a small leak today could become a major headache tomorrow? Catching issues early saves time and money, and ensures your kitchen runs smoothly.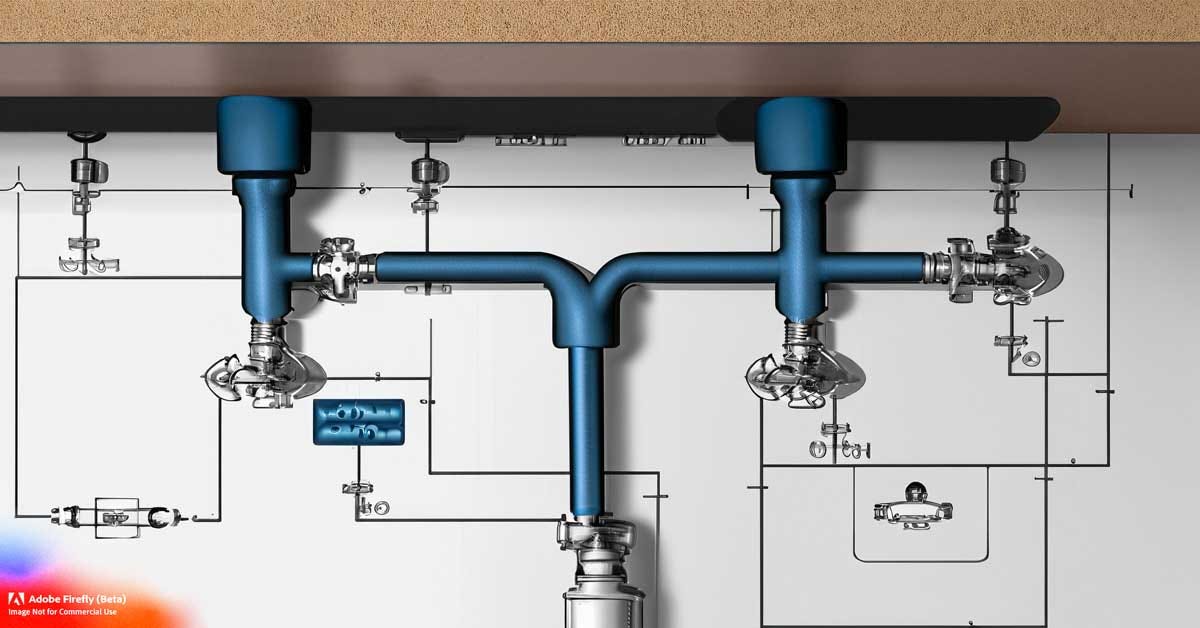
Credit: medium.com
Final Adjustments
Ensure pipes are securely connected, checking for leaks. Tighten all fittings and adjust traps to align perfectly. Test water flow to confirm smooth drainage.
Once you’ve installed the pipes and fittings for your double kitchen sink, the final adjustments are crucial for ensuring everything works smoothly. These tweaks can mean the difference between a dry cabinet and a soggy mess. Let’s dive into the key steps to perfect your setup.Tightening Connections
It’s tempting to leave connections slightly loose, thinking it might be easier to adjust later. But, this can lead to leaks that might damage your cabinet. Use a wrench to snugly tighten all the nuts and bolts. Be careful not to over-tighten, as this might crack the pipes or fittings. If you’re unsure, hand-tighten and then give it a quarter turn with the wrench. Do you remember the last time you had a small leak? Proper tightening could save you from that hassle.Ensuring Proper Alignment
Proper alignment ensures that water flows smoothly without any obstructions. Misaligned pipes can lead to clogs or slow drainage. Check each section of your plumbing to ensure everything lines up correctly. Use a level to verify horizontal pipes are perfectly straight. Vertical pipes should be plumb. Adjust as needed by gently repositioning the pipes. If you’ve ever had a sink that drains slowly, you know how frustrating misalignment can be. Taking the time to make these final adjustments can save you from future headaches. A well-plumbed sink is not only efficient but also a testament to your DIY skills. Are you ready to enjoy your new double kitchen sink without worry?Maintenance Tips
Maintaining your double kitchen sink is key to ensuring its longevity and efficiency. Regular upkeep not only extends its lifespan but also saves you from unexpected plumbing emergencies. Let’s dive into some practical maintenance tips that you can easily implement in your daily routine.
Regular Cleaning
Regular cleaning is vital for keeping your double kitchen sink functioning smoothly. Make it a habit to clean your sink with mild detergent or baking soda weekly. This prevents the build-up of grime and keeps it sparkling.
Don’t forget to clean the drain traps. They can accumulate food particles and grease over time. Use a small brush or old toothbrush to scrub the traps, ensuring clear pathways for water flow.
Remember, a clean sink is a happy sink. Keeping it tidy helps avoid nasty odors and potential clogs.
Preventive Measures
Taking preventive measures can save you a lot of hassle down the road. Install a mesh strainer or drain guard to catch food scraps before they slip down the drain. It’s an inexpensive tool that can prevent major blockages.
Be mindful of what you pour down the sink. Avoid disposing of oil, fat, or coffee grounds as these can lead to stubborn clogs. Consider collecting grease in a separate container and disposing of it in the trash instead.
Ever thought about scheduling an annual plumbing inspection? It might sound excessive, but it can catch potential issues early. A plumber can identify small problems before they turn into costly repairs.
Frequently Asked Questions
How Should A Double Sink Be Piped?
Pipe a double sink using a shared trap. Connect both sink drains to a T-fitting. Ensure proper venting to avoid clogs. Use PVC pipes for durability and easy installation. Seal connections tightly to prevent leaks. Confirm compliance with local plumbing codes for safe operation.
Do I Need 2 P Traps For A Double Sink?
You typically need only one P-trap for a double sink. Connect both sink drains to a single P-trap. This setup helps prevent sewer gases and ensures efficient drainage. Always follow local plumbing codes for the best results.
Can I Plumb A Sink Myself?
Yes, you can plumb a sink yourself with basic DIY skills. Gather necessary tools and materials first. Ensure you follow local plumbing codes and guidelines. Watching online tutorials can help. If unsure, consult a professional plumber to avoid potential issues.
Does A Double Sink Need Two Water Lines?
A double sink typically requires two water lines, one for hot and one for cold water. Each sink connects to these lines, ensuring both have access to hot and cold water. Proper installation ensures efficient plumbing functionality and water flow.
Conclusion
Plumbing a double kitchen sink seems tough, but it’s manageable. With basic tools and patience, you can do it yourself. Follow each step carefully and double-check connections. A well-installed sink prevents leaks and ensures smooth drainage. Regular maintenance keeps everything working well.
Always remember to turn off the water before starting. This avoids any unexpected spills. Enjoy the satisfaction of completing the task yourself. A functional sink makes kitchen work easier. Feel proud of your plumbing skills. You’ll save money and gain confidence for future projects.
Happy plumbing!

Similar Posts