How to Repair a Mobile Home Kitchen Faucet: Easy Fix Guide
Your mobile home kitchen faucet is more than just a simple fixture. It’s the heart of your culinary space, crucial for everything from preparing meals to keeping your kitchen clean.
So what happens when it starts leaking, dripping, or worse, stops working altogether? Before you consider calling a plumber or heading to the store to replace it, there’s good news: you can fix it yourself! In this guide, you’ll discover how to repair a mobile home kitchen faucet with ease and confidence.
Imagine the satisfaction of turning those frustrating drips into a smooth, efficient flow. You’ll save money, time, and, most importantly, gain a sense of accomplishment. Ready to take control of your kitchen and get back to hassle-free cooking? Let’s dive in and transform your faucet issues into a simple DIY success story.

Credit: www.tiktok.com
Tools And Materials Needed
Essential tools include a wrench, screwdriver, and pliers. Gather materials like replacement washers, plumber’s tape, and a bucket.
Repairing a mobile home kitchen faucet requires several specific tools and materials. Having the right equipment ensures a smooth repair process. Gathering these items beforehand saves time and makes the task easier. Below is a list of essential tools and materials needed for the repair.Wrench Set
A wrench set is crucial for loosening and tightening nuts. Choose adjustable wrenches for better flexibility.Screwdriver
A flathead or Phillips screwdriver is needed for removing screws. Ensure you have the right size for the screws you encounter.Plumber’s Tape
Plumber’s tape, also known as Teflon tape, helps seal connections. It prevents leaks and ensures a tight fit.Replacement Parts
Have replacement parts ready, such as washers or O-rings. These are often the source of leaks and wear.Bucket
A bucket is useful for catching water. Place it under the faucet when removing parts to prevent spills.Cleaning Cloth
A cleaning cloth helps wipe away debris or excess water. It keeps the area tidy and improves visibility.Safety Glasses
Safety glasses protect your eyes from debris. Wear them to ensure safe working conditions.Flashlight
A flashlight provides extra light in dim areas. Use it to see inside cabinets or behind the sink.Rubber Gloves
Rubber gloves protect your hands from dirt and chemicals. They also improve grip on wet surfaces. Having these tools and materials ready makes the repair process efficient and smooth.Identify The Problem
Leaky faucets can cause water wastage. Listen for drips or check for loose parts. Identifying the problem early helps prevent damage.
Identifying the problem is the first step in repairing a mobile home kitchen faucet. This ensures you address the root cause and save time. A faucet can malfunction in several ways, causing inconvenience in your daily routine. It’s essential to detect the issue accurately for an efficient fix.Common Faucet Issues
Start by listing common problems. Dripping is a frequent issue. Check if water leaks from the spout even when turned off. Low water pressure is another common problem. This might indicate a clogged aerator or supply line. Is the handle stiff or loose? This could point to a damaged component inside. Also, check for strange noises like screeching or clanking. These sounds can signal internal damage.Visual Inspection
Conduct a visual inspection. Look for visible leaks around the base or spout. Check under the sink for moisture or water pooling. Observe the faucet’s overall appearance. Corrosion or rust can be a sign of underlying issues. Examine all visible parts for cracks or damage. This helps you pinpoint the problem area.Touch And Feel Test
Use your sense of touch. Turn on the faucet and feel the water temperature. Uneven temperatures can suggest a mixing valve issue. Feel the handle’s movement. Is it smooth or does it stick? This could indicate worn-out parts. Gently shake the faucet. If it wobbles, it might need tightening or have loose parts.Listen For Unusual Sounds
Pay attention to any unusual sounds. Listen while turning the faucet on and off. A screeching noise can indicate worn-out washers. A clanking noise could mean loose parts inside. These sounds help you identify the specific problem.Check Water Supply
Ensure the water supply is consistent. Check if the water flow fluctuates or stops suddenly. This might be a sign of a blockage in the pipes. Inspect the supply lines for any kinks or bends. Such issues can restrict water flow. Once you identify the problem, gather the necessary tools for repair. Addressing the correct issue ensures a smooth and effective repair process.Turn Off Water Supply
Locate the water supply valve under the sink. Turn it clockwise to stop the water flow. Ensure the faucet is dry before beginning repairs.
Before diving into the nitty-gritty of repairing your mobile home kitchen faucet, the first crucial step involves turning off the water supply. This simple action prevents any unexpected water flow or spills, allowing you to work comfortably and efficiently. Imagine being halfway through the repair and suddenly being sprayed with water; it’s not just inconvenient, it’s messy and frustrating. Ensuring the water is off is your safeguard against such mishaps.Locate The Main Water Valve
Begin by identifying the main water valve. In mobile homes, this is often found either under the kitchen sink or in an adjacent utility area. Familiarize yourself with its location so you can quickly access it when needed.Turn Off The Valve
Once located, turn the valve clockwise until it’s completely shut. You might encounter some resistance, especially if the valve hasn’t been turned in a while. Use a towel for better grip if necessary.Test The Faucet
After turning off the valve, test the faucet by turning it on. If water does not flow, you’ve successfully shut off the supply. This step confirms that you can proceed without any surprises.Consider Additional Safety Measures
Think about placing a bucket under the sink to catch any residual water left in the pipes. It’s a simple precaution that saves time on cleanup later. Have you ever had to clean up after forgetting this step?Document The Process
Taking notes or even snapping a few pictures of the valve and its position can be incredibly helpful for future reference. This ensures you can easily locate and turn off the water supply again if needed. Turning off the water supply is not just a procedural task; it’s a strategic move that sets the stage for a smooth repair process. How does it feel to know you’ve eliminated the risk of an unwanted water mess?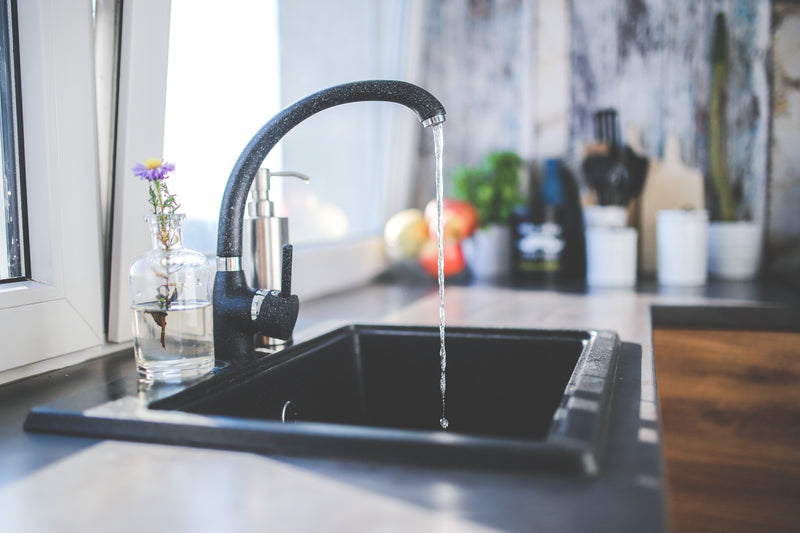
Credit: www.starsupplyusa.com
Remove The Faucet Handle
Removing the faucet handle is a key step in repairing a mobile home kitchen faucet. Begin by turning off the water supply, then use a screwdriver to loosen the screw beneath the handle. Carefully pull the handle away to access the internal components.
Repairing a mobile home kitchen faucet can seem daunting, but with a few simple steps, you can save both money and time. One of the first tasks in this process is to remove the faucet handle. This step is crucial, as it allows you to access the inner components for repair or replacement. Imagine the satisfaction of fixing a leak yourself, transforming frustration into accomplishment. Let’s dive into the steps to remove the faucet handle efficiently.Gather Your Tools
Before starting, make sure you have the necessary tools. Typically, you will need a screwdriver, an adjustable wrench, and perhaps an Allen wrench. Having these tools at hand will make the process smoother and more efficient.Turn Off The Water Supply
Safety first! Turn off the water supply to prevent any unexpected gushes or spills. Usually, you can find the shutoff valve under the sink. Turn it clockwise until it’s tight.Locate The Screw
Look for a small screw that holds the faucet handle in place. It might be hidden under a decorative cap, which you can gently pry off using a flathead screwdriver. This small step often feels like finding a hidden key, unlocking access to the next phase.Remove The Screw
Once you’ve located the screw, use the appropriate screwdriver or Allen wrench to remove it. Unscrew it carefully to avoid stripping it, which could complicate reassembly. Once removed, set the screw aside in a safe place.Detach The Handle
With the screw removed, you should be able to lift or slide the handle off easily. If it’s stuck, gently wiggle it until it loosens. Persistence is key here; sometimes a little patience goes a long way. Removing the faucet handle is often one of those tasks that seem more complex than they are. It’s a satisfying first step in the repair process, empowering you with the knowledge to tackle more DIY projects. Have you ever tackled a home repair and felt a surge of pride in your handiwork?Inspect And Replace Damaged Parts
Inspect the faucet for leaks or worn components. Replace damaged washers or seals to ensure smooth function and prevent water waste.
Repairing a mobile home kitchen faucet doesn’t have to be daunting. One of the most crucial steps is inspecting and replacing any damaged parts. This can prevent leaks and ensure the faucet operates smoothly. By focusing on key components like washers, O-rings, and cartridges, you can effectively maintain your faucet’s performance. Let’s dive into what you need to check and replace.Check Washer And O-ring
Begin by turning off the water supply to avoid any mishaps. Once the water is off, disassemble the faucet handle to access the internal parts. Look closely at the washer, which is typically located at the base of the faucet stem. A worn-out washer can cause persistent drips. If you notice any wear or cracks, it’s time to replace it. The O-ring is another essential part to check. It provides a seal to prevent leaks. If the O-ring appears brittle or cracked, replacing it can save you from future headaches.Examine Cartridge Or Valve
The cartridge or valve is the heart of your faucet. It controls the water flow and temperature. Remove it carefully to inspect its condition. Look for signs of wear or mineral build-up. A faulty cartridge can lead to inconsistent water flow or temperature issues. If cleaning doesn’t resolve these problems, consider replacing it. When I first tackled a faucet repair, I overlooked the cartridge. This simple oversight prolonged the issue. Learning from this, always ensure the cartridge is in top shape. Do you feel prepared to tackle these repairs? Remember, patience and attention to detail are key. With these insights, you’re well on your way to a fully functioning mobile home kitchen faucet.Reassemble The Faucet
Reassemble the faucet by aligning all parts carefully. Tighten each component securely to prevent leaks. Ensure the faucet functions smoothly with a gentle test run.
Reassembling a mobile home kitchen faucet can seem daunting, but with a little patience and attention to detail, it becomes a straightforward task. You’ve successfully disassembled, cleaned, and replaced any worn-out parts. Now it’s time to put everything back together to ensure a leak-free and smooth-operating faucet.Gather Your Tools And Parts
Before starting, make sure you have all the necessary tools and parts at hand. This includes the screws, washers, and any new components you might have purchased. Having everything ready will save you time and frustration.Follow The Disassembly Steps In Reverse
Think back to how you took the faucet apart. Reassemble it by reversing those steps. If you documented the process or took photos, now is the time to use them.Ensure Proper Alignment
As you fit parts together, pay close attention to alignment. Misaligned parts can cause leaks or operational issues. Double-check each connection to make sure everything fits snugly.Install New Washers And O-rings
If you bought new washers and O-rings, now is the time to install them. These small components are crucial for preventing leaks. Make sure they are seated properly in their grooves.Tighten Screws And Bolts
Use a screwdriver or wrench to tighten screws and bolts securely. Be careful not to overtighten, as this can damage components. Tighten just enough to hold everything firmly in place. Once everything is reassembled, turn on the water supply. Check for any leaks by running the water and inspecting each connection. If you notice a leak, turn off the water and adjust the faulty part.Adjust Handle Movement
Test the handle’s movement to ensure it’s smooth and free from obstruction. If it feels tight or uneven, you may need to readjust the internal components.Enjoy Your Refreshed Kitchen Faucet
With the faucet reassembled and functioning well, step back and admire your handiwork. You’ve successfully tackled a task that many find challenging. How does it feel knowing you can handle such repairs on your own? Reassembling your kitchen faucet isn’t just about fixing a problem; it’s about taking control of your space and learning new skills. Now, every time you use your faucet, you’ll have a sense of accomplishment.Test For Leaks
Check for any water leaks by turning on the faucet. Look for drips or puddles beneath the sink. Tighten connections if leaks are found.
Testing for leaks is a crucial step in repairing a mobile home kitchen faucet. Leaks can lead to water damage, mold, and increased water bills. Detecting leaks early saves time and money. It also ensures the faucet works efficiently. This section will guide you through the process of checking for leaks.Inspect Visible Connections
Start by examining the faucet’s visible parts. Look for any signs of water pooling or dripping. Pay attention to the joints and fittings. These areas often show leaks first. Tighten any loose connections with a wrench. This simple action can resolve minor leaks.Check Underneath The Sink
Open the cabinet beneath your sink. Use a flashlight to examine the pipes and connections. Look for dampness or water stains. Touch the pipes to feel for moisture. If you detect wetness, further investigation is needed.Run The Water
Turn the faucet on and let the water run. Observe the flow for a few minutes. Watch for any dripping or unusual sound. These can indicate a leak. If you spot a leak, shut off the water supply immediately.Use A Paper Towel
Place a paper towel around joints and connections. Leave it for several minutes. If the paper towel becomes wet, there’s a leak. This method helps pinpoint leaks that are hard to see.Test Water Pressure
Low water pressure can signal a leak. Compare the pressure with other faucets in your home. If the kitchen faucet is weaker, check for blockages. A blocked pipe can cause leaks and pressure issues.Monitor Water Meter
Turn off all water sources in your home. Check the water meter reading. Wait for about an hour. If the meter reading changes, a leak exists. This method finds hidden leaks that aren’t visible.Seek Professional Help
If leaks persist, consider calling a plumber. Professionals have tools to detect and fix hidden leaks. Their expertise ensures your faucet works correctly.Additional Tips For Maintenance
Regularly check faucet components for wear and tear. Clean aerators to prevent blockages and ensure smooth water flow. Always keep spare parts handy for quick fixes.
Maintaining your mobile home kitchen faucet can prevent future headaches and extend its lifespan. Regular upkeep not only keeps it functional but also enhances the overall look of your kitchen. Plus, taking simple preventive measures can save you from costly repairs down the line. Here are some practical tips to keep your faucet in top shape.Regular Cleaning
To maintain the shine and functionality of your faucet, clean it weekly. Use a mixture of mild soap and warm water to wipe down the faucet. Avoid harsh chemicals, as they can damage the finish and internal components. You might find that a soft toothbrush is perfect for reaching those tricky spots.Check For Leaks
Leaks often start small but can lead to larger issues if ignored. Routinely check under the sink for any signs of moisture or dripping water. If you detect a leak, tighten any loose parts or replace worn-out washers immediately. Imagine saving yourself from a major water damage crisis with just a few minutes of inspection!Inspect The Aerator
The aerator can accumulate mineral deposits over time, affecting water flow. Unscrew it and soak it in vinegar overnight to dissolve any buildup. Rinse it thoroughly before reattaching. This simple step can make a noticeable difference in your water pressure.Lubricate Moving Parts
A squeaky handle is annoying, right? Apply plumber’s grease to any moving parts like the valve stem or handle. This prevents wear and tear and keeps everything running smoothly. It’s amazing how a little lubrication can transform the ease of use.Replace Worn Parts
Over time, certain parts may wear out and need replacement. Keep an eye on rubber washers and O-rings, as they are prone to degradation. Having spare parts handy can make the replacement process seamless. It’s a small investment for peace of mind.Water Quality Check
Poor water quality can lead to faster wear on your faucet. Consider installing a water filter if your area has hard water. This reduces mineral deposits and extends the life of your faucet. Have you ever thought about how water quality impacts your appliances? Implementing these maintenance tips can keep your faucet functioning optimally and save you from unexpected hassles. What other areas in your kitchen could benefit from similar attention?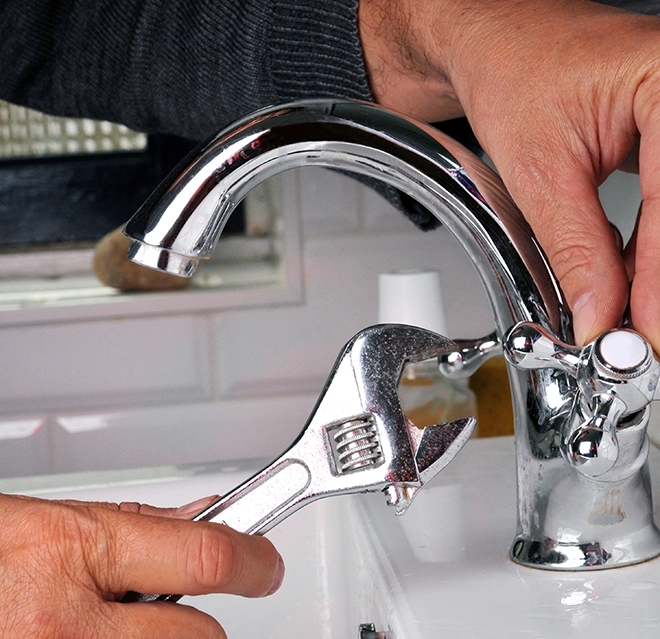
Credit: www.mrhandyman.com
Frequently Asked Questions
Are Mobile Home Kitchen Faucets Different?
Mobile home kitchen faucets often differ in size and design from standard ones. They usually have unique mounting configurations and may require specific adapters. Always check compatibility before purchasing to ensure a proper fit.
Can You Put A Regular Faucet In A Mobile Home?
Yes, you can install a regular faucet in a mobile home. Ensure compatibility with existing plumbing connections and sizes. Use flexible hoses for ease. Proper sealing prevents leaks. Consult a professional for best results if unsure.
How To Replace A Cartridge In A Kitchen Faucet?
Turn off the water supply. Remove the faucet handle using a screwdriver. Take out the old cartridge. Install the new cartridge securely. Reattach the handle and turn on the water supply. Check for leaks and ensure proper function.
How Do I Get My Kitchen Faucet To Stop Dripping?
Turn off the water supply. Remove the faucet handle using a screwdriver. Replace worn-out washers or O-rings. Reassemble the faucet. Turn the water supply back on. Test for leaks.
Conclusion
Repairing a mobile home kitchen faucet is simpler than it seems. With the right tools, you can fix it yourself. Save money and learn new skills. Start by identifying the problem. Follow each step carefully. Ensure you have all necessary materials.
Turn off the water supply before starting. This prevents any mess or damage. Remember, patience is key. Don’t rush the process. Once fixed, test the faucet for leaks. Enjoy the satisfaction of a job well done. Your kitchen is now ready for use again.
Happy repairing!