
Is your kitchen sink sprayer causing more headaches than convenience? If you’ve noticed a weak spray, constant leaks, or just want to upgrade to something more modern, you’ve come to the right place.
Replacing your kitchen sink sprayer might seem daunting, but it’s easier than you think. With just a few tools and some simple steps, you can transform your kitchen sink experience. Imagine the satisfaction of fixing it yourself and having a sprayer that works flawlessly every time.
Stay with us, and we’ll guide you through the entire process, ensuring you feel confident and accomplished by the end. Let’s get started on turning that kitchen frustration into a smooth, rewarding project!

Credit: www.youtube.com
Tools And Materials Needed
Gather a replacement sprayer, adjustable wrench, and plumber’s tape. Ensure a bucket and towels are handy for spills.
Replacing your kitchen sink sprayer can seem daunting, but with the right tools and materials, it’s a task you can tackle confidently. Before you dive into the project, having a clear list of what you need will save time and prevent mid-task runs to the store. Let’s explore the essential tools and materials required to ensure a smooth replacement process. Are you ready to get started?Tools Needed
- Adjustable Wrench:An adjustable wrench is crucial for loosening and tightening nuts and bolts. It’s versatile and will fit various sizes, making it your go-to tool.
- Pliers:Pliers are perfect for gripping and twisting. They come in handy for holding parts securely while you work.
- Screwdriver:A screwdriver will help you remove the screws from the sink sprayer. Ensure you have both flathead and Phillips head types available.
- Basin Wrench:This specialized wrench is designed for reaching and maneuvering in tight spaces, like under the sink.
- Bucket:A bucket is necessary to catch any water that might spill during the replacement. It prevents mess and keeps your workspace clean.
Materials Needed
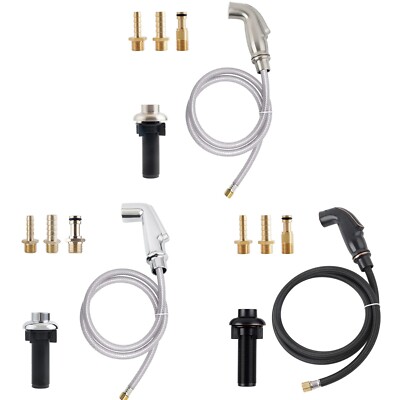
- Replacement Sink Sprayer:Choose a sink sprayer that matches your existing setup. Check the compatibility with your faucet before purchasing.
- Teflon Tape:Teflon tape is used to seal threads on pipe connections. It prevents leaks and ensures a tight fit.
- Rubber Washers:These washers help in creating a watertight seal. They are essential to prevent leaks once the sprayer is installed.
- Flexible Supply Lines:If your existing supply lines are worn out, replacing them will ensure better water flow and prevent future leaks.
Credit: abbathemusic.nl
Preparing The Workspace
Preparing the Workspace Clear the area under the sink to make room for tools. Gather necessary equipment like pliers and a wrench. Ensure the water supply is turned off to prevent leaks.
Preparing the workspace is crucial for replacing a kitchen sink sprayer. A well-organized area ensures safety and efficiency. Follow these steps to set up your workspace properly.Clearing The Area
Start by removing items around the sink. Clear any dishes, soap bottles, or utensils. This provides a clean area to work in. It also prevents accidents or damage to your belongings. Lay down a towel or mat to catch any small parts. This helps you avoid losing screws or washers. Ensure the sink and counter are dry. A dry surface prevents slips or falls during the process.Shutting Off Water Supply
Locate the water valves under the sink. Turn both hot and cold valves clockwise to shut them off. Check the faucet to ensure water is no longer flowing. If the water continues, check if the valves are fully turned off. Have a bucket or towel ready for any drips. This keeps your space dry and clean.Removing The Old Sprayer
Begin by disconnecting the water supply under the sink. Unscrew the old sprayer hose from the faucet base. Carefully pull the hose out through the sink hole.
Removing the old kitchen sink sprayer can seem challenging. But with the right steps, it becomes manageable. First, ensure the water supply is off. This prevents any unwanted leaks. Gather necessary tools like pliers and a wrench. A flashlight can help illuminate dark areas under the sink. Remember, safety first.Detaching The Hose
Locate the sprayer hose under the sink. It’s usually connected to the main faucet line. Use pliers to loosen the connection. Grip firmly and twist to detach. Be gentle to avoid damage to the hose. Once loose, pull the hose free from the fitting. Ensure all water has drained from the hose.Unscrewing The Sprayer
Find the sprayer head above the sink. Hold it steady with one hand. Use a wrench to unscrew the base. Turn counterclockwise for removal. Keep the sprayer head upright. This prevents any water spills. Once loose, lift the sprayer from the sink. Set aside for disposal or recycling.Installing The New Sprayer
Installing the new kitchen sink sprayer can be straightforward. With a few simple steps, you can get your sprayer working efficiently. Let’s dive into how to attach the hose and secure the sprayer to finish the installation.
Attaching The Hose
Start by connecting the hose to the faucet base. Ensure the hose is aligned properly with the faucet connection. Use a wrench to tighten the connection securely. Avoid over-tightening to prevent damage. Check for any leaks after attaching the hose.
Securing The Sprayer
Place the sprayer head on the hose end. Push it firmly until it clicks into place. Ensure the sprayer is facing the correct direction. Test the sprayer by turning on the faucet. Make sure the water flows smoothly through the sprayer head.
Testing For Leaks
Check for water leaks after installing a new kitchen sink sprayer. Turn on the water and inspect connections. Tighten any loose fittings to prevent drips.
Testing for leaks is a crucial step in replacing a kitchen sink sprayer. Ensuring everything is watertight prevents future problems. This process involves careful observation and patience. You will confirm whether the installation was successful. Let’s explore how to test for leaks efficiently.Turning On The Water Supply
Begin by slowly turning on the water supply. This prevents sudden pressure surges. Listen for any unusual sounds. A hissing sound might indicate a loose connection. Keep an eye out for water drips around the connections. Even a small leak can cause major issues later.Checking Sprayer Functionality
Once the water supply is on, test the sprayer. Ensure it sprays water evenly. A weak spray might suggest a blockage. Check if the sprayer head retracts smoothly. Look for any water pooling around the sink base. This could mean a leak in the hose. Observe the sprayer for any unexpected behavior. Make sure it shuts off completely. This confirms that the valve is working properly.
Credit: www.youtube.com
Final Touches
The final touches in replacing your kitchen sink sprayer are crucial. These steps ensure everything works perfectly and looks great. Completing these tasks will make your kitchen shine and function smoothly.
Cleaning Up
After installing the new sprayer, tidy up the area. Remove any leftover tools and materials. Wipe down surfaces to remove dust or debris. Cleaning ensures your kitchen remains neat and organized. A clean space enhances the overall look of your new sprayer.
Ensuring Proper Operation
Test the sprayer to confirm it functions well. Turn on the water and check for leaks. Make sure the spray pattern is consistent. Adjust any loose connections. Proper operation guarantees a hassle-free experience with your new sprayer.
Frequently Asked Questions
Can You Replace Just The Sink Sprayer?
Yes, you can replace just the sink sprayer. Disconnect the old sprayer, attach the new one, and ensure it’s secure. Make sure to turn off the water supply before starting. It’s an easy and cost-effective way to update your kitchen or bathroom sink.
How To Replace Kitchen Sink Sprayer Head?
Turn off the water supply under the sink. Unscrew the sprayer head from the hose. Attach the new sprayer head by screwing it onto the hose. Ensure all connections are secure. Turn the water supply back on and check for leaks.
How To Replace A Sink Sprayer Diverter?
Turn off the water supply. Remove the faucet spout and locate the diverter. Unscrew and replace the faulty diverter. Reattach the spout, turn on the water, and test the sprayer. Make sure all connections are secure to prevent leaks.
How To Replace A Sprayer Nozzle?
Turn off the water supply. Unscrew the old nozzle using pliers. Attach the new nozzle by hand. Tighten with pliers. Turn on the water supply to test.
Conclusion
Replacing your kitchen sink sprayer is easy. Follow the steps given above. Gather your tools first. Check the connections for leaks. Test the new sprayer. Ensure everything fits tightly. A functioning sprayer improves your kitchen experience. It simplifies cleaning tasks.
Saves water too. Feel proud of your DIY skill. Share tips with friends. Help them replace their sprayer. Keep your kitchen running smoothly. Enjoy the convenience of a new sprayer. Happy renovating!