
Have you ever tried to snip through a piece of chicken or cut herbs and found your kitchen shears struggling to do the job? Dull shears can be frustrating and make meal prep a real chore.
But what if you could easily restore them to their former glory? Imagine effortlessly slicing through anything with ease and precision once again. In this guide, you’ll discover how to sharpen your kitchen shears quickly and effectively. Say goodbye to the frustration of blunt blades and hello to smoother, more enjoyable cooking experiences.
Keep reading to learn the simple steps to keep your kitchen shears sharp and ready for action. Your future self will thank you!

Credit: www.youtube.com
Importance Of Sharp Kitchen Shears
Sharp kitchen shears are more than just a convenience; they’re a necessity in every well-equipped kitchen. Whether you’re snipping herbs, trimming meat, or opening packaging, the efficiency and ease of sharp shears make all the difference. Dull shears can slow you down, frustrate your cooking process, and even pose safety risks. But why is it so crucial to keep them sharp?
Effortless Cutting For Precision
Imagine trying to cut through a thick piece of chicken with dull shears. It requires excessive force and can lead to uneven cuts or even slips. Sharp shears glide through effortlessly, providing precision in your kitchen tasks. This precision not only enhances presentation but also ensures uniform cooking.
Safety First
Dull shears require more pressure, increasing the risk of slipping and accidental cuts. Sharp blades, on the other hand, offer controlled cutting with minimal effort. This reduces the chance of accidents, keeping you and your fingers safe during meal prep.
Time And Energy Saver
Do you enjoy spending extra minutes hacking away at packaging or stubborn meat? Sharp shears cut down on time and effort, allowing you to focus on what matters—creating delicious meals. With sharp blades, you save energy and streamline your cooking process.
Improved Hygiene
When shears struggle to cut, food particles can get caught in the blades, leading to potential hygiene issues. Sharp shears make clean cuts that prevent food buildup and simplify cleaning. This means healthier, safer kitchen practices.
Keeping your kitchen shears sharp is a small but vital part of maintaining a functional and safe kitchen. How often do you check the sharpness of your shears? Ensuring they’re in top condition can transform your cooking experience and keep your kitchen running smoothly.
Credit: en.brilio.net
Signs Your Shears Need Sharpening
Dull kitchen shears struggle to cut cleanly and may require more force. They can leave jagged edges on food. Sharpening them restores their efficiency, making meal prep easier.
Sharpening kitchen shears might not be the most glamorous task, but it’s essential for maintaining their efficiency. But how do you know when it’s time to give those blades a little TLC? Recognizing the signs can save you time, effort, and even prevent kitchen mishaps. Let’s dive into the telltale signs that your kitchen shears are due for a sharpening session.Uneven Cuts
If your shears are no longer giving you a clean cut and the edges look jagged, it’s a clear indication they need sharpening. Uneven cuts can be frustrating, especially when precision is needed, like when trimming herbs or cutting parchment paper. Don’t let this minor inconvenience turn into a major headache during meal prep.Increased Effort
Do you find yourself applying more pressure than usual when using your shears? This increased effort can be a sign that the blades are dull and need attention. Over time, this can lead to hand fatigue, turning a simple task into a chore.Snagging Or Sticking
Notice any snagging or sticking as you cut? This can be especially problematic when dealing with delicate foods or materials. Snagging can damage the item you’re cutting and is a sign that the shears are not functioning at their best.Visible Nicks Or Bends
Inspect your shears for any visible nicks or bends on the blades. Even small imperfections can significantly impact their performance. Regularly checking for these can help you catch issues early and maintain the longevity of your tools.Loss Of Alignment
If the blades don’t meet evenly and you notice a gap when closed, sharpening might not be enough; they may need realignment. Misalignment can cause the shears to cut poorly and can be frustrating when you’re in the middle of a task. Consider whether your shears might benefit from professional attention in this case. Taking a moment to assess these signs can make a big difference in your kitchen efficiency. Have you experienced any of these issues with your kitchen shears lately? Address them promptly to keep your kitchen running smoothly.Tools For Sharpening Shears
Keeping your kitchen shears sharp is essential for efficient food preparation. But how do you choose the right tool for sharpening? Various options can get the job done, each with its unique benefits. Let’s explore some popular tools that can bring your shears back to life.
Sharpening Stone
A sharpening stone is a traditional tool, often found in many kitchens. It’s versatile and can sharpen multiple types of blades. You simply glide the shears along the stone at the correct angle. While it requires a bit of practice, the results can be outstanding. Have you ever tried using a stone and noticed your shears cutting like new?
Honing Rod
Honing rods are often associated with knives, but they can be effective for shears too. They help maintain the edge by realigning it. A few strokes on each blade might be all you need. If you’re already honing your knives, why not give your shears some love with the same tool?
Sharpening Scissors Tool
Specialized sharpening tools for scissors are available. These are user-friendly and designed specifically for shears. Simply insert the blades and pull them through the tool. It’s straightforward and efficient. Could this be the answer to your dull scissors woes?
Sandpaper Method
Sandpaper is an unconventional yet effective method. Fold a piece and use it to cut, mimicking regular use. The abrasive surface sharpens the blades with each cut. It’s a hands-on approach that’s surprisingly satisfying. Have you considered this simple trick for a quick fix?
Preparing Shears For Sharpening
Preparing your kitchen shears for sharpening is a crucial step to ensure their longevity and effectiveness. You might wonder why this preparation matters. Imagine trying to sharpen a blade covered in grime—it just won’t work. By taking the time to clean and disassemble your shears, you set the stage for a smooth sharpening process that will leave your tools cutting like new.
Cleaning The Blades
Start by giving your blades a thorough cleaning. Grab a soft cloth, warm water, and a bit of dish soap. Scrub away any residue or food particles stuck to the blades. This not only makes the sharpening easier but also prevents any dirt from dulling the edges prematurely.
It’s amazing how much difference a clean blade can make. You’ll notice that even before sharpening, your shears might start feeling more efficient. A clean blade is like a clean slate, ready to be honed to perfection.
Disassembling The Shears
Next, disassemble the shears to access the blades more effectively. This might seem daunting, but it’s a simple process. Locate the screw or bolt holding the blades together and gently unscrew it using a screwdriver. Keep all the parts in a safe place to avoid losing them.
With the blades separated, you can now focus on sharpening each piece individually. This ensures a more precise sharpening and avoids any accidental nicks or scratches. Have you ever tried sharpening a pair of scissors while they’re still assembled? It’s a challenge that’s easily sidestepped with this simple disassembly.
Step-by-step Sharpening Guide
Sharpen kitchen shears with ease using a whetstone or honing rod. Begin by cleaning the blades thoroughly. Hold the shears at a 30-degree angle and gently slide the blade across the sharpening tool. Repeat until the edges are smooth and sharp, ensuring even pressure on both sides.
Step-by-Step Sharpening Guide Keeping kitchen shears sharp enhances their performance. Dull blades struggle to cut smoothly. Regular sharpening ensures precision. This guide explains simple methods to sharpen kitchen shears. Follow the steps for effective results.Using A Sharpening Stone
A sharpening stone is versatile. It’s ideal for honing shears. Begin by disassembling the shears. This makes the process easier. Wet the stone slightly with water. Hold the blade at a 20-degree angle. Slide it across the stone in a smooth motion. Repeat this until the blade is sharp. Make sure to sharpen both blades equally.Employing A Honing Rod
A honing rod is perfect for regular maintenance. It’s less abrasive than stones. Hold the shears open. Position the blade against the rod. Glide the blade along the rod. Use a gentle, consistent motion. Repeat for the other blade. Check sharpness after several strokes. This method maintains edge without removing material.Trying The Sandpaper Technique
Sandpaper is a handy sharpening tool. Choose medium-grit sandpaper for best results. Place it on a flat surface. Open the shears wide. Swipe the blade over the sandpaper. Use long strokes from base to tip. Ensure even pressure throughout. Test sharpness after several passes. This technique is quick and effective.Testing Sharpness After Sharpening
Ensure your kitchen shears are sharp by testing them on paper. Cut smoothly through the sheet without tearing. This confirms the effectiveness of your sharpening efforts.
After the diligent process of sharpening your kitchen shears, the crucial step is testing the sharpness. It’s not just about achieving a razor-sharp edge; it’s about ensuring your shears are ready to perform effectively for all your culinary tasks. Whether you’re slicing through herbs or cutting poultry, sharp shears make a noticeable difference in your cooking experience.Using Paper Test
Take a piece of paper and try to cut it with your shears. A clean, effortless cut indicates that your shears are sharp. If the paper tears or requires extra pressure, you might need to revisit your sharpening technique.Vegetable Cutting Test
Grab a tomato or a bell pepper and slice through it. Sharp shears will glide through without squashing the vegetable. This test not only checks sharpness but also gives you a sneak peek into your next culinary endeavor.Fabric Cutting Test
Use an old piece of fabric to test your shears. A sharp pair will cut through smoothly, without snagging or requiring additional force. This test is excellent for ensuring precision and control.Personal Experience: The Herb Challenge
I once struggled with shears that wouldn’t cut basil leaves effectively, leaving me frustrated. After sharpening and testing them on herbs, the difference was remarkable. The fresh herbs were cut with ease, enhancing my cooking process and the dish itself. Remember, testing sharpness isn’t just a technical step; it’s about enhancing your overall cooking experience. What culinary tasks do you look forward to tackling with your newly sharpened shears?Maintenance Tips For Long-lasting Sharpness
Sharpen kitchen shears by using a sharpening stone or honing rod. Regular sharpening ensures smooth cutting and extends the life of your tools. Clean the blades after sharpening for optimal performance.
Maintaining the sharpness of your kitchen shears is essential for ensuring effortless and precise cutting in your culinary adventures. While sharpening them is critical, regular maintenance plays an equally important role in keeping them in top-notch condition. By embracing some simple yet effective maintenance tips, you can extend the life and sharpness of your kitchen shears significantly.Proper Cleaning Techniques
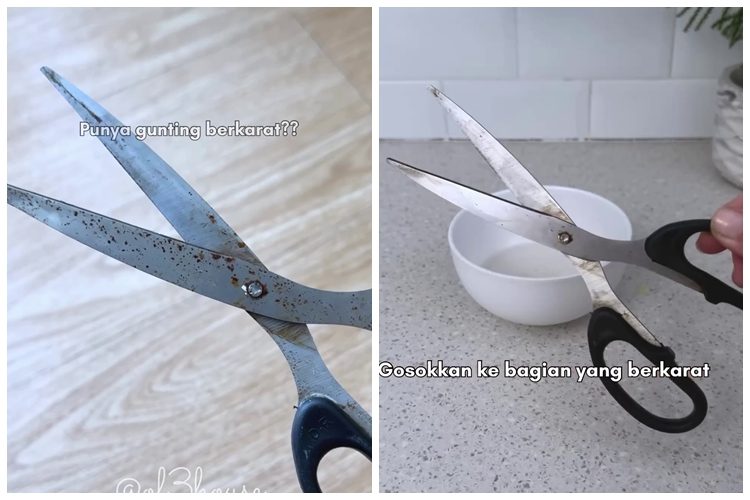
Regular cleaning is the cornerstone of maintaining your kitchen shears. After each use, wash them with warm soapy water and thoroughly dry them with a soft cloth. This prevents rust and ensures they remain sharp over time. Consider using a toothbrush to scrub off any residue from the blades, especially near the hinge where food particles can accumulate. Make it a habit to clean your shears immediately after use to avoid stubborn stains. A quick wipe with a bit of vinegar can also help to keep them sparkling and free of bacteria.Safe Storage Solutions
Storing your kitchen shears properly is just as important as cleaning them. Avoid tossing them into a drawer where they can get damaged or dull by clashing with other utensils. Instead, consider using a magnetic strip on the wall for easy access and to prevent unnecessary wear. If you prefer to keep them in a drawer, invest in a protective sheath or blade guard. This not only preserves the sharpness but also adds a layer of safety. Another option is to store them in a knife block, ensuring they have their own dedicated slot. Could your current storage method be dulling your shears? It’s worth considering if you find yourself reaching for the sharpener more often than you’d like. By focusing on these maintenance tips, you can ensure your kitchen shears remain sharp and efficient, making your cooking experience more enjoyable and hassle-free.
Credit: www.duroxtools.com
Common Mistakes And How To Avoid Them
Kitchen shears often become dull due to incorrect sharpening techniques. Use a whetstone to maintain sharp edges effectively. Avoid using electric sharpeners, as they can damage the shears’ blades.
Sharpening kitchen shears might seem straightforward, but it’s easy to make mistakes that could dull or damage your tool. Understanding these common pitfalls can save you time and frustration. By avoiding these errors, you’ll ensure your shears remain a reliable kitchen companion.Using The Wrong Sharpening Tool
Choosing the right tool is critical. Avoid using a knife sharpener on your shears as it may not fit the blade’s angle and can result in uneven sharpening. Instead, opt for a sharpening stone or a specialized scissor sharpener designed for the unique blade structure of shears.Neglecting To Clean The Shears First
Dirty blades can hinder sharpening efforts. Always clean your shears thoroughly to remove any food residue or rust before you start. This ensures the sharpening process is smooth and effective, allowing the blades to glide without obstruction.Not Maintaining The Correct Angle
Holding the blade at the wrong angle is a common issue. Each shear has a specific angle, typically between 20 to 25 degrees, which you need to maintain. Practice on an old pair first to develop a feel for the correct angle.Applying Too Much Pressure
It’s easy to think more pressure equals sharper blades, but this can lead to uneven edges. Use gentle, consistent strokes to maintain the blade’s integrity. Imagine you’re slicing through a soft piece of fruit; let the tool do the work.Overlooking The Importance Of Testing
After sharpening, don’t forget to test the shears. Cut through a piece of paper or fabric to check for smoothness and efficiency. If they snag or tear, revisit your sharpening technique for areas needing improvement.Skipping Regular Maintenance
Sharpening isn’t a one-time task. Regular maintenance can prevent dullness and extend the life of your shears. Create a routine to periodically check and sharpen your tools, keeping them in peak condition for all your culinary adventures.Ignoring The Importance Of Lubrication
Lubrication can be easily overlooked but is crucial for smooth operation. After sharpening, apply a drop of oil to the pivot point to ensure seamless movement. This simple step can reduce wear and tear, keeping your shears functioning optimally. Have you made any of these mistakes before? Reflect on your past sharpening sessions and consider these points to enhance your next attempt.Frequently Asked Questions
How Often Should You Sharpen Kitchen Shears?
Sharpening kitchen shears depends on usage. Regular use demands sharpening every few months. For occasional use, once or twice a year is sufficient. Ensure they maintain efficiency and precision. Proper care extends their lifespan and performance.
Can I Sharpen Kitchen Shears At Home?
Yes, you can sharpen kitchen shears at home using a sharpening stone or tool. Follow manufacturer instructions for best results. DIY sharpening saves time and cost. Ensure tools are clean and dry before sharpening.
What Tools Are Needed To Sharpen Kitchen Shears?
To sharpen kitchen shears, use a sharpening stone, diamond sharpener, or a specialized tool. These tools ensure precision and efficiency. Choose one based on your comfort and availability. Proper tools enhance sharpening results.
Are There Easy Methods To Sharpen Shears?
Yes, simple methods include using aluminum foil or sandpaper. Fold foil and cut several times. For sandpaper, cut through it gently. These methods temporarily improve sharpness. Regular professional sharpening ensures long-term efficiency.
Conclusion
Sharpening kitchen shears is simple with the right steps. Clean them first. Use a sharpening stone or file. Move the blade evenly across the stone. Test the sharpness with paper. Repeat if needed. Regular sharpening keeps shears effective. Don’t wait for dullness.
Maintain them often. It’s quick and saves money. Sharp shears make cooking easier. They cut herbs, meat, and packaging with ease. A little care goes a long way. Enjoy using sharp, efficient shears. Keep them ready for any kitchen task.
Your cooking experience improves with sharp tools.