How to Replace Kitchen Counter Laminate: DIY Guide
Thinking about giving your kitchen a fresh, new look without breaking the bank? Replacing your kitchen counter laminate might just be the perfect solution.
Imagine the satisfaction of transforming your cooking space into a stylish haven, all with a simple update. You don’t need to be a DIY expert to make this change; with a little guidance, you can do it yourself! In this post, we’ll walk you through the straightforward steps to replace your kitchen counter laminate.
We’ll cover everything you need to know, from gathering materials to the final touches. Get ready to discover how easy it can be to breathe new life into your kitchen, and keep reading to unlock the secrets of a beautiful, budget-friendly transformation.
Preparing For The Project
Gather necessary tools and materials before beginning. Ensure accurate measurements for a perfect fit. Clear the workspace for easy access and safety.
Replacing kitchen counter laminate can transform your cooking space, giving it a fresh and modern look. Before diving into the project, preparation is key to ensuring a smooth and successful process. Planning not only saves time but also prevents costly mistakes. Let’s dive into the essential steps that will pave the way for your kitchen makeover.Gathering Tools And Materials
To kickstart your laminate replacement, gather all necessary tools and materials. You’ll need:- Utility knife
- Measuring tape
- Sandpaper
- Adhesive
- Clamps
- Safety goggles
Measuring The Countertop
Accurate measurements are the foundation of a flawless laminate installation. Use a measuring tape to determine the length, width, and any unique angles of your countertop. Double-check your measurements. This ensures the new laminate fits perfectly and reduces waste. Have you ever had to redo a task because of a small oversight? This step is your chance to avoid that frustration.Choosing The Right Laminate
Selecting the ideal laminate involves balancing aesthetics and functionality. Consider color, texture, and durability. Do you prefer a glossy finish or a matte look? Visit showrooms or browse online galleries to see options in real-life settings. Remember, the right choice can elevate your kitchen’s style without compromising practicality. What’s more important to you: a bold statement or a subtle elegance?Removing The Old Laminate
Removing the old laminate carefully prevents damage to the countertop base. Use a putty knife to lift the edges. Gently peel it away, ensuring a clean surface for the new laminate.
Removing the old laminate from your kitchen counter is a crucial step in giving your kitchen a fresh, new look. This process can be both exciting and daunting, but with the right approach, you’ll find it’s manageable and even rewarding. The old laminate has served its purpose, and now it’s time for a change. Before you get started, let’s dive into the essential steps involved in safely and effectively removing it.Safety Precautions
Before you begin, ensure your safety comes first. Wear protective goggles and gloves to shield yourself from any sharp tools or debris. Make sure the area is well-ventilated to avoid inhaling any dust or fumes. Have a first-aid kit nearby in case of minor cuts or scratches. Taking these precautions will help you focus on the task without unnecessary worries.Detaching Fixtures
Start by removing any fixtures attached to the counter, such as sinks or faucets. Turn off the water supply before you proceed. Use a wrench or screwdriver to gently detach them. Store the fixtures safely to avoid damage and label them for easy reinstallation later.Stripping The Laminate
Once the fixtures are removed, it’s time to strip the laminate. Use a heat gun to gently warm the edges, which will loosen the adhesive. Carefully peel off the laminate using a putty knife or scraper. Work slowly to prevent damaging the underlying surface. If the laminate resists, applying more heat can help. Removing the old laminate is a step towards a kitchen transformation. As you peel away the old, think about the new possibilities that await. Are you ready to make your kitchen the heart of your home once again?Prepping The Surface
Preparing the surface is crucial for a smooth installation. Begin by removing old laminate and cleaning the area thoroughly. Sand any rough spots to ensure a flat base for the new countertop.
Replacing kitchen counter laminate requires careful preparation. The surface must be clean and smooth for a successful installation. Let’s explore how to prep the surface effectively.Cleaning The Base
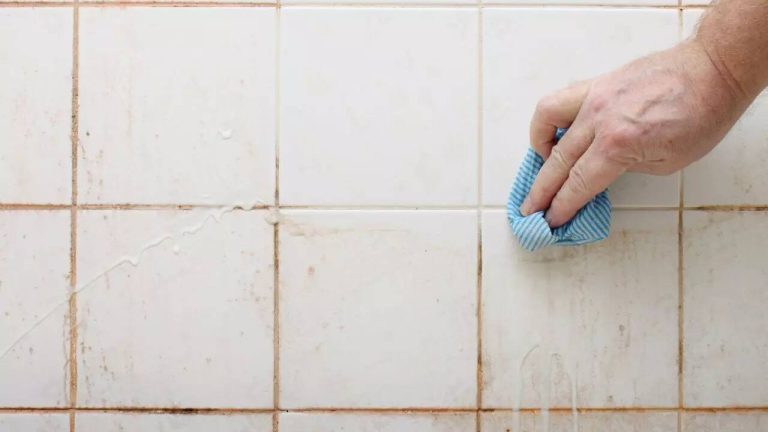
Start with removing all items from the counter. Use a mild detergent and warm water to clean the surface. Remove grease, stains, and any residue. A clean base ensures new laminate adheres well.Repairing Damage
Inspect the counter for any damage. Fill cracks or holes with wood filler. Let it dry completely before proceeding. A smooth surface is essential for a flawless finish.Sanding For Adhesion
Sand the counter lightly to improve adhesion. Use fine-grit sandpaper for this task. Sanding removes gloss and creates a rough texture. This helps the new laminate to stick properly. Proper preparation leads to a beautiful kitchen counter transformation. Follow these steps for the best results.
Credit: www.manmadediy.com
Cutting And Fitting New Laminate
Cutting and fitting new laminate requires careful measurement and precision. Start by removing the old laminate, then measure the counter dimensions accurately. Cut the new laminate to fit, ensuring clean edges and seamless alignment for a polished finish.
Replacing your kitchen counter laminate can breathe new life into your cooking space. However, cutting and fitting the new laminate is a crucial step that can make or break the final outcome. You’ll need precision, patience, and a few handy tips to ensure your laminate fits perfectly and looks stunning. Dive into this transformative process with confidence and make your kitchen countertop a masterpiece.Measuring Accurately
Accurate measurements are your best friend when replacing laminate. Grab a reliable tape measure and jot down dimensions meticulously. Double-check every measurement. A small error can lead to misaligned pieces, impacting the overall aesthetic. Consider accounting for any irregularities or unique shapes in your countertop. Will your current measurements accommodate them seamlessly?Using A Laminate Cutter
A laminate cutter is essential for clean and precise cuts. Invest in a high-quality tool to make the task easier. Ensure the cutter’s blade is sharp. A dull blade can lead to jagged edges, ruining the finish. Practice your technique on a scrap piece first. It’s a simple way to gain confidence before tackling the real deal.Dry Fitting The Pieces
Before committing to adhesive, dry fit the laminate pieces. This helps you visualize the layout and spot any potential issues. Check for gaps or overlaps that might require adjustments. It’s easier to fix them now than after installation. Does everything look aligned? A perfect fit sets the stage for a flawless finish once glued down.Adhering The Laminate
Adhering the laminate is a crucial step in updating your kitchen counter. Proper adhesion ensures the laminate lasts long and remains aesthetically pleasing. This process involves applying contact cement, positioning the laminate, and using a roller for bonding. Each step requires careful attention to detail for a flawless finish.
Applying Contact Cement
Contact cement is essential for bonding laminate to the counter surface. Start by cleaning the surface thoroughly. Dust or grease can affect adhesion. Apply contact cement evenly on both the counter and the laminate sheet. Use a brush or roller for uniform application. Let the cement dry until it feels tacky to the touch.
Positioning The Laminate
Positioning the laminate requires precision. Carefully align the laminate with the counter edges. Avoid touching the tacky surface. Use dowels or spacers to keep the laminate elevated while aligning. Once aligned, remove the spacers slowly. Press the laminate onto the counter, starting from one end.
Using A Roller For Bonding
A roller ensures strong bonding between the laminate and counter. Start rolling from the center, moving outwards. Apply firm pressure with the roller. This action removes air bubbles and strengthens the bond. Check all edges to ensure they are firmly attached. Repeat rolling if needed for a perfect finish.
Trimming And Finishing
Smooth edges and a polished look matter when replacing kitchen counter laminate. Trim excess material carefully, ensuring neat edges. Use finishing techniques to seal and secure for a professional appearance.
Replacing kitchen counter laminate involves precise trimming and finishing. This ensures a professional and polished look. Cutting excess material and smoothing edges are crucial steps. Proper installation of fixtures completes the process. Attention to detail is key for a seamless finish.Trimming Excess Laminate
Cut the laminate slightly larger than the countertop. Use a utility knife or laminate trimmer for this task. Carefully trim the excess material along the edges. Keep the blade steady to avoid mistakes. Use a straight edge for guidance. This helps achieve a clean cut.Smoothing Edges
Smoothing edges creates a refined appearance. Use a fine-grit sandpaper for this process. Gently sand the trimmed edges. This removes any sharp or rough spots. Ensure the laminate is flush with the countertop. Test the smoothness with your fingers. The surface should feel even.Installing Fixtures
Reattach fixtures like sinks and faucets. Check all fittings for proper alignment. Use a sealant to prevent water leaks. Ensure fixtures are secure and stable. Test each fixture for functionality. Adjust if necessary for a perfect fit.Maintaining Your New Countertop
Replacing kitchen counter laminate involves careful preparation and installation. Begin by removing the old laminate, ensuring the surface is clean and smooth. Apply adhesive evenly, then position the new laminate precisely, pressing firmly to secure it. Trim edges for a neat finish, and inspect for bubbles, smoothing them out for a flawless appearance.
Maintaining your new kitchen countertop is essential for its longevity. Proper care ensures it remains beautiful and functional for years. Here are some useful tips to help you keep your laminate countertop in great condition.Cleaning Tips
Regular cleaning prevents stains and keeps the surface shiny. Use a mild dish soap and warm water for daily cleaning. Avoid harsh chemicals that can damage the laminate. A soft cloth or sponge is ideal for wiping the surface. Dry the countertop after cleaning to prevent water spots.Avoiding Damage
Prevent scratches and dents by using cutting boards. Avoid placing hot pots directly on the laminate. Use trivets or heat-resistant mats to protect the surface from heat. Don’t drag heavy objects across the countertop; lift and place them gently.Long-term Care
Routine checks can help spot issues early. Inspect the edges and seams for any signs of wear. Address minor damages promptly to avoid costly repairs. Consider applying a laminate polish periodically to maintain its shine. Regular maintenance will keep your countertop looking fresh and new.
Credit: www.familyhandyman.com

Credit: www.familyhandyman.com
Frequently Asked Questions
Is It Easy To Replace Laminate Countertops?
Replacing laminate countertops is straightforward with basic tools. Remove old countertops, measure, cut, and install new ones. Ensure precise measurements for a perfect fit. Consider hiring a professional for flawless results. The process is manageable for DIY enthusiasts, enhancing kitchen aesthetics efficiently.
Proper preparation simplifies installation, saving time and effort.
Can You Replace Laminate Countertops Without Replacing Cabinets?
Yes, you can replace laminate countertops without replacing cabinets. Ensure proper measurements and support for the new countertops. Hiring a professional can ensure precise installation and avoid potential damage.
Can You Put A New Laminate Countertop Over Old Laminate?
Yes, you can install new laminate countertops over old ones. Ensure the old surface is clean and smooth. Sand any glossy finishes for better adhesion. Proper preparation ensures a durable and attractive result.
How Do You Redo Laminate Countertops Without Replacing Them?
To redo laminate countertops, clean and sand them thoroughly. Apply a primer, then paint using countertop-specific paint. Seal with a clear polyurethane topcoat for durability. Consider using contact paper or countertop refinishing kits for an alternative, budget-friendly option. These methods refresh the look without replacing the countertops.
Conclusion
Replacing kitchen counter laminate is easier than you think. Follow simple steps to transform your space. Gather tools and materials first. Measure the counter accurately. Cut laminate with care. Use adhesive for a secure fit. Trim edges neatly. Finish with protective sealant.
Enjoy your refreshed kitchen look. Boost home value with updated counters. Save money by doing it yourself. Impress guests with your handiwork. Share your success story with friends. Dive into DIY projects confidently. Your kitchen awaits its new look. Get started today.