How to Put Kitchen Sink: Step-by-Step Installation Guide
Are you thinking about upgrading your kitchen? Installing a new kitchen sink can be a game-changer.
It’s one of those projects that might seem intimidating at first, but with the right guidance, you can do it yourself. Imagine the satisfaction of turning on your new faucet, knowing that you made it happen. In this guide, we’ll break down the steps on how to put in a kitchen sink, making it simple and straightforward.
You’ll discover tips and tricks that save time and avoid common pitfalls. Ready to enhance your kitchen with a fresh, functional sink? Let’s get started and make your kitchen the heart of your home.
Preparation And Planning
Proper planning ensures a smooth kitchen sink installation. Measure the space accurately and gather necessary tools. Prepare the area by cleaning and removing old fixtures.
Installing a kitchen sink requires careful preparation and planning. This ensures a smooth installation process. Before you start, think about the sink’s design. Consider the size and type that suits your needs. Also, gather all the necessary tools and materials. Accurate measurements are crucial for a perfect fit. Take your time during this stage. It prevents costly mistakes later on. Here’s how to prepare and plan effectively.Choosing The Right Sink
Selecting the right sink is crucial. It affects functionality and style. Consider the space available in your kitchen. Think about the sink’s depth, width, and material. Stainless steel is durable and easy to clean. Porcelain offers a classic look. Choose a style that complements your kitchen’s design. Undermount sinks create a seamless look. Top-mount sinks are easier to install. Each type has its pros and cons.Gathering Necessary Tools And Materials
Before you begin, gather all tools. This saves time and effort. You’ll need a wrench, a screwdriver, and a jigsaw. Have plumber’s putty and a measuring tape on hand. Sealant and silicone caulk are also essential. Make sure to have a bucket and towels ready. These help manage any water spills. Having everything nearby keeps you focused.Measuring And Marking The Countertop
Accurate measurements ensure a perfect fit. Use a measuring tape to measure the sink’s dimensions. Mark these on the countertop with a pencil. Double-check all measurements. This prevents cutting errors. Ensure the sink is centered and aligned. Mark the cutout area carefully. Take your time during this step. It sets the stage for the rest of the installation.
Credit: torva.com
Removing The Old Sink
Removing the old sink involves disconnecting water supply lines and the drainpipe. Carefully unscrew mounting clips and lift the sink out. This paves the way for installing a new kitchen sink with ease.
Removing the old sink can seem challenging. But with the right steps, it becomes manageable. Start by ensuring safety and preparing your workspace. This process involves turning off the water supply, disconnecting plumbing, and detaching the sink from the countertop. Follow each step carefully to avoid any mishaps.Turning Off Water Supply
Begin by shutting off the water. Locate the shutoff valves under the sink. Turn them clockwise to stop the water flow. This prevents leaks while you work.Disconnecting Plumbing
Next, disconnect the plumbing. Use a wrench to loosen the nuts on the pipes. Carefully remove the pipes connected to the sink. Keep a bucket handy to catch any water.Detaching The Sink From The Countertop
Finally, detach the sink from the countertop. Look for clips or brackets holding the sink. Use a screwdriver to remove them. Once loose, lift the sink out gently. Ensure no damage to the countertop during removal.Installing The New Sink
Begin by turning off the water supply to prevent leaks. Remove the old sink carefully, and ensure all connections are detached. Place the new sink into the countertop hole, and secure it with clips. Reattach the plumbing and seal the edges with silicone for a watertight fit.
Installing the New Sink Upgrading your kitchen by installing a new sink can bring a fresh, clean look and improved functionality to your home. Whether you’re a seasoned DIY enthusiast or tackling this for the first time, installing a sink is a rewarding endeavor. The key to success lies in careful preparation and attention to detail. Let’s dive into the essential steps to ensure your new kitchen sink is securely in place and ready for action.Applying Sealant To The Edges
Applying sealant is a critical step that prevents water from seeping into unwanted areas. Begin by selecting a high-quality, waterproof sealant designed for kitchen use. After cleaning the countertop surface, apply the sealant generously around the edges of the sink cutout. Remember, the sealant acts as a barrier, so ensure there are no gaps. A smooth, continuous line will offer the best protection. Using a caulking gun can help you achieve a neat and even application. Don’t rush—take your time to ensure the sealant is properly applied. Have you ever noticed how a small oversight can lead to bigger issues? Paying attention here saves trouble later.Positioning And Securing The Sink
Positioning the sink correctly is crucial for functionality and aesthetics. Carefully lower the sink into the cutout, ensuring it sits evenly and aligns perfectly with the countertop. Check if your sink requires additional securing measures like mounting clips or brackets. These components are vital for keeping the sink stable over time. It’s helpful to have a second pair of hands during this process. A friend or family member can assist with maintaining alignment while you secure the sink in place. Have you ever thought about how teamwork can make tasks easier and more enjoyable?Reconnecting The Plumbing
Reconnecting the plumbing is the final step to get your sink operational. Start by attaching the faucet and drain pipes according to your sink model’s specifications. Ensure all connections are tight to prevent leaks. You might want to use plumber’s tape on threaded areas to enhance the seal. Test the connections by running water through the sink. Check for leaks and make adjustments if necessary. Isn’t it satisfying when everything works perfectly after your hard work? With the sink installed, you can enjoy the enhanced look and functionality of your kitchen. Remember, the effort you put into this project pays off in both style and utility.
Credit: www.kingstonbrass.com
Testing And Final Adjustments
Ensuring a perfect fit is crucial during the testing and final adjustments of your kitchen sink installation. Align the sink properly, check all connections, and tighten any loose fittings to prevent leaks. Confirm everything is sealed and secure for lasting functionality.
Installing a kitchen sink can be a rewarding DIY project. Yet, after fitting it into place, you must ensure everything functions perfectly. This is where testing and final adjustments come into play. By taking the time to check for leaks, align the sink properly, and ensure efficient drainage, you can prevent future headaches and enjoy a seamless kitchen experience.Checking For Leaks
Water leaks can be sneaky and might go unnoticed until they cause damage. After installing your sink, run water through all the taps. Check under the sink for any sign of water dripping or pooling. Use a flashlight to inspect hard-to-see areas. If you spot a leak, tighten the connections or replace worn-out washers. Don’t leave leaks unchecked; they can lead to mold and costly repairs.Adjusting Sink Alignment
An uneven sink can be a nuisance, affecting the way water drains and how your countertops look. Use a spirit level to check the sink’s alignment. If adjustments are needed, gently shift the sink until it sits level. Ensure the mounting clips are secure to prevent future misalignment. A well-aligned sink adds to the aesthetic and functionality of your kitchen.Ensuring Proper Drainage
Proper drainage is essential to avoid water stagnation and unpleasant odors. Fill the sink with water and remove the stopper to see how quickly it drains. If the water drains slowly, check for clogs or misaligned pipes. Adjust the pipes or clean out any obstructions to restore full drainage. Remember, efficient drainage is key to maintaining a clean and odor-free kitchen. Taking these extra steps might seem tedious now, but they are crucial for a hassle-free kitchen. Have you encountered issues during a kitchen project that a simple adjustment could have prevented? Share your story below!Cleanup And Maintenance Tips
Keep your kitchen sink sparkling clean by wiping it daily with soap and water. Remove stains with a mixture of vinegar and baking soda. Regularly check for leaks and unclog drains using a plunger or natural cleaners like lemon and salt.
Installing a new kitchen sink is exciting, but ensuring it remains in top condition requires a little effort on your part. Regular cleanup and maintenance not only extend the life of your sink but also keep your kitchen looking pristine. Let’s dive into some essential cleanup and maintenance tips that will help you keep your newly installed sink in excellent shape.Cleaning The Installation Area
Before you even fit the sink into its new home, make sure the installation area is spotless. Dust and debris can cause issues with sealing and can lead to leakage. Wipe down the countertop and surrounding areas using a gentle cleaner. Avoid harsh chemicals that might damage surfaces. A clean area ensures a snug fit and prevents future maintenance headaches. Have you ever noticed how a little prep work can save you from major repairs later on?Maintaining Your New Sink
Once your sink is installed, maintenance becomes key to its longevity. Regularly clean your sink with mild soap and water to prevent staining and buildup. Avoid using abrasive materials that might scratch the surface. Opt for a soft sponge or cloth. Consider adding a sink grid or mat to protect the base from heavy pots and pans. Remember, prevention is better than cure, especially when it comes to maintaining a spotless kitchen sink. Routine checks for leaks under the sink can also save you from costly water damage. When was the last time you checked the pipes under your sink? A quick inspection every few months can save a lot of trouble.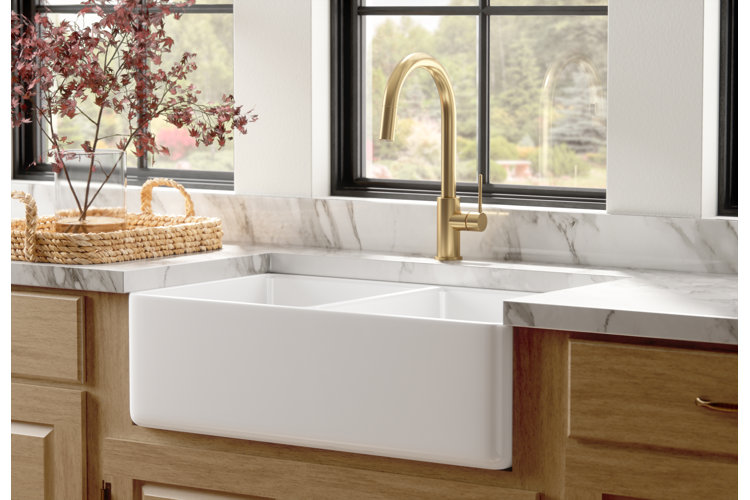
Credit: www.wayfair.ca
Frequently Asked Questions
Can I Install A Kitchen Sink Myself?
Yes, you can install a kitchen sink yourself. Basic plumbing knowledge and tools are needed. Follow manufacturer instructions carefully. Ensure all connections are secure to avoid leaks. If uncertain, consult a professional plumber for assistance.
How Is A Kitchen Sink Held In Place?
A kitchen sink is secured using clips, brackets, or mounting hardware. Sealant or caulk prevents water leaks. The sink rests on the countertop cutout. Proper installation ensures stability and prevents movement. Always follow manufacturer instructions for best results.
How Do You Install A Sink Step By Step?
Turn off the water supply. Remove the old sink. Position the new sink in the countertop cutout. Secure it with mounting clips. Connect the faucet and drain. Reconnect the water supply lines. Check for leaks and ensure everything is tight.
Do I Need A Plumber To Hook Up A Sink?
Yes, hiring a plumber is recommended for sink installation. They ensure proper connections, prevent leaks, and follow plumbing codes. This ensures your sink functions efficiently and safely. A professional plumber can also address any unexpected issues that may arise during installation, saving you time and potential repair costs.
Conclusion
Installing a kitchen sink is simpler than it seems. Start with clear planning and gather your tools. Follow each step carefully for a smooth process. Double-check connections to avoid leaks. Tighten fixtures securely. Ensure proper alignment and support. Don’t rush.
Take your time to understand each part. Consult a professional if unsure. A properly installed sink boosts kitchen functionality. You’ve got this! With patience and focus, your kitchen sink will work perfectly. Enjoy your new setup and the satisfaction of doing it yourself.
Happy installing!