How to Build Kitchen Cabinet: Step-by-Step Guide
Imagine walking into your kitchen and being greeted by cabinets that perfectly match your style and needs. Building your own kitchen cabinets might sound daunting, but it’s more achievable than you think.
You don’t need to be a master carpenter or have a workshop filled with tools. All it takes is a bit of guidance, patience, and a touch of creativity. In this guide, you’ll discover the step-by-step process to create stunning kitchen cabinets that not only enhance the aesthetics of your space but also provide practical storage solutions.
From selecting the right materials to assembling and finishing, every step will be broken down into simple, manageable tasks. Are you ready to transform your kitchen with custom cabinets that you built with your own hands? Let’s dive in and unlock the secrets to crafting the perfect kitchen cabinet that will impress everyone who steps into your home.
Planning Your Cabinet Design
Designing kitchen cabinets involves careful planning of layout and style. Consider the space available and storage needs. Choose materials that match your kitchen theme for a cohesive look.
Planning your cabinet design is a crucial first step in building kitchen cabinets that perfectly fit your space and style. It’s more than just picking out colors and materials; it’s about creating a functional and beautiful space that meets your needs. This stage involves careful consideration and creativity, allowing you to tailor your kitchen to reflect your personality and lifestyle.Assessing Your Space
Before you dive into selecting materials or styles, take a close look at your kitchen layout. Measure every inch, considering windows, doors, and appliances that could affect cabinet placement. Sketch out a plan, marking where you want each cabinet to go. Think about how you use your kitchen. Do you need more storage for pots and pans, or are you looking for a streamlined space with minimal clutter? Your lifestyle will guide your design choices.Choosing Materials
The material you choose for your cabinets can dramatically affect both their durability and appearance. Solid wood offers a classic look and robust longevity, but can be costly. Plywood is a more affordable option and is quite sturdy. Consider the climate in your area. If you live in a humid region, materials resistant to moisture like laminate might be more appropriate. Don’t forget to think about maintenance; some surfaces are easier to clean and maintain than others.Deciding On Style And Finish
Cabinet style and finish define the overall aesthetic of your kitchen. Are you drawn to modern, sleek lines or do you prefer a rustic, cozy feel? The style you choose should harmonize with your kitchen’s existing elements. Finishes range from matte to glossy, each offering a unique feel. A matte finish can provide a subtle, understated look, while glossy finishes add brightness and energy. Test different samples to see which complements your lighting and color scheme. As you plan, imagine how each choice will affect your daily life in the kitchen. Will that glossy finish be easy to clean after cooking a big meal? Is the style you’re considering going to feel outdated in a few years? These questions help refine your vision and ensure your cabinets are both beautiful and practical.Gathering Necessary Tools And Materials
Gather essential tools like a saw, drill, and screwdriver for building kitchen cabinets. Ensure you have materials such as wood panels, hinges, and handles ready. A well-organized workspace helps streamline the assembly process efficiently.
Gathering the necessary tools and materials is a crucial step in building kitchen cabinets. This preparation phase sets the stage for a smooth and efficient assembly process. Properly equipping yourself with the right gear can save you time, reduce stress, and ensure your project turns out just as you envisioned. Let’s dive into what you’ll need to get started.Essential Tools List
Having the right tools is the foundation of any successful DIY project. Here’s a list of essentials you’ll want to have on hand:- Drill and Drill Bits:Useful for creating holes and driving screws.
- Screwdriver Set:Essential for tightening screws in hard-to-reach places.
- Measuring Tape:Ensures precise measurements, which are critical for cabinet fitting.
- Level:Keeps your cabinets perfectly aligned and straight.
- Clamps:Helps hold pieces together securely while you work.
- Hammer:Useful for assembling frames or when additional force is required.
- Saw (Circular or Table):Needed for cutting wood to size.
Material Checklist
Choosing the right materials is just as important as using the right tools. Here’s a checklist to guide your selection:- Plywood or MDF:Common choices for cabinet frames due to durability and affordability.
- Hinges and Handles:Essential for functionality and style.
- Screws and Nails:Ensure you have various sizes for different applications.
- Wood Glue:Provides additional strength to joints.
- Sandpaper:Helps smooth the surfaces before finishing.
- Paint or Finish:Protects the wood and adds a personal touch to your cabinets.
Safety Equipment
Never underestimate the importance of safety. Protecting yourself should always be a top priority:- Safety Glasses:Shield your eyes from debris and dust.
- Gloves:Protect your hands from splinters and sharp edges.
- Dust Mask:Prevents inhalation of dust, especially when sanding or sawing.
- Ear Protection:Reduces noise exposure from loud tools.
Measuring And Cutting Components
Building kitchen cabinets can be a rewarding DIY project, allowing you to customize your space to fit your specific needs. The foundation of this endeavor lies in measuring and cutting components accurately. These steps are crucial to ensure your cabinets fit perfectly and function seamlessly in your kitchen. Here’s how to tackle the essential stages of this process.
Taking Accurate Measurements
Start by assessing the space where your cabinets will be installed. Use a reliable measuring tape to take precise measurements of the width, height, and depth of the area. Consider any existing fixtures like plumbing or electrical outlets that may affect your cabinet dimensions.
Record each measurement meticulously. A small error can lead to a big problem later on. Double-check your figures to ensure accuracy. If you have a smartphone or tablet, using a measurement app can help track and verify your data.
Cutting Wood Panels
With your measurements in hand, it’s time to cut the wood panels. Choose a high-quality plywood or MDF for durability. Ensure your saw blades are sharp for clean cuts and a professional finish. If you’re new to woodworking, practice on a scrap piece first to gain confidence.
Use a straight edge or guide to assist in making precise cuts. Consider wearing safety goggles and gloves to protect yourself during the cutting process. A small table saw or circular saw can provide the control needed for detailed work.
Preparing Doors And Shelves
Doors and shelves require special attention as they contribute to both the functionality and aesthetics of your cabinets. Decide on the style and design you prefer, such as shaker-style or flat-panel doors. Cut the pieces according to your design specs, ensuring uniformity for a polished look.
For shelves, think about the weight they will hold. Opt for sturdy materials and consider adding extra support if necessary. Adjustable shelf pins can offer flexibility for future changes in shelf placement.
As you prepare these components, ask yourself: Do they match the overall look and feel of your kitchen? Your cabinets should not only be functional but also enhance the visual appeal of your space.
Assembling The Cabinet Frame
Assembling the cabinet frame involves aligning the panels accurately and securing them with screws. Ensure stability by using corner clamps for precise positioning. Double-check measurements to ensure a perfect fit and finish.
Assembling the cabinet frame is the foundational step in building kitchen cabinets. It’s where your vision starts to take shape. This process requires precision and a bit of patience. Let’s dive into the steps for constructing a durable and stable cabinet frame.Constructing The Base
Start by laying a strong foundation. The base is crucial for supporting the entire cabinet structure. Use plywood or MDF for a sturdy base, ensuring it’s level and square. Measure the space where the cabinet will sit. Cut the base material to fit these dimensions perfectly. A misaligned base can lead to wobbly cabinets, which you definitely want to avoid. Secure the base using wood glue and screws. This combination provides both strength and stability. As you work, keep a carpenter’s square handy to maintain right angles.Attaching Side Panels
Next, you will attach the side panels. These panels are like the walls of your cabinet. Opt for high-quality, moisture-resistant wood. Align the panels with the base and mark where the screws will go. Pre-drill holes to prevent the wood from splitting. This small step can save you from potential headaches later. Attach the panels using screws, ensuring they are flush with the base. Double-check that the panels are perpendicular to the base for a polished look.Installing The Back Panel
The back panel adds rigidity and keeps your cabinet frame stable. Choose a material that matches the quality of the side panels. Measure and cut the back panel to fit snugly between the side panels. An ill-fitting back panel can compromise the cabinet’s integrity. Secure it with screws, ensuring it’s flush with the edges of the side panels. This creates a seamless appearance and enhances the overall strength of the cabinet. Building a cabinet frame may seem like a daunting task, but with careful attention to detail, you can create a sturdy foundation for your kitchen cabinets. Have you ever tried assembling a cabinet frame before? What tips worked for you?Installing Shelves And Dividers
Installing shelves and dividers in a kitchen cabinet maximizes storage and organization. Ensure accurate measurements for a perfect fit. Use sturdy materials to support the weight of items.
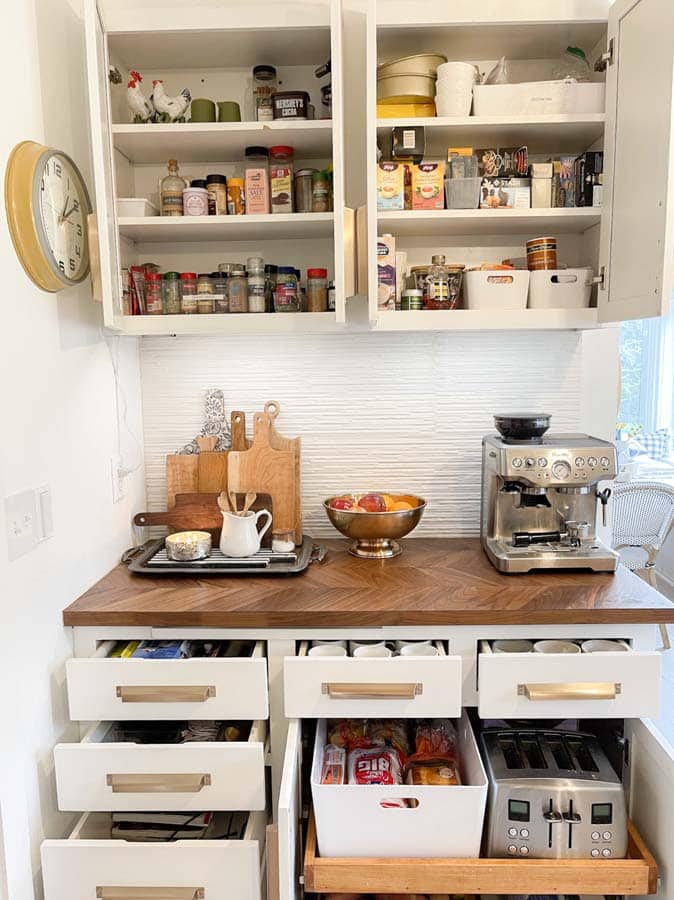
Installing shelves and dividers in your kitchen cabinets can transform your storage space into a more organized and functional area. By carefully considering the placement and securing of these elements, you’ll ensure everything from pots and pans to spices and canned goods have a designated spot. Let’s dive into the practical steps to make your kitchen cabinets more efficient and tailored to your needs.Positioning Shelves
First, determine the optimal height for each shelf based on what you plan to store. Do you have tall cereal boxes or short spice jars? Consider adjustable shelving brackets, which allow you to change the height as your storage needs evolve. Use a level to ensure each shelf is straight. Uneven shelves can cause items to slide or fall.Securing Dividers
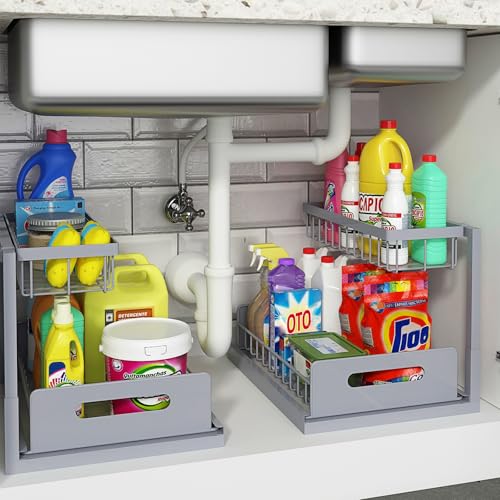
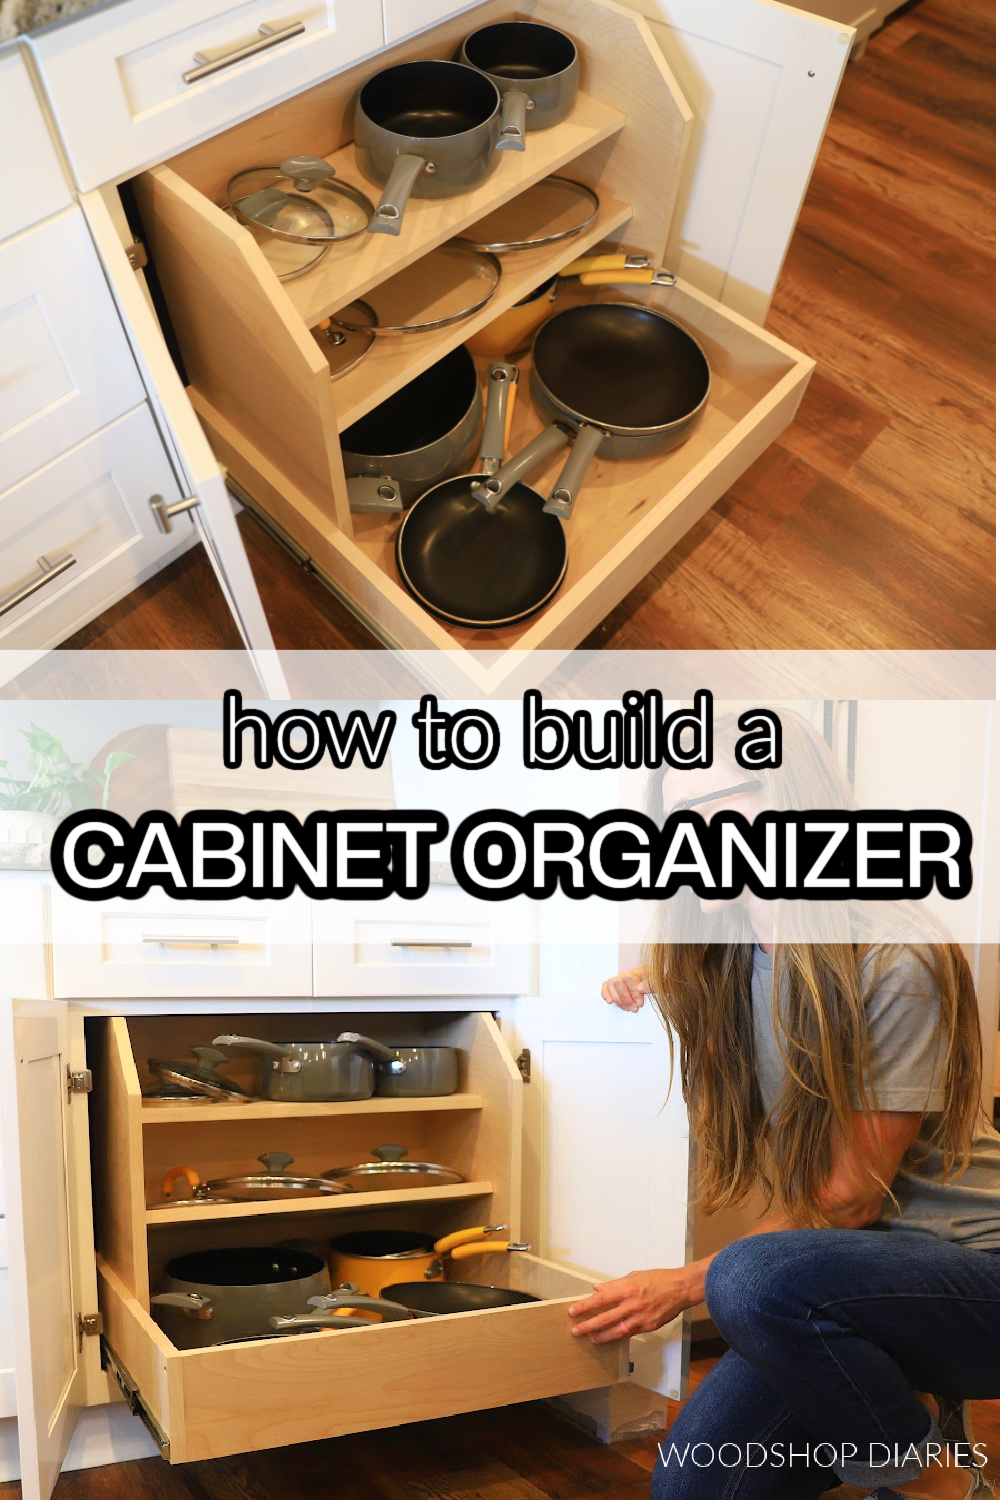
Dividers are perfect for keeping pans, lids, and baking sheets in place. Measure the space to determine the number and size of dividers needed. Use secure fasteners or clips to hold them in place. This ensures they won’t shift when you slide items in and out. Think about the materials too. Would you prefer sleek metal, sturdy wood, or easy-to-clean plastic dividers?Adjusting For Custom Needs
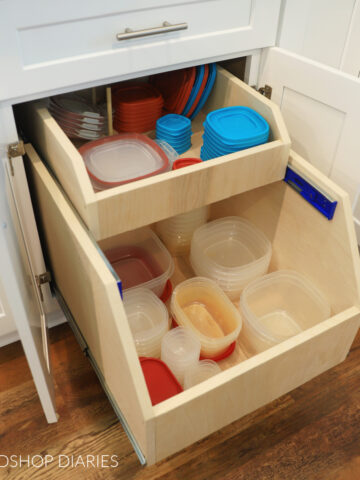
Every kitchen is unique, just like its owner. Do you need a special spot for grandma’s recipe book or a hidden snack stash for the kids? Consider adding slide-out shelves for easy access to deep cabinets. They’re a game-changer for reaching items in the back. Don’t be afraid to tweak and adjust as you go. It’s your space, and it should work for you. How do you ensure your kitchen stays organized? Are there specific items you always struggle to store? Your feedback could inspire others to find innovative solutions for their kitchen challenges!Attaching Doors And Hardware
Attaching doors and hardware is crucial for kitchen cabinet building. Align hinges carefully to ensure smooth door movement. Secure handles and knobs for easy access.
Attaching doors and hardware to kitchen cabinets adds the finishing touch. This process transforms basic boxes into functional storage spaces. Proper installation ensures smooth operation and enhances the kitchen’s look. This section guides you through attaching doors and hardware efficiently.Hanging Cabinet Doors
Start with the doors. Position the hinges on the cabinet frame accurately. Use a pencil to mark hinge placements. Drill pilot holes for screws to avoid splitting wood. Attach the hinges to the cabinet frame securely. Align the door with the frame. Fasten the hinges onto the door, ensuring they are flush and tight. Check the door’s alignment and swing to confirm it opens smoothly.Installing Handles And Knobs
Handles and knobs are next. Decide on their placement for ease of use. Measure the distance from the edge for consistency. Drill holes carefully to prevent damage. Insert screws through the back of the door. Attach handles or knobs using a screwdriver. Ensure they are tight and firmly attached. Double-check their position and comfort in your grip.Adjusting Hinges
Adjust hinges for perfect door alignment. Loosen screws slightly on the hinges. Move the door up or down if needed. Tighten screws once the door is level. Ensure the door closes without gaps or rubbing. Test the door’s movement multiple times. Fine-tuning ensures optimal functionality and appearance.Finishing Touches
Finishing touches are the secret sauce to crafting kitchen cabinets that truly stand out. These final steps are where your hard work transforms into a polished masterpiece, ready to grace your kitchen. Whether you’re aiming for a sleek modern look or a rustic charm, perfecting the finish ensures your cabinets not only look stunning but are durable too.
Sanding And Smoothing Surfaces
Sanding is crucial in achieving a smooth surface that will hold paint or stain effectively. Use a fine-grit sandpaper for the best results. Consider renting an electric sander if you’re covering a large area—it saves time and energy.
Don’t rush this step. Feel the surface with your fingertips; it should be silky smooth. Miss any rough spots, and they’ll be glaringly obvious once the finish is applied. Have you ever experienced frustration from a bumpy finish? This step eliminates that risk.
Applying Paint Or Stain
The choice between paint and stain can transform your kitchen’s vibe. Paint offers a clean, uniform appearance, while stain showcases the wood grain beautifully. Choose based on your desired aesthetic.
Apply thin, even coats for a professional finish. Are you worried about brush marks? Opt for a high-quality brush or a roller to minimize streaking. Remember to let each coat dry thoroughly before adding another.
Adding Protective Coating
A protective coating is essential for durability. It shields your cabinets from spills, stains, and everyday wear and tear. Polyurethane is a popular choice for its robust protection and glossy finish.
Apply the coating carefully, ensuring even coverage. Can you imagine the peace of mind knowing your cabinets are protected against kitchen chaos? This final step ensures your hard work lasts for years. Choose a finish that complements your style—matte, semi-gloss, or gloss.
Each of these steps is a vital puzzle piece in your cabinet-making journey. Dive into these finishing touches with confidence and watch your kitchen transform into a space you love.

Credit: www.youtube.com
Installing The Cabinets In Your Kitchen
Building kitchen cabinets involves precise measuring and cutting. Assemble the pieces and secure them with screws. Finally, install the cabinets, ensuring they align perfectly for a sleek finish.
Installing the cabinets in your kitchen is a pivotal phase in your remodeling journey. It’s the moment when your vision starts to materialize into a functional space. Whether you’re an experienced DIY enthusiast or a first-timer, ensuring that each cabinet is positioned, secured, and aligned correctly can save you from future headaches.Positioning The Cabinets
Start by identifying the layout plan for your cabinets. This is where your kitchen’s blueprint comes into play. Make sure to mark the wall with a pencil to visualize where each cabinet will be placed. Have you ever tried fitting a puzzle without knowing where each piece goes? Positioning your cabinets is similar. Make sure to start with the corner or the most prominent cabinet, as it will dictate the alignment for the rest.Securing To Walls
Once positioned, securing the cabinets firmly to the walls is crucial. Use the right screws and wall anchors that can handle the weight of the cabinets and their contents. A tip I learned the hard way: always check for studs using a stud finder. Anchoring into a stud provides maximum stability. If you miss a stud, the risk of your cabinet coming loose increases.Leveling And Aligning
Leveling is not just about aesthetics; it ensures that your cabinets open and close smoothly. Use a spirit level to check for evenness. Adjust as needed by adding shims under the cabinets. Alignment extends beyond leveling. Are all cabinet doors and drawers aligning seamlessly? Adjust the hinges if necessary. A trick I discovered: stepping back and observing from different angles helps catch misalignments that are not visible up close. Remember, patience is key. Taking the time to position, secure, and align your cabinets properly will reward you with a kitchen that functions beautifully and lasts for years.Maintenance Tips For Longevity
Keeping your kitchen cabinets in top shape is crucial. Proper maintenance ensures they last longer and look good. Simple care routines can prevent damage and costly repairs. Follow these tips to maintain your kitchen cabinets and extend their life.
Regular Cleaning Routine
Dust and dirt can damage cabinet surfaces over time. Wipe cabinets with a soft, damp cloth weekly. Use mild soap and water for sticky spots. Avoid harsh chemicals that strip finishes. Dry the surface with a clean towel to prevent moisture damage.
Handling Repairs
Minor issues can escalate if ignored. Tighten loose screws and hinges promptly. Replace damaged knobs and handles. Use wood filler for small chips and scratches. For larger issues, consult a professional to avoid further damage.
Protecting Against Moisture
Moisture is a major threat to cabinets. Avoid placing wet items directly on cabinet surfaces. Use coasters and mats under damp items. Ensure your kitchen is well-ventilated. Fix leaks and drips immediately to prevent water damage.

Credit: www.youtube.com
Credit: www.woodshopdiaries.com
Frequently Asked Questions
Is It Cheaper To Build Your Own Kitchen Cabinets?
Building your own kitchen cabinets can be cheaper, especially if you have woodworking skills. DIY allows savings on labor costs, and you can purchase materials at a lower price. However, factor in time, tools, and potential mistakes which might increase expenses.
Evaluate your skills and budget before deciding.
Can A Beginner Make Kitchen Cabinets?
Yes, a beginner can make kitchen cabinets with proper planning and tools. Start with simple designs and learn basic woodworking skills. Online tutorials and guides offer valuable assistance. Ensure safety and accuracy during the process. Practice patience and attention to detail for better results.
What Kind Of Wood Do You Use To Build Kitchen Cabinets?
Popular woods for kitchen cabinets include oak, maple, cherry, and hickory. These woods are durable and visually appealing. Oak offers a rustic look, while maple provides a smooth finish. Cherry adds rich color, and hickory showcases unique grain patterns. Choose based on your style preference and budget.
How To Construct Kitchen Cabinets Step By Step?
Begin by measuring your space accurately. Cut plywood pieces for cabinet sides, top, and bottom. Assemble using wood glue and screws. Attach the back panel. Install shelves and doors with hinges. Sand and finish the surface. Attach handles and mount the cabinets securely to the wall.
Conclusion
Building kitchen cabinets can be a rewarding experience. You save money. You create something uniquely yours. Plus, you learn valuable skills. Start with a clear plan. Gather your materials. Follow each step carefully. Measure twice, cut once. Take your time.
Enjoy the process. Mistakes happen. Learn from them. Ask for help if needed. Your new cabinets will transform your kitchen. They bring style and functionality. You’ll appreciate your hard work every day. Ready to start your project? Dive in and create your perfect kitchen space.
Happy building!