How Do You Put Up Backsplash in the Kitchen: Expert Tips
Are you ready to transform your kitchen without breaking the bank? Installing a backsplash is one of the simplest ways to add personality and flair to your cooking space.
Imagine having a kitchen that not only looks stunning but also reflects your unique style. Whether you’re aiming for a sleek modern look or a cozy rustic vibe, the right backsplash can make all the difference. But you might be wondering, how do you actually put up a backsplash in your kitchen?
Don’t worry—this guide will walk you through every step, ensuring you have all the tips and tricks you need to succeed. Let’s dive into this rewarding DIY project and watch your kitchen come to life. Keep reading to discover how easy it can be to achieve that designer look you’ve always wanted.
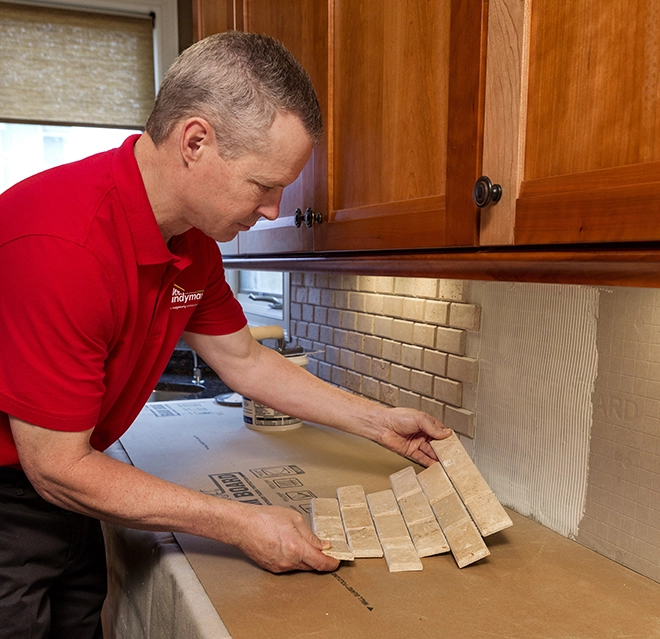
Credit: www.mrhandyman.com
Choosing The Right Materials
Choosing the right materials for your kitchen backsplash can transform your space, making it both functional and visually appealing. The materials you select will significantly impact the overall look and feel of your kitchen. With the right choices, you can create a stunning focal point that complements your kitchen’s style while also withstanding daily wear and tear.
Tile Options
Tiles are a popular choice for kitchen backsplashes due to their versatility and aesthetic appeal. Ceramic tiles offer a classic look and are available in a wide range of colors and patterns. If you’re aiming for a more modern vibe, glass tiles can add a sleek and shiny finish, reflecting light beautifully. Stone tiles, like marble or travertine, bring a natural, earthy touch to your kitchen, offering a luxurious feel. Consider using a mix of these tiles to create a unique mosaic design that catches the eye.
Color And Texture Selection
The color and texture of your backsplash can set the mood of your kitchen. Neutral tones such as whites, greys, and beige are timeless and can easily match with various cabinet colors and countertop styles. On the other hand, bold colors can add a pop of personality and make your kitchen stand out. Textures also play a crucial role; a smooth tile gives a clean look, while a textured tile adds depth and interest. Imagine the joy of preparing a meal in a space that truly reflects your style.
Durability Considerations
Durability is key, especially in high-traffic areas like the kitchen. Consider materials that are resistant to heat, stains, and moisture. Porcelain tiles are known for their strength and durability, making them an excellent choice for backsplashes. Glass tiles, while beautiful, can be prone to chipping, so they might require more care. Think about the long-term maintenance and how much effort you’re willing to invest in keeping your backsplash pristine. Wouldn’t it be great to enjoy both style and practicality?
Gathering Essential Tools
Gathering essential tools makes installing kitchen backsplash easier. Ensure you have tiles, adhesive, a notched trowel, and a tile cutter. These tools help achieve a smooth and professional finish.
Gathering the right tools can make the difference between a smooth backsplash installation and a frustrating ordeal. Imagine diving into the project only to realize you’re missing a crucial tool. Avoid that pitfall by preparing ahead of time! Having a well-stocked toolbox ensures you can tackle any unexpected challenges with ease. Let’s explore the essential tools you need to get started.Basic Tools Required
- Measuring Tape:Ensure your measurements are accurate to cut tiles or panels correctly.
- Level:Keep your backsplash perfectly aligned, avoiding a crooked finish.
- Tile Cutter or Wet Saw:Cut tiles to fit corners and edges smoothly.
- Adhesive Trowel:Spread adhesive evenly to secure your backsplash firmly.
- Rubber Grout Float:Apply grout with precision, filling gaps for a seamless look.
Safety Equipment
- Safety Glasses:Protect your eyes from tile shards and dust.
- Gloves:Safeguard your hands against sharp edges and adhesive materials.
- Dust Mask:Avoid inhaling dust particles from cutting and sanding tiles.
Optional Tools For Precision
- Laser Level:Achieve unparalleled accuracy in leveling your tiles.
- Tile Spacer:Keep consistent gaps between tiles for a professional look.
- Electric Drill with Mixer Attachment:Mix adhesive or grout to the perfect consistency.
Preparing The Wall Surface
Begin by cleaning the kitchen wall thoroughly, removing grease and dirt. Ensure the surface is dry and smooth to allow tiles to adhere properly. Fill any holes or cracks with spackle for a seamless finish.
Putting up a backsplash in your kitchen can dramatically enhance its aesthetic appeal, but before diving into this exciting project, it’s crucial to prepare the wall surface properly. This foundational step ensures your backsplash adheres smoothly and lasts for years. Let’s explore the essential aspects of preparing your wall surface.Cleaning And Smoothing
Begin by thoroughly cleaning your wall surface. Use a mild detergent and water solution to remove any grease, dust, or residues that may interfere with adhesion. A clean surface is key to ensuring your tiles stick properly. Once cleaned, inspect the wall for any rough patches or imperfections. Sanding these areas will create a smooth surface, allowing the backsplash to sit evenly. Consider using fine-grit sandpaper for this task—it’s gentle yet effective. Have you ever noticed how a small bump can ruin the look of a tiled wall?Marking Guidelines
Before you start tiling, marking guidelines can save you from uneven rows and awkward gaps. Use a level and a pencil to draw straight lines where the tiles will be placed. These guides act as a roadmap, ensuring your tiles align perfectly. Think of it as planning your route before a road trip. You wouldn’t want to end up miles away from your destination, right? Similarly, well-marked guidelines keep your backsplash project on track.Protecting Surrounding Areas
It’s easy to overlook the areas around your workspace, but protecting them can prevent unnecessary damage or mess. Cover countertops and appliances with plastic sheets or drop cloths. This simple step keeps grout and adhesive from staining surfaces. Consider using painter’s tape along the edges of cabinets and walls to shield them from accidental splashes. This precaution might seem minor, but it saves time and effort in clean-up later. Have you ever had to scrub dried adhesive off a pristine countertop? It’s not fun!Cutting And Fitting Tiles
Putting up a kitchen backsplash requires careful measurement and precise tile cutting. Lay tiles from the center outward for even coverage. Use spacers for uniform gaps, then fit tiles in place with adhesive.
Cutting and fitting tiles for your kitchen backsplash might seem like a daunting task, but with a little preparation and the right tools, you can achieve a professional look. It’s all about precision and patience. Before you know it, you’ll be admiring the seamless finish of your hard work.Measuring Techniques
Accurate measurements are the cornerstone of a perfect fit. Start by measuring the height and width of the area where you’ll install the backsplash. Use a tape measure and jot down the dimensions. Double-check your measurements. It’s better to measure twice than to make a costly mistake. Remember, even a few millimeters can make a difference.Using A Tile Cutter
A tile cutter is your best friend in this process. It allows you to make clean, straight cuts with ease. Position the tile on the cutter, aligning it with the marked line. Apply steady pressure as you score the tile. Then, use the breaker bar to snap the tile along the scored line. Practice on a spare tile to gain confidence.Dealing With Odd Shapes
Not all areas are straightforward. You might encounter spaces around outlets or corners. Create a paper template of the odd shape first. Trace the template onto the tile, ensuring accuracy. Use a tile nipper or a wet saw for intricate cuts. Patience is key—rushing can lead to broken tiles. Doesn’t it feel rewarding to tackle such a hands-on project? Share your experiences and tips with others. You might inspire someone else to take on their own kitchen transformation!Applying Adhesive
Applying adhesive to the wall requires a clean, dry surface. Spread the adhesive evenly using a trowel. Press the backsplash tiles firmly into place, ensuring proper alignment and coverage.
Applying adhesive to install a backsplash is a crucial step that can make or break your kitchen’s new look. A steady hand and the right materials are key to ensuring your backsplash not only stays in place but looks seamless and professional. Let’s dive into the nitty-gritty of applying adhesive, making the process as smooth as possible.Choosing The Right Adhesive
The type of adhesive you choose can significantly impact the durability and appearance of your backsplash. Mastic adhesive is a popular choice for its ease of use and strong bond, especially on drywall surfaces. However, if you’re working with a heavy tile, such as stone, thin-set mortar is often preferred due to its superior strength and moisture resistance. Consider the conditions in your kitchen. For instance, in areas prone to moisture, like behind the sink, a waterproof adhesive is advisable. You might also want to think about the drying time—quick-setting adhesives can save you time but require you to work swiftly.Spreading Techniques
Once you’ve chosen the right adhesive, it’s time to apply it. Use a notched trowel to spread the adhesive evenly across the wall. The type of tile you’re using will determine the size of the notches; generally, larger tiles require larger notches. Start at the center of your workspace and work outward. This ensures you have a balanced layout and can make adjustments as needed. Remember to apply pressure evenly to prevent air pockets, which can weaken the bond.Ensuring Even Coverage
Even coverage is essential for both the aesthetics and the longevity of your backsplash. As you spread the adhesive, periodically check for uniform thickness. Run a finger lightly over the surface to feel for any inconsistencies. A pro tip: Use a level to keep your tile rows straight as you go. An uneven application can lead to misaligned tiles, which can be a hassle to fix later. Don’t rush this step—precision now will save you headaches in the future. Have you ever wondered why some backsplashes seem to last forever while others fall apart after a few years? The secret often lies in the adhesive application. With careful attention to detail, your kitchen backsplash will not only enhance your cooking space but also stand the test of time.Placing The Tiles
Placing the Tiles Start by preparing the surface, ensuring it’s clean and smooth. Next, apply adhesive evenly with a trowel. Carefully press each tile onto the wall, maintaining equal spacing. Use spacers for consistency. Let the adhesive dry before applying grout to fill gaps.
Finish by wiping away excess grout.
Placing tiles for a kitchen backsplash transforms your cooking space. The tiles add color and protect walls from splashes. Ensuring they are placed correctly is crucial. Begin with a clean surface. Gather all materials and tools before starting. Follow these steps for a beautiful backsplash.Aligning Tiles Perfectly
Start by marking the center of your workspace. Use a level and pencil to draw a guide. This helps in aligning tiles straight. Begin placing tiles from the center and move outward. Check each tile against the guide line. Ensure edges match the line. A perfect alignment enhances the overall look.Using Spacers For Uniformity
Spacers keep tiles evenly spaced. Place them between tiles as you work. They ensure consistent gaps for grout. Using spacers prevents uneven spacing. This makes the final design look professional. Remove spacers once adhesive sets. Uniform spaces add neatness to the design.Adjusting For Final Position
Check each tile’s final position before adhesive dries. Adjust tiles gently if needed. Make sure every tile is securely placed. Look for any misalignment or gaps. Correct these issues promptly. A final check guarantees a perfect backsplash. It’s the finishing touch to your kitchen’s style.Grouting The Tiles
Begin by preparing the surface for the backsplash. Ensure tiles are clean and dry. Apply grout evenly between tiles using a rubber float, pressing firmly to fill gaps. Wipe excess grout with a damp sponge, allowing it to dry for a polished finish.
Grouting the tiles in your kitchen backsplash is where the magic happens. It’s the step that transforms individual tiles into a unified, sleek surface. While grouting might seem daunting, with the right approach, you can achieve a professional finish without breaking a sweat. Let’s dive into the essentials of grouting the tiles with precision and care.Mixing Grout Correctly
Mixing grout is all about achieving the perfect consistency. Too dry, and it won’t adhere well; too wet, and it will be a nightmare to apply. Aim for a peanut butter-like texture. You can achieve this by gradually adding water to the grout powder while stirring. Use a bucket and a paddle mixer for uniform results. Don’t rush this step—patience ensures your grout will set properly. Consider doing a small test batch first. It helps you get the feel for how much water your mix needs.Applying Grout Evenly
Applying grout evenly is your next challenge. Use a rubber float to spread the grout across the tiles. Hold the float at a 45-degree angle for the best coverage. Press the grout into the spaces between tiles to ensure no gaps are left unfilled. Work in small sections to maintain control and avoid the grout drying prematurely. Wipe the tiles diagonally with the float to remove excess grout. This technique prevents the grout from being pulled out of the joints.Cleaning Excess Grout
Cleaning excess grout off your tiles is crucial for a clean finish. Use a damp sponge to gently wipe the surface of the tiles in circular motions. This not only cleans off extra grout but also helps smooth the grout lines. Rinse the sponge frequently to avoid smearing grout back onto the tiles. Be mindful of the grout lines and avoid over-saturating them with water. After the initial cleaning, wait about 30 minutes, then buff the tiles with a dry cloth for a sparkling finish. You’d be amazed at how this final touch brings out the beauty of your backsplash. As you grout your kitchen backsplash, remember that each step builds towards the final result. What challenges do you anticipate as you grout your tiles?
Credit: food52.com
Finishing Touches
Applying a backsplash in the kitchen enhances its look. Measure the area carefully. Cut tiles to fit. Apply adhesive to the wall. Press tiles firmly into place. Ensure even spacing between them. Once dry, grout the gaps. Wipe away excess grout with a damp sponge.
Enjoy your refreshed kitchen space!
Putting up a kitchen backsplash can feel like a major accomplishment, but don’t overlook the final steps that ensure your project shines. The finishing touches are crucial to not only make your backsplash look professionally done but also to prolong its lifespan. This phase involves sealing, inspecting, and polishing, which will transform your kitchen into a space you’ll be proud to show off.Sealing The Backsplash
Sealing is a step you don’t want to skip. It protects your tiles from stains and moisture, especially if you’ve used porous materials like natural stone. A good sealant acts like a shield, making cleaning easier and keeping your backsplash looking new. Apply the sealant with a soft cloth or a brush, ensuring you cover the grout lines thoroughly. Leave it to dry for the recommended time, usually a few hours. Trust me, taking the time to seal properly now saves you headaches in the future.Inspecting For Flaws
Once the sealant is dry, take a closer look. Inspect each tile and grout line for any gaps, chips, or uneven spots. You might find areas that need a touch-up or even a redo. Don’t rush this step. Use a flashlight to spot any imperfections that might not be visible in regular lighting. Address these flaws immediately, as they can become bigger issues if left unchecked.Polishing The Surface
Polishing gives your backsplash that final, professional touch. Use a microfiber cloth to buff the tiles, enhancing their natural shine. This step also removes any leftover residue from the sealing process. If you’ve used glossy tiles, polishing will make them glisten under your kitchen lights. Even matte finishes benefit from a good polish, looking cleaner and more refined. Have you ever noticed how a polished surface can elevate the entire look of a room? That’s exactly what you’ll achieve here. By focusing on these finishing touches, you’re not just completing a task; you’re enhancing your entire kitchen experience.Common Mistakes To Avoid
Ensure surfaces are clean and dry before installing backsplash. Measure accurately to prevent tile misalignment. Avoid using incorrect adhesive types for your specific tiles.
Putting up a backsplash in your kitchen can transform the space, adding both style and function. However, there are common mistakes that can derail your project, leaving you with less-than-perfect results. Understanding these pitfalls will ensure your backsplash installation is as smooth and successful as possible.Ignoring Wall Preparation
Proper wall preparation is crucial. Failing to clean the wall thoroughly can prevent the adhesive from sticking properly. Ensure the surface is free of grease, dust, and old adhesive. A smooth, even surface is essential. Sand any rough spots and repair any holes or cracks. Starting with a well-prepared wall sets the foundation for a flawless backsplash.Rushing The Process
Patience is key. Rushing through the installation can lead to misaligned tiles and uneven grout lines. Take your time to measure and plan. Double-check your layout before applying adhesive. This extra step can save you from costly mistakes. Remember, a well-done backsplash is worth the patience.Using Incorrect Materials
Choosing the right materials is essential. Not all tiles and adhesives are suitable for kitchen environments. Ensure your selections are water-resistant and durable. Consult with a professional if you’re unsure about material compatibility. Investing in the right materials will ensure your backsplash withstands the test of time.Maintenance Tips
Preparing the kitchen wall is crucial. Clean the surface and ensure it’s smooth and dry. Choose adhesive wisely for your backsplash tiles. Use spacers for even spacing and a level for accuracy. Press tiles firmly. Allow adhesive to dry before grouting.
Seal grout lines to prevent stains and moisture damage.
Maintaining a kitchen backsplash can keep it looking fresh and clean. A well-cared-for backsplash adds beauty and function to your kitchen space. Here are some practical maintenance tips to ensure your backsplash remains in top condition.Regular Cleaning Routine
Regular cleaning prevents grime buildup. Use a soft cloth and mild detergent. Wipe the backsplash gently. This routine keeps the surface shiny and free from dirt. Avoid using harsh chemicals. They can damage the material over time.Handling Stains And Spills
Act quickly on stains and spills. Use a damp sponge to blot the area. For stubborn stains, mix baking soda with water. Apply the paste, let it sit, then rinse. This method is gentle and effective. It helps maintain the backsplash’s original look.Long-term Care Advice
Inspect your backsplash regularly for any damage. Fix loose tiles or grout promptly. Seal grout lines every six months. This prevents moisture damage. Use a silicone-based sealant for better protection. Regular care extends the lifespan of your backsplash.
Credit: www.youtube.com
Frequently Asked Questions
What Is The Easiest Way To Install A Kitchen Backsplash?
The easiest way to install a kitchen backsplash is using peel-and-stick tiles. Clean the wall surface thoroughly. Measure and cut tiles to fit. Peel off the backing and press tiles firmly onto the wall. Align them carefully for a seamless finish.
Enjoy your new backsplash with minimal effort.
What Holds A Backsplash To A Wall?
A backsplash is secured to the wall using adhesive, screws, or nails. Ensure the surface is clean and dry before installation. These methods provide stability and ensure the backsplash stays in place, enhancing kitchen or bathroom aesthetics. Proper installation prevents water damage and maintains the backsplash’s durability over time.
Can I Put A Backsplash Directly On Drywall?
Yes, you can install a backsplash directly on drywall. Ensure the surface is clean, smooth, and dry. Use appropriate adhesive for the material. Sealing the grout prevents moisture damage. Proper installation ensures durability and aesthetics.
When Tiling A Backsplash, Where Do You Start?
Start tiling the backsplash from the center of the wall. This ensures a balanced and symmetrical layout. Use a level to keep tiles straight. Plan your design and cut tiles for corners and edges. Begin with full tiles and adjust the rest for a seamless finish.
Conclusion
Installing a backsplash elevates your kitchen’s style and function. It protects walls and adds character. Follow each step carefully for a smooth process. Gather your tools and materials beforehand. Measure accurately to avoid errors. Clean the wall surface thoroughly. Apply adhesive evenly for a secure fit.
Place tiles precisely, ensuring proper alignment. Allow time for drying before grouting. With patience and attention, you’ll achieve a stunning look. Enjoy your refreshed kitchen space. Share your results with friends and family. They’ll admire your handiwork. Embrace the satisfaction of a job well done.
Your kitchen deserves this upgrade.