How to Calibrate Kitchen Thermometer: Expert Tips
Executive Chef & Lead Commercial Kitchen Specialist at Daily Kitchup Test Lab
Have you ever wondered if your kitchen thermometer is giving you the most accurate readings? In cooking, precision is key, and the difference of a few degrees can transform your culinary masterpiece into a disaster.
Imagine slicing into a perfectly roasted chicken, only to find it undercooked or dry. Yikes! That’s why calibrating your kitchen thermometer is crucial. It ensures that your readings are spot-on, giving you peace of mind and helping you achieve perfect results every time.
You’ll learn simple steps to calibrate your kitchen thermometer, making your cooking experiences not just successful, but delightful. Ready to make every meal a triumph? Let’s dive in!
Importance Of Accurate Temperature
When you’re cooking, the precision of your kitchen thermometer can make or break your dish. Accurate temperature readings ensure your food is cooked to perfection, enhancing both flavor and safety. Imagine preparing a succulent roast chicken only to find it’s undercooked when served. Not only does this disappoint your taste buds, but it could also pose health risks. This is why calibrating your kitchen thermometer is not just a step in cooking—it’s a crucial practice for every home chef.
Why Accuracy Matters In Cooking
Accurate temperature control is essential for achieving the desired texture and taste. For example, a perfectly medium-rare steak requires a precise internal temperature of around 135°F. If your thermometer is off by even a few degrees, you might end up with a steak that’s either overcooked or still raw.
Moreover, cooking at the right temperature affects the nutritional value of your meals. Overcooking can destroy essential nutrients, while undercooking could leave harmful bacteria alive. This balance is especially important when cooking poultry or seafood.
Ensuring Food Safety
Temperature accuracy is critical for food safety. Undercooked meats can harbor bacteria like Salmonella or E. coli, leading to foodborne illnesses. By ensuring your kitchen thermometer is calibrated correctly, you can confidently serve dishes that are both delicious and safe.
Have you ever thought about the last time you calibrated your thermometer? If it’s been a while, or perhaps never, it might be time to consider doing so. This simple act could be the key to elevating your cooking game and ensuring every meal is both tasty and safe.
The Role Of Thermometer Calibration In Baking
Baking is an exact science where even slight temperature variations can affect the outcome. For instance, yeast thrives at specific temperatures, and slight inaccuracies can lead to flat bread or overly dense cakes. Ensuring your thermometer provides precise readings helps you achieve consistent results every time.
In the world of pastries, a few degrees can make the difference between a perfect caramel or a burnt disaster. Calibration ensures your sweet creations turn out exactly as planned, delighting friends and family with every bite.
Credit: myfoodservicelicense.com
Types Of Kitchen Thermometers
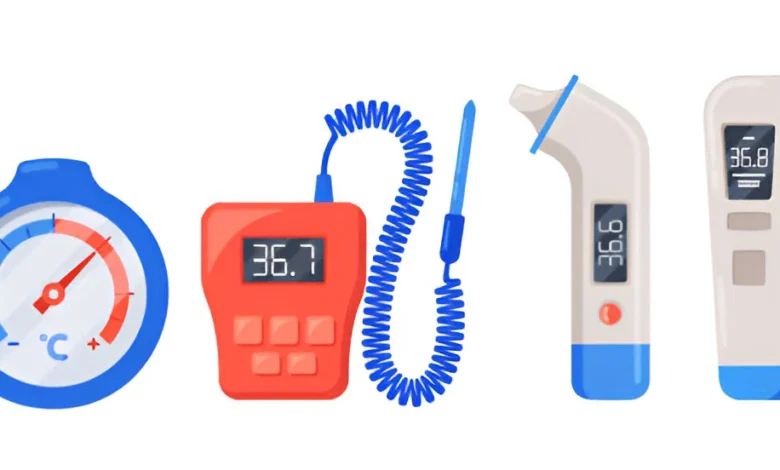
Kitchen thermometers are essential tools for cooking. They help ensure food safety and perfect doneness. But there are various types to consider. Each type has unique features and benefits. Understanding these can help you choose the right one for your needs.
Digital Vs. Analog
Digital thermometers offer precise readings. They display temperatures on a screen. These are easy to read and often come with extra features. Some digital models beep when they reach the desired temperature. This makes them convenient for busy cooks.
Analog thermometers use a dial to show the temperature. They don’t need batteries. Many chefs prefer them for their simplicity. They are durable and often more affordable. But they may not offer the same precision as digital models.
Probe Vs. Infrared
Probe thermometers have a metal stick. You insert it into the food for measurement. This type is great for meats and thick dishes. They provide accurate readings inside the food.
Infrared thermometers measure surface temperatures. They use a laser to gauge heat. You don’t need to touch the food. These are perfect for liquids and thin foods. They are quick but may not be as precise for internal temperatures.
Signs Your Thermometer Needs Calibration
Knowing when your kitchen thermometer needs calibration is crucial for achieving accurate results in your culinary endeavors. Over time, even the most reliable thermometers can lose their precision, leading to inconsistent cooking outcomes. Recognizing the signs that your thermometer requires calibration can save you from overcooked or undercooked dishes, ensuring your meals are perfect every time.
Inconsistent Readings
Have you ever noticed that the same dish registers different temperatures on separate occasions? This inconsistency is a clear sign your thermometer might need recalibrating. If you find yourself doubting the temperature readings, it’s time to consider calibration. Accurate temperature is vital for recipes like custards or meat, where precision can make or break the dish.
Frequent Usage
Think about how often you use your kitchen thermometer. Frequent usage can lead to wear and tear, impacting its accuracy. If you’re an avid home chef who relies on your thermometer for various recipes, regular calibration is essential. Imagine preparing a delicate soufflé only to have it flop due to a faulty temperature reading. Regular checks and calibration can prevent such culinary mishaps.

Credit: www.epicurious.com
Preparation For Calibration
Calibrating your kitchen thermometer ensures accurate readings. This process improves cooking results. Proper preparation is key to successful calibration. Begin with a few simple steps. These steps set the stage for accurate calibration. Let’s dive into the preparation essentials.
Gathering Necessary Tools
Start by assembling the tools needed for calibration. You will need:
- A glass of ice water
- Boiling water
- A small pot
- A clean, soft cloth
Having these tools ready makes the process smooth. It saves time during calibration. Ensure all items are within reach.
Cleaning The Thermometer
Before calibration, clean your thermometer. Use warm, soapy water for cleaning. Gently wipe the thermometer with a cloth. This removes any dirt or residue.
Cleaning prevents inaccurate readings. It also maintains the thermometer’s condition. Ensure the thermometer is dry after cleaning. A dry thermometer is essential for accurate calibration.
Calibration Methods
Calibrating your kitchen thermometer is crucial for accurate cooking. Nothing ruins a meal faster than an incorrect temperature reading. But how do you ensure your thermometer is giving you the right numbers? Two simple and effective methods can be used to calibrate your kitchen thermometer: the Ice Water Method and the Boiling Water Method. These techniques can help you maintain precision in your culinary adventures.
Ice Water Method
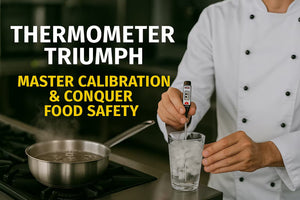
The Ice Water Method is a straightforward way to check your thermometer’s accuracy. Start by filling a glass with ice and then add water until the glass is full. Let it sit for a minute so the temperature stabilizes.
Immerse the thermometer stem into the ice water without touching the sides or bottom of the glass. Wait until the thermometer reading stops moving. The temperature should read 32°F (0°C). If it doesn’t, adjust the thermometer accordingly.
This method is quick and doesn’t require boiling water, making it ideal for busy kitchens. You might be surprised how often your thermometer needs recalibrating using this simple technique.
Boiling Water Method
The Boiling Water Method is equally effective but involves a bit of heat. Begin by bringing a pot of water to a rolling boil. Carefully insert the thermometer stem into the boiling water, again avoiding contact with the pot itself.
Allow the thermometer to stabilize and check the reading. It should show 212°F (100°C) at sea level. If your reading is off, you’ll need to make adjustments to ensure accuracy.
Remember, elevation affects boiling points. If you live at a higher altitude, consider this when calibrating. Ever wondered why recipes sometimes fail? Your thermometer might be the culprit!
Both methods are easy, practical, and ensure your meals turn out just right. Have you tried calibrating your kitchen thermometer using these methods before? If not, give it a go and see the difference it makes in your cooking precision.
Credit: sts-calibration.com
Step-by-step Calibration Process
Calibrating your kitchen thermometer ensures accurate temperature readings. This process helps in cooking food safely and perfectly. Follow these simple steps to calibrate your kitchen thermometer. You’ll need ice water and boiling water to test accuracy.
Adjusting The Thermometer
Start with ice water. Fill a glass with ice and water. Stir well. Insert the thermometer into the water. Wait until the needle stops moving. Check the reading. It should be 32°F or 0°C. If not, adjust the thermometer. Use the calibration nut or button. Twist until it reads correctly.
Next, test with boiling water. Boil a pot of water. Carefully place the thermometer in the water. Avoid touching the pot sides. The reading should be 212°F or 100°C. Adjust as needed.
Testing Accuracy
Repeat the process. Check both ice water and boiling water. Ensure consistency in readings. This confirms accurate calibration. Regular testing keeps your thermometer reliable. It ensures safe cooking temperatures.
Proper calibration improves cooking results. It’s crucial for recipes needing precise temperatures. Calibrate regularly for best performance. Your kitchen thermometer will serve you well.
Best Practices For Maintenance
Maintaining your kitchen thermometer ensures accurate temperature readings. A well-maintained thermometer can improve cooking results and food safety. Regular care keeps your device reliable and extends its life. Explore these best practices to maintain your kitchen thermometer effectively.
Regular Calibration Schedule
Calibration is essential for accuracy. Schedule regular checks to ensure precision. Ideally, calibrate your thermometer monthly. If you use it often, consider weekly calibration. Test it in ice water; it should read 32°F (0°C). Test it in boiling water too; it should read 212°F (100°C). Adjust according to your altitude if needed.
Proper Storage
Storing your thermometer correctly prevents damage. Keep it in a protective case if possible. Avoid storing it near heat sources. This could affect its sensitivity. Store it in a dry place to prevent rust or corrosion. Always clean and dry it before storing.
Common Mistakes To Avoid
Incorrect calibration methods can lead to inaccurate temperature readings. Ignoring manufacturer instructions is a common oversight. Neglecting to clean the thermometer before calibration is another frequent mistake, affecting accuracy.
Calibrating a kitchen thermometer ensures accurate temperature readings. Many make mistakes during calibration, leading to unreliable results. Understanding these common pitfalls can help maintain your thermometer’s accuracy.Ignoring Calibration
Some people forget to calibrate their thermometers. This oversight can lead to inaccurate readings. Regular calibration is essential for precise measurements. A thermometer that is not calibrated can ruin your recipe. Always check the calibration before using the thermometer.Improper Handling
Handling thermometers incorrectly can affect their accuracy. Dropping or mishandling them may cause damage. Store the thermometer in a safe place. Avoid exposing it to extreme temperatures. Handle it with care during calibration and use. Proper handling extends the lifespan of your device.Troubleshooting Calibration Issues
Calibrating your kitchen thermometer can sometimes feel like solving a mystery. Even when you follow the instructions to the letter, you might face persistent issues that make you question whether your thermometer will ever show the right temperature. These problems can be frustrating, but understanding the root causes is the first step in troubleshooting effectively. Let’s dive into some common calibration issues and how you can address them.
Persistent Inaccuracy
Does your thermometer still show the wrong temperature even after calibration? This could be due to incorrect calibration settings or external factors affecting its accuracy. Check if the thermometer is set to the correct units (Celsius or Fahrenheit). A slight mix-up here could lead to persistent inaccuracies.
Consider environmental factors. Is your thermometer exposed to extreme temperatures or humidity? These conditions can impact its performance. Try calibrating it in a neutral environment to see if that resolves the issue.
Have you tried calibrating more than once? Sometimes, a second calibration can correct persistent inaccuracies. Don’t hesitate to repeat the process and see if results improve.
Thermometer Malfunction
If your thermometer seems to malfunction, it might be time to check for physical damage. Inspect the probe and display for signs of wear or damage. A damaged probe can lead to inaccurate readings.
Is the battery working properly? Weak or dead batteries can lead to malfunction. Consider replacing them to see if it resolves the issue.
If you suspect a deeper malfunction, consult the manufacturer’s troubleshooting guide. They often provide specific solutions for common issues related to their product.
Have you faced calibration issues that left you scratching your head? Share your experiences and solutions in the comments below. Your insights could be the key to helping someone else solve their thermometer troubles!
Expert Tips For Reliable Results
Calibrating a kitchen thermometer ensures cooking accuracy. Start by placing the thermometer in ice water for a reliable 32°F reading. Adjust until it shows the correct temperature, ensuring precise culinary results.
Calibrating a kitchen thermometer ensures you get reliable results every time. Precision in cooking is vital, and a well-calibrated thermometer helps achieve this. These expert tips will guide you to get the most accurate readings. Let’s dive into two essential aspects: using multiple thermometers and recording calibration data.Using Multiple Thermometers
Using more than one thermometer can verify accuracy. It’s like having a second opinion. Use different types, like digital and analog. This helps compare readings. Place each thermometer in the same spot for consistency. If they show similar results, your calibration is likely correct. If not, check each one for errors.Recording Calibration Data
Keep a log of your calibration checks. Write down the date and results. This helps track changes over time. If a thermometer drifts, you’ll know when it started. Regular records can highlight patterns. Use a simple notebook or a digital app. Consistent data recording ensures you always have reliable information.Frequently Asked Questions
How To Calibrate A Digital Kitchen Thermometer?
To calibrate a digital kitchen thermometer, immerse the probe in ice water. Wait for it to stabilize at 32°F (0°C). Adjust settings if necessary. Repeat with boiling water for 212°F (100°C) verification. Follow the thermometer’s manual for specific instructions. Ensure accuracy by checking regularly.
How To Test If A Cooking Thermometer Is Accurate?
Test accuracy by placing the thermometer in ice water. Ensure the reading shows 32°F (0°C). Adjust if necessary.
How To Correctly Calibrate A Thermometer?
To calibrate a thermometer, place it in ice water, ensuring it reads 32°F (0°C). Adjust if necessary. Then, test it in boiling water, expecting 212°F (100°C) at sea level. Make adjustments again if needed. Regular calibration ensures accuracy for reliable temperature readings.
When Should Kitchen Thermometers Be Calibrated?
Calibrate kitchen thermometers regularly for accuracy. Do it before first use, and after dropping or exposing them to extreme temperatures. Monthly checks ensure reliability.
Conclusion
Calibrating your kitchen thermometer ensures accurate cooking results. It’s simple and crucial. Check and adjust regularly for best performance. Clean your thermometer before calibrating. This prevents errors. Follow the steps in this guide for precise calibration. Test with boiling and ice water.
This confirms accuracy. A well-calibrated thermometer helps in perfecting recipes. No more guesswork in cooking. Your meals will taste better. Keep your kitchen thermometer in good shape. It’s an essential tool. Happy cooking!

Similar Posts