How to Replace a Kitchen Faucet With Two Handles: Easy Guide
Are you tired of dealing with a leaky or outdated kitchen faucet? Replacing it with a new two-handle model might seem like a daunting task, but it’s easier than you think.
Imagine turning on your tap and enjoying a smooth, steady stream of water without any drips or rust. Whether you’re upgrading your kitchen’s look or fixing a persistent problem, learning how to replace a kitchen faucet with two handles can save you time and money.
Plus, there’s something incredibly satisfying about completing a DIY project that transforms your space. Ready to roll up your sleeves and tackle this home improvement task with confidence? Let’s dive in and discover how simple this process can be.
Tools And Materials Needed
Gather a wrench, plumber’s tape, basin wrench, and screwdriver. Ensure you have a new faucet, supply lines, and sealant. These tools and materials will make the replacement process smooth and efficient.
Embarking on the task of replacing a kitchen faucet with two handles can be both exciting and rewarding. Not only does it refresh the look of your kitchen, but it also enhances functionality. Before diving in, having the right tools and materials at your disposal is crucial. With the right preparation, you can save time and avoid unnecessary trips to the hardware store.Essential Tools
To ensure a smooth installation process, gather these essential tools:- Adjustable wrench:Perfect for loosening and tightening nuts of various sizes.
- Basin wrench:Designed for those hard-to-reach areas underneath the sink.
- Plumber’s tape:Also known as Teflon tape, it ensures watertight seals on threaded connections.
- Bucket or bowl:Handy for catching any water spills during the process.
- Towel or cloth:Useful for wiping up any excess water or residue.
Necessary Materials
Beyond tools, having the right materials is equally essential. Make sure you have:- New faucet:Choose a model that fits your sink’s specifications. Double-check its compatibility with existing plumbing.
- Replacement hoses:If your existing hoses are worn out, new ones are crucial for preventing leaks.
- Sealant or caulking:Helps secure the faucet base and prevent water seepage.
Considerations Before You Start
Take a moment to consider these aspects:- Inspect your existing plumbing setup—are there any signs of wear or corrosion?
- Is your water supply shut off? Double-check to avoid unexpected spills.
- Think about the faucet style and finish that complements your kitchen decor.
Real-world Tips
As someone who’s replaced a faucet before, here’s a tip: patience is your best friend. Sometimes nuts can be stubborn, but don’t let them intimidate you. Have you ever wondered why certain tools are recommended? It’s because they make the job easier. Trust in your toolkit. Is your kitchen ready for a mini transformation? Dive into the process with confidence, knowing that the right tools and materials are your allies.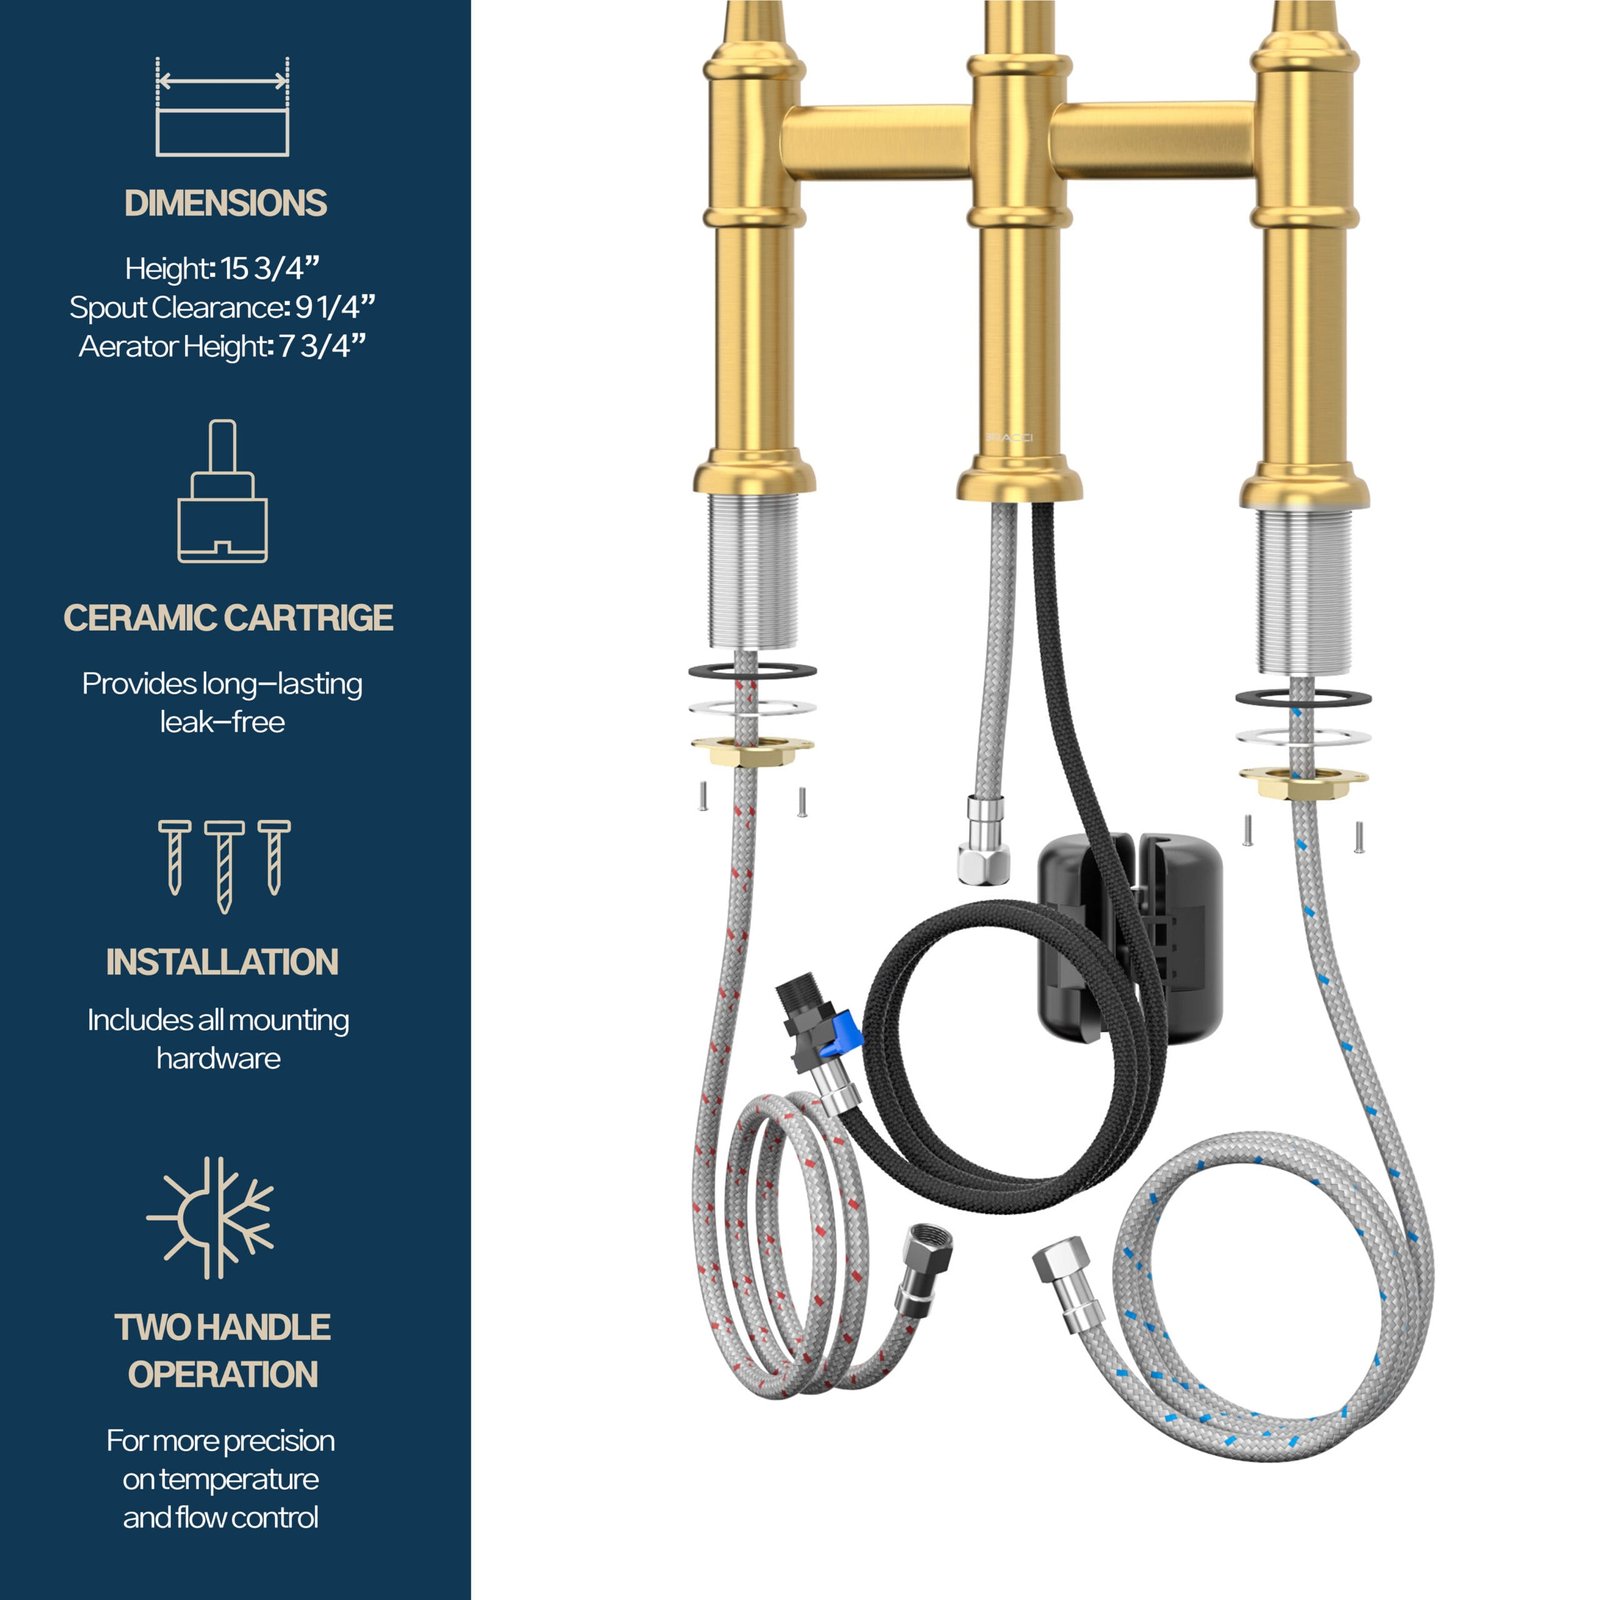
Credit: bracciusa.com
Preparing The Work Area
Preparing the work area is crucial for replacing a kitchen faucet with two handles. Clear the sink and surrounding space. Gather necessary tools like wrenches, towels, and a bucket for easy access.
Replacing a kitchen faucet can refresh your space. Before starting, prepare the work area properly. A well-prepared area ensures a smoother installation process. It also minimizes potential problems.Clearing The Sink
Remove all items from the sink and surrounding area. Clear dishes, soap, and other objects. This space will be your work zone. A clutter-free area helps prevent accidents. Place a towel or bucket beneath the sink. It will catch any water drips during the process.Turning Off The Water Supply
Locate the valves under the sink. Turn them clockwise to stop the water. Test the faucet to ensure the water is off. If water still runs, check the main supply valve. It might be necessary to turn it off. Be sure everything is dry before moving to the next step.Removing The Old Faucet
Removing the Old Faucet Begin by shutting off the water supply under the sink. Use a wrench to disconnect the water lines. Loosen and remove the nuts securing the old faucet, then lift it out carefully.
Replacing a kitchen faucet can be a rewarding task. It gives your kitchen a fresh new look. The first step is removing the old faucet. This process involves a few simple tasks. Each task is crucial to ensure a smooth transition. Let’s dive into the steps required to remove the old faucet.Disconnecting Water Lines
Start by shutting off the water supply. Look under the sink and find the water valves. Turn them clockwise to close the water flow. Next, use a wrench to disconnect the water lines. Place a bucket underneath to catch any drips. Water lines connect the faucet to the plumbing. Loosening these connections is essential.Loosening Mounting Nuts
Now, focus on the nuts holding the faucet in place. These nuts are located underneath the sink. Use a basin wrench to loosen them. Be patient, as space can be tight. Turn the nuts counterclockwise to remove them. This step releases the faucet from its grip.Lifting The Faucet
Once the nuts are loosened, gently lift the faucet. Pull it up from the sink’s surface. Check if any parts are still attached. If necessary, disconnect them carefully. Ensure no damage occurs to the surrounding area. Your old faucet is now free. It’s ready for replacement.Installing The New Faucet
Replacing a kitchen faucet with two handles is simple. Turn off the water supply. Disconnect old faucets using a wrench. Remove the fixture carefully. Attach the new faucet, ensuring a tight fit. Reconnect the water lines, and check for leaks.
Enjoy your upgraded kitchen faucet.
Installing the new faucet in your kitchen can be a straightforward process. It’s essential to follow each step with care to ensure a secure and functional installation. This guide will walk you through the key steps, helping you achieve a satisfying result.Positioning The New Faucet
Begin by placing the new faucet into the designated holes on your sink. Make sure the handles and spout align properly. This ensures a neat appearance and smooth operation. Double-check the alignment to prevent future leaks.Securing The Faucet Base
Secure the faucet base by tightening the mounting nuts underneath the sink. Use a wrench for a snug fit. Avoid over-tightening to prevent damage. Ensure the base is stable and won’t wobble during use.Connecting Water Supply Lines
Attach the water supply lines to the faucet using the appropriate fittings. Make sure each connection is tight to prevent leaks. Turn on the water and check for any drips. Adjust as needed for a leak-free installation.Testing The Installation
Ensure the faucet is securely mounted and connections are tight. Turn on water to check for leaks or drips. Adjust handles and verify smooth water flow.
Replacing a kitchen faucet with two handles can feel like a big task, but once you’ve tightened the last screw and connected the pipes, it’s time for the moment of truth—testing the installation. This is where you’ll ensure everything is working perfectly and that your kitchen is back to being fully functional. It’s important to approach this step with patience and attention to detail. After all, you want to make sure your hard work pays off without any hitches.Checking For Leaks
Begin by turning on the water supply. Watch closely around the joints and connections for any signs of water escaping. Use a dry cloth to wipe around these areas—this will help you spot any potential leaks immediately. Even the smallest drip can indicate a loose connection, so don’t ignore any moisture. If you find a leak, gently tighten the connections and check again.Ensuring Proper Water Flow
Once you’re satisfied there are no leaks, it’s time to test the water flow. Turn on both handles fully and observe the water stream. Is it steady and strong? A weak flow might suggest a blockage or an improperly installed component. Make sure both hot and cold water flow correctly, and adjust the knobs to see if the water temperature changes as expected. Completing these tests not only verifies your installation but also boosts your confidence in tackling DIY tasks. Isn’t it satisfying to know you’ve installed a fixture yourself?
Credit: www.youtube.com
Cleaning Up
Replacing a kitchen faucet with two handles requires careful preparation. Gather tools like a wrench and plumber’s tape. Turn off the water supply, then disconnect the old faucet. Install the new faucet by securing the handles and connecting water lines.
Test for leaks to ensure proper installation.
Cleaning up after replacing a kitchen faucet with two handles is an essential step that ensures your kitchen is not only functional but also pristine. The process might have left a bit of a mess, but tidying up can be surprisingly satisfying. Plus, it gives you the opportunity to inspect your work and make sure everything is in its right place.Tidying The Area
Start by gathering all the tools and materials you used and putting them back in their respective places. This helps prevent any accidental misplacement, making future projects smoother. Wipe down the sink and countertop with a gentle cleaner to remove any water stains or residue from the installation process. It’s amazing how a quick clean can make your kitchen feel refreshed and new. Take a moment to look under the sink for any drips or leaks. It’s better to catch any issues now than to deal with water damage later.Disposing Of Old Parts
Responsibly dispose of the old faucet and any parts you replaced. Check if your local recycling center accepts metal parts; many do, and it’s a great way to be environmentally conscious. Old gaskets and washers might seem insignificant, but they should be disposed of properly as well. Tossing them in the regular trash can help you avoid clutter. Consider donating usable parts to a local charity or thrift shop. You’d be surprised how many DIY enthusiasts are looking for affordable, second-hand materials for their projects. Cleaning up might not be the most glamorous part of the project, but it’s crucial. How satisfying is it to see your work not only function well but also look great?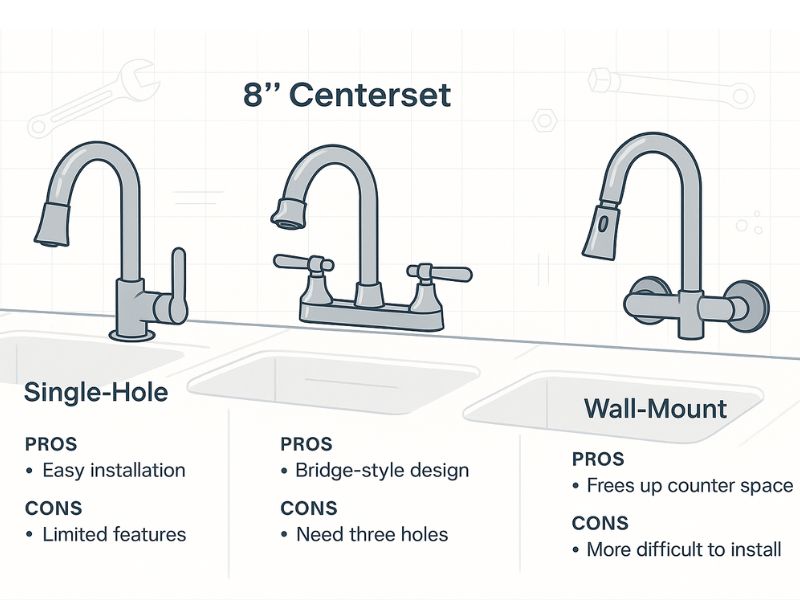
Credit: www.faucetproducer.com
Frequently Asked Questions
Can You Replace A One Handle Faucet With A Two-handle Faucet?
Yes, you can replace a one-handle faucet with a two-handle faucet. Ensure proper compatibility and plumbing adjustments.
How To Remove A Two-handle Kitchen Faucet?
Turn off the water supply and disconnect hoses. Remove mounting nuts under the sink. Lift the faucet off the sink.
What Is A Faucet With Two Handles Called?
A faucet with two handles is called a double-handle or two-handle faucet. Each handle controls either hot or cold water. This design allows precise temperature adjustment. Common in bathrooms and kitchens, it offers a classic and functional style. Ideal for those preferring separate controls for water temperature.
How Do You Replace A Two-handle Kitchen Faucet Cartridge?
Turn off the water supply. Remove the faucet handles using a screwdriver. Unscrew and extract the old cartridges. Insert new cartridges, ensuring they align correctly. Reattach handles and secure them. Turn on the water supply to check for leaks.
Conclusion
Replacing a kitchen faucet with two handles is straightforward with the right tools. Start by gathering necessary supplies. Ensure the water supply is off. Carefully disconnect old fittings. Attach the new faucet securely. Double-check for any leaks. Tighten connections as needed.
This project can refresh your kitchen’s look. Plus, it enhances functionality. Following these steps saves time and money. You gain confidence in handling DIY tasks. Remember to stay patient throughout the process. Enjoy the satisfaction of a job well done.
Your kitchen will thank you!