How to Create a Kitchen Island: Step-by-Step Guide
Imagine transforming your kitchen into a space that not only looks stunning but also works better for you. The secret?
A perfectly designed kitchen island. You might think creating a kitchen island is a daunting task, but what if we told you it could be simple and fun? With the right guidance, you can turn your kitchen into the heart of your home, where family and friends love to gather.
Picture yourself effortlessly preparing meals, with everything you need at your fingertips. Envision the extra storage and seating space, making your kitchen more functional and inviting. This article is your step-by-step guide to crafting a kitchen island that reflects your style and meets your needs. Dive in, and discover how easy it can be to create a kitchen centerpiece that will leave a lasting impression.
Benefits Of A Kitchen Island
Creating a kitchen island enhances functionality and style. It offers extra counter space for meal prep. Also, it provides storage solutions for kitchen essentials, helping you stay organized.
A kitchen island is more than just an attractive centerpiece in your cooking space; it offers a multitude of advantages that can transform your kitchen into a more efficient, organized, and social environment. Whether you’re an avid cook seeking additional counter space or someone who loves entertaining guests, a kitchen island can be a game-changer. Let’s explore the key benefits that a kitchen island can bring to your home.Additional Workspace
A kitchen island provides extra counter space that can be invaluable during meal prep. Imagine having the freedom to chop vegetables, roll out dough, or set up a buffet spread without feeling cramped. This extra room can make your cooking experience smoother and more enjoyable. Think about how much easier your holiday meal preparations could be with that additional surface area to work on.Storage Solutions
One of the most practical benefits of a kitchen island is the extra storage it provides. You can incorporate drawers, shelves, or even cabinets to keep your kitchen essentials organized and within easy reach. No more rummaging through crowded cupboards; you can have your pots, pans, and utensils neatly tucked away. Consider adding hooks or rails to the sides of the island for hanging towels or frequently used kitchen tools.Social Hub
A kitchen island can become the heart of your home, where friends and family gather. It creates a casual atmosphere for socializing, whether it’s chatting over coffee or helping your kids with their homework while you cook. The seating options around an island encourage interaction and make the kitchen a welcoming space. Picture hosting a small get-together where your guests can comfortably sit and converse while you finish preparing the meal. Incorporating a kitchen island can enhance not only the functionality of your kitchen but also its warmth and appeal. What could be better than combining efficiency with style in the most used room of your house?Planning Your Kitchen Island
Designing a kitchen island involves deciding its size, shape, and functionality to fit your space. Consider storage needs, seating, and how it complements the kitchen layout.
Planning Your Kitchen Island A kitchen island can transform your cooking space, adding functionality and style. But before you start building, proper planning is crucial. This ensures your island meets your needs and fits seamlessly into your existing kitchen layout.Assessing Space Requirements
Begin by measuring your kitchen to determine the space available for an island. A good rule of thumb is to have at least 36 to 48 inches of clearance on all sides. This allows for easy movement and ensures the island doesn’t impede workflow. Consider how your family uses the kitchen. Do you need more prep space, seating, or storage? Tailoring the island’s size to your lifestyle can maximize its utility.Choosing The Right Design
Designing your kitchen island involves selecting a shape and style that complements your kitchen. Rectangular islands are popular for larger spaces, while circular or L-shaped designs can work well in compact areas. Think about incorporating features like a sink, stove, or built-in appliances. These can enhance functionality but require careful consideration of plumbing and electrical needs.Selecting Materials And Finishes
The materials and finishes you choose will impact the island’s durability and aesthetic. Solid wood, granite, or quartz are excellent choices for the countertop, offering both beauty and resilience. Don’t forget about the base material. Painted or stained wood, metal, or even concrete can make your island stand out. Ensure that the finishes match or complement your existing kitchen decor. Is there a particular material you’ve always wanted to include in your kitchen? This might be the perfect opportunity to incorporate it. Remember, your kitchen island should be a reflection of your personal style while also serving as a practical addition to your home.Essential Tools And Materials
Building a kitchen island requires essential tools like a saw, drill, and measuring tape. Gather materials such as wood, screws, and paint. Proper preparation ensures a smooth construction process.
Creating a kitchen island is an exciting way to transform your cooking space into a functional and stylish centerpiece. Whether you’re a seasoned DIY enthusiast or just starting, having the right tools and materials is crucial. These essentials not only ensure a smooth building process but also guarantee the durability and aesthetics of your island. As you embark on this project, remember the satisfaction of crafting something unique with your hands. Let’s dive into what you’ll need to get started.Tools You’ll Need
Gathering the proper tools is the first step to success. A tape measure is essential for accurate dimensions, ensuring your island fits perfectly in your space. A circular saw will make cutting through wood a breeze, while a drill is crucial for assembling the frame and attaching surfaces. A level will help keep everything straight, and a square ensures precise angles. Don’t forget a set of screwdrivers and a hammer for those final touches. Investing in quality tools not only saves time but also enhances your DIY experience.Materials Checklist
Choosing the right materials impacts both the look and functionality of your kitchen island. Start with sturdy wood for the base and frame; oak or maple is a popular choice for its strength and beauty. For the countertop, consider butcher block for warmth or quartz for a sleek, modern finish. Hardware such as screws and brackets should be durable to ensure longevity. You may also want to add features like wheels for mobility or shelves for extra storage. A splash of paint or stain can personalize the island, aligning it with your kitchen’s decor. Does the thought of having a custom-made island excite you? With these tools and materials in hand, you’re one step closer to making your kitchen dreams a reality.
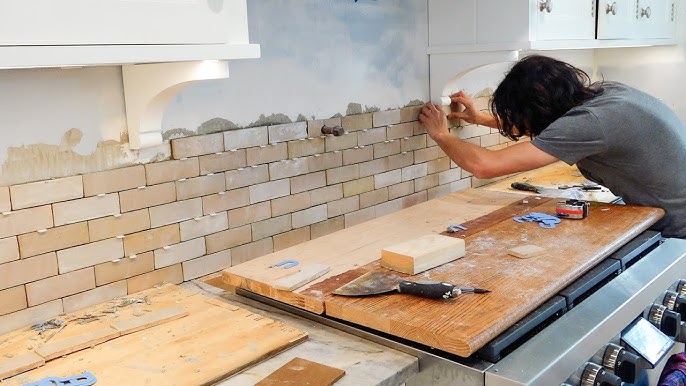
Credit: www.familyhandyman.com
Building The Base
Building the base of your kitchen island is where the magic truly begins. It’s the foundation that supports everything else, ensuring your island stands strong and sturdy. A well-crafted base not only adds to the durability but also enhances the aesthetic appeal of your kitchen. Let’s dive into the essential steps to create a solid base for your kitchen island.
Cutting And Assembling The Frame
Begin by determining the dimensions of your island. This will guide you in cutting the wood to the correct size. Use a saw to cut the pieces accurately.
Once cut, lay out the wooden pieces on the floor to visualize your frame. Ensure each piece fits perfectly before proceeding to assembly.
Join the pieces together using screws and brackets. This provides a strong framework that can withstand daily use. Remember, precision in assembly ensures long-term stability.
Installing Support Structures
Add support beams within the frame. These will hold up heavy countertops and any additional features you plan to include.
Consider using metal or reinforced wood for these supports. They should be evenly spaced and securely fastened to the frame.
Always check the alignment and stability of these supports. Wouldn’t you want your island to last for years without any sagging or wobbling?
- Use a level to ensure everything is aligned properly.
- Double-check all connections for stability.
- Think about the weight of items your island will hold.
Building a kitchen island base is an exciting project that can transform your kitchen space. By focusing on the frame and support structures, you create a reliable foundation for your culinary adventures. What’s your vision for your kitchen island? Let’s make it a reality!
Adding Countertops
Install a countertop to transform a simple table into a functional kitchen island. Choose durable materials like granite or quartz for longevity. Ensure ample workspace for meal preparation and storage needs.
Adding a countertop to your kitchen island is like putting the cherry on top of a sundae. It enhances both functionality and style. Choosing and installing the right countertop can transform your island into the heart of your kitchen. But how do you ensure that your choice meets your needs and complements your space?Selecting Countertop Material
First, consider your lifestyle and cooking habits. Do you cook daily or entertain often? If so, durability should top your list. Materials like granite or quartz resist scratches and heat, making them ideal for busy kitchens. Next, think about maintenance. Some materials like marble can stain easily, requiring regular sealing. If low-maintenance is your goal, look into laminate or solid surfaces which are both easy to clean and maintain. Aesthetics matter too. Your countertop should complement the existing kitchen decor. If your kitchen leans toward a modern aesthetic, sleek stainless steel or polished concrete might be a perfect fit.Installing The Countertop
Start by measuring your kitchen island. Accurate measurements ensure you buy the right size and avoid costly mistakes. Remember, measure twice, cut once. Once you have your countertop, prepare the surface of your island. Ensure it’s clean and level. This step is crucial for a seamless installation. When it’s time to install, enlist help. Countertops are heavy, and having an extra pair of hands can prevent accidents. Secure the countertop in place using appropriate adhesives or fasteners as recommended by the manufacturer. Finally, seal any edges or seams to prevent moisture damage. This step not only protects your investment but also ensures a long-lasting, pristine appearance. Adding a countertop is more than just a functional upgrade. It’s an opportunity to express your style and enhance your kitchen’s overall feel. What will your kitchen island say about you?
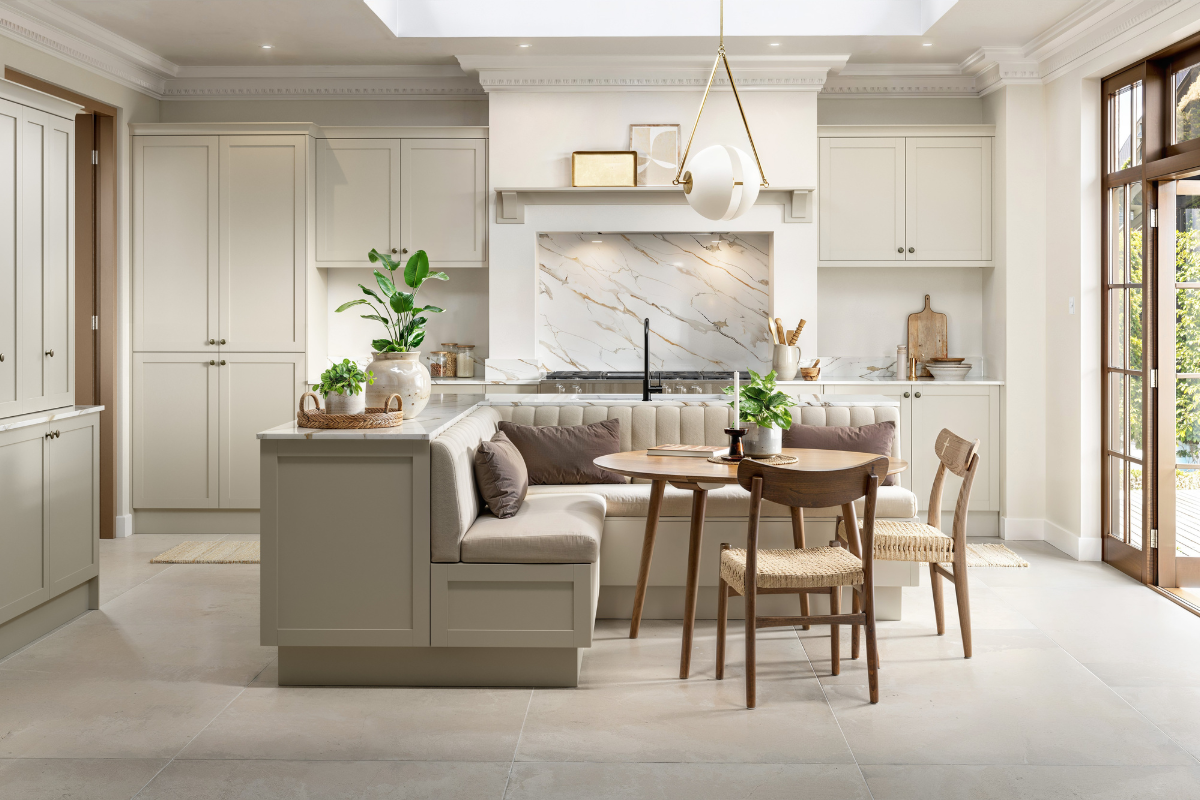
Credit: uk.style.yahoo.com
Incorporating Storage
Incorporate storage by adding shelves and drawers to your kitchen island. This creates extra space for utensils and cookware. Built-in cabinets can keep essentials organized and within reach.
Incorporating storage in a kitchen island enhances its functionality. An island becomes more than just a countertop; it transforms into a central storage hub. Clever storage solutions can help keep your kitchen tidy and organized. Consider incorporating drawers, cabinets, and shelves into your design. These options maximize space and provide easy access to kitchen essentials.Designing Drawers And Cabinets
Drawers and cabinets add significant storage to your kitchen island. Drawers can store utensils, cutlery, and small kitchen gadgets. Deep drawers work well for pots and pans. Consider installing soft-close mechanisms for a smooth, noise-free experience. Cabinets can hold larger items like mixing bowls and small appliances. Opt for adjustable shelves inside cabinets to accommodate varying sizes. Use cabinet doors that match your kitchen style for a cohesive look.Installing Shelving Units
Shelving units are versatile and stylish storage options. Open shelves provide easy access to frequently used items. They also allow you to display decorative pieces or cookbooks. Ensure the shelves are sturdy enough to hold heavier items. Floating shelves create a modern look, while traditional shelves offer a classic feel. Consider using baskets or bins on shelves for a neat appearance. Make sure the shelving complements the rest of your kitchen design.Installing Plumbing And Electrical
Installing plumbing and electrical in your kitchen island enhances functionality. Ensure proper planning for water and power connections. Consult professionals for safe installations and adherence to local codes.
Creating a kitchen island is a rewarding project. It adds functionality and style to your kitchen. Installing plumbing and electrical is a crucial step. Proper installation ensures the island meets your needs effectively. Below, we explore adding a sink and incorporating electrical outlets. These elements enhance the island’s usability.Adding A Sink
Adding a sink to your kitchen island boosts convenience. First, select a sink that fits your design. Ensure it complements the island’s dimensions. Choose plumbing fixtures that match your kitchen theme. Install pipes and connect them to the main water supply. Ensure the drainage system is efficient. Use quality materials to avoid leaks. Test the water flow once installed.Incorporating Electrical Outlets
Electrical outlets are essential for kitchen appliances. Plan the number of outlets needed. Consider the types of devices you’ll use. Install outlets on the sides of the island. Ensure they are easily accessible. Use waterproof outlets for safety. Connect the wiring to the main electrical panel. Check connections to avoid short circuits. Test the outlets with a small appliance.Finishing Touches
Add vibrant stools or a stylish pendant light to enhance your kitchen island. Choose a countertop that complements your kitchen’s theme. Incorporate storage solutions like shelves or drawers for added functionality and style.
Creating a kitchen island is not just about adding functionality to your space; it’s also about infusing your personality and style into the heart of your home. As you approach the finishing touches, remember that this is where your creativity can truly shine. Whether you prefer a sleek, modern look or a cozy, rustic vibe, the final details will set the tone for your entire kitchen.Painting And Staining
The color and finish of your kitchen island can dramatically alter the atmosphere of your space. Choose a paint or stain that complements your existing decor. If your kitchen has a lot of neutral tones, a bold color on the island can create a striking focal point. Consider a high-gloss finish for a contemporary feel or a matte stain for a more traditional look. If you’re painting, remember to use a primer to ensure the color adheres well and lasts longer. A personal tip: I once painted my kitchen island a deep navy blue, which added an unexpected pop of color and became a conversation starter during gatherings.Adding Decorative Elements
Decorative elements can add character and warmth to your kitchen island. Think about incorporating unique hardware, such as vintage handles or modern brushed metal knobs, to enhance the overall design. You can also add open shelving to showcase beautiful dishware or cookbooks. Consider under-counter lighting for a cozy, inviting ambiance in the evenings. Small details, like a stylish bowl of fresh fruit or a vase of flowers, can make your island feel welcoming and lived-in. What decorative touch will make your kitchen island uniquely yours? Embrace the opportunity to express your style and transform your kitchen into a space that feels both functional and personal.Maintenance Tips
Creating a kitchen island involves choosing durable materials and ensuring proper lighting. Regular cleaning and sealing of surfaces help maintain its beauty and functionality. Keep the island organized with storage solutions for a tidy cooking space.
Maintaining your kitchen island is essential to keep it looking fresh and functioning well. Whether you’re an avid home cook or just love a stylish kitchen, taking the time to care for this centerpiece can make a huge difference. Let’s dive into some practical tips to ensure your island stays in top condition for years to come.Cleaning And Care
Regular cleaning is vital for preserving the beauty of your kitchen island. Wipe down the surface daily with a soft cloth and mild dish soap. Avoid harsh chemicals that can damage the finish. For wooden islands, apply a food-safe oil monthly to maintain its sheen and prevent drying out. Granite or marble countertops may require a specialized cleaner to protect their natural beauty. Don’t forget the edges and corners; they often collect dust and crumbs. A quick vacuum or brush will keep them tidy. How often do you clean the hidden parts of your kitchen island?Repairing Damage
Accidents happen, and your kitchen island might endure a scratch or a dent. Address these issues promptly to prevent further damage. For minor scratches on wood, a matching wax crayon can work wonders. Deeper gouges might need wood filler, followed by sanding and refinishing. Stone surfaces can benefit from a professional reseal to tackle chips or cracks. Consider keeping a small repair kit on hand for quick fixes. Have you ever tackled a repair yourself and felt that satisfying accomplishment?
Credit: penniesforafortune.com
Frequently Asked Questions
Is It Cheaper To Buy Or Build A Kitchen Island?
Buying a kitchen island is usually cheaper than building one. Prefabricated models save time and labor costs. Custom-built islands can be more expensive due to materials and craftsmanship. Consider your budget and specific needs when deciding between buying or building.
Can I Build My Own Kitchen Island?
Yes, you can build your own kitchen island. Gather materials, tools, and a detailed plan. Ensure you have basic carpentry skills. Customize it to fit your space and needs. Consider consulting online tutorials or guides for step-by-step instructions. A DIY kitchen island can enhance functionality and style.
What Are The Rules For Kitchen Island Design?
Design kitchen islands with ample workspace, maintain 42-inch clearance, match island style to kitchen, ensure proper lighting, and incorporate storage solutions.
What Can I Use Instead Of A Kitchen Island?
Consider using a rolling cart, dining table, or countertop extension. These options provide space and functionality. A wall-mounted foldable table or a butcher block on wheels can also work. Opt for a peninsula or a floating shelf for added versatility in compact kitchens.
Conclusion
Creating a kitchen island is a rewarding project. It enhances your kitchen’s functionality and style. Start with a clear plan. Measure your space accurately. Choose materials that match your kitchen decor. Consider storage needs and seating options. Assemble your tools and gather materials.
Follow each step with care. Remember, patience is key. A well-crafted island adds value to your home. Enjoy the process and the result. Your kitchen will become a favorite gathering spot. Happy building!