How to Fit Kitchen Sink: Step-by-Step Guide for DIY Enthusiasts
Are you looking to upgrade your kitchen with a new sink? Or maybe you’re tackling a DIY project to boost your home’s value?
Whatever your reason, fitting a kitchen sink can seem daunting. But don’t worry, you’ve come to the right place! Imagine the satisfaction of admiring your perfectly fitted sink, knowing you did it yourself. This guide will walk you through the process, step by step, making it easier than ever to achieve professional results.
You’ll learn the secrets to a seamless installation, avoiding common pitfalls that could cost you time and money. Ready to transform your kitchen? Let’s dive into how you can fit your kitchen sink like a pro!
Choosing The Right Sink
Choosing the right kitchen sink is a pivotal step in your remodeling journey. It’s not just about aesthetics; functionality and durability are key. With so many options available, selecting the perfect sink can feel overwhelming. But fear not! With a bit of guidance, you can pick a sink that fits your kitchen and lifestyle seamlessly.
Types Of Kitchen Sinks
The variety of sink types can suit any kitchen style. Consider the following:
- Top-mount Sinks:Easy to install and ideal for quick upgrades. They sit above the countertop, making them a popular choice.
- Undermount Sinks:Provide a seamless look with countertops. They require professional installation but offer easy cleaning.
- Farmhouse Sinks:Known for their deep basin and rustic charm. Perfect if you love the classic, spacious design.
Materials And Durability
The material you choose impacts the sink’s longevity and maintenance. Consider these options:
- Stainless Steel:Durable and easy to clean. It’s a favorite for modern kitchens but can show water spots.
- Cast Iron:Coated with enamel for a glossy finish. It’s heavy and requires sturdy support but offers excellent durability.
- Composite Granite:Scratch-resistant and available in various colors. Offers durability with a stylish touch.
Size And Configuration Considerations
Before settling on a sink, think about its size and configuration. These factors can greatly affect your kitchen’s workflow:
- Single Bowl:Offers ample space for large pots. It’s ideal for those who prefer uninterrupted space.
- Double Bowl:Allows multitasking, like washing dishes while prepping food. Choose this if you value versatility.
- Custom Sizes:Tailored to fit unique spaces. Consider your kitchen layout and countertop space carefully.
Have you ever struggled with fitting large pans into your sink? Reflect on your daily kitchen tasks to identify your needs. The right sink configuration can make cooking and cleaning a breeze.

Credit: torva.com
Gathering Essential Tools
Gather tools like a wrench, plumber’s tape, and a bucket to fit your kitchen sink efficiently. Ensure all necessary tools are within reach to avoid interruptions during installation.
Gathering essential tools is the first step in fitting a kitchen sink. Without the right tools, the task may become challenging and time-consuming. Proper preparation ensures efficiency and safety during installation.Basic Tools Required
To install a kitchen sink, a few basic tools are necessary:- Adjustable wrench: Useful for tightening nuts and bolts.
- Pipe wrench: Needed for working with plumbing pipes.
- Screwdriver set: Essential for various screws in the sink setup.
- Plumber’s tape: Helps prevent leaks in threaded connections.
- Bucket: Catches any water during the installation.
Safety Gear And Precautions
Safety is crucial during any installation process. Wearing appropriate gear can protect you from unexpected injuries.- Gloves: Keep your hands safe from sharp edges.
- Safety goggles: Protect your eyes from debris.
- Ear protection: Useful if using loud power tools.
Preparing The Work Area
Clear the area for easy access to pipes and fittings. Ensure all tools are within reach. Remove any items that might obstruct your workspace.
Preparing the Work Area Fitting a kitchen sink is an exciting home improvement project that can transform the look and functionality of your space. Before diving into the installation, it’s crucial to prepare your work area meticulously. A well-prepared area not only speeds up the process but also minimizes risks and potential damage.Clearing The Space
Begin by removing all items from under the sink and the surrounding countertop. This is your chance to declutter and perhaps discover things that have been tucked away for too long. By clearing the space, you avoid unnecessary obstructions and create a more efficient work environment. Utilizing a small table or tray to organize tools and parts can be immensely helpful. This ensures everything is within arm’s reach and you aren’t scrambling around looking for a screwdriver or a washer mid-installation.Protecting Surfaces
It’s easy to overlook surface protection, but this simple step can save you from costly repairs later. Use drop cloths or old towels to cover the countertop and any flooring directly beneath the workspace. This acts as a safeguard against scratches, dents, and any accidental spills. Consider using painter’s tape on the edges of the countertop. It provides an extra layer of protection and can help prevent chipping. Remember, a little precaution goes a long way in preserving the aesthetics of your kitchen. Have you ever considered how vulnerable your surfaces are during such projects? Taking this time to protect them is a small task that pays off immensely in keeping your kitchen pristine.:strip_icc()/kitchen-bamboo-countertops-colored-cabinets-sink-3FyjOiKM4fP95cPOHZJR-P-15f5f0dfef9945b9af9c121b0a7aad6e.jpg)
Credit: www.bhg.com
Removing The Old Sink
Removing the old sink makes space for fitting a new kitchen sink. Disconnect plumbing pipes using a wrench. Lift the sink carefully after removing the mounting clips.
Removing the old sink is the first step in fitting a new kitchen sink. This part of the process needs careful planning and attention. Start by ensuring all necessary tools are within reach. Make sure to turn off the water supply to the sink. Safety is key, so wear protective gloves and glasses. Let’s dive into the detailed steps for removing the old sink.Disconnecting Plumbing
Begin by placing a bucket under the sink pipes. This will catch any excess water. Use a wrench to loosen the nuts on the water supply lines. Carefully disconnect the hot and cold water lines. Next, focus on the drain pipe. Loosen the slip nuts and remove the pipe. Have some towels handy to wipe any spills. Ensure all connections are completely detached before moving to the next step.Detaching The Sink
Check for any clips holding the sink in place. Use a screwdriver to remove these clips. If caulk is present around the edges, cut it with a utility knife. Gently lift the sink from the counter. If it resists, double-check for missed fasteners. Once free, remove the sink and set it aside. Clean the area to prepare for the new sink installation. This ensures a smooth and secure fit.Fitting The New Sink
Ensure the sink is the right size for the counter space. Secure the sink with mounting clips underneath. Connect the plumbing, including the faucet and drain pipes, tightly to prevent leaks.
Fitting the New Sink When you’re ready to fit your new kitchen sink, the process can feel both exciting and daunting. A well-fitted sink not only enhances the functionality of your kitchen but also elevates its aesthetic appeal. Let’s dive into the practical steps to ensure your new sink fits perfectly in your space.Positioning And Marking
First, determine the ideal position for your sink. Consider factors like plumbing access and usability. It’s crucial to ensure the sink aligns well with the existing piping to avoid extensive plumbing adjustments. Place the sink upside down on the countertop where you plan to install it. Trace the outline with a pencil, ensuring it’s centered and appropriately distanced from the edge. This line will guide you in creating the cutout.Cutting The Countertop
Cutting the countertop is a critical step that requires precision. Use a drill to create a pilot hole at one corner of the marked outline. This hole will help you insert the jigsaw blade for cutting. Follow the traced line with a jigsaw, keeping your cuts slow and steady. It’s vital to support the cut-out section from beneath to prevent it from falling and damaging the countertop. Once you’ve completed the cut, test fit the sink to ensure it sits perfectly in the opening. Adjust the cuts slightly if necessary, ensuring a snug fit. Are you feeling confident about making that first cut? Remember, a steady hand and a clear plan can make all the difference.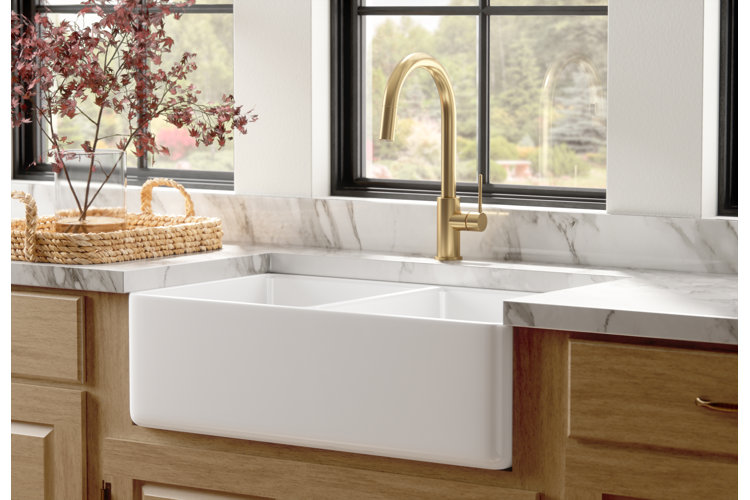
Credit: www.wayfair.ca
Installing The Sink
Installing a kitchen sink can enhance your kitchen’s functionality. Follow these steps for a seamless installation process. Begin by ensuring you have all necessary tools and materials. Check the sink fit against the countertop cutout. Make adjustments if required. Position the sink carefully, aligning it with plumbing connections.
Securing The Sink
Properly secure the sink to avoid movement. Use brackets or clips under the countertop. These provide stability. Tighten each clip equally. Ensure the sink is level and secure. This prevents leaks and damage.
Sealing Edges
Seal the sink edges to prevent water seepage. Apply silicone caulk around the sink perimeter. Ensure an even layer. Use a caulk gun for precision. Smooth the caulk with a tool or finger. Allow drying time as per instructions. This ensures a watertight seal.
Reconnecting Plumbing
Begin by ensuring all connections are secure. Align the sink with the countertop opening. Tighten clamps and seal edges to prevent leaks.
Reconnecting plumbing is a pivotal step in fitting your new kitchen sink. Ensuring everything is properly connected will prevent future leaks and keep your kitchen running smoothly. It’s like finishing a puzzle, where each piece must fit precisely to achieve the perfect picture.Attaching Pipes And Hoses
Begin by aligning the pipes with the sink’s drain outlet. This might require some maneuvering, especially if you’ve installed a different model than your previous sink. Use flexible hoses to connect the faucet to the water supply. These hoses are your allies in tight spaces and awkward angles. Tighten the connections using a wrench but be cautious not to overtighten, which can damage the fittings. Consider using plumbing tape to create a secure seal. This tape acts as a buffer, ensuring that your connections remain leak-free.Checking For Leaks
Now that the pipes and hoses are attached, it’s time for a thorough leak check. Run both hot and cold water to test the connections. Pay attention to any drips or water accumulation around the fittings. Place a dry paper towel beneath each connection. This simple trick will quickly highlight any leaks. If you notice damp spots, inspect the connections and tighten them if necessary. Remember, a small leak now can turn into a big problem later. Are you confident everything is sealed tight? It’s worth double-checking to ensure peace of mind.Finishing Touches
Completing the installation of your kitchen sink feels rewarding. The final steps ensure everything works perfectly. These finishing touches make your kitchen shine.
Cleaning Up The Area
A tidy workspace makes a big difference. Start by removing any debris or leftover materials. Use a damp cloth to wipe down surfaces around the sink. This prevents dust and dirt from settling in the crevices. Check the faucet and handles for any smudges or fingerprints. A clean sink area enhances the overall look of your kitchen.
Testing The Installation
Testing ensures your installation is successful. Turn on the water and check for leaks around the edges. Listen for unusual sounds that might indicate a problem. Run both hot and cold water to verify proper connections. Check the drainage to ensure water flows smoothly without any blockages.
If you notice any issues, address them immediately. Tighten connections or adjust the fittings as needed. Proper testing prevents future problems and keeps your sink in top condition.
Frequently Asked Questions
Can You Fit A Kitchen Sink Yourself?
Yes, you can fit a kitchen sink yourself. Ensure you have the right tools and follow instructions carefully. Check plumbing connections to avoid leaks. Consult a professional if you’re unsure about the installation process.
What Holds A Kitchen Sink In Place?
Clips, brackets, and adhesive sealants hold a kitchen sink in place. These components ensure stability and prevent leaks. Proper installation and secure fastening are crucial for a durable and functional kitchen sink setup. Regular maintenance can help maintain its position and effectiveness.
Do You Need A Plumber To Fit A Kitchen Sink?
Hiring a plumber ensures proper installation and avoids potential issues. DIY installation is possible with the right tools and skills, but professional help guarantees efficiency and compliance with regulations. A plumber can also handle unexpected complications.
How To Seal A Sink To A Countertop?
To seal a sink to a countertop, clean the surface. Apply silicone sealant around the sink’s edge. Position the sink on the countertop. Press firmly to ensure a tight seal. Wipe off excess sealant with a damp cloth. Allow the sealant to cure for at least 24 hours.
Conclusion
Fitting a kitchen sink is simpler than it seems. With the right tools, anyone can do it. Follow the steps carefully. Measure twice, cut once. Securely connect all plumbing parts. Check for leaks after installation. Tighten connections if necessary. Having a functional sink enhances kitchen tasks.
It adds convenience and value to your home. Remember, safety first. Always turn off the water supply before starting. With patience and attention to detail, your sink will fit perfectly. Enjoy your new kitchen sink and the ease it brings.