How to Fix a Leaky Delta Kitchen Faucet: Quick Guide
Is the constant drip-drip-drip of your Delta kitchen faucet driving you up the wall? You’re not alone.
A leaky faucet isn’t just annoying; it can also inflate your water bill and even lead to water damage over time. But here’s the good news: you don’t have to be a plumbing pro to fix it. With a few basic tools and a little guidance, you can stop that leak and restore peace to your kitchen.
Imagine the satisfaction of turning that tap off, only to hear. . . Nothing. It’s easier than you think. Ready to take control of your faucet and your sanity? Let’s dive into the simple steps that will have your Delta kitchen faucet running like new again.

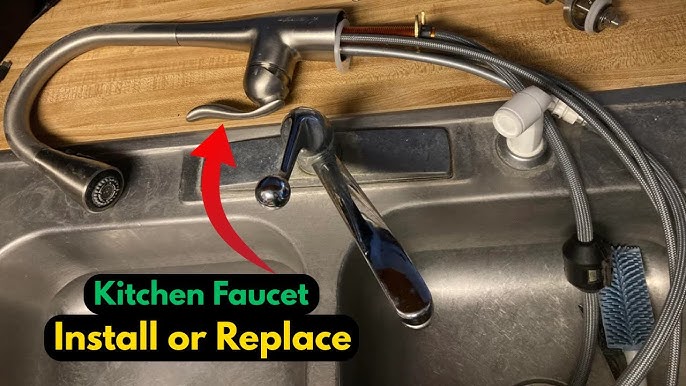
Credit: www.youtube.com
Identify The Leak Source
Determine the exact location of the leak by carefully inspecting the faucet. Check handles, spout, and connections.
Identifying the source of a leak in your Delta kitchen faucet is the crucial first step in resolving the issue. A leaky faucet can disrupt your daily routine and increase your water bill. Understanding where the leak originates empowers you to fix it efficiently, saving time and money. Whether it’s a minor drip or a constant flow, pinpointing the exact source allows for a targeted solution. Let’s dive into the common areas where leaks may occur.Check Faucet Handle
The faucet handle is a common culprit for leaks. Begin by turning off the water supply to prevent any accidents. Carefully remove the handle using a screwdriver, observing any worn-out washers or seals that might need replacement. Often, mineral deposits accumulate, causing the handle to malfunction. Cleaning these deposits can sometimes resolve the issue.Inspect The Spout
A persistent drip from the spout can be annoying. To tackle this, inspect the spout for any visible damage or loose connections. Remove the aerator and clean it thoroughly; dirt buildup can obstruct water flow, causing leaks. If the spout itself is damaged, consider replacing it to restore your faucet’s functionality.Examine The Base
Leaks around the base often go unnoticed until water pools around the faucet. Check for cracks or gaps that might be causing the leak. Tighten any loose screws or bolts; sometimes a simple adjustment is all that’s needed to stop the leak. If the gasket is worn out, replacing it can effectively seal the base and prevent further leaks. By scrutinizing these key areas, you can determine the source of your faucet leak and apply the necessary fixes. Have you ever faced a faucet leak that seemed impossible to fix? Understanding the source is often half the battle.Gather Necessary Tools
Prepare by gathering essential tools like a wrench, screwdriver, and plumber’s tape. These tools help in removing the faucet and sealing leaks effectively. Having them ready ensures a smooth repair process.
Gathering the necessary tools before starting a repair can save you time and frustration. Whether you’re a seasoned DIY enthusiast or tackling your first plumbing project, having the right tools on hand is crucial. Imagine diving into a repair only to realize you’re missing a key component. It’s a common hiccup that can turn a straightforward task into a drawn-out ordeal. So, let’s ensure you have everything you need to fix that leaky Delta kitchen faucet.List Of Basic Tools
Before embarking on your repair journey, make sure you have the essentials ready. These tools form the backbone of most home repair tasks:- Adjustable Wrench:A versatile tool that grips onto various sizes, making it perfect for loosening and tightening faucet nuts.
- Phillips and Flathead Screwdrivers:These are indispensable for removing screws from the faucet handle.
- Plumbers Tape:Also known as Teflon tape, it helps ensure a watertight seal on threaded connections.
- Bucket:Place this under the sink to catch any water that escapes during the repair process.
Special Tools For Delta Faucets
Delta faucets may require some unique tools that aren’t found in every toolbox. Equipping yourself with these can make the process smoother:- Allen Wrench Set:Delta faucets often use Allen screws to secure parts. A set with various sizes ensures you can remove any screws with ease.
- Delta Cartridge Puller:This specialized tool is designed to safely extract the cartridge without damaging the faucet housing.
- O-Ring Replacement Kit:Delta faucets are known for their high-quality seals, and having a replacement kit ensures you can fix leaks efficiently.
Turn Off Water Supply
Locate the main water valve under the sink and rotate it clockwise to stop water flow. Ensure the faucet and pipes are dry before proceeding with repairs.
Turning off the water supply is the first step to fixing a leaky Delta kitchen faucet. This prevents water from flowing while you work, reducing the risk of further leaks or water damage. Make sure your water is turned off before starting any repair tasks.Locate Shut-off Valves
Most kitchen faucets have shut-off valves under the sink. Look for small handles or knobs connected to pipes. These are often located at the back of the cabinet. Turn the knobs clockwise to shut off the water. You should feel them tighten as the water flow stops. If you can’t find them, the main water supply might need to be turned off.Drain Excess Water
Once the water is off, drain any remaining water from the faucet. Open the tap and let any water in the lines escape. This ensures that your work area stays dry. Catch the water in a bowl or bucket to avoid mess. This step is crucial for a clean and efficient repair process.
Credit: www.youtube.com
Disassemble The Faucet
Turn off the water supply before disassembling the Delta kitchen faucet. Remove the handle and unscrew the bonnet nut carefully. Follow with taking out the ball assembly to inspect for worn parts and replace them as needed.
Disassembling your Delta kitchen faucet is the first step to fixing leaks. It helps you access inner parts and identify issues. Before starting, shut off the water supply. This prevents spills and makes the task easier. Gather essential tools like a screwdriver and wrench.Remove Handle
To remove the handle, locate the set screw. It’s often hidden under a cap or cover. Use a screwdriver to gently lift off the cap. Once exposed, loosen the set screw with an Allen wrench. Pull the handle off the faucet body. This reveals the cartridge and other components.Detach Spout Assembly
Next, detach the spout assembly. It’s crucial for accessing seals and washers. First, unscrew the retaining nut holding the spout in place. Carefully lift the spout off the faucet. Check for O-rings or seals on the assembly. These might need replacement if worn or damaged.Inspect And Replace Damaged Parts
Inspect the faucet for worn-out or cracked parts. Replace any damaged components to prevent future leaks.
Inspecting and replacing damaged parts is a crucial step in fixing a leaky Delta kitchen faucet. By focusing on this task, you can effectively identify the root cause of the leak and apply the necessary repairs. Taking the time to thoroughly inspect the faucet can save you from future headaches and potentially costly replacements.Check For Worn Seals And O-rings
Begin by turning off the water supply to prevent any mess. Disassemble the faucet handle carefully to expose the internal components. Here, you’re looking for worn seals and O-rings, which are often the culprits behind leaks. Worn seals lose their flexibility over time and can crack, leading to leaks. Gently inspect these parts for any visible damage. If you notice any wear or brittleness, it’s time to replace them. You might wonder how often these should be replaced. It largely depends on usage, but checking them annually can prevent unexpected leaks.Replace Cartridges Or Washers
Next, focus on the cartridges or washers inside your faucet. These parts play a vital role in controlling water flow and pressure. If they’re damaged, leaks are inevitable. Remove the cartridge or washer using a wrench or screwdriver, depending on your faucet model. Pay attention to the orientation of these parts during removal for easy reinstallation. Once out, examine them closely. If they appear worn or cracked, replace them with new ones from your local hardware store. Always ensure the replacements are compatible with your Delta faucet model. Replacing these parts can seem daunting, but it’s a straightforward task with the right tools. Have you ever thought about how much water could be wasted due to a simple washer issue? Addressing these small components can make a big difference in your water bill and environmental footprint.Reassemble The Faucet
Reassemble the faucet by carefully aligning the parts. Ensure all components fit snugly to prevent future leaks. Tighten screws and check the seals for a secure fit.
Reassembling your Delta kitchen faucet requires careful attention. After fixing the leak, putting it back together ensures smooth operation. Follow these steps to complete the task efficiently.Reattach Spout
Begin by sliding the spout back onto the faucet base. Ensure it sits firmly without any gaps. Align it correctly to prevent future leaks. Check for any remaining debris or dirt. Clean the area to ensure a tight fit. Gently press the spout down until it clicks into place. Test the spout by rotating it to ensure it moves freely.Secure Handle
Position the handle over the cartridge stem. Ensure it aligns with the grooves correctly. Use a screwdriver to tighten the handle screw. Do not overtighten, to avoid damaging the faucet. Check the handle’s movement; it should be smooth and steady. Replace the decorative cap if your model has one. Make sure it snaps securely into place. Once reassembled, test the faucet for any leaks. Turn on the water supply and observe. A properly reassembled faucet will function without drips. If leaks persist, retrace your steps. Adjust and tighten any loose components as needed.Test For Leaks
Test for leaks by turning on the faucet and checking for drips around the base and spout. Identifying leaks early helps in fixing them effectively, preventing water wastage and potential damage.
Testing for leaks is a crucial step in fixing a leaky Delta kitchen faucet. After making repairs, it ensures everything is in working order. This process helps confirm your efforts were successful. Let’s go through the steps to test for leaks effectively.Turn On Water Supply
Begin by turning on the water supply. Locate the water valves under the sink. Turn the valves counterclockwise to open them. This allows water to flow into the faucet. Ensure both the hot and cold supplies are fully open. Listen for any unusual sounds. This could indicate potential issues. Once open, proceed to check the faucet.Check For Drips
With the water on, inspect the faucet closely. Look beneath the sink and around the base. Keep an eye out for drips or small leaks. These may be subtle, so take your time. Use a dry cloth to detect moisture. If you find any, you might need to tighten connections. Ensure the faucet handle is turned off. Check the spout for any continuous drips. If none are present, your repair was successful. If leaks persist, re-evaluate the repair steps. Adjust or replace components as needed.
Credit: www.youtube.com
Maintenance Tips
Keeping your Delta kitchen faucet in top-notch condition is crucial for avoiding leaks and ensuring smooth operation. Regular maintenance can significantly extend the lifespan of your faucet and prevent costly repairs. Below are some practical maintenance tips that can help you keep your faucet running like new.
Regular Cleaning
Regular cleaning is essential for maintaining the functionality and appearance of your faucet. Mineral deposits from hard water can accumulate over time, affecting the faucet’s performance. A simple mix of vinegar and water can be used to clean these deposits.
- Apply the solution to a soft cloth and gently wipe the faucet.
- Use a toothbrush to clean hard-to-reach areas.
- Rinse with water and dry with a soft towel to prevent water spots.
Have you noticed your faucet looking dull? A little cleaning goes a long way in keeping it shiny and efficient.
Routine Inspections
Routine inspections can help you catch potential issues before they become major problems. Regularly check for leaks, loose handles, or worn-out seals. Early detection can save you from a sudden leak.
- Inspect the base and spout for any signs of water leakage.
- Check the aerator for sediment build-up that can affect water flow.
- Ensure all parts are tightly secured and functioning smoothly.
Have you ever been surprised by a sudden leak? Routine checks can prevent these unexpected issues.
Why not make a habit of adding these maintenance tasks to your monthly chores? Your faucet will thank you for the extra attention!
Frequently Asked Questions
How Do I Stop My Delta Faucet From Leaking?
Turn off the water supply. Remove the handle and replace worn-out washers or seals. Reassemble and test for leaks.
Why Is My Kitchen Faucet Dripping After Shut Off?
Your kitchen faucet may drip due to a worn-out washer, damaged cartridge, or loose parts. Check for mineral deposits or faulty seals. Fixing or replacing these components can usually resolve the issue. Regular maintenance helps prevent future leaks.
How Do I Change The O-rings On My Delta Kitchen Faucet?
To change the O-rings on your Delta kitchen faucet, turn off the water supply. Remove the handle and collar. Pull out the spout. Replace old O-rings with new ones. Reassemble the faucet. Check for leaks by turning the water supply back on.
How Do I Know What Model Delta Faucet I Have?
Check for a model number on your Delta faucet, usually found on the faucet’s packaging, manual, or under the sink. You can also visit Delta’s website and use their product identification tool. Contact Delta customer service with photos if you need further assistance.
Conclusion
Fixing a leaky Delta kitchen faucet is straightforward. Gather tools, follow steps, and ensure tight seals. Regular maintenance prevents future leaks. Check washers and O-rings frequently. Keep your faucet clean and functional. A little effort saves time and money. Take pride in handling small repairs.
Enjoy a leak-free kitchen. Share your success with friends. Encourage them to try fixing faucets too. Home repairs build confidence. You can do it. Every small fix counts. Appreciate your handiwork. Happy plumbing!