
How to Kitchen Backsplash Like a Pro: Tips & Tricks
Are you dreaming of a kitchen that reflects your style and personality? Look no further than your backsplash.
This often-overlooked space can transform your kitchen from ordinary to extraordinary. Whether you’re aiming for a sleek, modern look or a cozy, rustic feel, the right backsplash can make all the difference. But where do you start? The process might seem daunting, but with a little guidance, you can tackle it like a pro.
Imagine impressing your guests with a kitchen that feels like it belongs in a magazine. Intrigued? Keep reading to discover the secrets to choosing and installing the perfect kitchen backsplash, and turn your culinary space into the heart of your home.

Credit: carlaaston.com
Choosing Materials
Choosing the right materials for a kitchen backsplash is crucial. Consider durability, style, and ease of cleaning. Popular options include ceramic, glass, and stone tiles.
Choosing the right materials for your kitchen backsplash is an exciting part of the renovation journey. Your choice not only influences the aesthetic appeal but also the functionality and longevity of your kitchen space. As you consider various options, think about how each material complements your kitchen’s style, your cooking habits, and how much maintenance you’re willing to handle.Tile Options
Tile is a classic choice for kitchen backsplashes, offering a wide variety of colors, patterns, and textures. Ceramic and porcelain tiles are popular for their durability and ease of cleaning. If you’re looking for a touch of tradition with a modern twist, subway tiles could be a perfect fit. Handmade tiles, though more expensive, add a unique charm and are perfect for creating a custom look. Consider how grout color can impact the overall look—contrast for a bold statement or matching for a seamless appearance.Glass Backsplash
Glass backsplashes are perfect for modern kitchens, offering a sleek, reflective surface that can make a space feel larger. They come in a range of colors and can even be back-painted for a custom hue. Glass is easy to clean and resistant to water damage, making it a practical choice for busy kitchens. If you enjoy art, consider a printed glass backsplash featuring a favorite pattern or image. This can turn your kitchen into a personal gallery, making daily cooking a more enjoyable experience.Natural Stone Choices
Natural stone backsplashes, like marble, granite, or slate, add a touch of luxury and timeless elegance to your kitchen. Each stone has unique veining and color variations, ensuring that your backsplash is one-of-a-kind. However, natural stone requires a bit more maintenance. It needs to be sealed regularly to prevent staining. Think about how much wear and tear your kitchen sees and whether you’re prepared for the upkeep. Your kitchen backsplash is an opportunity to express your style and add practical value to your home. Which material resonates with your vision for your kitchen?
Credit: www.youtube.com
Essential Tools
Selecting essential tools for a kitchen backsplash project simplifies the process. Measure tape, tile cutter, and adhesive ensure precise and secure installation. Grout float and sponge finish the look, providing a professional touch.
Installing a kitchen backsplash can transform the look and feel of your space. It’s not just about aesthetics; a backsplash protects walls from spills and stains. But before you dive in, understanding the essential tools you need is crucial. This ensures you not only have a smoother experience but also achieve a professional finish.Cutting Tools
To start, you’ll need precise cutting tools. Tile cutters or wet saws are indispensable for cutting tiles to fit around outlets and corners. A tile cutter is great for straight cuts, while a wet saw is ideal for intricate shapes. Consider using a glass cutter for glass tiles; it’s a small tool but mighty in precision. Always wear safety goggles to protect your eyes from flying shards.Adhesive Materials
Adhesive materials are the backbone of your backsplash installation. Thin-set mortar is popular for its strength and durability, making it ideal for heavier tiles. Alternatively, adhesive mats offer a cleaner application, suitable for lighter materials like peel-and-stick tiles. It’s essential to choose the right adhesive for your tile type. This choice can make or break the longevity of your backsplash. Test a small patch to ensure it adheres well to your wall surface.Grouting Supplies
Grouting is the final step that seals the deal. A rubber grout float helps in evenly spreading grout between the tiles. Opt for sanded grout if your tiles have wider gaps; unsanded grout is better for narrower spaces. Don’t forget a sponge to wipe away excess grout. The key to a clean finish is to remove the surplus before it hardens. Grouting can be messy, but a well-grouted backsplash is worth the effort. Are you ready to start your backsplash project? With the right tools, you’ll find the process not only rewarding but fun. Each completed step will bring you closer to your dream kitchen.Preparing The Surface
Preparing the surface is crucial for a successful kitchen backsplash installation. Ensuring a clean and smooth area helps tiles stick better and last longer. This step involves several key tasks that set the foundation for a flawless finish. By carefully cleaning, measuring, and protecting, you create the ideal canvas for your backsplash masterpiece.
Cleaning The Wall
Start with removing all dust and grease. Use a damp sponge with mild soap. Wipe the wall thoroughly to eliminate residue. Let the wall dry completely before proceeding. This prevents tiles from slipping and ensures strong adhesion.
Measuring For Fit
Accurate measurements are essential. Use a measuring tape to gauge wall dimensions. Mark areas where switches and outlets exist. Consider tile size for a perfect fit. Double-check measurements to avoid errors during installation.
Protecting Countertops
Shield your countertops with plastic sheets or newspaper. Tape edges securely to prevent slipping. This safeguards against adhesive spills and tile debris. A clean workspace enhances focus and efficiency.
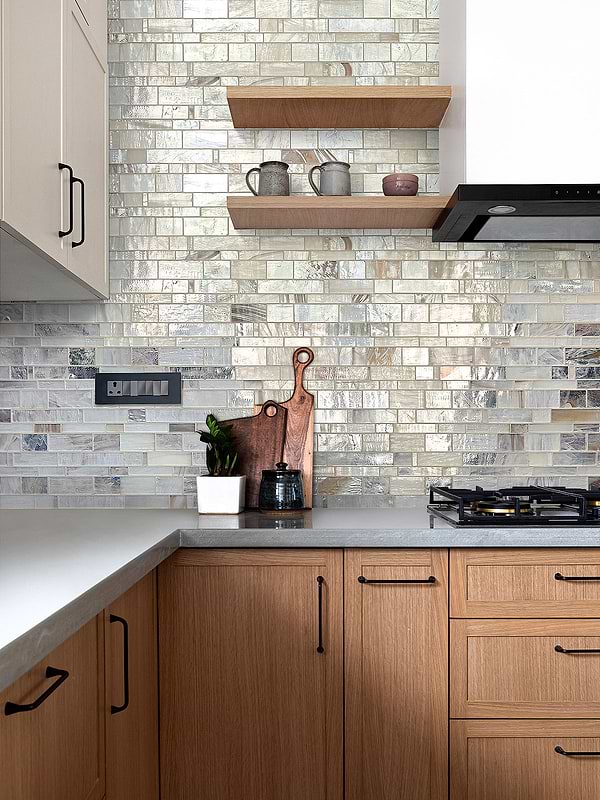
Credit: www.backsplash.com
Installation Process
The installation process for a kitchen backsplash can seem challenging. But with a little patience, it becomes manageable. Follow these steps for a smooth installation. Each stage is crucial for a perfect finish.
Applying Adhesive
Start by preparing the wall surface. It should be clean and dry. Use a notched trowel to apply the adhesive. Spread it evenly across a small section of the wall. Work in small areas to prevent the adhesive from drying out. A thin, even layer works best. This ensures the tiles stick properly.
Setting The Tiles
Press each tile gently into the adhesive. Use spacers between tiles for consistent gaps. This helps with grout application later. Start from the bottom center and work outward. This method maintains symmetry. Continue until the section is covered. Adjust tiles as needed before the adhesive sets.
Ensuring Alignment
Check alignment regularly using a level. This ensures straight rows and columns. Adjust any misaligned tiles immediately. Misalignment can affect the overall look. It’s easier to fix before the adhesive dries. Keep your lines straight for a professional appearance.
Grouting Techniques
Grouting techniques ensure a neat kitchen backsplash. Proper application prevents water damage and enhances tile appearance. Use a rubber float to spread grout evenly between tiles. Clean excess grout with a damp sponge for a polished look.
Grouting is a crucial step in installing a kitchen backsplash. It seals the tiles and enhances the overall appearance. Proper grouting techniques ensure durability and a polished look. Let’s explore some essential steps in grouting.Mixing Grout
Mixing grout correctly is vital for a smooth finish. Use a clean bucket to mix grout powder with water. Follow the instructions on the grout package for accurate measurements. Stir the mixture until it’s free of lumps and has a creamy consistency. Let it sit for a few minutes, then stir again. This helps to activate the ingredients for better bonding.Applying Grout
Apply grout using a rubber float. Hold the float at a 45-degree angle. Press grout into the spaces between tiles. Work in small sections to ensure even application. Move the float diagonally across the tiles. This helps to fill all gaps effectively. Remove excess grout from the tile surface with the edge of the float.Cleaning Excess
Cleaning excess grout is essential for a neat finish. Wait about 15 minutes for the grout to set slightly. Use a damp sponge to wipe away excess grout from tile surfaces. Rinse the sponge frequently to avoid spreading grout residue. After an hour, buff the tiles with a dry cloth. This removes any remaining haze and enhances shine.Sealing The Backsplash
Seal your kitchen backsplash to protect against moisture and stains. Use a quality sealant for lasting durability. Ensure a clean surface before applying for optimal results.
Sealing the backsplash adds longevity and beauty to your kitchen design. It protects against stains and moisture, preserving the look of tiles or other materials. A well-sealed backsplash also makes cleaning easier, reducing wear over time.Choosing A Sealant
Selecting the right sealant is crucial for effective protection. Consider the material of your backsplash. Glass tiles may need a different sealant than stone or ceramic. Look for a sealant that enhances durability and resists moisture. Read product labels to ensure compatibility with your tile type. Opt for a sealant that is easy to apply and dries clear.Application Tips
Applying sealant requires precision. Clean the backsplash surface thoroughly before application. Remove dirt and grease with a mild cleaner. Use a brush or roller to apply the sealant evenly. Cover all areas, including grout lines, to ensure complete protection. Avoid applying thick layers that could lead to uneven drying. Follow manufacturer instructions for best results.Drying Time
Drying time is important to ensure the sealant sets properly. Allow the sealant to dry for at least 24 hours. Avoid using the backsplash during this period. Check the sealant instructions for specific drying times. Ventilate the kitchen to speed up drying. Ensure the sealant is fully dry before cleaning or using the backsplash.Maintenance Tips
Regular cleaning keeps the kitchen backsplash looking fresh. Use a mild detergent and soft cloth for gentle scrubbing. Periodically check for grout damage, and reseal if necessary to prevent stains.
Maintaining your kitchen backsplash is crucial for its longevity and appearance. Regular care prevents grime buildup and keeps your kitchen looking fresh. Follow these tips to ensure your backsplash remains in top condition.Regular Cleaning
Wipe the backsplash weekly with a damp cloth. Use a mild detergent to remove any grease. Avoid abrasive cleaners that can scratch the surface. Rinse with clean water and dry with a soft towel. This prevents water spots and streaks.Dealing With Stains
Tackle stains promptly to avoid permanent marks. For stubborn stains, apply a baking soda paste. Let it sit for ten minutes, then scrub gently with a soft brush. Rinse thoroughly and dry the area.Inspecting For Damage
Check for cracks or loose tiles monthly. Repair any damage immediately to prevent further issues. Use a grout sealer to protect against moisture. This helps maintain the integrity of your backsplash. Regular inspection ensures your backsplash stays in excellent condition.Common Mistakes
Installing a kitchen backsplash can enhance your cooking space. Mistakes can lead to extra costs and frustration. Knowing these common errors can help achieve a flawless finish.
Incorrect Measurements
Accurate measurements are crucial. Many people overlook this step. They rely on rough estimates. This leads to tiles not fitting properly. Always use a measuring tape. Double-check your numbers. Precision ensures a perfect fit.
Poor Adhesion
Tiles need strong adhesion to stay in place. Some underestimate this. They use the wrong adhesive type. Or they apply too little. This causes tiles to fall off. Choose the right adhesive for your tile type. Apply it evenly. Ensure a secure bond.
Improper Grouting
Grout fills gaps between tiles. It prevents water seepage. Many rush this step. They use too much grout. Or fail to clean excess. This results in a messy look. Take your time. Wipe off surplus grout. Maintain clean lines between tiles.
Frequently Asked Questions
What Is The Rule For A Kitchen Backsplash?
A kitchen backsplash should complement the countertop, be easy to clean, and use durable materials like tile or glass. Keep it proportional, typically 18 inches high, to balance aesthetics and functionality. Choose colors and patterns that enhance the kitchen’s overall design while considering maintenance and cost.
When Tiling A Backsplash, Where Do You Start?
Start tiling a backsplash at the center of the wall. This ensures symmetry and balance. Use a level to maintain straight lines. Work outward from the center to the edges. This approach minimizes cutting tiles and ensures a professional look.
Always plan your layout before starting.
Can A Beginner Install A Kitchen Backsplash?
Yes, a beginner can install a kitchen backsplash. Start with simple designs and use peel-and-stick tiles. Follow step-by-step guides or video tutorials for assistance. Proper tools and preparation ensure a successful project. Practice patience and take your time for best results.
Do You Put Backsplash Directly On Drywall?
Yes, you can install a backsplash directly on drywall. Ensure the surface is clean and dry. Use appropriate adhesive for tiles. For areas with moisture, like kitchens, sealing edges is essential.
Conclusion
Creating a kitchen backsplash can be simple and fun. It adds style to your cooking space. Choose a material that fits your taste and budget. Tile, glass, or metal all work well. Measure carefully before you start. Prepare the surface for installation.
Use the right tools for a clean finish. A backsplash protects walls from spills. It also highlights your kitchen’s personality. Experiment with colors and patterns. Enjoy the process and the results. Your kitchen will look fresh and inviting. Remember, a backsplash is more than decoration.
It’s a smart choice for every kitchen.


