How to Refinish a Kitchen Table: Expert Tips Revealed
Executive Chef & Lead Commercial Kitchen Specialist at Daily Kitchup Test Lab
Have you ever looked at your kitchen table and thought it could use a little love? Maybe it’s showing signs of wear, or perhaps you’re just ready for a fresh look.
Refinishing your kitchen table is a simple yet transformative project that can breathe new life into your space. Imagine the satisfaction of turning your table into a stunning centerpiece, reflecting your personal style and creativity. You’ll not only enhance the beauty of your kitchen but also enjoy the rewarding process of doing it yourself.
This guide will walk you through every step, ensuring you achieve a professional finish without the professional price tag. Stick with us, and soon, your kitchen table will be the envy of all who gather around it.
Choosing The Right Tools
Refinishing a kitchen table can be a rewarding DIY project, but selecting the right tools is crucial for achieving a professional-looking result. The tools you choose will determine not only the finish quality but also how smoothly the process goes. Are you ready to dive into your toolbox and pick the perfect equipment?
Essential Equipment
Every refinishing project starts with a set of key tools that make the job easier and more effective. A good sanding block or electric sander is invaluable for removing the old finish and smoothing the surface. Sandpaper of varying grits (from coarse to fine) will help you achieve the desired texture. Don’t forget a quality paintbrush or foam brush for applying stains and finishes evenly. Have you considered the impact of using high-quality brushes versus cheaper alternatives?
- Electric Sander:Speeds up the sanding process and ensures an even surface.
- Sandpaper:Available in multiple grits for different stages of sanding.
- Paintbrush/Foam Brush:Essential for applying the finishing coats smoothly.
Safety Gear
While refinishing a table can be fun, safety should never be compromised. Dust masks are essential to protect your lungs from fine particles. Safety goggles shield your eyes from sanding debris and chemical splashes. Gloves protect your skin from stains and finishes. Have you ever considered how a simple pair of gloves can save your hands from stains that linger for days?
- Dust Mask:Keeps harmful particles out of your respiratory system.
- Safety Goggles:Prevents eye irritation from dust and chemicals.
- Gloves:Protects your skin from harsh substances.
By selecting the right tools and safety gear, you set the foundation for a successful refinishing project. What tools will you prioritize for your next DIY endeavor?
Credit: www.thepaintedhinge.com
Preparing The Table Surface
Preparing the table surface involves cleaning and sanding it thoroughly. Remove old finishes and smooth the surface for a fresh start.
Refinishing a kitchen table can breathe new life into your dining space. Before diving into this rewarding task, ensure the table surface is well-prepared. Proper preparation sets the stage for a smooth, stunning finish.Cleaning Techniques
Begin by thoroughly cleaning the table surface. Dust and grease can affect the final look. Use a damp cloth to wipe away dirt. Avoid soaking the wood; excess moisture can cause damage. For stubborn stains, a mixture of water and mild detergent works well. Rinse with a clean cloth and let the table dry completely. Ensure no residue is left behind.Removing Old Finish
To achieve a fresh look, remove the old finish. Start with a gentle sanding using medium-grit sandpaper. This step reveals the bare wood. Sand evenly to avoid gouges. A power sander can speed up the process. After sanding, clean the surface again to remove dust. For tougher finishes, consider a chemical stripper. Follow the product instructions carefully. Apply the stripper with a brush and let it sit. Scrape off the old finish with a plastic scraper. Rinse the wood with water and let it dry thoroughly.Sanding Techniques
Smooth the surface with fine-grit sandpaper for a flawless finish. Work in the direction of the wood grain. Gradually move to finer sandpaper for an even texture.
Sanding is a pivotal step in the process of refinishing a kitchen table. It’s where you prepare the surface for a fresh coat of finish, ensuring it’s smooth and free of imperfections. The right sanding techniques can make a significant difference in the final appearance of your table. Whether you’re tackling this project for the first time or are a seasoned DIY enthusiast, mastering the art of sanding can transform your table into a masterpiece. Let’s dive into the essentials of sanding techniques that will elevate your refinishing project.Types Of Sandpaper
Choosing the right sandpaper is crucial. Not all sandpapers are created equal, and selecting the right grit can make or break your project. – Coarse Grit (40-60): Ideal for initial stripping of old finishes. It helps remove layers quickly but can leave scratches. – Medium Grit (80-120): Perfect for smoothing out scratches left by the coarse grit. It’s great for preparing the surface for finer sanding. – Fine Grit (150-220): Essential for the final smoothing. It leaves the surface silky smooth and ready for staining or painting. Consider the condition of your table. Is it heavily scratched or just needs a light touch-up? Your answer will guide your sandpaper choice.Sanding Process
The sanding process is all about patience and precision. Start by attaching your chosen sandpaper to a sanding block or an electric sander for larger surfaces. – Begin with coarse grit to strip away old finishes. Apply even pressure and move in the direction of the wood grain to avoid scratches. – Switch to medium grit to erase any rough marks left by the coarse sandpaper. This step prepares the surface for a smoother finish. – Finally, use fine grit for the last touches. This is where your table transforms into a smooth canvas, ready for its new finish. Are you finding the process tedious? Remember, every stroke brings you closer to a stunning table that reflects your efforts and creativity. Sanding might seem like a simple task, but it requires your full attention. The reward is a beautifully refinished table that becomes the centerpiece of your kitchen. As you sand, picture the end result, and let that vision drive you forward.Selecting The New Finish
Choosing the right finish for your kitchen table can enhance its beauty and durability. Consider factors like color, sheen, and maintenance requirements to match your style and lifestyle.
Selecting the new finish for your kitchen table can be exciting. It transforms the table’s look and feel. A fresh finish can revive old wood and match your decor. Consider the table’s use and the desired style. This choice affects the table’s durability and appearance.Types Of Finishes
Different finishes offer unique benefits. Varnish provides a clear, glossy shield. It protects the wood from scratches and stains. Polyurethane is durable and resists water and heat. Perfect for a busy kitchen table. Oil finishes like tung or linseed enhance the wood’s natural beauty. They penetrate deep, offering a warm glow. Lacquer gives a hard, durable finish. It dries quickly with a smooth, polished look. Each finish type suits different needs and styles.Choosing The Right Color
Color selection impacts the room’s mood. Light colors can make the space feel bigger. They add a fresh, airy vibe. Dark colors add warmth and elegance. They work well with traditional or rustic decor. Neutral tones offer versatility. They blend with various styles and colors. Test samples on a hidden area. This helps ensure the color matches your vision. The right color enhances your kitchen table’s charm.Applying The Finish
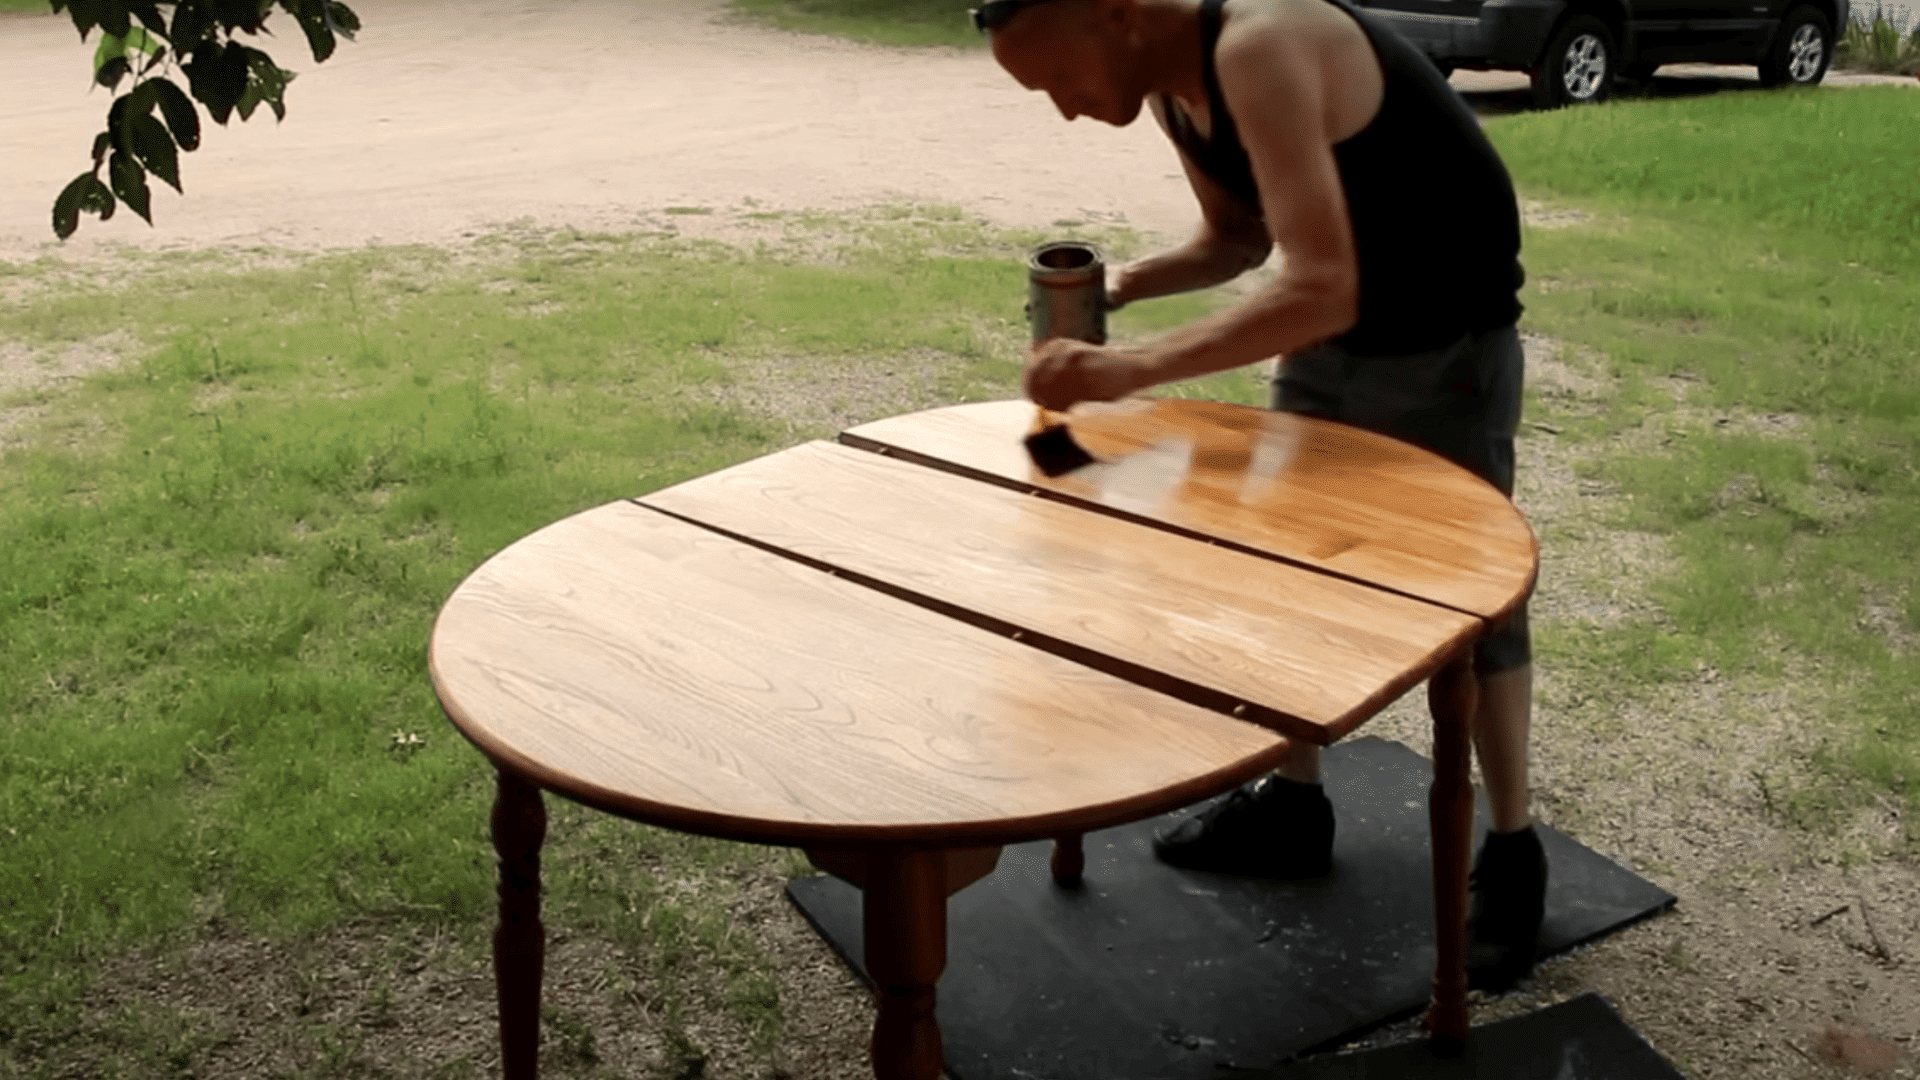
Applying the finish is the final step in refinishing a kitchen table. Choose a durable varnish or polyurethane for protection. Use a brush or foam applicator for even coverage, ensuring a smooth surface. Allow ample drying time before use to ensure longevity and a flawless appearance.
Applying the finish is the final and crucial step in refinishing a kitchen table. This is where your table gets its new look and protection. The finish not only enhances the appearance but also shields the wood from damage. Choosing the right method and technique is key to achieving a smooth and durable surface. Let’s explore two common methods and techniques to apply the finish effectively.Brush Vs. Spray
Choosing between a brush and spray depends on the desired effect. Using a brush offers control and precision. It allows you to reach detailed areas easily. Brushes are ideal for small spaces and edges. They can apply thicker layers, which may lead to a richer finish. Spraying provides a smooth and even coat. It covers large areas quickly and efficiently. Sprayers reduce the risk of brush strokes or uneven layers. They are perfect for a modern, clean look.Layering Techniques
Layering is essential to achieve a durable finish. Thin layers offer better adhesion and fewer imperfections. Start with a light coat and let it dry completely. Sand lightly between layers to remove bumps or dust. Applying multiple thin layers builds depth and strength. Each layer should be even and smooth. Use gentle strokes or movements to avoid streaks. Allow each layer to dry fully before adding the next. This ensures a flawless and lasting finish.
Credit: www.thesociablehome.com
Drying And Curing
Ensure the table dries completely after refinishing to prevent damage. Allow enough time for curing for best results.
Refinishing a kitchen table involves several steps, and drying and curing play a crucial role in achieving a durable finish. This stage ensures that the finish hardens properly, offering protection and longevity. Understanding the drying and curing process helps avoid common pitfalls like tackiness or uneven surfaces. Let’s delve into the optimal conditions and time considerations for drying and curing your kitchen table.Optimal Conditions
Creating the right environment is key for drying and curing. Ensure the room is well-ventilated to speed up the process. A fan can help circulate the air, reducing humidity levels. Ideal room temperature ranges from 60 to 75 degrees Fahrenheit. Avoid extreme temperatures, as they affect the finish. Direct sunlight can also cause problems like bubbles or streaks. Keep the table away from windows or use blinds to block sunlight.Time Considerations
Drying times vary depending on the type of finish used. Water-based finishes typically dry faster than oil-based ones. Allow at least 24 hours for water-based finishes to dry. Oil-based finishes might take up to 48 hours. Curing takes longer, often between 5 to 7 days. During this time, avoid placing heavy objects on the table. Light use is acceptable after the initial drying period. Be patient, as proper curing ensures a hard, durable finish.Final Touches
Apply a protective finish to ensure durability and shine. Use a clear coat or wax for a smooth surface. Allow ample drying time for the best results.
The final touches on your kitchen table bring it to life. These steps ensure your hard work stands out. You want a table that’s not only beautiful but durable.Buffing And Polishing
Buffing removes minor scratches and gives a smooth finish. Use a soft cloth or a buffing pad. Rub gently in circles across the table’s surface. This process enhances the table’s shine. Polishing adds a protective layer and deepens the gloss. Apply a quality furniture polish with a clean cloth. Work it into the wood, following the grain. This step brings out the table’s natural beauty.Protective Coatings
A protective coating shields your table from daily wear. Choose a clear polyurethane or varnish. These coatings are water-resistant and durable. Apply with a brush or roller for even coverage. Let it dry completely before using the table. Consider applying multiple coats for added protection. Sand lightly between coats for a smoother finish. This ensures your table stays beautiful for years to come.Maintenance Tips
Refinish your kitchen table by first sanding the surface to remove old finish. Apply a fresh coat of stain or paint, allowing it to dry completely. Finally, seal with a protective layer for durability. Regular maintenance ensures your table remains a beautiful centerpiece in your kitchen.
Maintaining your newly refinished kitchen table is crucial to preserve its beauty and longevity. A little care goes a long way in keeping it looking fresh and attractive for years. Follow these practical maintenance tips to ensure your table remains a centerpiece of your kitchen.Regular Cleaning
Keep your table spotless with routine cleaning. Dust and crumbs accumulate quickly, and regular wiping prevents buildup. Use a soft cloth with a mild soap solution to clean the surface, ensuring you remove any sticky residue or spills. Water can damage the finish, so always dry it thoroughly after cleaning. Remember, a clean table is a happy table!
Avoiding Damage
Your table is not just a piece of furniture; it’s the heart of your kitchen. Protect it from scratches by using placemats and coasters. Hot pots and dishes can leave marks; why not add a stylish trivet to your decor? Consider the impact of everyday items on your table. Have you ever thought about how a simple pen could leave a dent? A little caution can save your table from needless wear and tear.
Taking these steps to maintain your kitchen table will ensure it remains a cherished part of your home. What other techniques do you use to keep your kitchen furniture looking its best? Share your insights and keep the conversation going!

Credit: www.thesociablehome.com
Frequently Asked Questions
Is It Better To Stain Or Paint A Kitchen Table?
Staining a kitchen table enhances the natural wood grain and is easier to touch up. Painting offers a wider color selection and hides imperfections. Choose staining for a classic look or painting for a bold statement. Consider durability and maintenance needs for your lifestyle.
Can You Refinish A Table Without Sanding?
Yes, you can refinish a table without sanding. Use a deglosser or liquid sandpaper to remove the finish. Clean the surface thoroughly, then apply a new stain or paint. This method saves time and effort while achieving a refreshed look.
Should I Sand Or Strip My Dining Table?
Sand your dining table for minor scratches or uneven surfaces. Strip it if the finish is damaged or peeling. Sanding is less aggressive and preserves wood, while stripping removes old finishes. Choose based on the table’s condition and desired result.
Always test in an inconspicuous area first.
Do You Have To Remove Old Stains Before Restaining A Table?
Yes, remove old stains before restaining a table. This ensures better adhesion and a smooth, even finish. Sand the surface and clean thoroughly to prepare it for the new stain. Proper preparation enhances the table’s appearance and durability.
Conclusion
Refinishing a kitchen table can be a rewarding project. You give new life to an old piece. Sanding, staining, and sealing are the key steps. Always choose the right materials. Take your time to ensure a smooth finish. The effort will bring satisfaction and beauty.
Your table will look fresh and inviting. Anyone can follow these steps with patience. Enjoy your renewed table with family and friends. A little work creates a big impact. Try it and see the difference it makes.

Similar Posts