How to Repair a Leaking Kitchen Sink Faucet: Expert Tips
A leaking kitchen sink faucet can be more than just a minor annoyance—it can drive you up the wall with its constant dripping sound and potentially lead to higher water bills. Imagine this: every drop of water that escapes your faucet is not just wasted but also takes a toll on the environment and your budget.
But here’s the good news: you don’t need to be a plumbing expert to fix it. With a few simple tools and some easy steps, you can have your kitchen sink faucet working flawlessly in no time. In this guide, you’ll discover exactly how to tackle that pesky leak and save yourself from the headache of unnecessary expenses and water waste.
By the end of this article, you’ll not only feel empowered to handle this common household issue but also enjoy the peace of mind that comes with knowing you’ve taken action. So, are you ready to roll up your sleeves and reclaim your kitchen from the drip-drip-drip? Let’s dive in and start fixing that leak together!
Identifying The Leak Source
Locating the exact leak in a kitchen sink faucet is essential for effective repair. Check connections and seals for drips or moisture to identify the problem area.
Identifying the leak source in your kitchen sink faucet can feel like detective work but is crucial for effective repairs. Knowing where the leak originates allows you to address the issue precisely, saving time and avoiding frustration. Whether it’s a persistent drip or a sudden gush, pinpointing the source is the first step toward a dry and functional kitchen.Common Leak Areas
Leaks can originate from various parts of your kitchen sink faucet. One frequent culprit is the faucet handle itself. If the handle is wet or dripping, the leak might be due to worn-out seals or a loose connection. Another common area is the base of the faucet. Water pooling at the base indicates a leak in the O-ring or gasket. Don’t forget to check the spout; a continuous drip often signals problems with the valve seat or washer.Tools For Inspection
To effectively inspect and identify the leak source, having the right tools on hand is essential. A flashlight can help illuminate hard-to-see areas, especially under the sink where shadows can obscure leaks. Using a mirror can assist in viewing the faucet from angles that are difficult to reach. Additionally, having a wrench and screwdriver ready can help you dismantle parts for a closer look, aiding in a more thorough inspection. Engage with the process by asking yourself: What could be causing this leak?
Credit: www.youtube.com
Preparing For Repair
Preparing for a faucet repair is crucial to ensure a smooth and efficient process. Before you dive into the repair, gather all necessary tools and materials. Also, make sure to follow essential safety precautions to prevent any mishaps. Repairing a leaking faucet may seem daunting, but with proper preparation, you can tackle this task with confidence.
Necessary Tools And Materials
- Adjustable wrench
- Screwdriver set
- Pliers
- Replacement parts (such as washers or O-rings)
- Plumber’s tape
- Bucket or pan to catch water
- Cleaning cloth
Having the right tools and materials is half the battle won. Imagine you start the repair only to realize you don’t have a crucial component like plumber’s tape. Frustrating, right? Avoid interruptions by checking your toolbox beforehand. Do you have everything you need?
Safety Precautions
- Turn off the water supply to prevent flooding
- Place a towel on the floor to catch any drips
- Wear gloves to protect your hands
- Ensure adequate lighting to see clearly
Safety should never be overlooked. A simple oversight like forgetting to turn off the water supply can lead to a messy situation. Did you know that wearing gloves can protect your hands from sharp edges and potential injuries? Taking these precautions can make your repair process safer and more efficient.
Disassembling The Faucet
Disassembling the faucet is crucial for fixing a leaking kitchen sink. Begin by turning off the water supply. Carefully remove the handle and unscrew the components to access the internal parts.
Disassembling the faucet is a crucial step in fixing a leak. This process helps pinpoint the issue and allows for proper repair. Whether you’re dealing with a steady drip or a minor leak, understanding how to take apart your kitchen faucet is key. Follow these simple steps to ensure a smooth disassembly process.Turning Off Water Supply
Locate the water valves under your sink. Turn them clockwise to shut off the water supply. This prevents any mess while working on the faucet. Ensure both hot and cold water lines are securely closed.Removing Faucet Components
Gather essential tools like a wrench, screwdriver, and pliers. Carefully remove the handle by loosening screws or nuts. Once the handle is off, take out the faucet cap or cover. Next, remove the faucet cartridge or stem using a wrench. Take note of each part’s placement. This will help during reassembly. If needed, photograph each step for reference.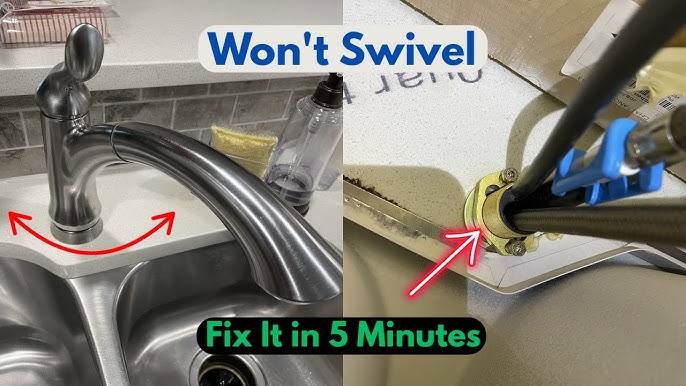
Credit: www.youtube.com
Replacing Damaged Parts
Damaged parts can cause leaks in kitchen sink faucets. Identifying and replacing these parts often solves the issue. Common culprits include worn washers, seals, or O-rings.
Sometimes, the secret to fixing a leaking kitchen sink faucet is simply replacing the damaged parts. This task might seem daunting, but with the right guidance, you can tackle it confidently. Whether it’s a faulty cartridge or worn-out O-rings and washers, addressing these components can restore your faucet’s functionality.Cartridge Replacement
Start by turning off the water supply under the sink. This prevents any unwanted mess when you disassemble the faucet. Next, remove the handle, usually by loosening a small screw underneath or on the side. Once the handle is off, you’ll see the cartridge. Gently pull out the old cartridge using a pair of pliers. When you buy a replacement, make sure it matches your faucet’s brand and model. Installing the new cartridge is simply a matter of reversing the removal steps. Secure it in place, reattach the handle, and turn the water back on. Test the faucet to ensure the leak is gone.O-rings And Washers
O-rings and washers are often the unsung heroes in preventing leaks. Over time, they can wear out, leading to drips. To replace them, you’ll need to disassemble the faucet. After removing the handle and the cartridge, you’ll find the O-rings and washers. Swap out the old ones with new, identical parts. It’s a good idea to apply a bit of plumber’s grease on the new O-rings to ensure a snug fit. Once everything is reassembled, check for leaks. Isn’t it satisfying to fix something with your own hands?Reassembling The Faucet
Reassembling the faucet involves aligning parts carefully to prevent further leaks. Ensure each component fits snugly into place. Test the faucet for leaks after assembly.
Reassembling the faucet is the final step in fixing a leak. It’s crucial to put everything back correctly. This ensures the faucet works without any more drips. Follow these steps to reassemble your kitchen sink faucet.Reinstalling Components
Start by placing the cartridge or valve back into its slot. Ensure it sits perfectly straight. If the cartridge has an alignment pin, match it with the slot. Once aligned, secure it with the retaining nut. Use a wrench for a snug fit, but don’t overtighten. Next, reattach the handle. Slide it onto the stem and tighten the screw. A screwdriver will help you secure it firmly. Finally, replace any decorative caps or covers. These add the finishing touch to your reassembly.Ensuring Tight Seals
Check all connections and seals for tightness. Gaps can lead to leaks. Use plumber’s tape on threaded connections. Wrap it around the threads before reconnecting parts. This helps prevent water leaks. For O-rings or rubber seals, ensure they are not cracked or worn. Replace them if necessary. A tight seal is crucial for preventing leaks. Once everything is in place, turn on the water supply. Check for leaks by running the faucet. If there are no drips, your repair is successful.
Credit: www.youtube.com
Testing For Leaks
Testing for leaks in your kitchen sink faucet is crucial. It ensures everything works properly and saves water. After completing any repairs, it’s essential to test for leaks. This confirms that your efforts have been successful. Follow these steps to ensure your faucet is leak-free.
Checking Water Flow
Begin by turning on the faucet. Let the water run for a few minutes. Observe the water flow carefully. Ensure it is steady and strong. Any weak flow could indicate a problem. Check both hot and cold settings. This helps identify potential issues. Listen for unusual sounds like sputtering or hissing. These might signal hidden leaks or blockages.
Inspecting For Drips
Examine the faucet closely for drips. Look under the sink for moisture or puddles. Use a flashlight to inspect hard-to-see areas. Pay attention to the joints and connections. Drips here often suggest loose fittings. Tighten any loose connections with a wrench. Check the faucet spout after turning it off. Any continuing drips indicate a problem. Replace worn-out washers or seals if needed. This can stop persistent leaks effectively.
Preventing Future Leaks
A leaking kitchen sink faucet can be a nuisance, but once you’ve successfully repaired it, the next step is ensuring it doesn’t become a recurring issue. Taking preventive measures can save you time, money, and the hassle of dealing with frequent leaks.
Regular Maintenance Tips
Regular maintenance is key to preventing future leaks. Make it a habit to check your faucet periodically for any signs of wear and tear. A quick inspection can help identify small issues before they turn into major problems.
- Clean the faucet and surrounding area regularly to prevent mineral buildup. This can extend the lifespan of your faucet and ensure smooth operation.
- Keep an eye on the water pressure. High pressure can cause strain on the faucet components. If you notice unusually high pressure, consider installing a pressure regulator.
- Listen for any unusual noises. Squeaks or drips can be indicators of underlying issues that need attention.
Choosing Quality Parts
The quality of parts you use in your kitchen sink faucet plays a significant role in preventing future leaks. Opt for durable materials that can withstand regular use and pressure.
- Invest in parts made from stainless steel or brass, as these materials are less prone to corrosion and wear.
- Consider purchasing from reputable brands known for quality and reliability. A slightly higher upfront cost can save you in long-term maintenance expenses.
- Ensure compatibility with your existing setup. Using mismatched parts can lead to improper fitting and eventual leaks.
How often do you think about the parts you’re using in your home repairs? The choice you make today can impact the longevity of your faucet tomorrow. Choose wisely, and keep those pesky leaks at bay!
Frequently Asked Questions
How Do I Stop A Kitchen Faucet From Dripping?
Turn off the water supply. Remove the faucet handle and replace damaged washers or O-rings. Reassemble the faucet.
What Is The Most Common Cause Of A Leaky Dripping To Handle A Faucet?
A worn-out washer or O-ring often causes a leaky dripping faucet handle. These components deteriorate over time, leading to leaks. Regular maintenance can prevent this common issue, ensuring smooth operation. Replacing these parts is usually a quick fix, restoring your faucet’s functionality effectively.
How To Fix A Leaking Faucet Step By Step?
Turn off the water supply. Unscrew the faucet handle. Replace the worn-out washer or O-ring. Reassemble the faucet. Test for leaks.
How To Change The Washer On A Kitchen Faucet?
Turn off the water supply. Remove the faucet handle using a screwdriver. Take out the old washer. Replace with a new washer. Reassemble the faucet and turn the water back on. Test for leaks.
Conclusion
Fixing a leaking kitchen sink faucet can be simple. Follow the steps carefully. Ensure you have the right tools. Check for worn-out parts. Replace any damaged washers or seals. Tighten loose connections. Regular maintenance prevents future leaks. Save time and money by doing it yourself.
Enjoy a leak-free kitchen sink. Feel confident with your plumbing skills. Keep your kitchen clean and dry. Small repairs make a big difference. Always turn off the water supply first. Practice safety while repairing. Your faucet will last longer with proper care.
Happy repairing!