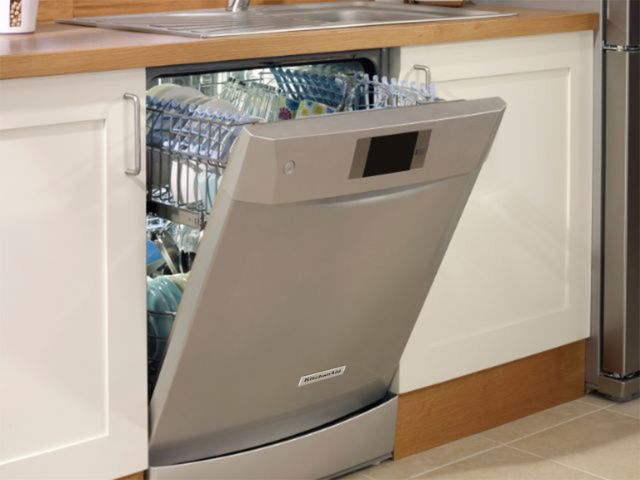
How to Clean a Kitchen Aid Dishwasher: Expert Tips
Is your KitchenAid dishwasher not performing as well as it used to? Maybe your dishes aren’t coming out as sparkling clean as you’d like.
Don’t worry, you’re not alone. Over time, food particles, grease, and hard water deposits can build up in your dishwasher, affecting its efficiency. But here’s the good news: with a few simple steps, you can restore your KitchenAid dishwasher to its peak performance.
Imagine the satisfaction of loading up your dishwasher and seeing spotless, gleaming dishes every time. In this guide, we’ll walk you through the process of cleaning your KitchenAid dishwasher, ensuring it operates smoothly and lasts longer. Get ready to transform your kitchen routine and enjoy the peace of mind that comes with a perfectly clean appliance. Let’s dive in and unlock the secrets to a sparkling clean dishwasher!

Credit: www.youtube.com
Preparation Steps
Cleaning your KitchenAid dishwasher starts with proper preparation. These steps ensure a smooth cleaning process. Proper preparation avoids damage and keeps your dishwasher in top shape.
Gather Cleaning Supplies
Having the right supplies makes cleaning efficient. Gather these essentials:
- Soft cloths
- White vinegar
- Baking soda
- Dishwashing soap
- Small brush or toothbrush
These items help tackle grime and ensure a thorough clean.
Unplug And Empty The Dishwasher
Safety first. Unplug the dishwasher to prevent electrical accidents. Ensure the dishwasher is empty. Remove dishes and any debris inside.
Check the racks and filters for leftover food particles. This prevents clogs during cleaning. Taking these steps ensures a safer and more effective cleaning process.
Cleaning The Filter
Cleaning the filter in your Kitchen Aid dishwasher is essential. It prevents clogs and maintains efficiency. A clean filter helps your dishwasher run smoothly and keeps your dishes spotless. Let’s dive into the steps to clean the filter effectively.
Locate The Filter
Start by opening the dishwasher door. Look at the bottom of the dishwasher. You should see the filter near the spray arm. It might be round or cylindrical, depending on your model. Check your manual if you can’t find it.
Remove And Rinse The Filter
Twist the filter to unlock it. Carefully pull it out from its position. Once removed, take it to the sink. Rinse it under warm water to remove debris and food particles. Use a soft brush for stubborn grime. Ensure it’s completely clean before reinserting.
Washing Spray Arms
Cleaning the spray arms of a Kitchen Aid dishwasher ensures better water flow and improved cleaning efficiency. Remove the arms carefully and rinse them under warm water to clear debris. Regular maintenance keeps your dishwasher running smoothly and prevents clogs.
Cleaning your Kitchen Aid dishwasher is essential for maintaining its efficiency and longevity. One crucial component to focus on is the washing spray arms. These arms are responsible for distributing water evenly throughout the dishwasher, ensuring every dish is thoroughly cleaned. If your dishes are coming out dirty or with residue, it might be time to give these spray arms some attention. Let’s dive into the steps you can take to effectively clean them.Detach Spray Arms
To begin, you need to carefully detach the spray arms. Most Kitchen Aid dishwashers have spray arms that can be easily removed by unscrewing or unclipping them. Check your manual for specific instructions related to your model. Once removed, you can inspect the arms for any visible blockages or build-up. This step is crucial as it allows you to clean them without hindrance, ensuring a more thorough job.Clean Spray Arm Holes
The tiny holes in the spray arms can often become clogged with food particles and mineral deposits. Use a toothpick or a small brush to gently clear any blockages. Be careful not to enlarge or damage the holes in the process. Rinse the arms under warm water to remove loosened debris. This simple act can dramatically improve your dishwasher’s performance. Remember, regular maintenance can prevent future clogs and keep your dishwasher running smoothly. When was the last time you checked your spray arms? A few minutes of maintenance can save you time and hassle in the long run.
Credit: www.instagram.com
Sanitizing The Interior
Sanitizing the interior of a Kitchen Aid dishwasher involves removing food debris and wiping down surfaces. Use vinegar and baking soda for a thorough clean. Regular maintenance ensures efficient performance and extends the appliance’s lifespan.
Sanitizing the interior of a Kitchen Aid dishwasher keeps it fresh and clean. Regular sanitization prevents germs and removes foul odors. This process helps maintain the appliance’s performance. Cleanliness ensures dishes emerge spotless and hygienic.Use Vinegar And Baking Soda
Vinegar dissolves mineral deposits and sanitizes surfaces. Pour one cup of white vinegar into the bottom of the dishwasher. Vinegar tackles tough stains and odors effectively. Baking soda acts as a gentle abrasive cleaner. Sprinkle a cup of baking soda across the bottom surface. This combination removes grime and neutralizes smells. Let the vinegar and baking soda sit for 30 minutes.Run A Cleaning Cycle
Close the dishwasher door securely. Select the hottest wash cycle available. This ensures thorough cleaning and sanitization. The heat activates the cleaning power of vinegar and baking soda. Let the dishwasher complete its cycle. The interior will be left sparkling and odor-free. Regular cleaning cycles maintain efficiency and hygiene.Cleaning The Exterior
Keeping your KitchenAid dishwasher’s exterior clean enhances its appearance. A sparkling exterior also complements your kitchen decor. Regular cleaning helps maintain its longevity and functionality. Let’s explore simple steps to clean the exterior effectively.
Wipe The Door And Control Panel
Start with the dishwasher door. Use a damp, soft cloth. Gently wipe the surface to remove fingerprints and stains. Avoid abrasive cleaners; they can damage the finish. For the control panel, use a slightly damp microfiber cloth. This prevents moisture from entering electrical components. Dry the area with a soft towel for a streak-free shine.
Polish Stainless Steel Surfaces
Many KitchenAid dishwashers have stainless steel exteriors. These need special care to maintain their sheen. Use a stainless steel cleaner or a mix of mild detergent and water. Apply it with a soft cloth, following the grain of the steel. This prevents scratches and keeps the surface glossy. Buff the area with a dry cloth to enhance the shine.
Maintaining The Dishwasher
Cleaning a Kitchen Aid dishwasher is simple and ensures efficient performance. Remove food particles from the filter regularly. Wipe down the interior with a damp cloth and run a vinegar cycle monthly to maintain cleanliness.
Maintaining your Kitchen Aid dishwasher ensures it runs smoothly and efficiently. Regular care extends its lifespan and helps avoid unexpected breakdowns. Let’s delve into some essential practices for maintaining your dishwasher.Regular Cleaning Schedule
Establish a cleaning schedule to keep your dishwasher in prime condition. Wipe down the door and control panel weekly with a damp cloth. Clean the interior monthly to remove any food residue or buildup. Use a dishwasher-safe cleaner for deep cleaning. This helps prevent clogs and ensures optimal performance.Inspect And Replace Parts
Regularly inspect your dishwasher’s parts for wear and tear. Check the racks for rust or damage. Inspect the spray arms for blockages or cracks. Ensure the door seal is intact to prevent leaks. Replace any damaged parts promptly. Keeping parts in good condition ensures efficient dishwashing every time. By following these practices, your Kitchen Aid dishwasher will remain reliable and efficient.
Credit: www.youtube.com
Frequently Asked Questions
What Is The Best Way To Clean A Kitchenaid Dishwasher?
Clean a KitchenAid dishwasher by removing debris, wiping the door seal, and running a vinegar cycle. Use a dishwasher-safe cleaner for stubborn stains. Regular maintenance keeps it efficient and odor-free. Check filters and spray arms for blockages. Always follow manufacturer guidelines for best results and longevity.
Is There A Filter To Clean On A Kitchenaid Dishwasher?
Yes, KitchenAid dishwashers have a filter to clean. Regular cleaning ensures optimal performance and prevents clogs. Access the filter at the bottom of the dishwasher, remove debris, and rinse under running water. Clean monthly or as needed to maintain efficiency.
Can You Use Vinegar In A Kitchenaid Dishwasher?
Yes, you can use vinegar in a KitchenAid dishwasher. It helps remove odors and mineral buildup. Just place a cup of vinegar in the top rack and run a hot water cycle. Avoid using it frequently to prevent potential damage to rubber parts.
How Do I Run A Clean Cycle In My Dishwasher?
Start by emptying your dishwasher. Add dishwasher cleaner or vinegar to the detergent compartment. Run on the hottest cycle. Wipe down the interior after the cycle finishes. Regular cleaning improves performance and prevents odors.
Conclusion
Keeping your KitchenAid dishwasher clean ensures it works efficiently. Regular maintenance prevents build-up and bad smells. Follow simple steps to clean the filters and spray arms. Don’t forget to wipe the door seals. Use vinegar and baking soda for deeper cleaning.
This keeps your dishes sparkling and your machine running smoothly. A clean dishwasher makes life easier. Spend less time on repairs and more time enjoying clean dishes. Practice these tips regularly for best results. Your dishwasher will thank you with consistent performance.
Enjoy hassle-free dishwashing every day!