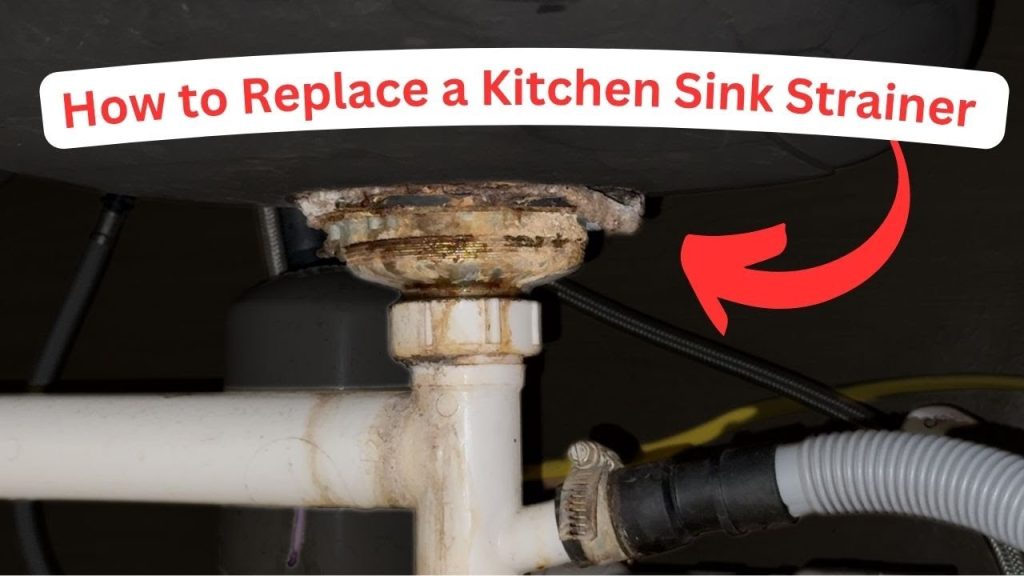
Are you tired of dealing with leaks and clogs in your kitchen sink? Replacing your kitchen sink plumbing might seem like a daunting task, but with the right guidance, you can tackle it yourself.
Imagine the satisfaction of having a fully functional kitchen sink that you fixed with your own hands. This step-by-step guide will walk you through the process, making it simpler than you ever thought possible. We’ll break down each stage into manageable tasks, ensuring you understand exactly what to do.
By the end of this article, you’ll not only know how to replace your kitchen sink plumbing but also feel empowered to take control of other DIY projects around your home. Ready to dive in and transform your kitchen? Let’s get started!

Credit: www.youtube.com
Tools And Materials Needed
Gather essential tools like a wrench, pliers, and a bucket. Ensure you have plumbing tape, replacement pipes, and seals. You’ll also need a screwdriver, pipe cutter, and towels for cleanup.
Replacing your kitchen sink plumbing might seem like a daunting task, but with the right tools and materials, it becomes manageable and even rewarding. Whether you’re tackling a clogged sink or upgrading to a more efficient plumbing setup, having the correct gear at hand is crucial. This section will guide you through the essential tools and materials required to ensure a smooth and successful plumbing replacement process.Essential Tools
- Adjustable Wrench:A versatile tool perfect for loosening and tightening nuts and bolts of varying sizes.
- Pipe Wrench:Specifically designed for gripping and turning pipes, ensuring you can easily handle even the most stubborn fittings.
- Plumber’s Putty:This malleable substance is ideal for sealing leaks and securing parts together, preventing water from seeping through.
- Teflon Tape:Also known as plumber’s tape, it’s essential for sealing threaded connections to prevent leaks.
- Bucket:Handy for catching excess water when removing old plumbing components.
- Plunger:Useful for clearing out any remaining debris before installing new plumbing parts.
Materials Required
- New Sink Drain Assembly:Ensure it matches your sink’s size and style for a seamless fit.
- PVC Pipes:Lightweight and durable, these are necessary for replacing old or damaged pipes.
- Flexible Supply Lines:These lines connect your faucet to the water supply, offering flexibility and ease of installation.
- Pipe Fittings:Various types of fittings are needed to connect pipes securely.
- Rubber Gaskets:Essential for preventing leaks and ensuring a tight seal at connections.
Safety Precautions
Ensure power to the garbage disposal is off to prevent accidents. Wear gloves to protect your hands from sharp objects. Keep a bucket nearby to catch any leaking water during the plumbing replacement process.
When replacing kitchen sink plumbing, safety should always be your top priority. Ignoring safety precautions can lead to accidents or damage to your home. Let’s dive into how you can ensure a safe and efficient plumbing replacement process.Wear Appropriate Safety Gear
Always wear safety goggles to protect your eyes from debris or splashes. Gloves are essential to guard against cuts from sharp tools or pipes. Non-slip footwear will help prevent accidents on wet surfaces. Before starting, make sure to turn off the water supply to avoid flooding. Locate the shut-off valves under the sink and turn them clockwise. If you’re unsure, ask a friend or look up a quick guide online.Disconnect Power Supply
If your sink includes a garbage disposal, ensure the power is off. Unplug the disposal unit or switch off the circuit breaker. This step prevents electrical hazards during the replacement process.Ventilate The Area
Open windows or use a fan to ensure good ventilation. Plumbing work can release fumes from cleaning agents or sewer gases. Fresh air will keep you safe and focused.Use The Right Tools
Using improper tools can lead to injuries or damage. Ensure you have basic tools like a wrench, pliers, and a bucket. It’s often helpful to have a toolbox nearby to avoid interruptions.Be Mindful Of Sharp Edges
Pipes and fittings can have sharp edges that pose a risk. Handle all components with care and use a file to smooth any rough areas. This simple step can prevent unnecessary cuts or scrapes.Know Your Limits
Sometimes, it’s best to call a professional. If you’re unsure or uncomfortable, seeking expert help can save time and prevent mishaps. Remember, it’s better to be safe than sorry. Taking these precautions not only protects you but also ensures a successful plumbing replacement. Have you ever overlooked a safety step and regretted it? Consider these tips your checklist for a secure and smooth plumbing experience.Turn Off Water Supply
Turning off the water supply is crucial before replacing kitchen sink plumbing. Locate the shut-off valves beneath the sink. Twist them clockwise to stop water flow, ensuring a safe and dry workspace.
Replacing your kitchen sink plumbing can seem daunting, but breaking it down into manageable steps makes it feasible. One of the first crucial steps is to ensure the water supply is turned off. This not only prevents water from flooding your kitchen but also ensures your safety. Imagine the chaos of discovering a geyser in your kitchen just because you skipped this vital step!Locate Your Shut-off Valves
Begin by finding the shut-off valves under your sink. These valves control the flow of hot and cold water to your faucet. If you’re unsure about their appearance, they usually look like small knobs or levers. Make sure you can turn them easily. If they’re stuck, a gentle tap with a wrench might help, but be cautious to avoid breaking them.Shut Off The Main Water Supply
If the valves under your sink are stubborn or you can’t locate them, don’t worry. You can shut off the main water supply for your entire home. This valve is typically found in your basement, garage, or outside. Remember that turning off this valve will stop water flow throughout the house. It’s a good idea to alert others at home to avoid unexpected surprises.Test To Ensure Water Is Off
Once you’ve turned off the water, it’s crucial to double-check. Turn on the faucet at your sink to ensure no water comes out. If water still flows, go back and ensure the valves are fully closed. This simple test will save you from potential water damage later.Drain Remaining Water
Even after turning off the water, there might be some left in the pipes. Place a bucket under the sink to catch any drips. Open the faucet to allow any residual water to escape. This step ensures that your workspace remains dry and safe as you proceed with replacing the plumbing. Taking these steps ensures a smooth start to your plumbing project. Have you ever had an unexpected water spill? Learning from others’ experiences can highlight the importance of this often overlooked step. Remember, a dry start is a smart start!
Credit: www.reddit.com
Remove Old Plumbing
Replacing kitchen sink plumbing involves removing old pipes carefully. Begin by disconnecting water supply lines and drain pipes. Install new plumbing fixtures, ensuring secure connections for leak prevention.
Replacing kitchen sink plumbing can be a rewarding task. The first crucial step involves removing the old plumbing. This process requires attention to detail and some basic tools. Let’s dive into the steps you need to follow.Detach Drain Pipes
Begin by placing a bucket beneath the sink. This will catch any water that spills out. Use a wrench to loosen the slip nuts on the drain pipes. Turn them counterclockwise to remove. Carefully take out the pipes and set them aside. Check for any leftover water and clean it up.Disconnect Water Lines
Turn off the water supply to the sink. This prevents any leaks during the process. Use an adjustable wrench to loosen the nuts on the water lines. Turn them counterclockwise to disconnect. Gently pull the lines away from the faucet. Check for water and dry the area thoroughly. These steps will help you successfully remove the old plumbing.Install New Sink
Replacing kitchen sink plumbing involves disconnecting pipes, removing the old sink, and installing the new one. Ensure you have the right tools and materials before beginning. Tighten connections securely to prevent leaks and test thoroughly once installed.
Installing a new sink can transform your kitchen space. It’s a task that needs precision and patience. With the right tools and a clear plan, you can do it yourself. This guide will help you understand the key steps to install a new sink effectively. Let’s dive into the details to ensure a seamless installation process.Position The Sink
Place the sink into the countertop opening carefully. Ensure it aligns with the pre-cut hole. Check that the sink sits flat without gaps. Adjust the alignment if necessary. Confirm the sink is level with a spirit level. This prevents water pooling on one side.Secure The Sink In Place
Tighten the mounting clips underneath the sink. Start at one corner and work around. Use a screwdriver for a snug fit. Do not overtighten to avoid damaging the sink. Apply a bead of silicone sealant around the edges. This creates a watertight seal. Wipe away excess sealant with a damp cloth. Let it dry for 24 hours before using the sink.Attach New Drain Pipes
Attach new drain pipes by aligning them with the sink’s outlet. Secure them tightly to prevent leaks. Test by running water to ensure everything is sealed correctly.
Replacing kitchen sink plumbing can be a rewarding task. Attaching new drain pipes is a crucial part of the process. This involves connecting pipes to ensure smooth water flow. It’s essential to focus on secure connections and proper alignment.Connect The Drain Trap
The drain trap is vital for preventing odors. Start by connecting it to the sink’s drain hole. Ensure that the trap aligns with the sink’s outlet. Use slip nuts to secure the connection tightly. Check for any leaks before proceeding.Ensure Proper Alignment
Proper alignment prevents water leaks and blockages. Align pipes carefully under the sink. Make sure each pipe fits snugly into the next. Adjust connections if necessary for a perfect fit. Test the alignment by running water through the pipes.Connect Water Supply Lines
Securely connect new water supply lines to ensure proper kitchen sink plumbing. Tighten connections and check for leaks. Ensure all fittings are snug for a reliable water flow.
Connecting the water supply lines is a crucial step in replacing your kitchen sink plumbing. This task may seem daunting, but with a little patience and the right tools, you can accomplish it smoothly. Ensuring a proper connection will prevent leaks and keep your kitchen functioning efficiently.Attach Hot And Cold Lines
Start by identifying the hot and cold water lines. Typically, the hot water line is on the left side, and the cold is on the right. Use a wrench to attach the flexible water supply hoses to the respective valves. Make sure they are securely fastened, but avoid over-tightening as it can damage the threads. For an extra layer of security, consider wrapping plumber’s tape around the threads before attaching the hoses. This can help create a watertight seal.Check For Leaks
Once the lines are connected, turn on the water supply slowly. Observe the connections closely for any signs of dripping or moisture. Place a dry paper towel under each connection point. This will help you easily spot any leaks as the water begins to flow. If you notice a leak, turn off the water supply immediately and tighten the connection slightly. Repeat the process until no leaks are detected. Do you have a favorite trick for checking leaks? Some prefer using a flashlight to highlight tiny droplets that might otherwise go unnoticed. By connecting your water supply lines carefully, you ensure a reliable water flow to your kitchen sink, minimizing future issues. Enjoy the satisfaction of a job well done.
Credit: www.reddit.com
Test The New Plumbing
Begin by checking for leaks in the new kitchen sink plumbing. Ensure all connections are tight and secure. Run water to verify if everything functions smoothly without any drips or blockages.
Testing your newly installed kitchen sink plumbing is a crucial step to ensure that everything is functioning smoothly. It’s the moment when your hard work comes to life, but it also requires attention to detail. Imagine turning on the faucet and witnessing the seamless flow of water without any leaks—it’s a satisfying experience. However, how do you make sure that everything is working perfectly? Let’s dive into the essential checks and tests you need to perform.Ensure All Connections Are Tight
Start by inspecting all the connections under the sink. Tighten any loose nuts or joints using a wrench. A snug fit prevents potential leaks and ensures optimal performance. Remember, even minor adjustments can make a significant difference.Check For Leaks
Turn on the water and observe the pipes closely. Look for drips or damp spots around the connections. If you spot any leaks, tighten the connections further or apply plumber’s tape to seal small gaps. A dry and clean area indicates a successful installation.Test Water Flow And Drainage
Run water through the faucet and watch the flow. It should be steady and consistent. Next, fill the sink and let it drain. Listen for any unusual sounds and check the speed at which water drains. A smooth operation means your plumbing is in top shape.Inspect For Odors
A well-functioning plumbing system should not emit any odors. If you notice any strange smells, it might indicate trapped debris or improper sealing. Cleaning the area or re-sealing connections might solve the issue.Evaluate Pressure And Temperature
Turn the faucet on and off several times to assess the water pressure. It should be strong and responsive. Test both hot and cold water to ensure the temperature adjusts accurately. A quick response confirms efficient plumbing. Testing your new plumbing is not just about functionality; it’s about achieving peace of mind. Have you ever faced any unexpected plumbing challenges? Share your experiences and tips below!Tips For Maintenance
Replace old pipes with new ones by turning off the water supply first. Unscrew fittings carefully to avoid damage. Ensure proper alignment and seal with plumber’s tape for leak-free connections.
Proper maintenance of your kitchen sink plumbing can save you time, money, and the hassle of unexpected repairs. A little attention to detail can go a long way in ensuring your plumbing remains in top shape. Let’s explore some practical tips that will help you maintain your kitchen sink plumbing effectively.Regularly Check For Leaks
Inspect your plumbing connections every few months. Look for moisture around the sink pipes and under the sink. If you notice any leaks, tighten the connections or replace worn-out washers promptly.Clear Clogs With Natural Solutions
Avoid using harsh chemicals that can corrode your pipes over time. Instead, try a mixture of baking soda and vinegar to clear minor clogs. Pour half a cup of baking soda followed by half a cup of vinegar down the drain, let it sit for a few minutes, and then flush with hot water.Protect Your Sink With A Strainer
Use a sink strainer to catch food particles and prevent them from going down the drain. This simple tool can significantly reduce the risk of clogs. Empty the strainer regularly to maintain optimal water flow.Keep The Area Dry
Wipe down the area under the sink to prevent mold and mildew. Moisture can accumulate and cause damage to your cabinetry and pipes. A dry environment helps in prolonging the life of your plumbing.Schedule Professional Inspections
Have a professional plumber inspect your kitchen plumbing every couple of years. They can identify potential issues before they become major problems. This proactive approach can save you from costly repairs down the line. Taking these maintenance steps can make a big difference in the longevity and efficiency of your kitchen sink plumbing. Are you ready to give your plumbing the attention it deserves? A little effort today can save you a lot of trouble tomorrow.Frequently Asked Questions
Do I Need A Plumber To Change My Kitchen Sink?
Hiring a plumber to change your kitchen sink ensures proper installation and avoids potential issues. DIY is possible if you have plumbing skills. However, professional help guarantees a smooth process, saving time and potential future repairs. Always consider your skill level and the complexity of the task.
How Much Do Plumbers Charge To Replace A Kitchen Sink?
Plumbers typically charge $150 to $500 to replace a kitchen sink. Costs vary based on labor, materials, and location. Complex installations may increase the price. Always request quotes from multiple plumbers to find the best deal.
Can I Plumb A Sink Myself?
Yes, you can plumb a sink yourself with basic tools and plumbing knowledge. Follow step-by-step guides online for assistance. Always ensure proper sealing and check for leaks. Consult a professional if you’re uncertain about any plumbing procedures to avoid potential issues.
Safety and accuracy are crucial.
Is It Easy To Change Sink Pipes?
Changing sink pipes can be simple for those with plumbing knowledge. Basic tools and instructions are needed. Ensure water supply is off before starting. Beginners should consider professional assistance for complex systems or potential issues. Proper installation prevents leaks and future damage.
Conclusion
Replacing kitchen sink plumbing is easier with some basic steps. Follow each step carefully. Ensure all tools are ready before starting. Check for leaks once done. Tighten connections properly. Patience is key for a smooth process. A well-installed sink prevents future issues.
Save money by doing it yourself. Gain confidence in home repairs. Always remember safety first. Wear gloves and eye protection. Keep your kitchen clean after the work. Regular maintenance extends sink life. Enjoy your functional kitchen space. Tackle plumbing tasks with ease.
Now, you’re ready for new challenges. Happy plumbing!