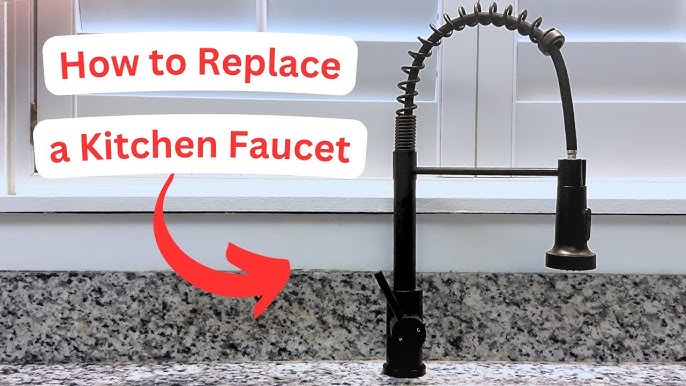
How to Replace a Single Handle Kitchen Faucet: Easy Guide
Replacing a single handle kitchen faucet might sound like a daunting task, but it doesn’t have to be. Imagine the satisfaction of upgrading your kitchen on your own, saving money, and gaining a handy new skill.
Whether you’re dealing with a leaky faucet or simply looking to enhance your kitchen’s style, knowing how to replace a faucet is a valuable skill. Are you ready to take control of your kitchen’s functionality and aesthetics? By following a few simple steps, you can transform your kitchen space with confidence and ease.
Stay with us, and we’ll guide you through the process, ensuring you have all the tips and tricks you need to complete this project like a pro.
Tools And Materials Needed
Gather essential tools like an adjustable wrench, basin wrench, and screwdriver. Prepare materials such as plumber’s tape, a bucket, and a new faucet.
Replacing a single handle kitchen faucet can seem daunting, but with the right tools and materials, you’ll find it straightforward and rewarding. Let’s explore the essentials you’ll need to tackle this project efficiently. Having everything ready beforehand not only speeds up the process but also ensures you don’t face any unexpected hitches.
Basic Tools
Before you roll up your sleeves, gather these basic tools:
- Adjustable Wrench:Essential for loosening nuts and bolts securely attached to the faucet.
- Phillips Screwdriver:Perfect for removing screws that hold the faucet in place.
- Plumber’s Putty:Helps seal the faucet and prevents leaks.
- Bucket:Handy for catching water when you disconnect the pipes.
Imagine starting the job only to realize you don’t have an adjustable wrench. Frustrating, right? Preparation is key.
Specialized Tools
Some tasks might require tools that aren’t in your typical toolbox:
- Basin Wrench:Ideal for reaching nuts that are in tight spaces under the sink.
- Plumber’s Tape:Ensures a watertight seal, preventing leaks.
A basin wrench can be a lifesaver when working in cramped quarters. Do you have one in your toolkit?
Materials Needed
Don’t forget these materials to ensure a smooth installation:
- New Faucet:Choose one that suits your kitchen’s style and your personal taste.
- Supply Lines:Often replaced with a new faucet to ensure compatibility and avoid wear and tear.
Choosing the right faucet can elevate your kitchen’s aesthetic. Have you considered how it will complement your current design?
Safety Gear
Lastly, prioritize safety with these items:
- Protective Gloves:Safeguard your hands from sharp edges and hot surfaces.
- Safety Glasses:Protect your eyes from any debris or sudden water sprays.
Safety glasses might seem trivial until water unexpectedly splashes in your face. Are you ready to protect yourself? By preparing these tools and materials, you’re setting yourself up for a smoother, more efficient faucet replacement. Keep this list handy and enjoy the satisfaction of a job well done!

Credit: www.youtube.com
Preparing The Workspace
Clear the kitchen workspace by removing items around the sink. Ensure easy access to tools and parts. Organize and prepare materials for an efficient faucet replacement process.
Preparing the workspace is a crucial step in replacing a kitchen faucet. A well-organized area ensures a smooth and efficient process. It minimizes potential mishaps and provides easy access to necessary tools. You’ll find it easier to focus on the task without distractions or obstacles. Follow these guidelines to set up your workspace properly.
Clearing The Area
Start by removing any items from the sink area. Clear away dish soap, sponges, and personal items. This prevents accidental damage and keeps the space tidy. Place a towel or mat on the countertop for tools. This keeps them within reach and protects surfaces from scratches. Ensure the sink is empty and clean. A clean sink allows better access and visibility during installation.
Turning Off Water Supply
Locate the water valves under the sink. Turn them clockwise to shut off the water. Double-check that both hot and cold supplies are off. This prevents leaks while you work. Test the faucet to ensure water is off. Turn it on; there should be no flow. This simple step avoids unexpected messes.
Removing The Old Faucet
Removing the old faucet is the first step in replacing a single handle kitchen faucet. Turn off the water supply, and disconnect the water lines. Unscrew the mounting nuts and lift the faucet out, clearing the way for a new installation.
Removing the old faucet is a crucial step in installing a new kitchen faucet. It requires careful attention to avoid damaging existing plumbing or the sink. Follow these simple steps to ensure a smooth removal process.
Disconnecting Water Lines
First, turn off the water supply to the faucet. Locate the valves under the sink and twist them clockwise. Next, use a wrench to disconnect the hot and cold water lines from the faucet. Place a bucket underneath to catch any drips. This prevents water spills.
Loosening Mounting Nuts
Find the mounting nuts securing the faucet to the sink. These are usually located underneath the sink. Use a wrench to loosen them. It might be tricky due to space constraints. Consider using a basin wrench, which is designed for tight spots. Once loose, remove the nuts completely.
Lifting Out The Old Faucet
With the mounting nuts removed, gently lift the old faucet out of its position. You may need to wiggle it slightly to free it from caulk or grime. Ensure all parts are detached before lifting. Dispose of or recycle the old faucet responsibly. Now, the sink is ready for the new installation.
Installing The New Faucet
Replacing a single handle kitchen faucet can be simple. Turn off the water supply first. Remove the old faucet and clean the area. Install the new faucet following the instructions. Reconnect the water supply and check for leaks. Enjoy your updated kitchen with a functional faucet.
Installing a new kitchen faucet can refresh your space. It might seem challenging, but with patience, it’s manageable. Here’s how to install a single-handle kitchen faucet effectively.
Positioning The New Faucet
Place the new faucet through the sink’s mounting holes. Ensure it aligns with the sink’s center. Check that the water lines reach the connections easily. Hold the faucet steady with one hand. This prevents it from moving around.
Securing With Mounting Nuts
Locate the mounting nuts provided with your faucet. Slide them onto the faucet’s threaded rods under the sink. Tighten the nuts using a wrench. Make sure the faucet stays centered. Hand-tighten first, then use the wrench for a snug fit. Avoid overtightening to prevent damage. Ensure the faucet is stable and doesn’t wobble.
Connecting Water Supply Lines
Connecting water supply lines is a crucial part of replacing a single handle kitchen faucet. Ensuring a proper connection not only helps prevent leaks but also guarantees that your faucet functions smoothly. This section will guide you through attaching hot and cold lines and tightening connections, making the process simple and efficient.
Attaching Hot And Cold Lines
Identify the hot and cold water supply lines under your sink. Usually, the hot line is on the left and cold on the right. If you’re unsure, touch the pipes to feel for temperature differences.
Attach the corresponding hoses from the faucet to the supply lines. Use flexible hoses for easy maneuverability. Ensure that you hand-tighten the connections initially. This prevents cross-threading and makes adjustments easier.
Ever had a surprise splash from a misconnected line? Double-checking the labels or markings on hoses can save you from this mishap.
Tightening Connections
Once the lines are attached, it’s time to tighten them securely. Use a wrench to ensure snug connections without overtightening. This reduces the risk of damaging the threads or causing leaks.
Listen for a gentle creak as you tighten, indicating a secure fit. If you hear or feel resistance, stop and reassess the connection.
After tightening, turn on the faucet and check for leaks. A dry paper towel beneath the connections can easily reveal any moisture. Wouldn’t you prefer to catch a leak now rather than after water has flooded your cabinet?
Testing The New Faucet
Turn on the new faucet and check for smooth water flow. Look for leaks around the base or connections. Adjust fittings if necessary for a perfect fit.
Testing the new kitchen faucet is crucial. It ensures everything works smoothly. After installation, take time to examine it thoroughly. This prevents future issues. Below are key steps to follow.
Checking For Leaks
Leaks can cause damage. Turn on the water supply. Look under the sink. Check all connections. Ensure there are no drips. Use a flashlight for better visibility. If you find leaks, tighten the connections. Use a wrench if necessary. Sometimes, replacing a washer helps. A dry paper towel can also detect leaks. Place it under the joints. Moisture will show on the towel.
Ensuring Proper Water Flow
Water flow should be steady. Turn the faucet on. Check both hot and cold water. Observe the water pressure. It should not be too low or too high. If the flow is uneven, inspect the aerator. Remove it and clean it if needed. Debris can block water flow. Reattach the aerator after cleaning. This ensures smooth water delivery.
Finishing Touches
After installing your new single handle kitchen faucet, it’s time for the finishing touches. These steps ensure your kitchen space is clean, functional, and eco-friendly.
Cleaning The Area
Begin by wiping down the sink and surrounding area. Use a gentle cleaner to remove any debris or residue. Pay attention to areas where the old faucet was attached. This helps prevent any buildup and ensures a fresh look.
Check for any leaks around the new faucet. Tighten connections if needed. A clean and dry area enhances the beauty of your new fixture.
Proper Disposal Of Old Faucet
Don’t forget to dispose of the old faucet responsibly. Many parts can be recycled. Contact your local recycling center for information. This reduces waste and supports environmental sustainability.
If the old faucet is in good condition, consider donating it. Many organizations accept used fixtures. This offers a second life for your old faucet and helps those in need.

Credit: www.youtube.com

Credit: www.youtube.com
Frequently Asked Questions
How To Take Off A Single Handle Kitchen Faucet?
Turn off the water supply. Remove the handle screw using a hex key or screwdriver. Lift off the handle. Unscrew the retaining nut beneath. Pull out the faucet body carefully.
Are Single Handle Kitchen Faucets Universal?
Single handle kitchen faucets are not universally compatible. They vary in design, installation type, and size. Always check compatibility with your sink and plumbing. Ensure the faucet fits your countertop hole size and matches your kitchen’s water supply lines for a proper fit.
Can I Change My Kitchen Faucet Myself?
Yes, you can change your kitchen faucet yourself. Follow instructions carefully, have necessary tools ready, and ensure water is turned off. Consider watching tutorial videos for guidance. If unsure, consult a professional to avoid potential issues.
How Do You Replace A Single Lever Faucet Cartridge?
Turn off the water supply. Remove the handle by loosening the screw. Take out the retaining nut. Pull out the old cartridge. Insert the new cartridge and reassemble the faucet. Test for leaks.
Conclusion
Replacing a single handle kitchen faucet is easier than it seems. With basic tools, anyone can do it. First, gather your materials. Next, remove the old faucet. Then, install the new one carefully. Check for leaks after installation. Tighten connections if needed.
Take your time and be patient. A new faucet can refresh your kitchen. Plus, it’s a fun project to tackle. Enjoy your improved space and the satisfaction of doing it yourself. Remember, practice makes perfect. You’ve got this!