
Are you tired of your kitchen’s outdated look but hesitant about the cost of a full renovation? Painting your kitchen cabinets can be a game-changer, transforming your space without breaking the bank.
Imagine walking into a kitchen that feels brand new, a space that reflects your style and creativity. In this guide, you’ll discover simple steps to breathe new life into your kitchen. With the right techniques, tools, and a bit of patience, you’ll have your cabinets looking like they were done by a professional.
Ready to learn how to paint your kitchen cabinets and enjoy a stunning, fresh look? Let’s dive in and get your kitchen makeover started!

Credit: food52.com
Choosing The Right Paint
Choosing the right paint for your kitchen cabinets can make all the difference between a professional finish and a DIY disaster. The type, color, and quality of paint you select will impact not only the look but also the durability of your cabinets. It’s essential to understand these elements to ensure your kitchen makeover is both stunning and long-lasting.
Types Of Paint For Cabinets
When painting kitchen cabinets, you have several options to consider:
- Oil-based Paints:Known for their durability and smooth finish. They are great for high-traffic areas but take longer to dry and require more ventilation.
- Water-based Paints:Easier to clean up and faster drying. They are less odor-intensive, making them a favorite for indoor projects.
- Chalk Paint:Offers a unique matte finish and requires minimal prep work. It’s great for a vintage or rustic look but may need a topcoat for protection.
Best Colors For Kitchen Cabinets
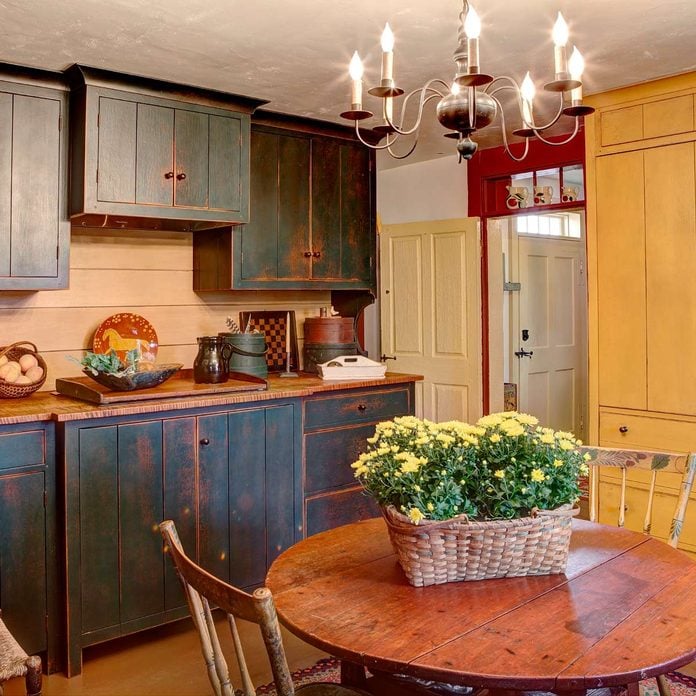
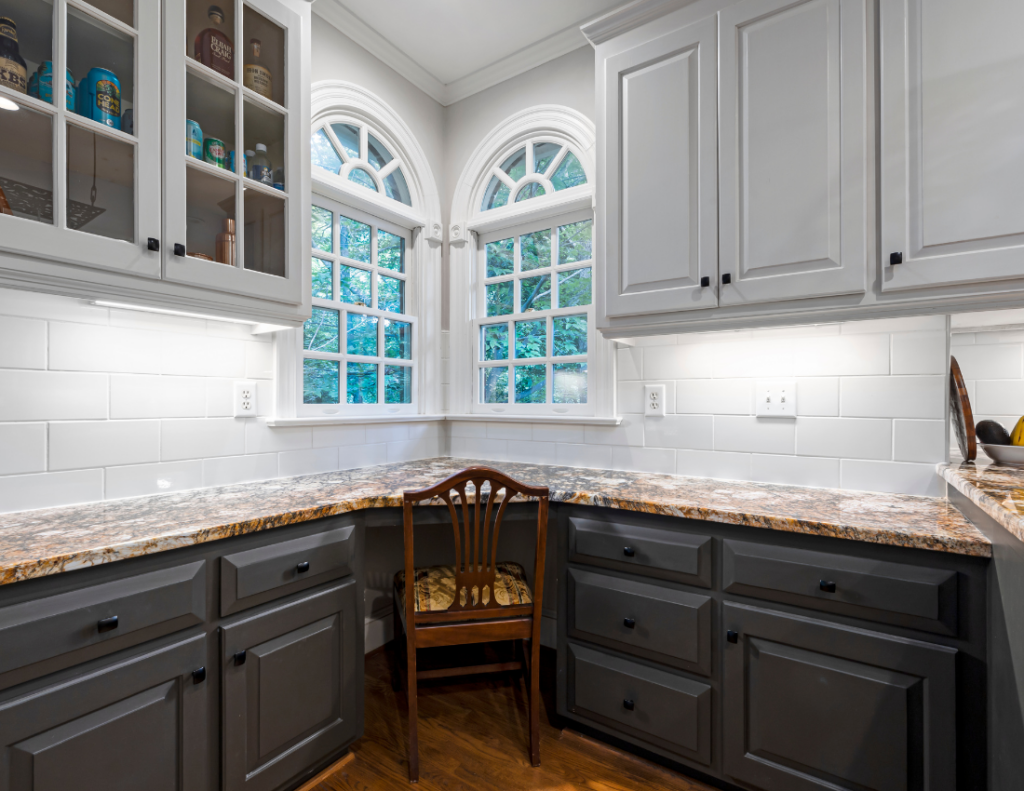
Your color choice can dramatically impact your kitchen’s ambiance. White and neutral tones create a clean and airy feel, making your space look bigger. Bold colors like navy or forest green add depth and personality, while pastels can bring a soft touch to your kitchen environment.
Consider how the cabinet color will complement existing elements like countertops and floors. Would a splash of color energize your space or would you prefer something calming and understated?
Quality Vs. Cost Considerations
Balancing quality with cost is crucial when choosing paint. Higher-quality paints often provide better coverage and last longer, saving you time and money in the long run. While it might be tempting to go for a cheaper option, consider whether it will hold up to daily wear and tear.
Reflect on your budget and priorities. Is it worth investing a bit more now to avoid frequent touch-ups later? Quality paint often translates to fewer coats and a more polished finish.
Preparing Your Cabinets
Before you can transform your kitchen cabinets with a fresh coat of paint, the most crucial step is preparing them properly. Proper preparation ensures that the paint adheres well and provides a smooth, lasting finish. Each phase of preparation requires attention to detail and a bit of elbow grease, but the results are worth it. Let’s dive into the essential tasks involved in preparing your cabinets.
Cleaning And Degreasing
Start by giving your cabinets a thorough cleaning. Kitchen cabinets tend to collect grease and grime over time, which can interfere with paint adhesion. Use a strong degreaser or a mix of dish soap and warm water to scrub all surfaces.
Pay special attention to areas around handles and edges where grease tends to accumulate. Once cleaned, wipe them down with a damp cloth to remove any soap residue, and let them dry completely. This step might seem tedious, but it’s vital for a professional-looking finish.
Sanding Techniques
Sanding is your next step in preparing your cabinets. This process helps in removing the old finish and roughing up the surface so the primer and paint can stick better. Use a medium-grit sandpaper (around 120 to 150 grit) for the first pass to remove the sheen.
Follow up with a finer grit (around 220) to smooth the surface for painting. An electric sander can speed up the process, but hand sanding might be necessary for grooves or intricate designs. Remember, the goal is to create a surface that the paint can easily cling to.
Repairing Damage
Inspect your cabinets for any damage, such as scratches, dents, or holes. These imperfections should be fixed before painting for a seamless finish. Use a wood filler to address any holes or significant dents.
Apply the filler with a putty knife, then sand it smooth once it’s dry. For minor scratches, a light sanding might be enough. Taking the time to repair damage ensures your cabinets will look as good as new.
Have you ever skipped these steps in a rush to finish a project? It can be tempting, but the preparation is what sets apart a DIY job from a professional one. Investing time in these steps will make your kitchen cabinets not only look great but also stand the test of time.
Gathering Essential Tools
Gathering essential tools for painting kitchen cabinets involves selecting brushes, rollers, and high-quality paint. Ensure you have sandpaper, primer, and a drop cloth to protect surfaces. Proper preparation and tools lead to a smooth and long-lasting finish.
Gathering the right tools can make or break your cabinet painting project. Imagine starting your painting journey only to realize halfway through that you’re missing a crucial item. It’s frustrating and can derail your progress. So, before you dip that brush into paint, let’s ensure you have everything you need for a smooth and efficient painting experience.
Brushes And Rollers
The type of brushes and rollers you choose directly impacts the finish of your cabinets. Opt for high-quality synthetic brushes for a smooth, even application. These are perfect for water-based paints and offer excellent coverage. For larger surfaces, consider using a foam roller. It helps avoid brush strokes and delivers a professional-looking finish. A combination of both will give you the flexibility to handle different surfaces efficiently.
Primers And Sealers
Priming your cabinets is a step you don’t want to skip. It ensures better paint adhesion and enhances durability. Choose a primer that’s compatible with your cabinet material—be it wood, laminate, or metal. After painting, sealing is crucial to protect your hard work. A clear sealer will shield the paint from scratches and moisture. This extra layer of protection ensures your cabinets maintain their fresh look for years.
Safety Equipment
Safety should always be a priority when painting. Wearing a mask will protect you from inhaling fumes. Even if you’re using low-VOC paints, it’s better to be safe. Don’t forget gloves and goggles. They keep your skin and eyes safe from accidental splashes. A small investment in safety gear can save you from potential health issues later. By gathering these essential tools, you’re setting yourself up for a successful cabinet makeover. Are you ready to transform your kitchen with confidence?
Applying Primer
Applying primer ensures a smooth surface for painting kitchen cabinets. Clean the cabinets thoroughly before starting. Use a quality primer to help the paint adhere better and last longer.
Applying primer is a vital step in painting kitchen cabinets. It prepares the surface, ensuring the final paint adheres properly. Skipping this step can lead to peeling or uneven paint. Let’s explore why primer is essential, how to choose the best one, and techniques for applying it evenly.
Why Primer Is Crucial
Primer creates a smooth base for paint. It seals the cabinet surface, preventing stains from showing through. It also helps in blocking moisture, preserving the wood. Without primer, paint can chip off easily. Primer ensures durability and longevity for your cabinets.
Choosing The Right Primer
Picking the correct primer is important for cabinet painting. Consider the cabinet material when choosing a primer. For wood, oil-based primers work best. They seal knots and prevent tannin bleed. For laminate surfaces, use a bonding primer. This ensures paint sticks well. Check for primers labeled for kitchen use.
How To Apply Primer Evenly
Start by cleaning the cabinets thoroughly. Remove any grease or dust. Apply primer using a quality brush or roller. Use even strokes for uniform coverage. Avoid overloading the brush with primer. Thin layers work better than thick ones. Let the primer dry completely before painting.
Painting Techniques
Painting your kitchen cabinets can give your space a fresh look. The right painting techniques can make a big difference. Choosing the correct method ensures durability and beauty.
Brushing Vs. Spraying
Brushing is simple and requires less equipment. It allows for detailed work. Use a high-quality brush for fewer streaks. Spraying provides a smoother finish. It covers large areas quickly. Spraying can be tricky indoors. It needs more prep work and ventilation.
Achieving A Smooth Finish
Start with a clean, dust-free surface. Sand the cabinets lightly for better paint adhesion. Use a primer to ensure the paint sticks well. Apply thin layers of paint. Let each layer dry completely before adding another. A final light sanding between coats helps achieve smoothness.
Avoiding Common Mistakes
- Skipping the primer can cause peeling.
- Thick paint coats lead to drips and uneven surfaces.
- Not sanding between coats reduces smoothness.
- Ignoring drying times results in smudges and imperfections.
- Using poor quality brushes or rollers affects finish quality.
Careful attention to these techniques will give you beautiful, long-lasting results.
Drying And Curing
Proper drying and curing ensure a smooth, durable finish on kitchen cabinets. Allow paint to dry completely between coats, and cure for several days before use. Patience during this stage enhances the longevity and appearance of your cabinets.
Painting kitchen cabinets can dramatically transform your space, but achieving that flawless finish requires patience during the drying and curing phases. Drying and curing are distinct processes, each crucial for the longevity and appearance of your cabinets. Drying is the initial phase where the paint loses its wetness, while curing involves the paint hardening and bonding with the surface. Let’s explore how to ensure these processes are optimized for the best results.
Optimal Drying Conditions
Creating the right environment for drying is key. Aim for a space with good air circulation; open windows or use fans to facilitate airflow. Avoid direct sunlight, as it can cause uneven drying and alter the paint color. Temperature matters too. A mild, consistent temperature between 60-75°F is ideal. Extreme temperatures can affect paint adhesion, leading to cracking or peeling down the line. Humidity is another factor to consider. High humidity can slow down drying, while too little can cause the paint to dry too quickly, impacting its finish. A humidity level of around 50% is generally optimal.
Curing Time Considerations
Curing isn’t just about waiting for the paint to dry; it’s about allowing it to fully harden. This process can take several days to weeks, depending on the type of paint used. Acrylic paints may take a week to cure, while oil-based paints can take up to a month. Don’t rush this stage. You might feel tempted to reassemble your kitchen early, but doing so can lead to damage. Consider planning your painting project around your schedule to allow adequate curing time without disruption. Think about the long-term benefits of patience. Proper curing leads to a more durable finish, resistant to chips and scratches. Isn’t it worth the wait for a kitchen that stays looking fresh longer?
Preventing Damage During Curing
Protecting your cabinets during curing is crucial. Avoid placing heavy objects on or near the freshly painted surfaces. Even slight pressure can leave marks or dents. Keep pets and children away from the area. Accidental bumps or scratches can compromise the curing process. Cover your cabinets with a protective layer like a thin plastic sheet, but ensure it doesn’t stick to the paint. Consider setting reminders to check on the curing progress. It’s easy to forget in the hustle of everyday life, but a quick daily check can help you catch any issues early. How can you make sure your kitchen’s new look lasts? Simple precautions and patience during curing can make all the difference.
Reassembling Cabinets
Transform kitchen cabinets with a fresh coat of paint. First, remove cabinet doors and hardware for easy access. Sand surfaces to ensure paint sticks well, then apply primer and your chosen paint color for a new look.
Reassembling your kitchen cabinets can feel like putting together a puzzle where each piece needs to fit perfectly for the best result. After the paint has dried and the satisfaction of a job well done sets in, it’s time to bring the cabinets back to life. This part of the process is all about precision and attention to detail, ensuring that everything aligns and functions smoothly.
Installing Hardware
Begin with the installation of hardware, which is like adding jewelry to your cabinets. Choose handles and knobs that match your style and the overall kitchen décor. Use a template or jig to ensure uniform placement. If you’ve ever struggled with uneven hardware, you know how it can ruin the aesthetic. Carefully measure and double-check each handle’s position. Tighten screws securely but avoid overtightening to prevent damage.
Aligning Doors And Drawers
Aligning doors and drawers is crucial for seamless operation. Misaligned doors can hinder functionality and disrupt the visual flow of your kitchen. Start by attaching the hinges and then hang the doors. Make adjustments by loosening or tightening screws until the doors sit perfectly. Ensure drawers slide smoothly without obstruction, checking their alignment with the cabinet frame.
Final Touches For A Professional Look
The final touches can make your kitchen look professionally done. Touch up any small paint imperfections with a fine brush. Clean all surfaces to remove any fingerprints or dust. Consider adding soft-close dampers to your drawers and doors. This simple upgrade not only adds functionality but also a touch of luxury. Step back and admire your handiwork – you’ve transformed your kitchen with your own hands. What detail might you add that reflects your personal touch?
Credit: www.familyhandyman.com
Maintenance And Care
Proper cleaning and sanding ensure a smooth finish on kitchen cabinets. Use quality primer to improve paint adhesion. Apply multiple thin coats of paint for best results.
Maintaining your freshly painted kitchen cabinets is crucial for preserving their beauty and function. Proper care not only extends their lifespan but also keeps them looking vibrant and fresh. Whether you’re dealing with everyday messes or accidental scratches, knowing how to handle them can make all the difference.
Cleaning Painted Cabinets
Cleaning painted cabinets requires a gentle approach. Use a soft cloth or sponge with mild soap and warm water to wipe down surfaces. Avoid abrasive cleaners or scrubbing pads as they can damage the paint. A regular cleaning routine is key. Consider wiping cabinets weekly to prevent grime buildup. If you spill something, clean it immediately to avoid stains.
Handling Scratches And Chips
Accidents happen, and scratches or chips are inevitable over time. When you notice a scratch, clean the area first. Then, use a touch-up paint that matches the cabinet color. For deeper chips, you may need a filler before painting. Follow up with a sealant to ensure durability.
Long-term Care Tips
Think about long-term care strategies to keep your cabinets in top shape. Applying a protective wax or varnish can add an extra layer of protection against moisture and daily wear. Consider installing hardware like knobs or handles to minimize direct contact with the painted surfaces. This simple addition can prevent oil and dirt transfer from your hands. When was the last time you checked your kitchen environment? High humidity can affect the paint’s longevity. Ensure proper ventilation to maintain a balanced environment. By integrating these maintenance tips, you not only protect your investment but also enhance the overall appeal of your kitchen space.
Credit: cabinetcoatingkings.com
Frequently Asked Questions
Can I Just Paint Over My Kitchen Cabinets?
Yes, you can paint kitchen cabinets. Clean and sand them first for best results. Use quality primer and paint. Ensure proper ventilation during the process. Consider professional help for a flawless finish.
What Is The Correct Way To Paint Kitchen Cabinets?
Clean and sand the cabinets thoroughly. Apply a quality primer. Use a brush or roller for even paint application. Apply multiple thin coats, allowing drying time between each. Finish with a protective topcoat for durability.
Is It Better To Roll Or Brush Paint Cabinets?
Rolling paint on cabinets provides a smoother finish with fewer brush marks. Brushes work better for corners and edges. Both methods have advantages, but rolling is often preferred for larger surfaces. Choose based on your skill level and project needs for best results.
Is It A Good Idea To Paint Kitchen Cabinets Yourself?
Painting kitchen cabinets yourself can be a cost-effective and rewarding project. Ensure proper preparation and use quality materials for best results. DIY painting allows customization and can enhance your kitchen’s appearance. Be patient and follow instructions to achieve a professional finish.
Conclusion
Painting kitchen cabinets can refresh your space. It adds charm easily. Follow the steps for the best results. Clean surfaces well. Choose high-quality paint. Use brushes and rollers evenly. Allow proper drying time. This ensures a lasting finish. Personalize your kitchen with color.
Enjoy the transformation. It’s simple yet effective. Anyone can achieve a new look. Save money and embrace creativity. Small changes make a big impact. Start today and enjoy your revamped kitchen. Perfect for family gatherings and daily meals. A fresh kitchen invites warmth and style.