How to Replace Kitchen Faucet 3 Hole: Step-by-Step Guide
Executive Chef & Lead Commercial Kitchen Specialist at Daily Kitchup Test Lab
Are you tired of that leaky, outdated faucet in your kitchen? Replacing a kitchen faucet can seem daunting, especially when dealing with a 3-hole setup.
But fear not! With a little guidance and the right tools, you can transform your kitchen into a more functional and stylish space. Imagine the satisfaction of upgrading your kitchen with a sleek, new faucet that not only works perfectly but also enhances your kitchen’s aesthetics.
In this guide, we’ll walk you through each step, making the process simple and stress-free. You’ll soon discover that replacing a kitchen faucet is easier than you think, and you’ll gain the confidence to tackle similar projects in the future. Ready to dive in and make a change that will leave you wondering why you didn’t do it sooner? Let’s get started!

Credit: www.amazon.com
Essential Tools And Materials
Gather essential tools and materials like a wrench, screwdriver, plumber’s tape, and a new faucet. Ensure you have a bucket to catch water and towels to keep the area dry. Double-check the size compatibility of the new faucet with your sink’s three-hole configuration.
Replacing a kitchen faucet can seem daunting, but with the right tools and materials, it’s a task you can handle confidently. Gathering everything before you start will save you time and make the process smoother. It’s like preparing for a recipe; you want to have all your ingredients ready to go. So, what do you need to get started?Essential Tools
| Tool | Purpose |
|---|---|
| Adjustable wrench | Loosen and tighten nuts |
| Phillips screwdriver | Remove screws |
| Plumber’s tape | Ensure a watertight seal |
| Basin wrench | Reach awkward spaces |
| Bucket | Catch water drips |
Essential Materials
- Replacement faucet:Ensure it’s compatible with your 3-hole setup.
- Flexible supply lines:New lines can prevent leaks and are often easier to work with.
- Sealant or plumber’s putty:Creates a watertight seal.
- Clean cloths:Keep your workspace tidy and wipe away any mess.
Preparation And Safety Measures
Ensure the water supply is turned off before beginning. Lay down towels to catch any spills. Use proper tools to loosen and remove the old faucet safely.
Replacing a kitchen faucet might seem daunting, but with the right preparation and safety measures, it can be a rewarding DIY project. Before jumping in, it’s crucial to ensure you have everything you need and understand the safety precautions to avoid common pitfalls. This section will guide you through essential preparations and safety tips to make the process smooth and efficient.Gather Your Tools And Supplies
Start by collecting all necessary tools and supplies. You’ll typically need a wrench, pliers, and a basin wrench for hard-to-reach spots. Don’t forget the new faucet, plumber’s tape, and possibly some silicone sealant. Have a towel and bucket handy to catch any residual water.Turn Off The Water Supply
Always turn off the water supply before starting any plumbing work. Locate the shut-off valves under your sink and turn them clockwise. If the valves are stuck, gently use pliers to loosen them. Confirm the water is off by turning on the faucet to release any remaining water in the pipes.Ensure Proper Lighting
Proper lighting is key to avoid mistakes. Use a flashlight or headlamp to illuminate the area under the sink. Good lighting helps you see connections clearly and work more effectively. Plus, it minimizes the risk of accidents.Clear The Workspace
Remove items from under the sink to create a clear workspace. This makes it easier to maneuver tools and access pipes. A clutter-free space reduces stress and enhances focus, ensuring a smoother installation process.Wear Safety Gear
Safety should never be an afterthought. Wear gloves to protect your hands from sharp edges and potential cuts. Safety goggles are also a good idea to shield your eyes from debris or unexpected splashes. Have you ever started a project only to realize you missed a crucial step? Taking the time to prepare properly can save you time and frustration. With these measures in place, you’re well on your way to a successful faucet replacement.Shutting Off Water Supply
Replacing a kitchen faucet can be a straightforward DIY task, but it all starts with the crucial step of shutting off the water supply. Imagine you’re ready to dive into the project, tools in hand, only to find water gushing everywhere. Avoid this chaos by ensuring the water is off before you start. It’s a small step with a big impact, saving you from potential water damage and ensuring a smooth installation process.
Locate The Shut-off Valves
Begin by locating the shut-off valves under your sink. Typically, these valves are easy to spot, attached to the water pipes leading up to your faucet. If your kitchen is older, you might need to do a bit of searching, but they’re usually within reach. Turn these valves clockwise to stop the water flow.
Test The Faucet
Once you’ve turned off the valves, test the faucet by turning it on. If water still comes out, double-check the valves to ensure they’re fully closed. This simple test can prevent messy surprises later. If no water flows, you’re good to proceed with your project.
Address Stubborn Valves
Sometimes, valves can be stubborn, especially if they haven’t been used in a while. Use a wrench to gently coax them into turning. Applying a bit of lubricant can also help if they’re stuck. Be patient and avoid forcing them to prevent damage.
Consider Main Water Supply
If the under-sink valves aren’t functioning properly, you may need to shut off the main water supply to your home. This is usually located where water enters your house. It’s a broader approach but ensures no water surprises while you work.
By focusing on these steps, you lay the groundwork for a hassle-free faucet replacement. Have you ever encountered a stubborn valve or faced a surprise water leak during a project? Share your experiences and tips in the comments below.

Credit: www.amazon.com
Removing The Old Faucet
Turn off the water supply. Unscrew the nuts beneath the sink using a wrench. Gently lift the old faucet out.
Removing the old kitchen faucet might seem daunting. But with the right tools, it’s straightforward. Ensure your water supply is turned off. Prepare a bucket or towel to catch any drips. This will keep your workspace tidy.Detaching Water Lines
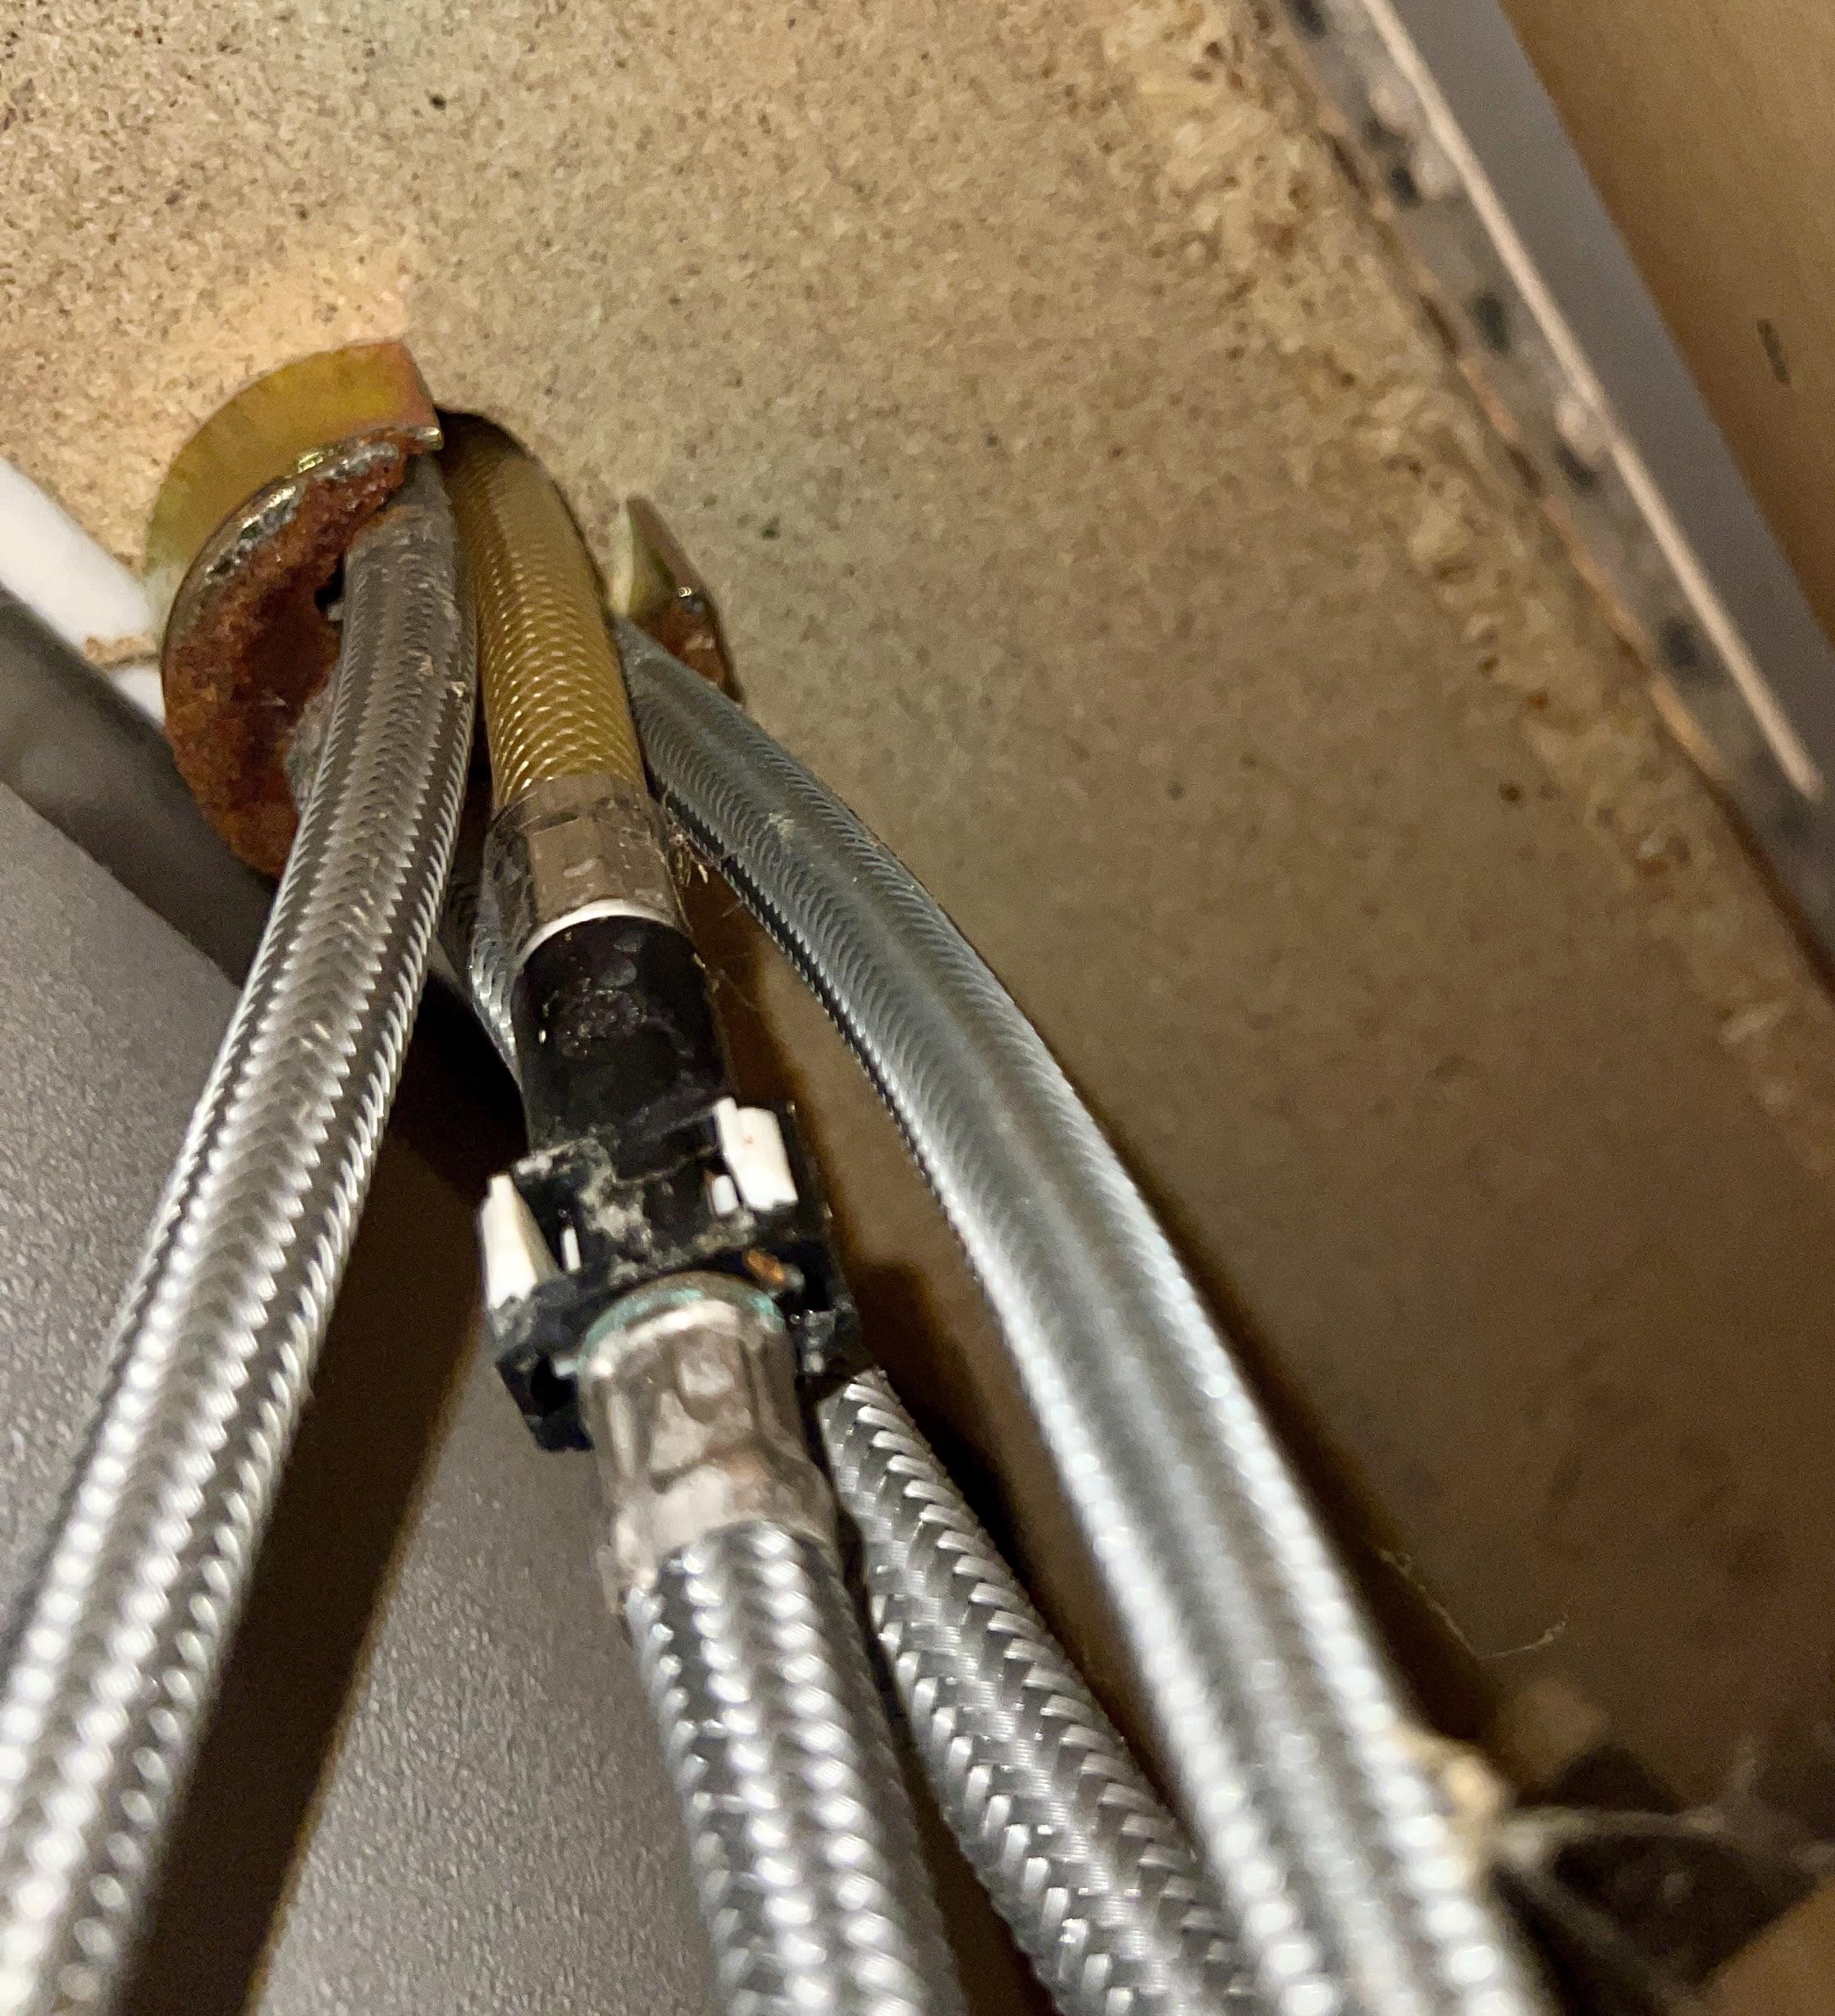
First, disconnect the water lines. Use an adjustable wrench to loosen the nuts. Turn counterclockwise to release them. Place a bucket underneath to catch any remaining water. This prevents any mess on the floor. After detaching, set the lines aside.Unscrewing Mounting Nuts
Next, locate the mounting nuts under the sink. Use a basin wrench for tight spaces. Turn the nuts counterclockwise to loosen them. Sometimes they might be a bit stuck. Apply a little force if necessary. Once loose, remove them completely.Lifting The Old Faucet
Finally, it’s time to lift the faucet. Gently pull it upward from the sink. If it sticks, check for any remaining connections. Wiggle the faucet side to side to free it. Once out, clean the sink area. This ensures a smooth installation of the new faucet.Cleaning The Sink Area
Replace the kitchen faucet in a 3-hole sink area by first clearing the sink. Remove items and wipe surfaces to prevent dirt and debris from interfering. Ensure the area is clean and dry for easy access to the faucet and piping connections.
Cleaning the sink area is an essential step before replacing your kitchen faucet, especially with a 3-hole system. A clean workspace ensures a smoother installation process and prevents debris from causing any issues. You might be surprised at what you find lurking under your old faucet—grime, mineral deposits, or even mold. Keeping this area spotless not only makes the job easier but also sets the stage for a fresh, new look.Remove Any Obstructions
Before diving into scrubbing, clear the sink area of dishes and any other items. You need ample space to work comfortably. Make sure to also remove any cleaning supplies or dish racks.Wipe Down Surfaces
Use a damp cloth to wipe down the sink and surrounding countertop. This will help remove any loose dirt and dust. Pay extra attention to the areas around the faucet and sink holes.Scrub Away Grime
Apply a mild cleaner or a mixture of vinegar and water to tackle stubborn stains and grime. Use a soft-bristled brush or an old toothbrush for hard-to-reach areas. Don’t forget to scrub around the sink holes where the faucet will be installed.Inspect For Mold And Mildew
Check the sink area and under the faucet for any signs of mold or mildew. If you find any, use a mold remover or a solution of bleach and water. Ensuring this area is mold-free is crucial for both aesthetics and hygiene.Rinse And Dry
After scrubbing, thoroughly rinse the sink and surrounding area with clean water. Use a dry towel to remove any excess moisture. A dry surface will make it easier to install the new faucet without slipping or sliding.Reassess For Remaining Debris
Look over the sink area one last time to ensure all debris and grime are removed. Small particles can get in the way during installation. A final check can save you from frustrations later on. By ensuring a clean and tidy sink area, you’re setting yourself up for a successful faucet replacement. Do you feel ready to tackle the next steps?Installing The New Faucet
Replacing a kitchen faucet with three holes involves removing the old fixture carefully. Attach the new faucet securely, ensuring all connections are tight. Check for leaks and proper alignment before finishing the installation.
Installing a new kitchen faucet can bring fresh life to your space. It’s a straightforward task with the right tools and patience. Once you’ve removed the old faucet, it’s time to install the new one. This section will guide you through positioning, securing, and connecting your new faucet.Positioning The New Faucet
Start by placing the new faucet into the designated holes. Make sure it’s centered. Check that the faucet aligns properly with the sink. This ensures smooth operation later.Securing Mounting Nuts
Once the faucet is positioned correctly, secure it with mounting nuts. Under the sink, tighten the nuts by hand first. Then use a wrench to ensure they’re snug. This keeps the faucet stable and prevents leaks.Reconnecting Water Lines
Reconnect the water lines to the faucet. Attach the hot and cold water lines to their respective valves. Ensure the connections are tight. Turn on the water to check for leaks. Adjust as necessary to ensure a secure fit.Testing For Leaks
Testing for Leaks Ensure all connections are secure. Turn on the water supply and observe for drips around joints and base. Tighten fittings if needed, ensuring the faucet operates smoothly without any leaks.
Testing for leaks is a crucial step after installing your new kitchen faucet. Identifying leaks early saves time and prevents water damage. Follow these steps to ensure everything runs smoothly.Check All Connections
Look at each connection point under the sink. Ensure they are tight and secure. Loose connections often cause leaks. Use a wrench to tighten if necessary.Turn On The Water Supply
Gradually turn the water supply back on. Observe the faucet and pipes closely. Listen for any unusual sounds. Water should flow smoothly without splashes or drips.Inspect Under The Sink
Check beneath the sink for any signs of moisture. Feel around the pipes and fittings. Any dampness indicates a potential leak. Tighten fittings if you find any wet spots.Test Hot And Cold Settings
Run both hot and cold water through the faucet. This tests the faucet’s functionality. Ensure the water flows without interruption. Adjust any settings if needed.Examine The Faucet Base
Look around the base of the faucet. Ensure there is no water pooling. Water around the base might indicate a seal problem. Re-seal if necessary.Check Aerator For Blockages
Remove the aerator and inspect for debris. Blockages can cause uneven water flow. Clean the aerator if required. Reattach it securely.Monitor For A While
Let the water run for a few minutes. Keep an eye on all components. This ensures any hidden leaks are revealed. Make adjustments as needed. Careful testing ensures your kitchen faucet works perfectly. Avoid future problems by addressing leaks immediately. Enjoy your new, leak-free faucet!Final Adjustments
Ensure all connections are tight to prevent leaks. Align the faucet handles properly for smooth operation. Test the water flow and temperature to confirm everything functions correctly.
Replacing a kitchen faucet with a 3-hole setup can be a rewarding task. After securing the faucet and connecting the water supply, the final adjustments ensure everything works perfectly. This stage involves checking for leaks, adjusting the faucet’s position, and ensuring a smooth water flow. Follow these steps to complete your faucet installation with confidence.Check For Leaks
Turn on the water supply to your faucet. Inspect all connections for any signs of leaks. Use a dry cloth to wipe around joints and connections. Feel for moisture or drips. Tighten any connections that show signs of leaking. A wrench can help with stubborn fittings. Ensure everything is snug, but avoid over-tightening.Align The Faucet
Check the faucet’s alignment with the sink and countertop. Adjust its position if necessary. Ensure the faucet handles operate smoothly. They should open and close easily without resistance. The spout should be centered over the sink. This ensures water flows directly into the basin.Test Water Flow
Turn the faucet handles to test water pressure. Ensure both hot and cold water flow properly. Listen for any unusual sounds. Adjust the aerator at the spout’s end if water sprays unevenly. Unscrew it and check for debris. Rinse it under water and replace it securely.Secure Loose Parts
Inspect the faucet for any loose parts. Check handles and the spout for stability. Tighten any screws or nuts as needed. This prevents future wobbles or movement. Ensure all components are firmly in place.Clean The Area
Wipe down the sink and faucet with a clean cloth. Remove any tools or debris from the installation. A clean workspace ensures a neat finish. It also helps identify any remaining issues. Keep the area tidy for daily use. These final adjustments complete your faucet replacement. Enjoy the convenience of a well-functioning kitchen faucet.Maintenance Tips
Replacing a kitchen faucet in a 3-hole setup can be simple with the right steps. First, turn off the water supply. Next, remove the old faucet by loosening the nuts underneath. Finally, fit the new faucet, ensuring all connections are tight.
Enjoy your updated kitchen!
Replacing a kitchen faucet with a 3-hole setup is a rewarding task that not only upgrades the look of your kitchen but also enhances its functionality. However, after installing your new faucet, maintaining it becomes essential to ensure its longevity and optimal performance. Regular maintenance can prevent leaks, mineral build-up, and other common issues that might arise with daily use.Regular Cleaning
Make a habit of cleaning your faucet regularly with mild soap and water. This helps remove any mineral deposits and keeps it looking shiny and new. Avoid using harsh chemicals, which can damage the finish. A soft cloth or sponge is ideal for wiping down the faucet without scratching it.Check For Leaks
Periodically inspect your faucet for leaks. Even a small drip can lead to bigger problems over time. Tighten any loose connections and replace worn-out washers or O-rings. If you notice persistent leaks, it might indicate a more significant issue that requires professional attention.Protect Against Hard Water
If your area has hard water, mineral deposits can accumulate quickly. Consider installing a water softener to minimize build-up. Regularly clean the aerator by unscrewing it and soaking it in vinegar. This simple step can prevent clogging and maintain steady water flow.Lubricate Moving Parts
The moving parts of your faucet, like handles and spouts, can benefit from occasional lubrication. Use a plumber’s grease to ensure smooth operation. This can prevent stiffness and squeaking, making your faucet easier to use.Inspect The Hoses
Take time to check the hoses connected to your faucet. Look for signs of wear, such as cracks or bulges. If you find any damage, replace the hoses promptly to prevent leaks. This proactive approach can save you from unexpected water damage. Taking the time to regularly maintain your kitchen faucet can save you from future headaches. Imagine waking up one morning to find water pooling under the sink because of a neglected leak. By following these tips, you can ensure your faucet remains a reliable and attractive feature in your kitchen. What maintenance routine do you follow for your home appliances?
Credit: www.homedepot.com
Frequently Asked Questions
Can You Replace A 3 Hole Kitchen Faucet With A Single?
Yes, you can replace a 3-hole kitchen faucet with a single-hole faucet. Use a deck plate to cover extra holes. Ensure the new faucet and deck plate are compatible with your sink design. Installation is straightforward with standard plumbing tools.
Always check the faucet instructions for specific guidelines.
Is It Difficult To Replace A Kitchen Faucet?
Replacing a kitchen faucet is usually straightforward for those with basic plumbing skills. Gather necessary tools and follow step-by-step instructions. Ensure you turn off the water supply before starting. If unsure, consult a professional to avoid potential issues. This task typically enhances kitchen functionality and aesthetics.
What Is A 3 Hole Kitchen Faucet?
A 3 hole kitchen faucet requires three sink holes for installation: one for the spout and two for handles. This design often includes a separate handle for hot and cold water, providing more control over water temperature and flow. It is a popular choice for traditional kitchen setups.
How To Remove A Kitchen Faucet Handle With No Visible Screws?
Locate the cap on top of the handle. Pry it off using a flat screwdriver. Unscrew the hidden screw underneath. Lift the handle off the faucet base. Ensure water supply is turned off before starting. Use gentle force to avoid damage.
Clean parts after removal for maintenance.
Conclusion
Replacing a kitchen faucet with three holes is straightforward. Follow the steps carefully, and you’ll succeed. Start by gathering the right tools. Turn off the water supply to avoid leaks. Remove the old faucet and clean the area. Install the new faucet securely.
Check for leaks after installation. Tighten any loose connections. Enjoy your newly refreshed kitchen space. The process may seem daunting, but you can do it. With patience and attention to detail, the task becomes manageable. Remember, practice makes perfect. Your kitchen will thank you for the effort!

Similar Posts