How to Replace Kitchen Faucet Sprayer: Easy DIY Guide
Executive Chef & Lead Commercial Kitchen Specialist at Daily Kitchup Test Lab
Are you tired of dealing with a leaky or outdated kitchen faucet sprayer? Replacing it might seem daunting, but it’s easier than you think!
Imagine transforming your kitchen into a more efficient space where every task flows seamlessly. Picture yourself enjoying the convenience of a sprayer that works perfectly, making cleaning and cooking a breeze. You deserve a kitchen that’s not only functional but also stylish, and the right faucet sprayer can make all the difference.
In this guide, we’ll walk you through each step of the replacement process, ensuring that you feel confident and equipped to tackle this project on your own. Ready to upgrade your kitchen and enhance your daily routine? Let’s dive in!
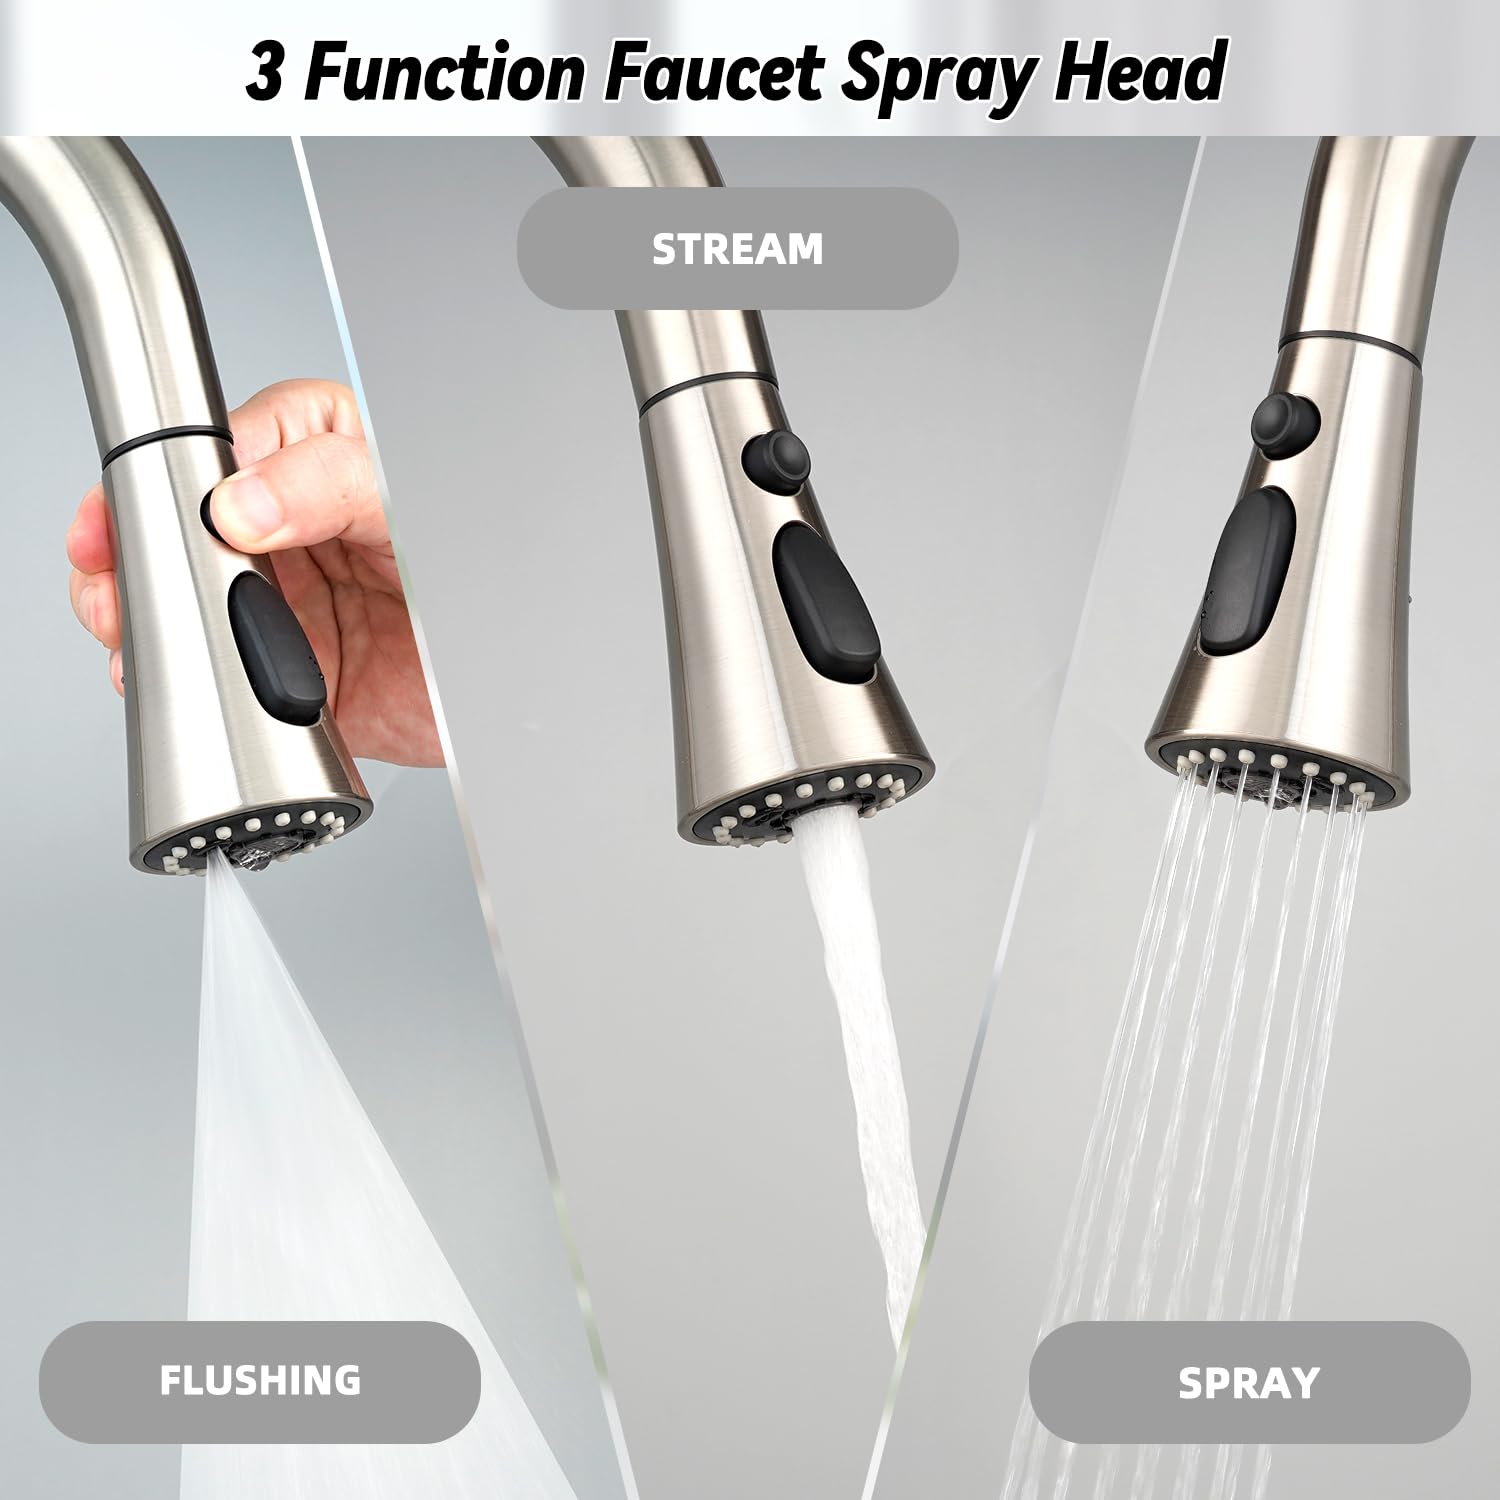
Credit: www.amazon.ca
Tools And Materials Needed
Gather a wrench, plumber’s tape, and a bucket. Ensure you have the new faucet sprayer and rubber washers. These tools and materials will help in smoothly replacing your kitchen faucet sprayer.
Replacing a kitchen faucet sprayer can seem daunting, but with the right tools and materials, it’s straightforward. Gather everything before you start, making the process smoother. Here, you will find a list of essentials needed for this task. Ensuring you have all items on hand will save you time and effort.Tools Required
A few basic tools are necessary for this project. These will help you remove the old sprayer and install the new one efficiently.- Adjustable Wrench:Useful for loosening and tightening connections.
- Pliers:Handy for gripping and turning components.
- Screwdriver:Helps in removing any screws you might encounter.
- Bucket:Catches water drips during removal.
- Tape Measure:Ensures the new sprayer fits correctly.
Materials Needed
Along with tools, you need specific materials for a successful installation. These ensure a secure and leak-free fit.- Replacement Sprayer:Ensure it matches your faucet type.
- Plumber’s Tape:Provides a tight seal on threaded connections.
- Cleaning Cloth:Wipes away any debris or water.
- Sealing Putty:Optional, for extra leak protection.
Preparing Your Workspace
Create a clear workspace by removing items around the sink. Gather necessary tools like wrenches and screwdrivers for easy access. Ensure good lighting to see connections clearly.
Preparing to replace your kitchen faucet sprayer is crucial. A well-organized workspace ensures a smooth process. With a few steps, you can set up your area efficiently. This makes the task easier and more enjoyable.Clearing The Area
Start by removing items around the sink. Clear away dishes, soap, and other items. This prevents accidents and provides a clear view. It also offers enough space to work comfortably. Wipe the sink and surrounding area. A clean space helps you focus on the task. Gather necessary tools nearby. This includes a wrench, bucket, and towel. Having tools within reach saves time.Turning Off Water Supply
Locate the valves under the sink. Turn them clockwise to stop water flow. This prevents water from spilling during the process. If there are no valves, turn off the main water supply. Check the faucet to ensure water is off. Turn on the faucet to drain any remaining water. This step is vital for a mess-free replacement. Keep a bucket under the sink to catch any drips. Now, you are ready to proceed with confidence.Removing The Old Sprayer
Detach the old sprayer by twisting the connector under the sink. Use pliers for stubborn fittings. Once loose, pull the sprayer from its socket above the sink.
Removing the Old Sprayer Replacing a kitchen faucet sprayer is a straightforward task that can breathe new life into your kitchen. Before you can enjoy the benefits of a shiny new sprayer, you must first remove the old one. This process involves a few simple steps that anyone can follow. It’s like hitting the refresh button on your kitchen sink setup. But how exactly do you go about doing this?Disconnecting The Hose
The first step is disconnecting the hose from the water supply. Start by locating the connection point under the sink. It’s usually attached to the faucet or the water supply pipe. Use a wrench to loosen the connection. Remember to place a bucket or towel underneath to catch any water that might spill. Once the hose is loose, gently pull it away from the connection point.Unscrewing The Sprayer
With the hose disconnected, it’s time to unscrew the sprayer itself. Hold the base of the sprayer and turn it counterclockwise. If it’s too tight, a pair of pliers can help, but be careful not to scratch the surface. Once unscrewed, the sprayer should come off easily. Removing an old sprayer can reveal a surprising amount of grime and buildup. Have you ever wondered how much gunk hides in plain sight? Taking these steps will ensure a smoother installation process for your new sprayer. Now, you’re ready to move on to the next exciting phase.Installing The New Sprayer
Installing a new kitchen faucet sprayer can refresh your space. It involves a few simple steps. With the right tools and patience, you can do it easily. Follow this guide to ensure a successful installation.
Attaching The New Hose
Begin by threading the new hose through the faucet base. Ensure it slides smoothly. Connect the hose to the faucet supply line. Use a wrench to tighten the connection securely. Avoid over-tightening to prevent damage.
Check for leaks by running the water. Tighten further if necessary. Ensure the hose is free from kinks. A smooth hose ensures proper water flow.
Securing The Sprayer Head
Attach the sprayer head to the hose. Twist it on until snug. Ensure a tight fit to prevent leaks. Test the sprayer by turning on the water. Ensure even water distribution.
If water flow is uneven, check the connections. Adjust if needed. Secure the sprayer head in its holder. Ensure it rests comfortably in place.
Testing The New Installation
Ensure the kitchen faucet sprayer is securely attached and free of leaks. Test water flow by turning on the faucet and checking for smooth operation and consistent pressure. Adjust any loose fittings or connections for optimal performance.
Testing the new kitchen faucet sprayer installation is crucial. Ensuring everything functions properly will save future headaches. A few simple checks confirm if the installation is successful.Checking For Leaks
Start by turning on the water supply. Look closely around the connections. Use a flashlight to inspect hard-to-see areas. If you find moisture, tighten the connections with a wrench. Use a dry cloth to wipe around the fittings. This helps detect any new leaks.Ensuring Proper Water Flow
Turn on the faucet and let the water run. Check if the water flows smoothly. Switch between hot and cold settings. Make sure both temperatures work well. Test the sprayer for consistent pressure. An uneven flow might indicate a blockage. If needed, clean the aerator or check the hose for kinks. Now, enjoy your fully functional kitchen faucet sprayer.
Credit: www.youtube.com
Tips For Maintenance
Replacing a kitchen faucet sprayer involves turning off the water supply first. Disconnect the old sprayer and install the new one by attaching the hose to the faucet. Ensure all connections are secure to prevent leaks.
Replacing a kitchen faucet sprayer can be straightforward. Keeping it in top condition demands regular maintenance. Proper care prolongs the sprayer’s life and ensures smooth operation. Here are some practical tips to keep your kitchen faucet sprayer in excellent shape.Regular Cleaning
Food particles and mineral deposits can clog the sprayer. Clean it monthly to avoid blockages. Use a toothbrush and vinegar solution to scrub the nozzle gently. Rinse thoroughly with warm water afterward. This prevents grime build-up and maintains water flow.Check For Leaks
Inspect the sprayer for leaks weekly. Water stains under the sink might indicate a problem. Tighten loose connections using a wrench. Replace worn-out gaskets to stop leaks. Early detection saves water and prevents damage.Inspect Hoses
The hose is vital for sprayer function. Examine it regularly for kinks or wear. Straighten any bends and replace damaged hoses immediately. This ensures smooth water movement and prevents ruptures.Maintain Water Pressure
Low pressure affects sprayer efficiency. Check your home’s water supply pressure. Clean or replace clogged aerators to improve flow. This enhances spray performance and helps in washing tasks.Use Quality Parts
Quality parts last longer and perform better. When replacing any component, choose durable materials. Brass and stainless steel parts resist corrosion. Investing in quality reduces frequent replacements.Lubricate Moving Parts
Lubrication keeps the sprayer functioning smoothly. Apply a silicone-based lubricant to moving parts annually. This minimizes wear and tear. Ensure no residue remains to prevent clogging. Each of these tips aids in maintaining your kitchen faucet sprayer. Regular attention can save money and extend its lifespan.Troubleshooting Common Issues
Replacing a kitchen faucet sprayer often involves disconnecting the old sprayer hose from the faucet. Ensure the water supply is turned off before removing the sprayer. Attach the new sprayer hose securely to avoid leaks.
Replacing a kitchen faucet sprayer can sometimes lead to unexpected issues. Understanding common problems helps ensure a smooth installation process. This guide covers frequent challenges like low water pressure and leaking connections. Follow these steps to troubleshoot effectively and enjoy a hassle-free kitchen experience.Low Water Pressure
Low water pressure can hinder your faucet’s performance. Check the water supply lines first. Ensure they are fully open. A blocked aerator may also cause low pressure. Remove the aerator and clean it thoroughly. If the problem persists, inspect the hose for kinks. Straighten any bends to improve water flow. In some cases, debris in the hose might block water. Flush the hose to remove any dirt or particles. These simple checks often restore normal pressure.Leaking Connections
Leaking connections are a common issue during faucet installation. Inspect all connections carefully. Ensure they are tightly secured. Loose nuts can cause leaks. Tighten them using a wrench. If the leak persists, check the washer for damage. Replace any worn-out washers with new ones. Sometimes, the hose may have small cracks. Inspect the hose and replace it if damaged. Make sure all components fit snugly to prevent leaks. Properly installed connections prevent water wastage and maintain efficiency.
Credit: www.youtube.com
Frequently Asked Questions
Can You Just Replace The Sprayer On A Kitchen Faucet?
Yes, you can replace the sprayer on a kitchen faucet. Ensure compatibility with your faucet model. Disconnect the old sprayer and attach the new one carefully. This simple swap can improve functionality and appearance. Always consult the faucet’s manual for specific instructions to avoid damage.
How To Replace Kitchen Faucet Sprayer Head?
Turn off the water supply. Unscrew the old sprayer head. Attach the new sprayer head. Ensure it’s tightly secured. Test for leaks by turning on the water.
How To Fix The Sprayer On A Kitchen Faucet?
Turn off the water supply. Unscrew the sprayer head and check for blockages. Clean or replace damaged parts. Reassemble the sprayer. Turn on the water supply and test the sprayer to ensure it works correctly. Regular maintenance can prevent future issues.
How Do You Remove A Spray Diverter From A Faucet?
Turn off the water supply. Remove the faucet handle and spout. Locate the diverter inside the faucet body. Pull it out gently using pliers. Clean or replace as needed. Reassemble the faucet.
Conclusion
Replacing a kitchen faucet sprayer isn’t complicated. Just follow the steps carefully. Gather your tools and materials before starting. Make sure to turn off the water supply. Remove the old sprayer gently. Install the new one securely. Check for any leaks after installation.
Tighten connections if needed. Remember, patience is key. A new sprayer can improve your kitchen’s efficiency. Enjoy your upgraded kitchen experience. If unsure, consider consulting a professional. Your kitchen deserves the best care. Happy fixing!

Similar Posts