How to Sharpen a Kitchen Knife With a Whetstone: Expert Tips
Have you ever struggled with a dull kitchen knife while trying to slice through a ripe tomato or finely chop herbs? You’re not alone.
A sharp knife is the cornerstone of efficient cooking, yet many of us neglect this essential tool. Imagine the ease and satisfaction of cutting with a knife that slices effortlessly. Sounds appealing, right? Sharpening your kitchen knife with a whetstone might seem daunting, but it’s easier than you think.
This ancient technique not only brings your blades back to life but also extends their lifespan. Plus, it’s a skill that can save you money and enhance your cooking experience. Ready to transform your culinary adventures with a simple yet powerful skill? Let’s dive into the art of using a whetstone to sharpen your kitchen knives, ensuring every meal preparation is as smooth as possible.
Choosing The Right Whetstone
Choosing the right whetstone can make all the difference in knife sharpening. A good whetstone ensures a smooth and efficient sharpening process. It helps maintain the knife’s edge and prolong its lifespan. Understanding the types and grit levels of whetstones is crucial. This knowledge helps in selecting the best stone for your kitchen knife.
Types Of Whetstones
Whetstones come in various types. Natural stones are traditional and often preferred for their unique textures. They offer a smooth sharpening experience. Synthetic stones are popular for their consistency and affordability. They are made from man-made materials. Ceramic stones are hard and durable, perfect for maintaining sharp edges. Diamond stones are the most robust. They offer fast sharpening due to their abrasive surface.
Grit Levels Explained
Grit levels determine the stone’s abrasiveness. Lower grit numbers mean coarser stones. These are ideal for repairing damaged edges. Medium grit stones are versatile. They are perfect for regular sharpening. Higher grit numbers indicate finer stones. These stones refine and polish the edge for a smooth finish.
Selecting The Best Stone For Your Knife
Choosing the best stone depends on the knife’s condition. For dull knives, start with a coarse grit stone. It helps restore the blade’s edge quickly. Regular maintenance requires medium grit stones. These maintain sharpness without removing much material. For finishing, use a fine grit stone. It polishes the edge for a razor-sharp finish. Consider the knife material. Some knives need specific stones for optimal sharpening.
Preparing Your Work Area
Preparing Your Work Area Clear your kitchen counter and gather your tools. Ensure good lighting and a stable surface. This setup helps avoid accidents while sharpening.
Preparing your work area is crucial for sharpening a kitchen knife with a whetstone. A well-organized space ensures efficiency and safety during the process. You need to gather tools, implement safety measures, and create a comfortable environment.Gathering Necessary Tools
Start by assembling all required tools. You need a whetstone, a towel, and a bowl of water. The whetstone should be of good quality. The towel helps to keep your workspace dry. Water is essential for soaking the stone, providing a smooth sharpening surface.Ensuring Safety Precautions
Safety should be a top priority. Keep your hands dry to prevent slipping. Use a towel to absorb excess water. Ensure the knife and stone are secure. This prevents accidents and ensures a steady sharpening process.Setting Up A Comfortable Workspace
Comfort enhances focus and efficiency. Choose a clean, flat surface for your work. Ensure good lighting to see clearly. Arrange tools within easy reach. This setup minimizes strain and helps maintain concentration.Soaking The Whetstone
Begin by soaking the whetstone in water for 10-15 minutes. This ensures the stone stays lubricated while sharpening. Properly soaked stones prevent damage and help achieve a sharp edge efficiently.
Soaking the whetstone is a crucial step in sharpening your kitchen knife. A properly soaked whetstone ensures smooth sharpening. It prevents blade damage and improves the sharpening process.How Long To Soak
The soaking time is important for effective sharpening. Generally, soak the whetstone for 10 to 15 minutes. Ensure the stone is fully submerged in water. The stone should stop releasing air bubbles. This means it has absorbed enough water.Checking For Proper Saturation
After soaking, check the stone’s saturation level. Touch the stone’s surface. It should feel wet and smooth. If it feels dry, soak it longer. Ensure the stone remains damp throughout sharpening. Re-wet the stone if needed. This ensures a smooth sharpening experience.Positioning The Knife
Place the knife at a 20-degree angle on the whetstone. Ensure the blade’s edge touches the stone. Use steady hands for control and precision.
Positioning the knife correctly on the whetstone is crucial for achieving a sharp edge. It’s not just about placing the knife; it’s about understanding the right technique to maintain consistency. This step can make the difference between a dull blade and a razor-sharp one.Finding The Right Angle
Finding the right angle is key to sharpening your knife effectively. Most kitchen knives require an angle between 15 and 20 degrees. To visualize this, imagine the angle you create when you fold a piece of paper corner to corner—that’s roughly 45 degrees. Now, halve it, and then halve it again. This angle might feel awkward at first, but practice makes perfect. Try maintaining this angle as you glide the knife across the whetstone. Consistency is more important than precision here.Using Angle Guides For Precision
Angle guides can be a game-changer if you’re struggling with maintaining the right angle. These handy tools attach to the back of your knife, ensuring you consistently hold the perfect angle. Using an angle guide simplifies the sharpening process, especially for beginners. It removes the guesswork, allowing you to focus on the pressure and motion. Consider investing in an angle guide if you’re serious about sharpening. It pays off in the long run, ensuring your knives are always ready for action. Have you ever noticed how a perfectly sharpened knife glides through a tomato? That’s the magic of proper positioning. Are you ready to transform your kitchen experience? Remember, a well-sharpened knife is the best tool in your culinary arsenal.Sharpening Technique
Sharpening a kitchen knife with a whetstone requires skill and patience. The technique involves a few essential steps for effective sharpening. A well-sharpened knife improves your cooking experience and ensures safety in the kitchen. Here’s how to achieve a sharp edge using a whetstone.
Applying Consistent Pressure
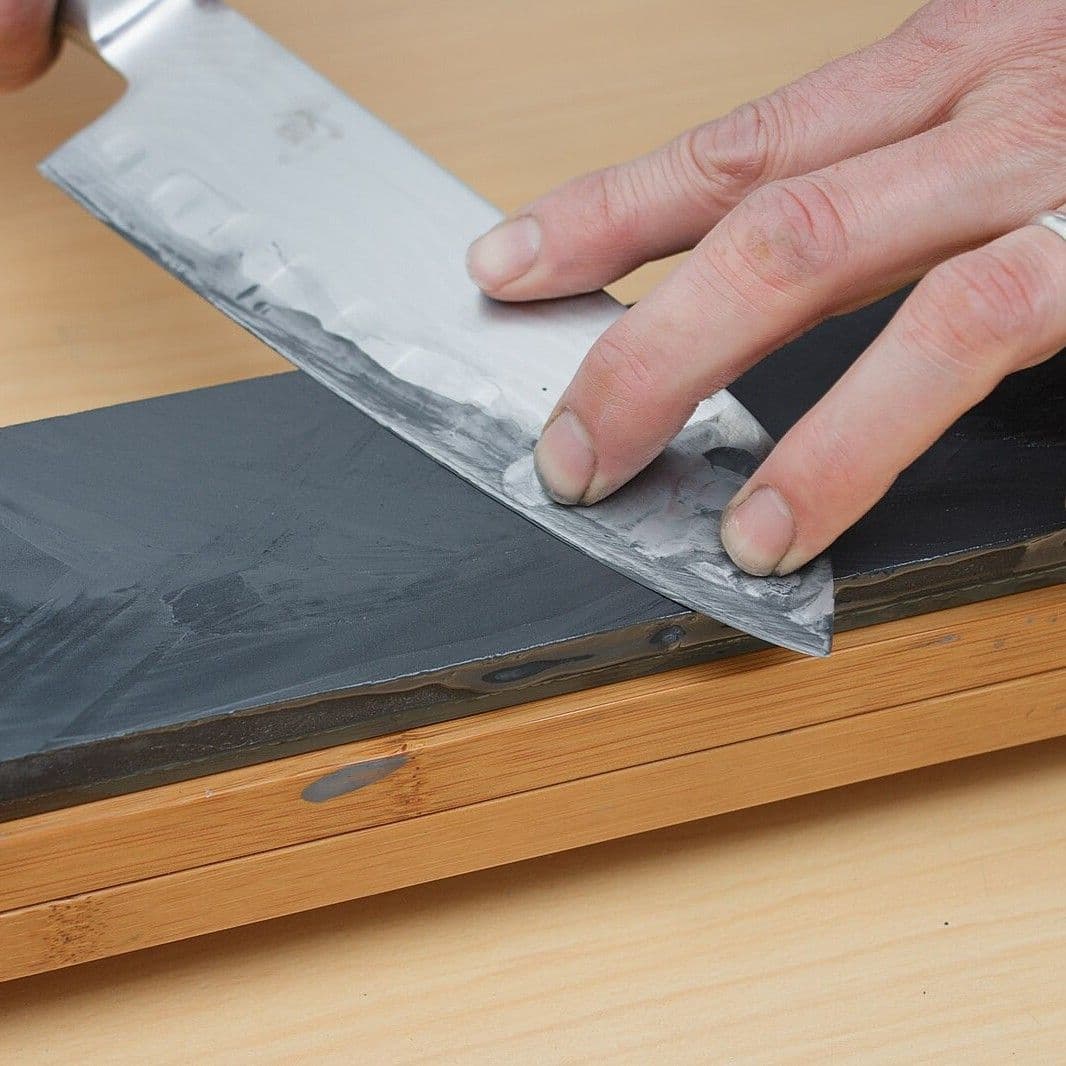
Apply even pressure while moving the knife across the whetstone. This helps maintain a uniform sharpening surface. Uneven pressure can lead to an irregular edge, reducing the knife’s effectiveness. Keep a steady hand to ensure the blade glides smoothly over the stone.
Maintaining The Correct Motion
Use a sweeping motion, from the heel to the tip of the knife. This ensures the entire blade sharpens evenly. Keep the angle consistent, usually around 15 to 20 degrees. Small, circular motions can also help in maintaining the edge.
Alternating Sides Evenly
Alternate sides after every few strokes to balance the sharpening. This prevents one side from wearing out faster than the other. It also helps in achieving a symmetrical edge. Count the strokes to ensure even sharpening on both sides.
Credit: www.culinarywonderland.com
Testing Sharpness
Testing sharpness helps ensure a well-honed edge. After sharpening, slice a piece of paper effortlessly. A clean cut signals a sharp knife, ready for precise kitchen tasks.
Testing the sharpness of your kitchen knife after using a whetstone is crucial to ensure the blade performs well in everyday cooking. There’s no satisfaction quite like effortlessly slicing through a tomato without squishing it. But how do you know if your knife is sharp enough? It’s not about guessing or hoping—it’s about using reliable methods to check its sharpness and recognizing the signs of a well-sharpened knife.Safe Methods To Check Sharpness
Testing knife sharpness should be safe and straightforward. You can try slicing through a sheet of paper. Hold the paper vertically and slide the knife downwards. A sharp knife will cut cleanly without any tearing. Another method is the tomato test. Gently place your knife on the skin of a tomato and attempt to slice it. If the knife easily penetrates the skin with minimal pressure, your sharpening efforts have paid off. You can also use the fingernail trick. Carefully rest the knife edge on your fingernail; a sharp blade should catch slightly without sliding off. Remember to handle your knife cautiously to avoid any accidents.Signs Of A Well-sharpened Knife
A well-sharpened knife glides through food effortlessly, reducing prep time. It should not require excessive force to slice or chop. You might notice cleaner cuts with minimal fraying. For instance, when chopping herbs or onions, a sharp knife will produce precise pieces without bruising the ingredients. Are you experiencing less hand fatigue during longer cooking sessions? This could be a sign that your knife’s sharpness is on point, allowing you to work more efficiently without strain. Reflect on your cooking experiences: does your knife perform consistently across different foods? If so, you’ve likely achieved the ideal sharpness level.Whetstone Maintenance
Sharpening a kitchen knife with a whetstone enhances cutting efficiency. Soak the whetstone in water before use. Slide the blade across the stone at a consistent angle for even sharpening.
Maintaining your whetstone is essential for achieving sharp knife edges. Proper care ensures its effectiveness and longevity. Regular cleaning and correct storage are key aspects of whetstone maintenance.Cleaning After Use
After sharpening, rinse your whetstone with warm water. Remove metal particles and residue with a soft brush. Avoid harsh chemicals; they damage the stone. Let the stone dry completely before storing. Moisture can lead to mold or damage.Storing Properly To Extend Lifespan
Store your whetstone in a dry, cool place. Avoid direct sunlight; it causes cracks over time. Use a protective case to prevent accidental damage. Ensure the storage area is free from dust and debris. Regular upkeep keeps your whetstone in optimal condition.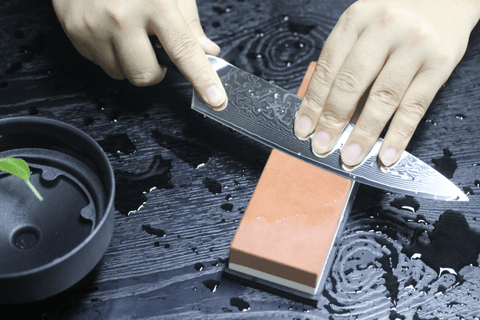
Credit: www.shanzuchef.com

Credit: www.youtube.com
Frequently Asked Questions
How Do You Sharpen A Knife With A Whetstone For Beginners?
Soak the whetstone in water for 10 minutes. Hold the knife at a 20-degree angle. Glide the blade across the stone, applying even pressure. Sharpen each side of the knife equally. Finish by honing the knife on a finer grit.
Dry and store the knife properly.
Do You Push Or Pull When Using A Whetstone?
Use a whetstone by pushing the blade forward. Maintain a consistent angle and apply even pressure. Pulling can dull the edge. Push strokes ensure effective sharpening. Always keep the whetstone lubricated with water or oil. Regular practice improves technique and sharpens blades efficiently.
Can You Ruin A Knife With A Whetstone?
Yes, improper use of a whetstone can damage a knife. Uneven pressure or incorrect angle can dull the blade. Always follow proper sharpening techniques to maintain knife quality.
What Is A Common Mistake When Sharpening A Knife?
A common mistake when sharpening a knife is using the wrong angle. Ensure you maintain the correct angle for optimal sharpness. Avoid excessive pressure, as it can damage the blade. Consistent strokes help achieve a sharper edge. Regularly clean the sharpening tool to prevent debris buildup.
Conclusion
Sharpening your kitchen knife with a whetstone is easy. Follow the steps carefully. Your knives will be sharp and ready for action. A sharp knife makes cooking enjoyable and safe. Regular maintenance keeps blades effective. Practice makes perfect. Start with simple strokes.
Feel the blade’s edge transform. Achieve precision with patience. Your kitchen skills will improve. Enjoy cooking with confidence. No more struggling with dull knives. Invest time in sharpening. Experience the benefits firsthand. Your kitchen tasks become smoother. Enjoy the satisfaction of a well-maintained tool.
Happy cooking and sharpening!