How to Lay Tile in Kitchen: Expert Tips & Techniques
Are you dreaming of a stunning new look for your kitchen? Installing tile can transform your space from bland to beautiful.
Imagine the satisfaction of stepping back and admiring your handiwork, knowing you did it yourself. But where do you start? The good news is, with the right guidance, laying tile in your kitchen is a project you can tackle. This guide will walk you through every step, making the process simple and stress-free.
Dive in to discover the secrets of a flawless tile installation that will not only enhance your kitchen’s beauty but also boost your home’s value. Ready to roll up your sleeves and get started? Let’s make your kitchen the heart of your home!
Choosing The Right Tile
Choosing the right tile for your kitchen can transform the space from mundane to magnificent. Imagine stepping into a kitchen where the tiles complement your style and withstand daily wear and tear. It’s not just about aesthetics—functionality plays a key role in your selection process. Are you prepared to make a choice that balances beauty and practicality?
Types Of Kitchen Tiles
The options for kitchen tiles are vast, offering choices for every taste and budget. Ceramic tiles are a popular choice due to their affordability and versatility. They come in an array of colors and finishes, allowing you to craft a unique look.
Porcelain tiles, on the other hand, offer superior durability and are perfect for high-traffic areas. If you’re looking for a touch of elegance, consider natural stone tiles like granite or marble. These options add a luxurious feel but require more maintenance.
Glass tiles are great for adding a modern touch and can be used creatively to make your kitchen a masterpiece. Have you thought about mosaic tiles for a splash of color and texture?
Durability And Style Considerations
When choosing tiles, consider how much foot traffic your kitchen endures. Porcelain tiles are hardier, making them ideal for busy kitchens. Ceramic tiles, while less durable than porcelain, are easier to replace if damaged.
Style is equally important. Do you prefer a sleek, modern look or a rustic, traditional vibe? Your choice of tiles can set the tone for the entire kitchen. Opt for neutral tones for a timeless appeal or bold colors to make a statement.
Think about maintenance—natural stone requires regular sealing, while porcelain and ceramic are easier to clean. How much upkeep are you willing to commit to?
Choosing the right tile involves more than just picking a color. It’s about finding a balance between durability, style, and maintenance. Are you ready to transform your kitchen into a space that reflects your personality while standing up to daily demands?

Credit: www.tilemountain.co.uk
Gathering Essential Tools
Gathering the right tools is crucial before starting your tile project. Having the proper equipment makes the process smoother and helps achieve professional results. Whether you’re a DIY enthusiast or a seasoned pro, knowing what tools to have on hand is essential. Let’s explore the tools needed for a successful kitchen tiling job.
Basic Tools For Tiling
- Tile Cutter:This tool cuts tiles to fit around corners or edges.
- Notched Trowel:Used to spread adhesive on the floor evenly.
- Level:Ensures tiles are even and properly aligned.
- Rubber Mallet:Helps gently tap tiles into place.
- Tile Spacers:Keeps tiles evenly spaced for grout lines.
- Measuring Tape:Essential for precise measurements.
- Sponge and Bucket:Useful for cleaning tiles and grout.
These basic tools are vital for anyone laying tiles in their kitchen. They ensure accuracy and cleanliness during installation.
Specialized Equipment For Professionals
- Wet Saw:Ideal for cutting thicker tiles with precision.
- Grout Float:Used for applying grout between tiles.
- Tile Nippers:Allows for intricate cutting and shaping.
- Knee Pads:Provides comfort during long hours of floor work.
- Laser Level:Offers precise leveling over large areas.
- Dust Mask:Protects from dust and debris during cutting.
These specialized tools cater to professionals seeking refined results. They enhance precision and efficiency in more complex tiling projects.
Preparing The Kitchen Surface
Clean the kitchen surface thoroughly. Ensure it’s dry and free from debris. This creates a solid base for tile installation.
Preparing the kitchen surface is a crucial step in laying tile. It’s not just about making it look good; it’s about ensuring durability and functionality. Imagine spending hours on a beautiful tile layout only to have it crack or become uneven over time. Proper surface preparation can save you from such headaches. Let’s dive into the essentials to get your kitchen ready for new tiles.Cleaning And Leveling
Begin with a thorough cleaning. Sweep away dirt and debris, then mop the surface to remove any lingering grime. A clean surface allows tiles to adhere properly. Check for levelness using a spirit level. Uneven floors can cause tiles to crack or shift. Use a leveling compound to address minor discrepancies. For bigger issues, consider hiring a professional to ensure a smooth foundation.Addressing Subfloor Issues
Inspect the subfloor for damage. Look for cracks, squeaks, or water damage. These issues can compromise tile installation. Repair any flaws you find. Replace damaged sections or reinforce weak areas. A strong subfloor supports the weight and longevity of your tiles. Consider using a backer board for extra stability. This adds an extra layer of protection, especially in areas prone to moisture. Are you confident that your kitchen surface is ready to support new tiles? Proper preparation is key to a successful tile installation.Measuring And Planning Layout
Accurate measurements ensure a perfect fit for kitchen tiles. Sketching a layout plan helps visualize tile arrangements. A well-organized plan minimizes waste and simplifies installation.
Measuring and planning the layout is key in tile installation. It ensures a smooth process and a stunning finish. Careful planning avoids unnecessary cuts and wasted tiles. This saves time and money. A well-thought-out layout enhances the kitchen’s aesthetic. It brings order and harmony to the space. Let’s dive into the essential steps for measuring and planning.Calculating Tile Quantity
Begin by measuring the kitchen floor area. Use a tape measure for accuracy. Record the length and width of the space. Multiply these numbers to find the total square footage. This is crucial for buying the right amount of tiles. Add 10% to the total for cuts and mistakes. This extra ensures you have enough tiles. Buying extra tiles prevents future color mismatches. Tile designs change over time, so having spares is wise.Designing A Tile Layout
Visualize the tile layout before starting. A simple sketch can be helpful. Decide the starting point, usually the center of the room. This creates symmetry and balance in the design. Consider any focal points like islands or countertops. These features might affect the layout. Lay tiles in a dry run to see the pattern. It helps to spot any adjustments needed before fixing them. Choose a pattern that complements the kitchen style. Classic grid, diagonal, or herringbone are popular choices. Ensure the design flows with existing kitchen elements. Use spacers to maintain uniform grout lines. This keeps the design clean and professional.Cutting Tiles Accurately
Cutting tiles accurately is crucial for a polished kitchen look. Precise cuts ensure tiles fit perfectly, leaving no gaps or uneven edges. This task might seem daunting, but with the right tools and techniques, it’s manageable. Whether working with a simple tile cutter or tackling irregular shapes, mastering the art of cutting will make your kitchen renovation seamless.
Using A Tile Cutter
A tile cutter is essential for straight cuts. It offers a clean, precise finish. Start by marking the tile where it needs to be cut. Place the tile on the cutter, aligning it with the cutting guide. Apply firm pressure, scoring the tile with the cutter’s blade. Once scored, press down to snap the tile along the line. This method is quick and effective for regular cuts.
Handling Irregular Cuts
Irregular cuts require patience and precision. Use a tile nipper for curved or angled cuts. Begin by marking the tile with a pencil. Slowly nibble away small pieces until the desired shape is achieved. For intricate designs, consider using a wet saw. This tool allows for detailed cuts and is excellent for complex patterns. Always measure twice to ensure accuracy before cutting.

Credit: www.youtube.com
Applying Adhesive Correctly
Proper adhesive application is crucial for kitchen tile laying. Ensure surfaces are clean and dry before starting. Spread adhesive evenly with a trowel to secure tiles firmly in place.
Applying adhesive correctly is a crucial step in laying tile in your kitchen. It can be the difference between a beautifully tiled floor and a DIY disaster. Getting it right ensures your tiles stay put and look great for years.Choosing The Right Adhesive
Selecting the right adhesive is the foundation of your tiling project. Consider the tile material—porcelain, ceramic, or glass—as each may require a different type of adhesive. Your kitchen’s environment, such as moisture levels, can also dictate your choice. Opt for a versatile, high-quality adhesive that can withstand the conditions in your kitchen. If you’re unsure, consult with a professional or do some research to find the best option for your specific needs. Remember, investing in the right adhesive now can save you from costly repairs later.Techniques For Even Application
Even application is key to a flawless tile installation. Start by spreading the adhesive with a notched trowel, ensuring an even layer across the surface. The size of the notches on your trowel should match the tile size for optimal adhesion. Apply the adhesive in small sections to prevent it from drying before you lay the tiles. Work methodically and take your time to avoid rushing, which can lead to uneven results. Have you ever noticed tiles that look uneven or wobbly? Chances are, the adhesive wasn’t applied properly. To avoid this, press each tile firmly into the adhesive, using a slight twisting motion to ensure good contact. This technique helps to remove air pockets, creating a stronger bond. By focusing on these techniques, you’re setting yourself up for a successful kitchen tiling project. What’s your next step to ensure those tiles stay in place perfectly?Laying The Tiles
Begin by ensuring the kitchen floor is clean and level. Apply thin-set mortar evenly, then place tiles carefully. Use spacers for uniform gaps and check alignment regularly for a polished finish.
Laying the tiles in your kitchen is a crucial step in creating a stunning and durable floor. This stage of the process requires precision and patience to ensure your tiles are perfectly aligned and securely set. Whether you’re a seasoned DIY enthusiast or a beginner, understanding the proper techniques will save you time and prevent mistakes.Starting Point And Sequence
Choosing the right starting point is essential for a successful tile layout. Begin by identifying the most visible wall or the center of the floor as your starting point. This ensures that any cut tiles will be placed in less noticeable areas, like under cabinets or at the edges. Next, establish a sequence that allows you to lay tiles efficiently. Work in small sections to maintain control over the tile alignment and adhesive drying time. Consider using a chalk line to mark your starting points and keep the sequence organized.Ensuring Straight Lines
Straight lines are the backbone of a professional-looking tile job. Use spacers between tiles to maintain consistent gaps and ensure even grout lines. A tile leveling system can also help keep tiles flat and aligned. Double-check your lines with a level or straightedge as you go. Adjust any tiles that drift off course immediately to avoid a domino effect of crooked tiles. Remember, a few extra minutes spent on alignment can save hours of rework. Are you ready to tackle your tile project with confidence? Start with a solid plan, and watch your kitchen transform before your eyes.
Credit: www.mineraltiles.com
Grouting And Sealing
Properly grouting and sealing tiles helps prevent water damage in kitchen areas. Clean the surface before applying grout, and evenly distribute it between tiles. Sealing ensures longevity and protection, maintaining the beauty of your kitchen floor.
Grouting and sealing tiles bring your kitchen floor to life. It enhances both appearance and durability. These final steps ensure your tiles withstand daily wear. The right grout and sealant can make all the difference.Selecting Grout Color
Choosing grout color impacts the overall look. Light colors make the space feel larger. Dark colors add contrast and hide stains. Match grout with tile for a seamless look. Complementary colors create striking designs. Consider lighting when choosing grout color. Test samples in different light conditions.Proper Grout Application
Grout application requires precision. Mix the grout to a paste-like consistency. Apply using a rubber float at a 45-degree angle. Press firmly to fill gaps between tiles. Wipe excess grout with a damp sponge. Let it dry for 24 hours. Check for any gaps or uneven areas. Reapply if necessary for smooth finish.Sealing For Longevity
Sealing protects tiles from moisture and stains. Choose a sealant suitable for your tile type. Apply sealant evenly with a brush or roller. Let it dry completely before using the kitchen. Regular resealing extends the life of your tiles. Follow manufacturer’s instructions for best results. Keep the area well-ventilated during sealing.Cleaning And Maintenance Tips
Keeping your kitchen tiles clean is essential for maintaining their shine. This ensures they last longer and look great. Regular cleaning prevents dirt and grime buildup. Proper maintenance helps avoid common issues like stains and damage. Follow these tips to keep your tiles looking brand new.
Daily Cleaning Advice
Daily cleaning keeps tiles fresh and spotless. Use a soft cloth or sponge. Warm water is effective for removing surface dirt. Avoid harsh chemicals that may damage tiles. Sweep or vacuum the floor to remove dust. This prevents scratches from tiny particles. A mild detergent can be used for deeper cleaning. Rinse thoroughly to remove any soap residue.
Preventing Common Issues
Prevent stains by wiping spills immediately. Water and liquids can seep into grout lines. This causes discoloration over time. Use mats near sinks and appliances to catch spills. Choose grout sealers to protect against stains and moisture. This adds an extra layer of defense. Inspect tiles regularly for cracks or chips. Repair them quickly to avoid further damage. Replace damaged tiles to maintain a uniform look.
Frequently Asked Questions
What Is The 3 4 5 Rule For Tiling?
The 3 4 5 rule helps ensure tiles are laid at a right angle. Measure 3 feet on one edge, 4 feet on the other, and adjust until the diagonal measures 5 feet. This forms a perfect right triangle, ensuring precise tile alignment.
Where To Start When Tiling A Kitchen Floor?
Begin tiling at the center of the kitchen floor for balanced appearance. Measure and mark guidelines for precision. Ensure tiles align with the central point. Use spacers for consistent gaps. Check level frequently to maintain even surface. Clean and prep the area thoroughly before starting.
What Goes Behind Tile In A Kitchen?
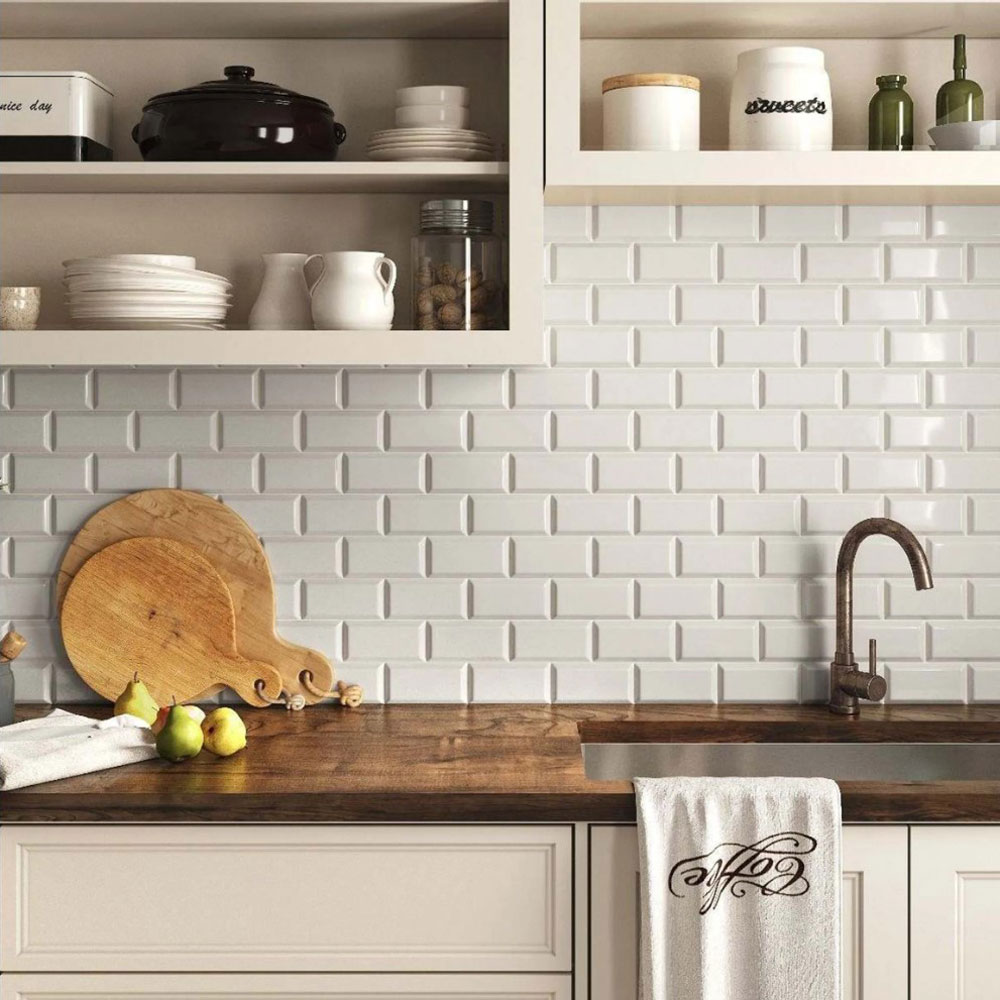
Behind kitchen tiles, install cement board for durability and moisture resistance. Use adhesive or thin-set mortar for securing tiles. Ensure proper waterproofing with a moisture barrier or sealant. This prevents water damage and maintains tile longevity. Proper preparation ensures a long-lasting, beautiful kitchen backsplash or wall.
What Is The 1 3 Rule For Tile?
The 1/3 rule for tile involves staggering tiles so that each seam falls at the one-third mark of the tile above or below it. This technique reduces the appearance of lippage, ensuring a more visually appealing and level surface. It’s commonly used in laying rectangular tiles.
Conclusion
Laying tile in your kitchen offers a fresh look. Follow the steps carefully for a polished finish. Measure accurately and choose the right tools. Take your time with cutting and placing tiles. Ensure even spacing and secure tiles firmly. Grouting completes the job, giving a smooth surface.
Clean thoroughly after finishing for shine. Kitchen tiles enhance beauty and value. A well-tiled floor lasts for years. Enjoy the satisfaction of a DIY success. With patience and care, you can achieve a stunning kitchen floor. Happy tiling!