How to Uninstall a Kitchen Faucet: Step-by-Step Guide
Are you ready to tackle that stubborn kitchen faucet that’s been giving you grief? Removing a kitchen faucet can seem like a daunting task, but with a little guidance, you’ll find it’s simpler than you think.
Imagine the satisfaction of taking control and upgrading your kitchen space on your terms. You don’t have to be a professional plumber to do this; you just need the right steps and a bit of confidence. You’ll discover a straightforward guide to uninstalling your kitchen faucet safely and efficiently, saving you both time and money.
Let’s dive in and unleash the DIY expert in you!
Credit: www.homedepot.com
Tools And Materials Required
Gather an adjustable wrench, basin wrench, and bucket for removing a kitchen faucet. Also, ensure you have a towel and pliers on hand. These tools will assist in loosening nuts and dealing with potential water spills.
When tackling a DIY project like uninstalling a kitchen faucet, having the right tools is essential. The process becomes easier and more efficient with proper preparation. Here, we break down the necessary tools and materials. This guide ensures a smooth and hassle-free faucet removal.Required Tools
You’ll need a few basic tools for this task. First, grab an adjustable wrench. It helps loosen and tighten various nuts. A basin wrench is also crucial. It reaches the hard-to-access nuts under the sink. A screwdriver, both flathead and Phillips, is often needed. It helps remove any screws holding the faucet in place. Pliers will be handy for gripping and turning small parts.Protective Gear
Safety is important. Wear safety goggles to protect your eyes from debris. Gloves keep your hands safe from sharp edges. A dust mask is helpful if you’re sensitive to dust.Cleaning Supplies
Once the faucet is removed, you’ll notice grime or residue. A sponge and a mild cleaner can remove this effectively. Keep a rag or paper towels nearby to wipe away moisture.Replacement Parts
If you’re replacing the faucet, gather new parts first. This includes the new faucet, washers, and any specific components needed.Plumbing Tape
Plumbing tape, often called Teflon tape, helps seal pipe threads. This prevents leaks in the new installation.Bowl Or Bucket
Place a bowl or bucket under the sink. It collects any water that might spill during the process.Flashlight
Under-sink areas are often dark. A flashlight helps you see clearly and work more efficiently. Using these tools and materials ensures a smooth faucet removal. Start your project with confidence and precision.
Credit: www.reddit.com
Preparation Steps
Begin by turning off the water supply to prevent leaks. Gather necessary tools like a wrench, basin, and towels. Carefully disconnect the faucet from the plumbing, ensuring all screws and nuts are removed.
Preparing to uninstall a kitchen faucet is crucial. It ensures a smooth and hassle-free process. Follow these steps to make sure you’re ready. Each step is simple but important. Let’s dive into the preparation steps.Shut Off Water Supply
Find the water valves under your sink. Turn them clockwise to shut off. This prevents water leaks during the process. Check the faucet by turning it on. Ensure no water flows out.Clear Under-sink Area
Remove items stored under the sink. This provides more space to work comfortably. Check for any obstacles that might hinder your task. A clear area prevents accidental damage to stored items.Gather Necessary Tools
Collect the essential tools before starting. You will need a wrench, bucket, and towels. A flashlight might be helpful in dim areas. Having tools ready saves time and stress.Disconnecting Water Lines
Removing a kitchen faucet might seem daunting, but with the right guidance, it’s a task you can accomplish. One of the key steps in this process is disconnecting the water lines. These lines bring hot and cold water to your faucet, and successfully detaching them is crucial to avoid any leakage or damage. Let’s dive into the details.
Identify Hot And Cold Water Lines
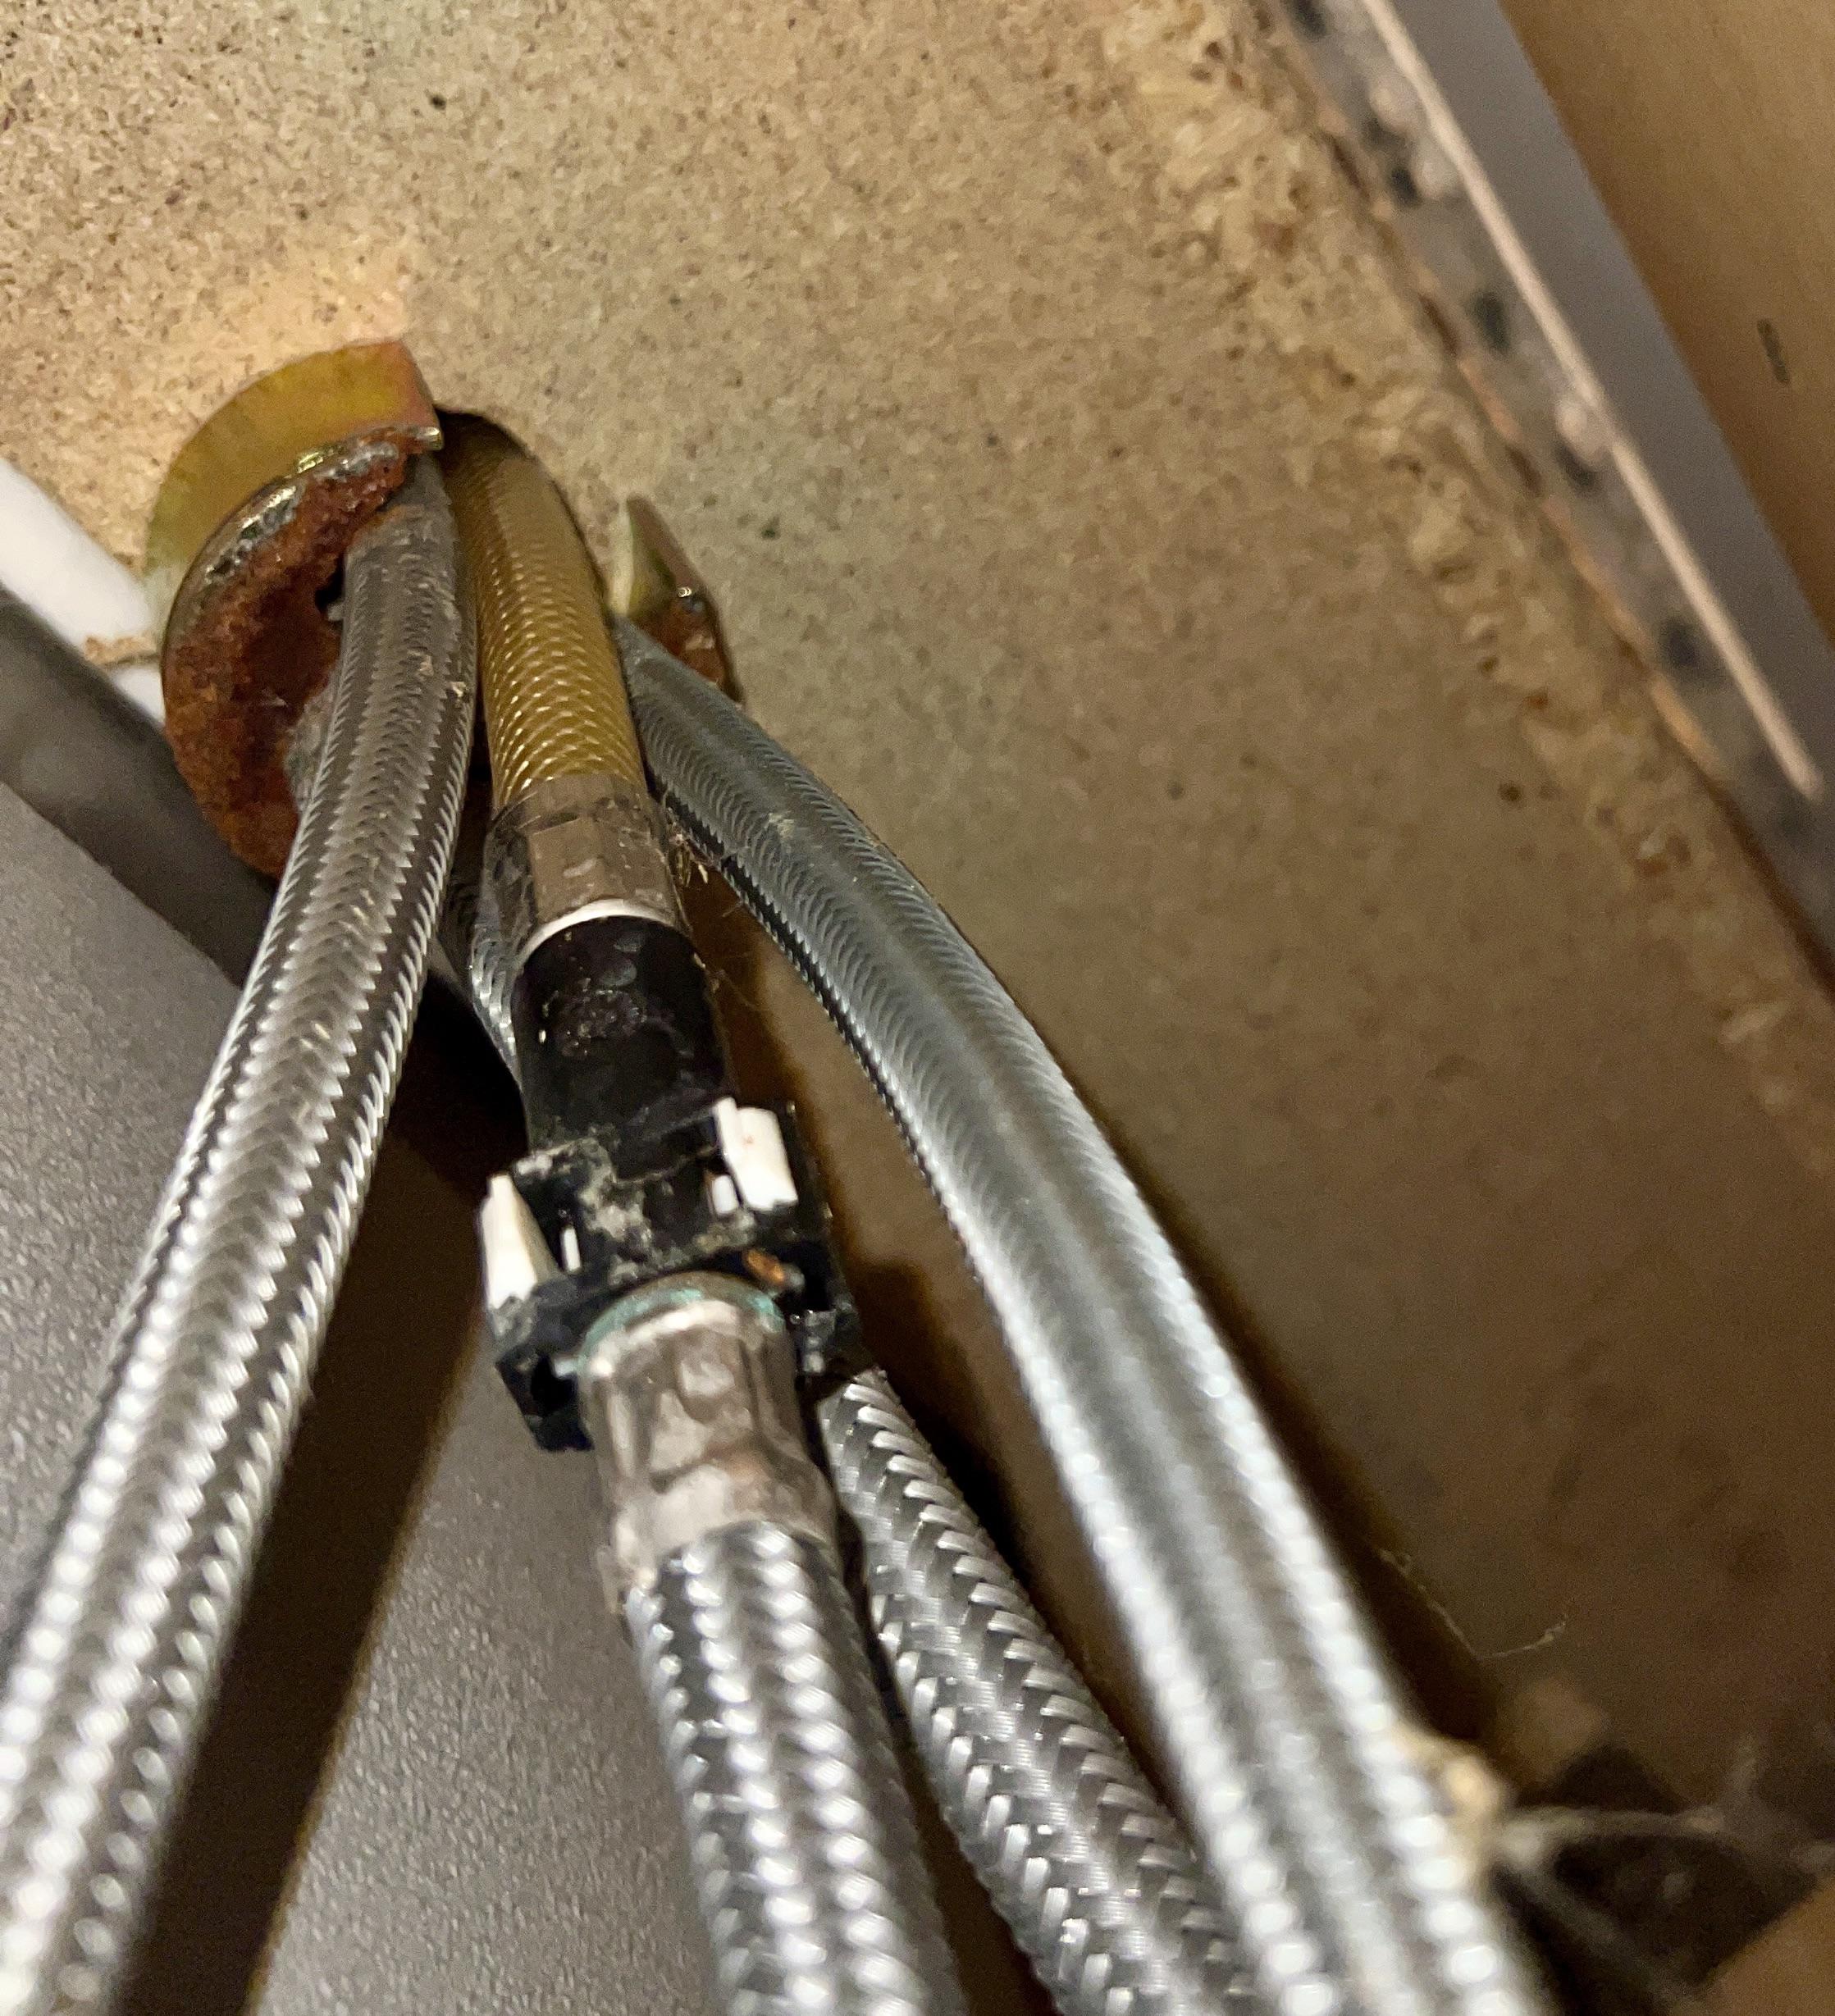
First, locate the hot and cold water lines under your sink. Typically, these are the two flexible hoses connected to the base of your faucet. Hot water lines are often on the left side, while cold water lines are on the right. However, it’s always best to check by turning each faucet handle and feeling which side heats up. Ensuring you’ve identified them correctly is essential to prevent any mix-ups later.
Loosen Connections With Wrench
Once you’ve identified the lines, it’s time to loosen their connections. Grab an adjustable wrench, which is usually the most suitable tool for this task. Gently loosen the nuts connecting the hoses to the shut-off valves. Remember, these can be tight, so a steady hand and patience are key. Avoid using excessive force, as you could damage the valves or hoses.
Have you ever tried loosening a connection only to find it won’t budge? If you’re struggling, try using a bit of WD-40 to help ease the process. This simple trick can save you a lot of frustration and time.
As you tackle this project, keep a towel handy to catch any residual water left in the hoses. Have you ever had a small flood under your sink because you forgot this step? It’s a lesson learned the hard way but easily avoided with preparation.
Are you ready to tackle your kitchen faucet project with confidence? Remember, disconnecting the water lines is just one step, but it’s crucial to get it right to ensure a smooth faucet removal process.
Removing The Faucet
Disconnect the water supply to begin removing the kitchen faucet. Unscrew mounting nuts underneath the sink carefully. Lift the faucet out, freeing it from the sink.
Removing a kitchen faucet might seem daunting at first, but with a bit of preparation and patience, it’s quite manageable. Whether you’re revamping your kitchen’s look or dealing with a leaky faucet, removing the old fixture is a necessary step. This process involves a few essential steps to ensure everything is done safely and efficiently. Let’s dive into the specifics and make this task a breeze.Locate Mounting Nuts
Start by crawling under your sink and locating the mounting nuts. These nuts hold the faucet in place and are typically found beneath the sink bowl. You might need a flashlight to see clearly, especially if the area is dimly lit. Look for the nuts directly under the faucet. They are usually attached to threaded rods or bolts. If you’re unsure, refer to your faucet’s manual for guidance. A little patience here pays off, as a clear view of the nuts makes the next steps much easier.Unscrew And Detach Faucet
Once you’ve found the mounting nuts, it’s time to unscrew them. Use an adjustable wrench or a basin wrench for this task. These tools are particularly handy in tight spaces and help you maintain a firm grip on the nuts. Turn the nuts counterclockwise to loosen them. You may need to apply some elbow grease if they’re stuck due to rust or mineral buildup. Keep a rag or paper towels nearby to wipe any grime or water that might leak during this step.Lift Faucet From Sink
With the nuts removed, you’re ready to lift the faucet out of the sink. Grasp the base of the faucet firmly and pull upwards. If it feels stuck, gently wiggle it back and forth to loosen any remaining debris or sealant. Consider asking a friend for help if the faucet is heavy or awkwardly positioned. Teamwork can make this step much smoother. Once removed, inspect the sink area to ensure it’s clean and ready for the new faucet installation. Are you ready to tackle this project on your own, or would you prefer a helping hand?Cleaning And Inspecting Sink Area
Keep the sink area clean and inspect for leaks or stains. Ensure all connections are dry before uninstalling the faucet. Regular maintenance helps prevent future issues.
Cleaning and inspecting the sink area is a crucial step in uninstalling a kitchen faucet, as it sets the stage for a smooth installation of your new fixture. A clean workspace not only ensures that you can work efficiently but also helps prevent potential issues down the line. Have you ever thought about the grime and old sealant lurking in those hard-to-reach spots around your sink? It might be time to pay them some attention!Remove Old Sealant Or Putty
Begin by carefully scraping away any old sealant or putty around the sink area. This can usually be done with a putty knife or a similar tool. If you’re like me, you might find this to be the most satisfying part of the job—like peeling off an old sticker, it’s oddly therapeutic! Make sure to remove all residue to prevent any obstruction when installing the new faucet. A clean surface is essential for achieving a tight seal and preventing leaks. You might be surprised at how much gunk accumulates over time, so give it a thorough check.Check For Damages
Once you’ve cleared the sealant, inspect the sink area for any damages. Look closely for cracks or corrosion, as these could cause problems later. Have you ever replaced a fixture only to find that the surrounding area was compromised? It’s a frustrating experience that can be avoided with a careful inspection. If any damage is detected, consider whether it’s something you can repair yourself or if professional help is needed. Addressing these issues beforehand saves time and prevents the hassle of having to redo parts of the installation. Checking for damages might not be the most exciting part, but it’s definitely the most rewarding when it prevents future headaches!
Credit: www.reddit.com
Troubleshooting Common Issues
Removing a kitchen faucet can be straightforward. Begin by turning off the water supply. Next, disconnect the water lines and remove mounting nuts underneath the sink. Finally, lift the faucet out, ensuring all parts are intact.
Uninstalling a kitchen faucet might seem straightforward, but sometimes unexpected issues can arise. When the process doesn’t go as planned, it’s crucial to troubleshoot effectively. Addressing common problems can save you time and frustration. Let’s delve into some typical challenges and how to overcome them.Stuck Nuts Or Bolts
You might encounter nuts or bolts that refuse to budge. This can be particularly frustrating when you’re halfway through the task. Before you reach for more tools, consider applying a penetrating oil like WD-40. Allow it to sit for about 15 minutes to loosen the grip. If that doesn’t work, try using a basin wrench. Its long handle and pivoting jaw can reach and grip nuts in tight spaces. Remember, patience is key. Forcing the nuts could cause damage.Corroded Connections
Corrosion is another common issue, especially in older faucets. Rust and buildup can cement parts together, making removal tricky. A mixture of vinegar and baking soda can help break down corrosion. Apply the mixture and let it sit for a while before attempting removal again. In some cases, gently tapping the corroded area with a hammer can help break the rust’s hold. If the corrosion is severe, consider consulting a professional. You don’t want to risk damaging your plumbing. Have you ever faced these issues while uninstalling a faucet? What worked for you? Sharing your experiences can help others facing similar challenges. Remember, tackling these problems with the right approach can make the process smoother and less stressful.Disposal Of Old Faucet
Removing an old kitchen faucet can be simple with the right steps. Begin by turning off the water supply and disconnecting the hoses. Next, loosen the mounting nuts under the sink to detach the faucet. Finally, lift the faucet out, ensuring a clean removal for new installation.
Disposing of an old kitchen faucet requires responsible handling. It’s not just about tossing it away. Many parts of a faucet can be recycled, reducing environmental impact. Proper disposal ensures that you adhere to local regulations. Below, discover how to handle your old faucet with care.Recycling Options
Many faucets contain recyclable metals like brass and copper. Check local recycling centers. They often accept these metals. Some centers may even pay for them. Remove non-metal parts before recycling. This makes the process smoother. Always call ahead to confirm what they accept.Proper Waste Disposal
Not all faucet parts are recyclable. Plastic components may need special disposal. Contact your local waste authority. They provide guidelines for proper disposal. Some areas offer bulky waste pickup services. Use these services for larger faucet parts. Ensure you follow any specific disposal rules. This helps keep the environment clean.Frequently Asked Questions
How To Take An Old Kitchen Faucet Off?
Turn off the water supply. Disconnect water lines using a wrench. Loosen the mounting nuts under the sink. Remove the faucet by lifting it off the sink. Clean the area before installing a new faucet.
How To Remove A Kitchen Faucet Handle With No Visible Screws?
Locate the decorative cap on the handle. Pry it off gently using a flat tool. Access the hidden screw underneath. Unscrew it to detach the handle. Ensure you turn off the water supply before starting. Use a flashlight if needed for better visibility.
How Do You Unmount A Kitchen Faucet?
Turn off the water supply and disconnect the hoses. Loosen the mounting nuts with a wrench. Lift the faucet out carefully. Clean the area before installing a new one. Ensure all parts are properly secured.
How Do You Remove A Stuck Kitchen Faucet Nut?
To remove a stuck kitchen faucet nut, use a basin wrench for better grip. Apply penetrating oil to loosen rust. Heat the nut with a hairdryer if necessary. Tap gently with a hammer to break corrosion. Finally, turn the nut counterclockwise with the wrench.
Conclusion
Uninstalling a kitchen faucet can be simple with the right steps. Start by gathering your tools. Turn off the water supply first. Then, remove the faucet carefully. Check for any leaks after reinstallation. A clean and organized workspace helps. Remember to follow safety measures.
Replacing an old faucet can improve your kitchen’s look. Now, you can handle minor plumbing tasks confidently. Practice makes perfect. With patience, you can maintain your kitchen fixtures. Your kitchen will run smoothly with regular upkeep. Keep learning and improving your DIY skills.
Enjoy your refreshed kitchen space!


