Are you staring at your Moen kitchen faucet, wondering how to remove it? You’re not alone.
Many homeowners face this challenge, whether they’re updating their kitchen, fixing a leak, or simply curious about how things work. The good news? Removing a Moen kitchen faucet doesn’t have to be daunting. With the right guidance, you can tackle it with confidence and ease.
Imagine the satisfaction of knowing you’ve accomplished this task yourself, saving money and gaining a deeper understanding of your kitchen’s plumbing. This article will walk you through the process step-by-step. You’ll discover practical tips, common pitfalls to avoid, and insider secrets that can make the task quicker and less stressful. So, grab your tools and let’s get started—you’re just a few steps away from mastering your kitchen faucet removal.
Tools Needed
Gather a wrench, screwdriver, and pliers for removing a Moen kitchen faucet. You’ll also need a bucket to catch water. Ensure you have a towel handy to clean any spills.
To successfully remove a Moen kitchen faucet, having the right tools is crucial. Without them, the process becomes frustrating and time-consuming. A well-equipped toolbox ensures efficiency and ease. Let’s explore the essential tools needed for this task.Adjustable Wrench
An adjustable wrench is vital for loosening nuts and bolts. It provides the flexibility to fit different sizes.Phillips Screwdriver
A Phillips screwdriver helps in removing screws that secure the faucet. Its cross-shaped tip is perfect for this job.Flathead Screwdriver
A flathead screwdriver is useful for prying open small spaces. It also assists in removing certain screws.Plumber’s Putty
Plumber’s putty seals any gaps after removing the faucet. It’s essential for preventing leaks.Bucket
A bucket catches any residual water. This prevents mess and keeps your workspace clean.Towel
A towel is handy for wiping surfaces dry. It ensures a clean and tidy area during the removal process.Pliers
Pliers grip and twist stubborn parts. They are effective for removing hose connections.Penetrating Oil
Penetrating oil loosens rusted or stuck components. It makes the disassembly smoother and easier.Flashlight
A flashlight illuminates dark areas under the sink. It helps in better visibility during the removal. Equip yourself with these tools for a hassle-free experience.Safety Precautions
Ensure the water supply is off before starting. Wear protective gloves and goggles to prevent injuries. Keep tools organized to avoid accidents during the process.
Removing a Moen kitchen faucet might seem like a simple task, but ensuring safety during the process is paramount. You might be eager to get that old faucet out, but rushing through it without proper precautions can lead to accidents or damage. Let’s dive into some essential safety measures you should consider before and during the removal process.Turn Off The Water Supply
Before you start, make sure to turn off the water supply to avoid any unwanted flooding. Locate the valves under your sink and twist them clockwise. If you’re unsure, test by turning on the faucet to ensure no water flows.Unplug Electrical Appliances
If your sink area has any electrical appliances nearby, unplug them to prevent accidents. Water and electricity are a dangerous mix, so keep them separate during this task.Wear Protective Gear
Don some protective gear like gloves and goggles. This keeps your hands safe from sharp edges and protects your eyes from any debris or accidental sprays.Use Proper Tools
Ensure you have the right tools ready, such as a wrench and screwdriver. Using improper tools can damage the faucet or injure you. Double-check your toolkit before beginning.Clear The Workspace
Remove any clutter or items from under the sink and around the workspace. This gives you room to maneuver and reduces the risk of accidents or losing important parts. Taking these precautions not only ensures your safety but also makes the removal process smoother. Have you ever had a DIY project go wrong because of overlooked safety measures? Share your experiences in the comments!Turning Off Water Supply
Turn off the water supply by locating the valves under the sink. Twist them clockwise to stop water flow. Ensure both hot and cold lines are closed before removing the Moen kitchen faucet.
Turning off the water supply is a crucial step before removing your Moen kitchen faucet. Neglecting this could lead to unwanted water spillage and a messy cleanup. Ensuring you properly halt the water flow will save you time and prevent potential damage.Locate The Shut-off Valves
Begin by locating the shut-off valves beneath your sink. Typically, you’ll find two valves, one for hot water and one for cold. These valves are usually found near the back wall. If you’re having trouble spotting them, check behind any cleaning supplies or items stored under the sink.Turn The Valves Clockwise
Once you’ve located the valves, turn each one clockwise to close them. This action will stop the water supply to the faucet. Use your hand to turn the valve, but if it’s stiff, a wrench might be necessary. Ensure the valve is fully closed to avoid any drips.Test The Faucet
After turning off the water supply, it’s essential to test your faucet. Turn the faucet handles to their ‘on’ position and let any remaining water drain out. This step verifies that the water supply is indeed cut off. If water continues to flow, double-check that the valves are completely closed. By ensuring the water supply is off, you can proceed confidently with removing your Moen kitchen faucet. Have you ever turned off the water supply only to find it wasn’t fully closed? It’s a common mishap—always double-check to avoid surprises.
Credit: www.reddit.com
Disconnecting Water Lines
Disconnecting water lines is a crucial step in removing a Moen kitchen faucet. Begin by turning off the water supply valves under the sink. Use a wrench to carefully loosen and remove the water line connections from the faucet.
Disconnecting the water lines is a crucial step when removing a Moen kitchen faucet. It’s often perceived as a daunting task, especially if you haven’t done it before. However, with the right guidance, you can tackle it with confidence.Gather Your Tools
Before you dive in, make sure you have the necessary tools on hand. A wrench and a bucket are essential. The wrench will help you loosen the connections, and the bucket will catch any remaining water.Turn Off The Water Supply
First things first, locate the shut-off valves under your sink. These are typically found towards the back of the cabinet. Turn them clockwise to stop the flow of water to your faucet.Release The Pressure
After turning off the supply, open the faucet to release any remaining pressure. This will prevent water from splashing when you disconnect the lines. It’s a simple action that saves you from potential mess and frustration.Disconnect The Water Lines
Now, use your wrench to loosen the nuts that connect the water lines to the faucet. Be patient—these might be tight if they’ve been in place for a while. Once loosened, gently pull the lines away from the faucet.Check For Residual Water
As you disconnect, you might notice some residual water dripping. This is where your bucket comes in handy. Place it under the connections to catch any drips and keep your work area dry.Inspect The Lines
Take a moment to inspect the water lines. Look for any signs of wear or corrosion. If needed, consider replacing them to ensure a secure and leak-free installation of your new faucet. Disconnecting water lines might seem like a small step, but it sets the foundation for a smooth faucet replacement. Have you encountered any challenges while doing this? Share your experiences and insights in the comments below!Removing The Handle
Removing the handle from a Moen kitchen faucet involves locating and loosening the set screw with an Allen wrench. Gently pull the handle upwards to detach it from the faucet base.
Removing the handle of a Moen kitchen faucet can seem daunting, but it’s simpler than you might think. Whether you’re fixing a leak or updating the faucet’s appearance, knowing how to remove the handle is a useful skill. This section will guide you through the process with clear steps and insights, ensuring you can tackle this task with confidence.Gather Your Tools
Before you begin, make sure you have the right tools on hand. You’ll typically need a screwdriver, an Allen wrench, and possibly a pair of pliers. Check your faucet model’s manual if you’re unsure which tools are needed.Turn Off The Water Supply
Safety first! Turn off the water supply to the faucet. Look under your sink for the valves and twist them clockwise to stop the water flow. This prevents any accidental water spills while you’re working.Locate The Handle Set Screw
Examine the handle for a small screw, often located at the base or on the side. Some Moen faucets have a decorative cap that you need to gently pry off to access the screw. Use the Allen wrench or screwdriver, as appropriate, to loosen this screw.Remove The Handle
Once the set screw is loosened, gently pull the handle away from the faucet. If it’s stuck, wiggle it slightly to loosen any mineral build-up. Be cautious not to use too much force to avoid damaging the handle or the faucet.Inspect The Handle And Cartridge
With the handle removed, take a moment to inspect it and the cartridge beneath. Look for signs of wear or mineral deposits. If you notice any issues, now is a good time to clean or replace these parts.Reattach The Handle
If you’re done with repairs or replacements, it’s time to put everything back together. Align the handle with the faucet and tighten the set screw. Turn the water supply back on and check for proper function. Have you ever had a moment where a seemingly complex task turned out to be easier than expected? Removing a Moen kitchen faucet handle might just be one of those tasks. With the right tools and a bit of patience, you’ll have your faucet in top shape in no time.Detaching The Spout
Detaching the spout from a Moen kitchen faucet involves loosening the connection beneath the sink. Use a wrench to carefully unscrew the mounting nut. Once loose, gently lift the spout off the base.
Detaching the spout from a Moen kitchen faucet requires patience and precision. This task might seem daunting, but breaking it down into simple steps makes it manageable. Ensuring you have the right tools is crucial. Let’s explore the process of safely removing the spout.Understanding The Spout Structure
The spout is a central part of the faucet. It allows water flow. Before removal, familiarize yourself with its structure. This helps in avoiding damage. Use diagrams if available. Knowing the spout’s parts aids in its safe detachment.Gathering Necessary Tools
You need the right tools for a smooth process. Common tools include a wrench and screwdriver. These tools help in loosening the spout’s connections. Ensure they are within reach. Having them ready speeds up the process. Safety first. Turn off the water supply. This prevents leaks and accidents. Locate the valve under the sink. Twist it clockwise to shut off water flow. Check to ensure no water is flowing.Removing Decorative Cap
The decorative cap covers screws. Gently remove it using a flat screwdriver. Be careful not to scratch the surface. Place the cap aside safely. This exposes the screws for easy access.Unscrewing The Spout
Locate the screws under the cap. Use a screwdriver to loosen them. Turn counterclockwise until they are free. Keep the screws safe for reinstallation. The spout should now be easier to lift. Gently lift the spout upwards. Wiggle it if needed to loosen. Ensure it’s free from any connections. Avoid using force to prevent damage. Once free, place it aside carefully.Inspecting The Removed Spout
Examine the removed spout. Check for wear or damage. Inspect the seals and connections. This helps in planning repairs or replacements. A thorough check ensures future reliability.Unscrewing Mounting Nuts
Unscrewing mounting nuts is essential for removing a Moen kitchen faucet. Grasp the nuts with a wrench and twist counterclockwise. Ensure the sink’s underside is accessible for easy maneuvering.
Removing a Moen kitchen faucet can seem challenging. One crucial step is unscrewing the mounting nuts. These nuts secure the faucet to your sink, so removing them is essential. Let’s dive into the details.Identifying The Mounting Nuts
First, locate the mounting nuts under the sink. They hold the faucet in place. Usually, these are round or hexagonal. Shine a flashlight to spot them easily.Gathering Necessary Tools
Before unscrewing, gather your tools. A basin wrench is ideal. It reaches tight spots easily. Ensure you have a clean cloth too. This helps grip slippery nuts.Loosening The Mounting Nuts
Use your basin wrench. Secure it around the nut. Turn counterclockwise. This should loosen the nut. If it’s tight, apply gentle pressure. Be patient.Dealing With Stubborn Nuts
Some nuts won’t budge easily. Apply penetrating oil. Let it sit for a few minutes. Try unscrewing again. If still stuck, tap gently with a hammer. This can help break the grip.Removing The Nuts Completely
Once loose, unscrew by hand. This prevents damage. Keep the nuts safe. You might need them later. Wipe the area clean. Now, your faucet is ready for the next step. Removing a Moen kitchen faucet isn’t too tough. With the right approach, you’ll have it done in no time.Lifting Out The Faucet
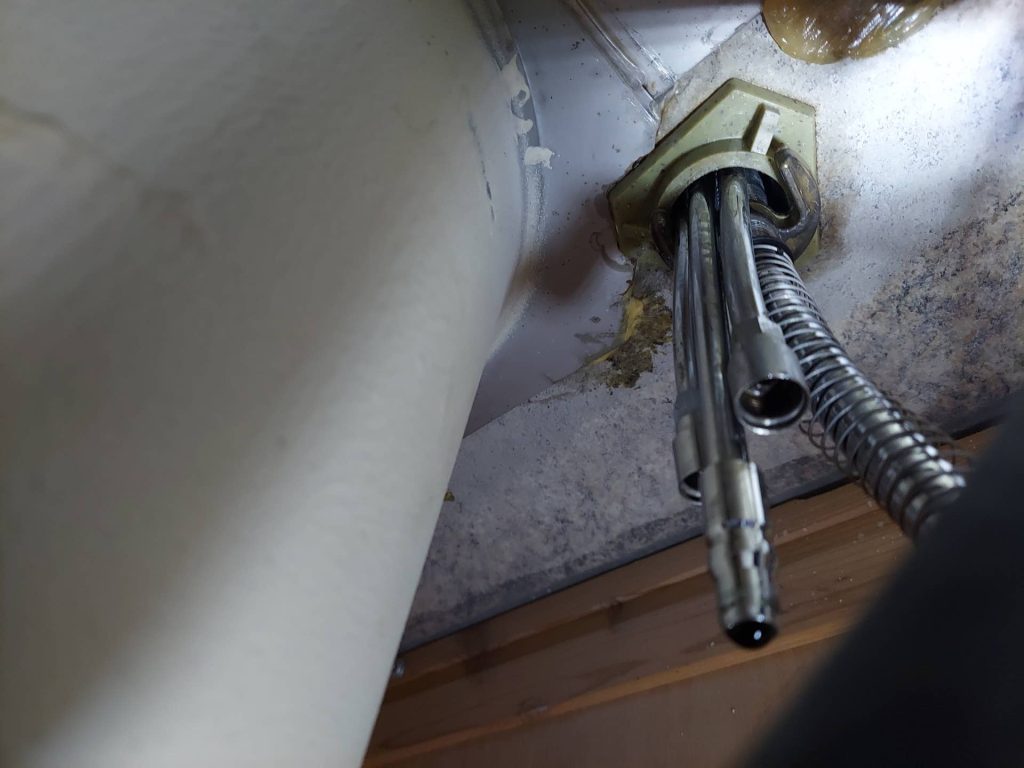
Begin by turning off the water supply under the sink. Then, use a wrench to loosen the nuts holding the faucet. Carefully lift out the Moen kitchen faucet from its position.
Lifting out a Moen kitchen faucet might sound daunting, but with the right approach, it can become a straightforward task. Whether your faucet is outdated or leaking, knowing how to lift it out efficiently will save you time and frustration. Let’s dive into the process and ensure you’re well-prepared to tackle this DIY project.Preparing Your Workspace
Before you begin, clear the area under your sink. Remove any cleaning supplies or stored items to give yourself ample room to work. It’s helpful to lay down an old towel to catch any drips and keep the space tidy. Ensure that the water supply is turned off. Locate the valves under the sink and turn them clockwise to shut off the water. Use a wrench to disconnect the water lines from the faucet. Be prepared for a small amount of water to leak out, so keep a bucket handy.Loosening Mounting Nuts
Most Moen faucets are secured with mounting nuts. Using a basin wrench, reach up behind the sink to loosen these nuts. It’s a bit of a tight space, so patience is key here. Once loosened, the faucet should move freely.Removing The Faucet
With the mounting nuts removed, gently lift the faucet out of its position. If it’s stuck, try wiggling it back and forth to loosen it from any accumulated residue. A steady and careful hand will prevent any accidental damage.Inspecting The Sink Area
Once the faucet is out, inspect the sink area for any wear or damage. This is an excellent opportunity to clean the surface thoroughly, removing any grime or buildup. Why not make the most of this moment to refresh your kitchen’s appearance? Remember, lifting out a faucet is just one part of the replacement process. Are you ready for the next step in your kitchen upgrade?Cleaning The Sink Area
Removing a Moen kitchen faucet involves turning off the water supply and disconnecting water lines. Unscrew the mounting nuts beneath the sink to detach the faucet. Carefully lift the faucet away from the sink area.
Cleaning the sink area is an essential step in removing a Moen kitchen faucet. A clean workspace makes the removal easier and prevents debris from falling into the sink. Follow these steps to ensure the sink area is clean and ready for the task.Gather Cleaning Supplies
Start by collecting necessary cleaning items. You will need a sponge, mild detergent, and a cloth. A bucket or bowl is useful for holding water.Clear The Sink
Remove any dishes, utensils, and other items from the sink. Keep the area around the sink free of clutter.Wipe Down The Surface
Dip the sponge in soapy water. Wipe the sink surface thoroughly, removing grime and stains. Pay attention to corners and edges where dirt accumulates.Dry The Sink
Use a clean cloth to dry the sink area. Ensure no water remains, as it can cause slipping or accidents during faucet removal.Check For Leaks
Inspect the sink for any leaks or drips. Fixing these issues beforehand will prevent complications while removing the faucet.
Credit: www.homedepot.com
Troubleshooting Common Issues
Removing a Moen kitchen faucet involves turning off the water supply and loosening the mounting nuts. Carefully disconnect the water lines and lift the faucet from the sink.
Removing a Moen kitchen faucet can be a straightforward task, but sometimes you might encounter unexpected issues along the way. These challenges can make the process more complicated than anticipated. Understanding and troubleshooting these common problems can save you time and frustration.Stuck Faucet Handle
If the faucet handle refuses to budge, don’t panic. Mineral deposits often cause this stiffness. Try soaking the handle area with vinegar for about 20 minutes. This helps dissolve the buildup, making it easier to remove. If that doesn’t work, gently use a rubber mallet to tap and loosen the handle.Stripped Screw
A stripped screw can halt your progress, leaving you scratching your head. Start by applying a rubber band over the screw head. This adds extra grip when you use your screwdriver. If the screw still doesn’t move, consider using a screw extractor tool for better results.Leaking Water Supply Line
A leaking water supply line can create a mess under your sink. Ensure the water supply is turned off completely. Check if the connections are loose or if the washers are worn out. Tighten the connections or replace the washers as needed to stop the leak.Corroded Mounting Nuts
Corroded mounting nuts can be a real pain, making it nearly impossible to remove the faucet. Use a penetrating oil to loosen the corrosion. Let it sit for a few hours, then use a basin wrench to remove the nuts. If they’re still stuck, a hacksaw might be your last resort.Disconnected Spray Hose
A spray hose that keeps disconnecting can disrupt your work. Ensure the quick-connect fitting is secure. Push it in until you hear a click, indicating it’s locked in place. If it continues to disconnect, inspect for damage and replace the hose if necessary. Encountering these issues can be frustrating, but each problem has a solution. Have you faced any of these challenges? How did you overcome them? Share your experience to help others navigating the same issues!Tips For Reinstallation
Reinstalling a Moen kitchen faucet can be a straightforward process. With the right tips, you can ensure a secure and efficient installation. Pay attention to details to prevent leaks or damage. Below are some helpful tips to guide you through reinstallation.
Check The Faucet Components
Ensure all parts are present and in good condition. Check for any missing or damaged components. Replace them if necessary to ensure proper functionality.
Clean The Mounting Surface
Wipe down the sink area where the faucet will be installed. Remove any debris or old sealant to ensure a smooth installation. A clean surface helps the new faucet fit snugly.
Use Plumber’s Tape
Apply plumber’s tape to threaded connections. This helps prevent leaks and ensures a tight seal. Wrap the tape clockwise around threads for best results.
Tighten Connections Properly
Use a wrench to tighten connections securely. Avoid over-tightening to prevent damaging the faucet. Check each connection twice to ensure they are firm.
Test For Leaks
Turn on the water supply and check for leaks. Run water through the faucet to inspect all connections. Address any leaks immediately by tightening or resealing as needed.

Credit: www.amazon.ca
Frequently Asked Questions
How To Remove A Kitchen Faucet Handle With No Visible Screws?
Remove the faucet handle by locating the hidden set screw under the decorative cap. Use a flathead screwdriver to pry off the cap gently. Unscrew the set screw using an Allen wrench. Slide the handle off the valve stem. Ensure to turn off the water supply before starting.
How To Remove A Moen Kitchen Spout?
Turn off the water supply. Disconnect the hose underneath the sink. Unscrew the retaining nut using a wrench. Lift the spout off the base. Clean the area before installing a new spout.
How To Remove A Single Hole Faucet?
Turn off the water supply and disconnect hoses. Unscrew the mounting nuts under the sink. Carefully lift the faucet. Clean and prepare the area for a new installation.
How Do You Unmount A Kitchen Faucet?
Turn off the water supply. Disconnect the water lines using a wrench. Remove the mounting nuts under the sink. Lift the faucet from the sink. Clean the area before installing a new faucet.
Conclusion
Removing a Moen kitchen faucet is not too hard. Follow the steps carefully. Gather all necessary tools before starting. Remember to turn off the water supply. Patience is key for a successful removal. Clean the area after taking out the faucet.
Inspect for any needed repairs or replacements. Keep all removed parts organized. Consider asking a friend for help. Safety should always be your priority. With these tips, you’ll manage the task well. Enjoy a smooth and successful faucet removal experience.
Your kitchen will thank you for it.