How to Install Kitchen Hardware: A Step-by-Step Guide
Executive Chef & Lead Commercial Kitchen Specialist at Daily Kitchup Test Lab
Have you ever looked at your kitchen and thought it could use a fresh update? Installing new kitchen hardware is one of the simplest ways to transform your space without breaking the bank.
Imagine the satisfaction of opening a drawer that glides effortlessly, or the sleek look of modern handles that perfectly complement your cabinets. This guide is here to empower you to make those changes yourself. You’ll discover how easy it can be to elevate your kitchen’s style and functionality with just a few tweaks.
So, whether you’re a seasoned DIY enthusiast or a beginner, get ready to learn how to install kitchen hardware like a pro. Dive in, and see how you can make your kitchen not just a place to cook, but a space you love to be in.

Credit: plankhardware.com
Essential Tools And Materials
Gather screwdrivers, drills, and measuring tape for precise installation. High-quality screws and hinges ensure durability and smooth operation. Keep a level handy for alignment and a pencil for marking positions.
Installing kitchen hardware can enhance your space’s functionality and style. Before starting, gather essential tools and materials for a smooth process. Having the right items ensures efficiency and reduces frustration. Below, you’ll find key tools and materials to have on hand.Drill And Drill Bits
A drill is indispensable for making holes. Ensure you have various drill bits. Different sizes accommodate different screws and fixtures.Screwdriver Set
A screwdriver set is vital for tightening screws. Choose both Phillips and flathead types. Each type serves specific screws, ensuring a secure fit.Measuring Tape
Accurate measurements are crucial. A measuring tape helps mark precise locations. Avoid guesswork for a perfect installation.Level
A level ensures hardware is straight. Even small misalignments can affect the look. Use a level for a professional finish.Marker Or Pencil
Mark the spots where hardware will go. A marker or pencil allows clear visibility. Erase marks easily after installation.Template Or Jig
Templates aid in consistent placement. They save time and prevent errors. Consider using a jig for accurate alignment.Screws And Anchors
Select screws suitable for your hardware. Use anchors for added stability. Ensure they match your wall type and weight requirements.Protective Gear
Safety is paramount. Wear gloves and goggles to protect yourself. Avoid injuries while working with tools. Prepare these tools and materials before starting your kitchen hardware installation. This ensures a seamless and efficient process. With everything ready, transform your kitchen with ease.Preparing Your Workspace
Preparing the right workspace is crucial for installing kitchen hardware efficiently. Clear off countertops to create ample space. Gather all necessary tools and materials before beginning the installation.
Preparing your workspace is vital for a smooth kitchen hardware installation. A well-organized area saves time and reduces stress. It also minimizes the risk of errors. Before starting, ensure you have everything you need at hand.Clear The Area
Begin by clearing all items from countertops. Remove any clutter that may obstruct your work. This ensures you have ample space to move around. It also prevents damage to your belongings during installation.Gather Necessary Tools
Collect all the tools you need for the installation. Common tools include a drill, screwdriver, and measuring tape. Keep them within reach to avoid unnecessary interruptions.Set Up A Workstation
Designate a specific area for your tools and hardware. Use a table or a sturdy surface for this purpose. This helps in maintaining order and efficiency.Ensure Adequate Lighting
Good lighting is crucial for precise installation. Use a bright lamp or overhead light to illuminate your workspace. This ensures you see every detail clearly.Wear Safety Gear
Safety should always be a priority. Wear protective gloves and goggles to protect yourself. This prevents accidents and ensures a safe installation process. By preparing your workspace effectively, you set the stage for success. An organized area leads to a hassle-free installation. It makes the task more enjoyable and efficient.Choosing The Right Hardware
Choosing the right kitchen hardware can transform your space from ordinary to extraordinary. It’s not just about picking something that looks good; it’s about finding pieces that complement your lifestyle, match your kitchen’s aesthetic, and stand the test of time. You might be surprised at how the right knobs and pulls can make your kitchen feel brand new.
Consider Your Kitchen Style
What kind of vibe are you aiming for in your kitchen? If you’re going for a modern look, sleek stainless steel might be your best bet. For a cozy farmhouse feel, consider rustic bronze or antique finishes. Your hardware should echo the overall theme of your kitchen to create a harmonious look.
Think About Functionality
While aesthetics matter, functionality is equally important. Are your current handles hard to grip? Do your knobs make it difficult to open cabinets quickly? Choose hardware that’s comfortable and easy to use, especially if you have kids or if you often cook large meals.
Quality Over Quantity
It’s tempting to go for the cheapest option, but quality hardware will save you money in the long run. Cheap materials might look good initially but can wear down quickly. Invest in durable options from reputable brands to ensure longevity.
Test Before You Commit
Before purchasing, try out different styles and finishes. Many stores offer samples or have displays you can test. Feel the weight and grip of different options to see what fits best in your hand. It’s a simple step that can prevent future regrets.
Mix And Match With Caution
Mixing different styles can add a unique flair, but be careful not to overdo it. Too many contrasting elements can make your kitchen feel chaotic. Stick to one or two styles that complement each other for a cohesive look.
Choosing the right kitchen hardware is more than a simple upgrade; it’s an opportunity to express your personality and improve your daily kitchen interactions. What changes are you considering to make your kitchen more functional and stylish?
Measuring And Marking
When installing kitchen hardware, precise measuring and marking are crucial steps that set the foundation for a flawless finish. Imagine the frustration of drilling holes that don’t align perfectly with your cabinet handles. Accurate measurements and clear markings can save you from such headaches, ensuring that your kitchen upgrade is both functional and aesthetically pleasing. Whether you’re an experienced DIYer or a novice, mastering these skills can make a world of difference.
Tips For Accurate Measurements
Accuracy in measuring is key to successful hardware installation. Start by using a reliable measuring tool like a tape measure or a ruler. Double-check your measurements to prevent costly mistakes.
Avoid measuring with a flexible tape measure for critical dimensions. Instead, opt for a sturdy ruler or a rigid tape measure that won’t sag or twist.
Consider marking your measurements directly on the surface with painter’s tape. This helps in visualizing the layout and allows for easy corrections before you commit to drilling.
- Measure each piece individually; cabinets can vary slightly even if they appear identical.
- Record measurements immediately to avoid forgetting them. Keeping a notebook handy can be invaluable.
Marking Techniques
Marking accurately is as essential as measuring. Use a pencil or fine-tip marker for marking your drill spots. Ensure your markings are visible but not intrusive, so they can be easily cleaned off after installation.
Consider using a template or jig for consistent marking. These tools can simplify the process and help avoid errors, especially for repetitive tasks.
When marking, hold the hardware against the surface to see how it fits. This can provide a clearer idea of where to place your marks, ensuring they align perfectly.
- Use a level to make sure marks are straight and even, particularly for handles and knobs that require symmetry.
- Check twice: Confirm your marks are in the right spots before you start drilling.
Have you ever thought about the impact of a misplaced handle or knob? Such details can affect the entire look and feel of your kitchen space. With careful measuring and marking, you can transform your kitchen hardware installation from daunting to delightful.
Drilling Holes
Drilling holes is essential for installing kitchen hardware. Precise measurements ensure proper alignment of handles and knobs. Use a drill with the correct bit size to avoid damaging the cabinets.
Drilling holes is a crucial step in installing kitchen hardware. Proper technique ensures the hardware fits securely and functions well. This section covers safety precautions and selecting the right drill bit for the job.Safety Precautions
Safety should be your first priority. Wear protective eyewear to shield your eyes from debris. Use gloves to protect your hands from sharp tools. Ensure the drill is in good working condition. Check the drill’s cord for any damage. Make sure your work area is clean and clutter-free. This reduces the risk of accidents.Drill Bit Selection
Choosing the right drill bit is important for a smooth installation. Assess the material you are drilling into. Wood requires a different bit than metal. Use a wood drill bit for wooden cabinets. Metal surfaces need metal drill bits. Measure the size of the hardware screws. Select a drill bit slightly smaller than the screw diameter. This ensures a snug fit.Attaching Handles And Knobs
Attaching handles and knobs is a simple way to update kitchen cabinets. First, measure and mark the placement for even spacing. Then, secure the hardware using screws and a screwdriver, ensuring a snug fit.
Attaching handles and knobs can transform your kitchen, giving it a fresh look with minimal effort. Whether you’re upgrading old hardware or installing new pieces, the process can be straightforward and rewarding. With just a few tools, you can enhance both the appearance and functionality of your cabinets.Aligning Hardware
Before drilling any holes, ensure your handles and knobs are aligned perfectly. Use a template or a ruler to measure consistent distances from the edge of each cabinet door or drawer. This step prevents a wonky appearance and saves you from unnecessary re-drilling. Consider using a spirit level to double-check alignment. A small mistake here can be glaringly obvious once the hardware is installed. Remember, patience in aligning ensures a professional finish.Securing With Screws
Once aligned, it’s time to secure the handles and knobs with screws. Using a power drill, carefully create pilot holes where you’ve marked the positions. This prevents the wood from splitting and makes inserting screws easier. Place the screw through the back of the drawer or door, attaching the handle or knob on the front. Tighten the screws firmly but avoid over-tightening, as this can strip the threads or damage the hardware. Have you ever accidentally stripped a screw? It’s frustrating but easily avoidable by using the correct screwdriver size. Take a moment to ensure the tool matches the screw head perfectly. By following these steps, you can confidently attach kitchen hardware, enhancing your space with a personal touch. Isn’t it satisfying to see your efforts reflected in your kitchen’s new look?Adjusting Hinges And Drawers
Properly aligning hinges ensures smooth cabinet door movement. Adjust drawers for easy access and optimal functionality.
Adjusting hinges and drawers is a crucial part of installing kitchen hardware, ensuring your cabinets and drawers not only look good but function smoothly. Imagine opening a cabinet and finding the door slightly misaligned, or pulling a drawer that sticks every time. These minor annoyances can add up over time. By taking a little extra care to adjust hinges and drawers correctly, you can enjoy a kitchen that works seamlessly and looks polished. Let’s dive into the details of how you can achieve this.Fine-tuning Hinges
Properly aligned hinges are essential for ensuring cabinet doors open and close effortlessly. Start by examining the door alignment. If a door is sagging or misaligned, use a screwdriver to adjust the screws on the hinge plates. Tightening or loosening these screws will help align the door to the frame. Check the gaps between doors. They should be even. If one door is closer to its neighbor than the other, adjust the hinge that attaches to the cabinet frame. This is usually the middle screw on the hinge plate. Consider the door’s depth. If it’s not flush with the cabinet, adjust the screw on the arm of the hinge. This controls how far the door sits from the cabinet.Ensuring Smooth Drawer Operation
Drawers that glide smoothly make a world of difference in your daily kitchen tasks. Begin by checking the drawer slides. Are they aligned correctly? Misaligned slides can cause sticking. Loosen the screws slightly, realign, and tighten them back. Assess the drawer’s balance. If it tips forward or backward, the slides might be uneven. Adjust the height on either side until the drawer sits level. Don’t forget the stops. These small pieces prevent drawers from pulling out too far. Ensure they’re positioned correctly so drawers open to the right distance without falling out. Have you ever thought about the satisfaction of a perfectly aligned cabinet or a smoothly gliding drawer? Taking the time to adjust these elements not only enhances your kitchen’s functionality but can also transform your cooking experience.
Credit: atelierdeluxe.online
Troubleshooting Common Issues
Installing kitchen hardware can sometimes present challenges. Ensure all tools are ready before starting to avoid delays. Align hardware pieces accurately to prevent crooked installations.
Installing kitchen hardware can seem straightforward. But, small issues might arise during the process. Identifying and fixing these problems ensures your kitchen looks perfect. Below, discover solutions to common hardware installation problems.Misalignment Solutions
Misaligned kitchen hardware can cause frustration. First, check the alignment of your holes. Measure the distance between holes again. Use a template to ensure accurate placement. If holes are off, consider re-drilling. Fill old holes with wood filler. Let it dry, then sand it smooth. Re-drill using a template for precision. Always double-check measurements before drilling.Fixing Loose Hardware
Loose hardware can be annoying. Tighten screws with a screwdriver. If screws don’t hold, use longer ones. Consider using wall anchors for extra stability. Thread-locking adhesive can secure screws further. Apply a small amount to threads before tightening. If knobs are loose, check the back for a tightening nut. Ensure it’s secure. If still loose, replace it with a new one.Maintaining Kitchen Hardware
Install kitchen hardware by first choosing the right style and size for your cabinets. Use a drill to make precise holes, then securely attach handles or knobs. Adjust as needed for a perfect fit.
Maintaining kitchen hardware is crucial for ensuring its longevity and functionality. Proper maintenance not only keeps your kitchen looking fresh but also saves you from costly replacements. Let’s dive into some practical tips for maintaining your kitchen hardware.Cleaning Tips
Regular cleaning is the first step in maintaining kitchen hardware. Use a gentle dish soap mixed with warm water to clean handles, knobs, and pulls. A soft cloth or sponge is ideal to avoid scratches. Avoid harsh chemicals as they can damage finishes. Instead, consider using a vinegar and water solution for a natural cleaning option. This not only cleans but also disinfects your hardware. Have you noticed sticky residues on your cabinet handles? A small amount of baking soda can be a great way to tackle stubborn grime without damaging the surface.Regular Inspection
Inspection is key to catching potential issues early. Check your hardware for any signs of wear, such as loose screws or wobbly handles. Tightening a screw now can prevent a bigger problem later. Are all parts moving smoothly? Drawer slides and hinges should operate without resistance. A little lubrication can work wonders if they start to stick. It’s easy to overlook small imperfections, but addressing them promptly can prevent them from escalating. A small crack today could mean a broken handle tomorrow. Keep an eye out and act quickly. By integrating these simple routines into your kitchen care, you ensure your kitchen hardware stays in top shape for years to come. What other maintenance tips have you found useful in your kitchen?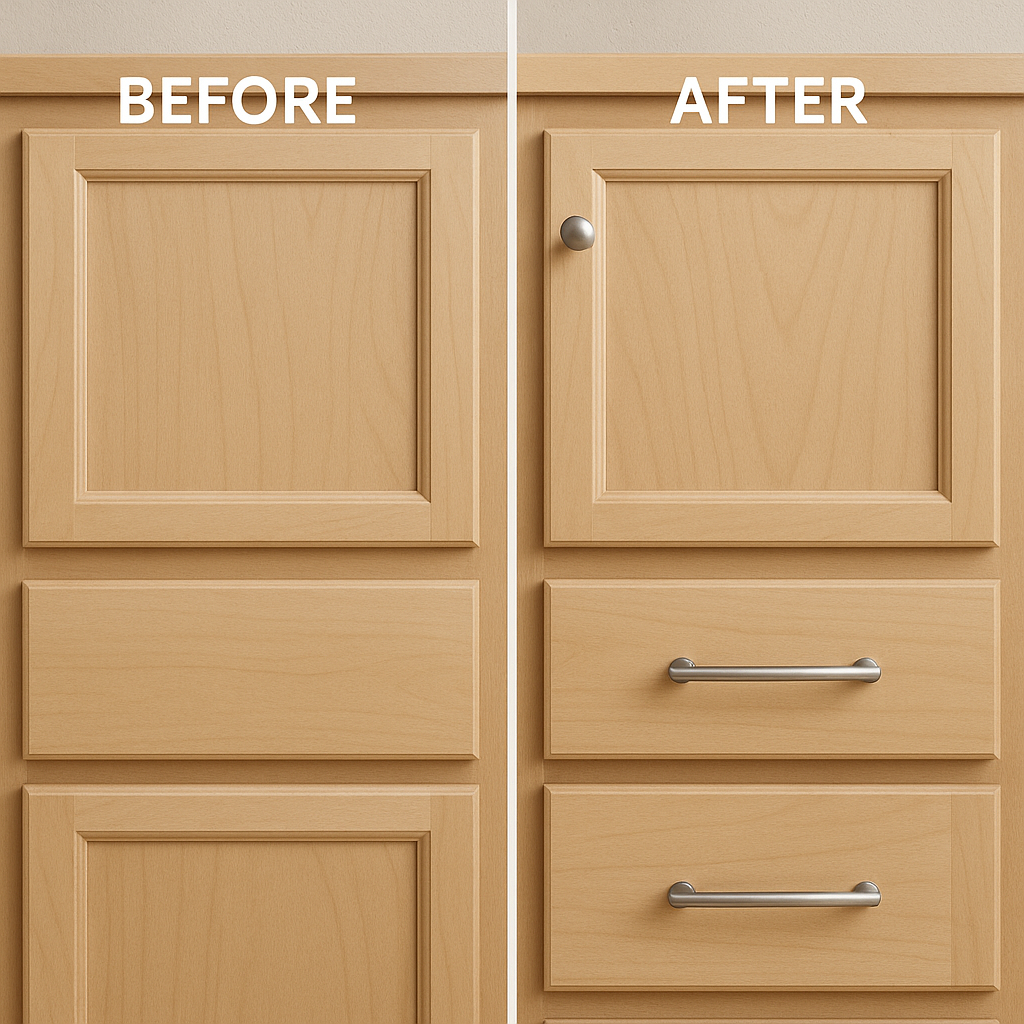
Credit: www.woodworkerexpress.com
Frequently Asked Questions
What Is The 1/3 Rule For Cabinet Hardware?
The 1/3 rule for cabinet hardware suggests using pulls or knobs one-third the length of the cabinet drawer. This proportion ensures an aesthetically pleasing and balanced look, enhancing the overall design of the kitchen or bathroom space. It provides a harmonious visual appeal while maintaining functionality.
How To Place Hardware On Kitchen Cabinets?
Measure and mark the placement for consistency. Drill pilot holes to prevent wood splitting. Attach the hardware using screws, ensuring alignment. Use a level to verify straightness. Test by opening and closing cabinets.
How Much Do People Charge To Install Cabinet Hardware?
Installing cabinet hardware typically costs $100 to $300. Prices vary based on complexity and location. Hiring a professional ensures quality work and saves time. Always compare quotes from different installers to get the best deal. Consider the type of hardware and any additional services needed.
Is It Hard To Put Hardware On Cabinets?
Installing hardware on cabinets is generally easy. Basic tools and instructions make the process straightforward for most.
Conclusion
Installing kitchen hardware can seem daunting at first. But it’s manageable with the right steps. Start by gathering all necessary tools. Follow the instructions carefully. Ensure screws and bolts are tight. Regularly check for any loose parts. This simple maintenance keeps your kitchen in great shape.
With patience, you can handle this task. Enjoy the satisfaction of a job well done. Your kitchen will look refreshed and updated. Happy hardware installing!

Similar Posts