
Are your kitchen cupboards looking a bit outdated or dull? Painting them white can instantly transform your space, giving it a fresh, modern look without the hefty price tag of a full remodel.
You might think this project sounds daunting, but with the right guidance, it can be surprisingly easy and enjoyable. Imagine walking into a bright, clean kitchen that feels brand new, all thanks to a simple change you made yourself. In this guide, you’ll discover step-by-step instructions that will make painting your kitchen cupboards white a breeze.
Let’s get started on turning your kitchen into the stylish, inviting heart of your home you’ve always wanted.
Choosing The Right Paint
Selecting the ideal paint ensures smooth coverage and a bright finish for kitchen cupboards. Opt for high-quality, durable white paint for lasting results. Proper surface preparation is key to achieving a professional look.
Choosing the right paint for your kitchen cupboards can make all the difference in achieving that crisp, clean look you desire. But how do you decide which paint is best suited for this transformation? You want something durable, easy to clean, and of course, aesthetically pleasing. Let’s dive into some essential considerations to help you make the best choice.Types Of Paint For Cupboards
When painting kitchen cupboards, you have several types of paint to choose from. – Latex Paint: This is water-based and dries quickly. It’s easy to clean with soap and water, making it ideal for high-traffic areas like the kitchen. – Oil-Based Paint: Known for durability and smooth finish, oil-based paint withstands heavy use. However, it takes longer to dry and requires mineral spirits for cleanup. – Chalk Paint: Offers a matte finish and can add a rustic charm. It’s less durable than other options but is easy to apply without extensive prep work. Which type of paint do you think would best suit your needs?Understanding Paint Finishes
The finish of your paint affects both the look and the functionality of your cupboards. – Matte Finish: Provides a smooth, non-reflective surface but is less resistant to stains. – Eggshell Finish: Offers a slight sheen and is more washable than matte. – Semi-Gloss Finish: Highly reflective and ideal for areas that need frequent cleaning. This finish is durable and highlights details in cabinetry. Consider how often you clean your kitchen and the look you’re aiming for. Is a shiny surface more appealing, or do you prefer a subtle elegance?Selecting Primer For Best Results
A primer creates a solid base for your paint, ensuring better adhesion and durability. – Oil-Based Primer: Works well with oil-based paints and provides excellent adhesion, especially for surfaces previously painted with oil-based paint. – Latex Primer: Best for latex paints and surfaces that need a quick turnaround. It’s easy to clean and less odorous. – Stain-Blocking Primer: Ideal for covering old stains and preventing them from seeping through your fresh coat of paint. Using a primer can be the key to a long-lasting, professional finish. Have you considered what kind of primer your cupboards need? Choosing the right paint involves more than just picking a color. By understanding types, finishes, and primers, you empower yourself to make informed decisions, ensuring your cupboards look stunning and stand the test of time.
Credit: food52.com
Preparing The Cupboards
Cleaning and sanding are essential before painting kitchen cupboards white. Ensure surfaces are smooth and free of dust. Apply a primer to create a perfect base for the white paint.
Preparing the cupboards is a crucial step in achieving a flawless and professional finish when painting your kitchen cupboards white. Before you dive into the painting process, ensuring your cupboards are well-prepared will make all the difference in the final outcome. From cleaning and degreasing to sanding and repairing damages, each step plays a vital role. Are you ready to transform your kitchen into a bright and inviting space?Cleaning And Degreasing
Start by removing any dust, dirt, or grease from the cupboard surfaces. Use a mixture of warm water and mild detergent to wipe down every nook and cranny. Pay special attention to the handles and edges where grime tends to accumulate. After cleaning, it’s time to degrease. A commercial degreaser or vinegar solution can work wonders. Ensuring that the surfaces are grease-free will help the paint adhere better and last longer.Sanding Techniques
Sanding is essential for creating a smooth surface that allows the paint to cling effectively. Use medium-grit sandpaper to gently sand the cupboard surfaces, focusing on areas with old paint or varnish. Don’t rush this step. A well-sanded surface can make a significant difference in the final finish. Remember to wipe away the dust with a damp cloth once you’re done sanding.Repairing Damages
Inspect your cupboards for any damages such as dents or scratches. Use wood filler to repair these imperfections, ensuring a seamless finish once painted. For larger damages, consider using a putty knife to apply the filler evenly. Once the filler dries, sand the area to ensure it’s level with the rest of the surface. Taking the time to address these repairs will not only improve the aesthetics but also add to the longevity of your painted cupboards. Are your cupboards ready to embrace their new look?Tools And Materials Needed
Painting kitchen cupboards white can brighten any kitchen space. To achieve a smooth finish, gather the right tools and materials. Proper preparation ensures a professional look. This guide lists everything you need for this DIY project.
Essential Brushes And Rollers
Choose quality brushes and rollers for a smooth paint job. Use a 2-inch angled brush for corners and edges. This helps reach tight spots easily. For larger areas, a foam roller works best. It provides an even finish without brush marks.
Protective Gear
Safety is important when painting. Wear a mask to avoid inhaling fumes. Protect your eyes with safety goggles. Gloves keep your hands clean and safe. Cover your clothes with an old apron or painting suit.
Additional Supplies
- Sandpaper for smoothing surfaces
- Primer for better paint adhesion
- Painter’s tape to protect non-painted areas
- Drop cloths to cover floors and counters
- Stir sticks to mix paint thoroughly
- Paint tray for easy roller use
Ensure you have all these supplies before starting. Proper preparation makes the job easier and the results better.

Credit: usacabinets.com
Painting Techniques
Transform kitchen cupboards with a fresh coat of white paint. Start by cleaning and sanding the surface. Then, apply primer to ensure a smooth finish. Finally, use a high-quality paint for lasting results.
Painting kitchen cupboards white can transform a space. The right techniques ensure a smooth finish. This section explores methods to achieve stunning results.Brushing Vs. Spraying
Brushing is a classic method. It offers control over the application. Use quality brushes for better results. Brushes work well on detailed areas. They allow precision with corners and edges. Spraying, on the other hand, provides a more even finish. It covers large surfaces faster. Spraying minimizes brush strokes, offering a sleek look. Choose the method that suits your needs and skills.Tips For Even Coats
Start with a clean surface. Remove dust and grease. Prime the cupboards before painting. Use thin coats for better adhesion. Allow each coat to dry fully. Sand between coats for smoothness. Keep your brush or sprayer at a consistent angle. This helps avoid uneven application. Lightly sand the final coat for a professional finish.Avoiding Common Mistakes
Don’t rush the drying process. Give each coat enough time. Avoid using cheap brushes or sprayers. These can lead to streaks or uneven coverage. Ensure the paint is suitable for cupboards. Some paints are more durable than others. Test your technique on a small area first. This helps avoid large-scale mishaps. Maintain a steady hand and consistent pressure.Drying And Curing
Proper drying and curing are vital for a smooth paint finish on kitchen cupboards. Allow paint to dry fully between coats, ensuring a durable and long-lasting result. This patience prevents peeling and ensures a professional look.
Drying and curing are crucial in painting kitchen cupboards white. It’s not just about applying the paint. Proper drying ensures the paint lasts longer. Curing makes the surface durable. Understanding these processes helps achieve a flawless finish.Optimal Drying Times
Paint drying is affected by temperature and humidity. Warm environments speed up drying. Cool temperatures slow it down. Aim for a room temperature between 65°F and 75°F. This range allows optimal drying. Humidity should be below 70%. High humidity delays drying. Use fans or dehumidifiers to maintain conditions. Typically, paint dries to the touch in 4 to 6 hours. Wait at least 24 hours before handling the cupboards.Handling Freshly Painted Cupboards
Freshly painted cupboards need careful handling. Avoid touching them immediately after painting. Give them time to cure. Curing can take up to 30 days. During curing, avoid placing heavy objects. This prevents marks or dents. Handle doors gently during this period. Use soft cloths to clean them. Harsh chemicals can damage the fresh paint. Regularly check for any signs of damage. Early detection helps maintain the finish.Reassembling And Finishing Touches
Carefully reassemble the kitchen cupboard parts after painting. Ensure hinges, handles, and doors are securely attached. Inspect every detail for a smooth, flawless finish.
Reassembling and finishing touches are crucial in painting kitchen cupboards white. After painting, this stage ensures everything looks neat and professional. It involves putting back all the components and adding protective layers. Proper reassembly makes your kitchen look fresh and new. Let’s dive into the steps to complete your cupboard painting project.Reinstalling Hardware
Once the paint dries completely, it’s time to reinstall the hardware. Gather all your screws, knobs, and handles. Use a screwdriver to attach each piece back in its place. Align the hinges carefully to ensure cupboard doors close smoothly. Take your time to avoid scratching the fresh paint.Applying Protective Coatings
A protective coating prolongs the life of your paint job. Choose a clear, water-based polyurethane for a glossy finish. Apply it with a clean brush in thin, even layers. Let each layer dry before applying the next. This step protects against scratches and makes cleaning easier.Final Inspection
Inspect your cupboards for any paint drips or missed spots. Touch up any imperfections with a small brush. Check that all hardware is secure and aligned properly. Open and close the cupboards to ensure smooth operation. This final check guarantees a perfect finish for your kitchen cupboards.Maintaining Painted Cupboards
Painting kitchen cupboards white brightens any kitchen. Start by cleaning surfaces thoroughly to remove grease and dirt. Use primer for a smooth base, then apply two coats of quality white paint for lasting results. Regular cleaning keeps them looking fresh and vibrant.
Painting your kitchen cupboards white can transform your space, giving it a fresh and airy look. But how do you ensure they stay pristine over time? Maintaining painted cupboards is key to keeping them looking like new. Whether you’re a busy parent or a culinary enthusiast, a little care goes a long way. Let’s dive into how you can keep your white kitchen cupboards spotless and stunning.Cleaning Tips
White cupboards can show dirt and grease more easily. Regular cleaning is essential. Use a soft cloth and a mild detergent mixed with warm water. Wipe the surfaces gently to avoid scratches. A microfiber cloth is ideal for picking up dust and leaving a streak-free finish. Avoid abrasive cleaners that could damage the paint. Do you have greasy fingerprints near the handles? A solution of vinegar and water can work wonders on those stubborn spots. Spray it on and wipe with a clean cloth. It’s a simple yet effective routine that even busy schedules can accommodate.Handling Touch-ups
Chips and scratches can happen, no matter how careful you are. Keeping a small pot of the original paint color can save you stress when you need a quick touch-up. Use a small brush to apply the paint to the affected area. Allow it to dry thoroughly before using the cupboard again. Are you afraid of mismatched colors? Test the paint on a hidden area first to ensure it blends perfectly. This small step can make your cupboards look like they were never damaged.Long-term Care Advice
Think about the long-term care of your painted cupboards. Regular inspections can prevent minor issues from becoming big problems. Check for any signs of wear or damage every few months. Consider applying a clear polyurethane sealant if you frequently use your kitchen. This extra layer protects the paint from moisture and stains. Is your kitchen a high-traffic area? This might be the extra protection your cupboards need to maintain their shine. Lastly, be mindful of the humidity in your kitchen. Excess moisture can cause the paint to peel. Use a dehumidifier or open a window when cooking to reduce humidity levels. Keeping an eye on these factors can help you enjoy your beautiful white cupboards for years to come.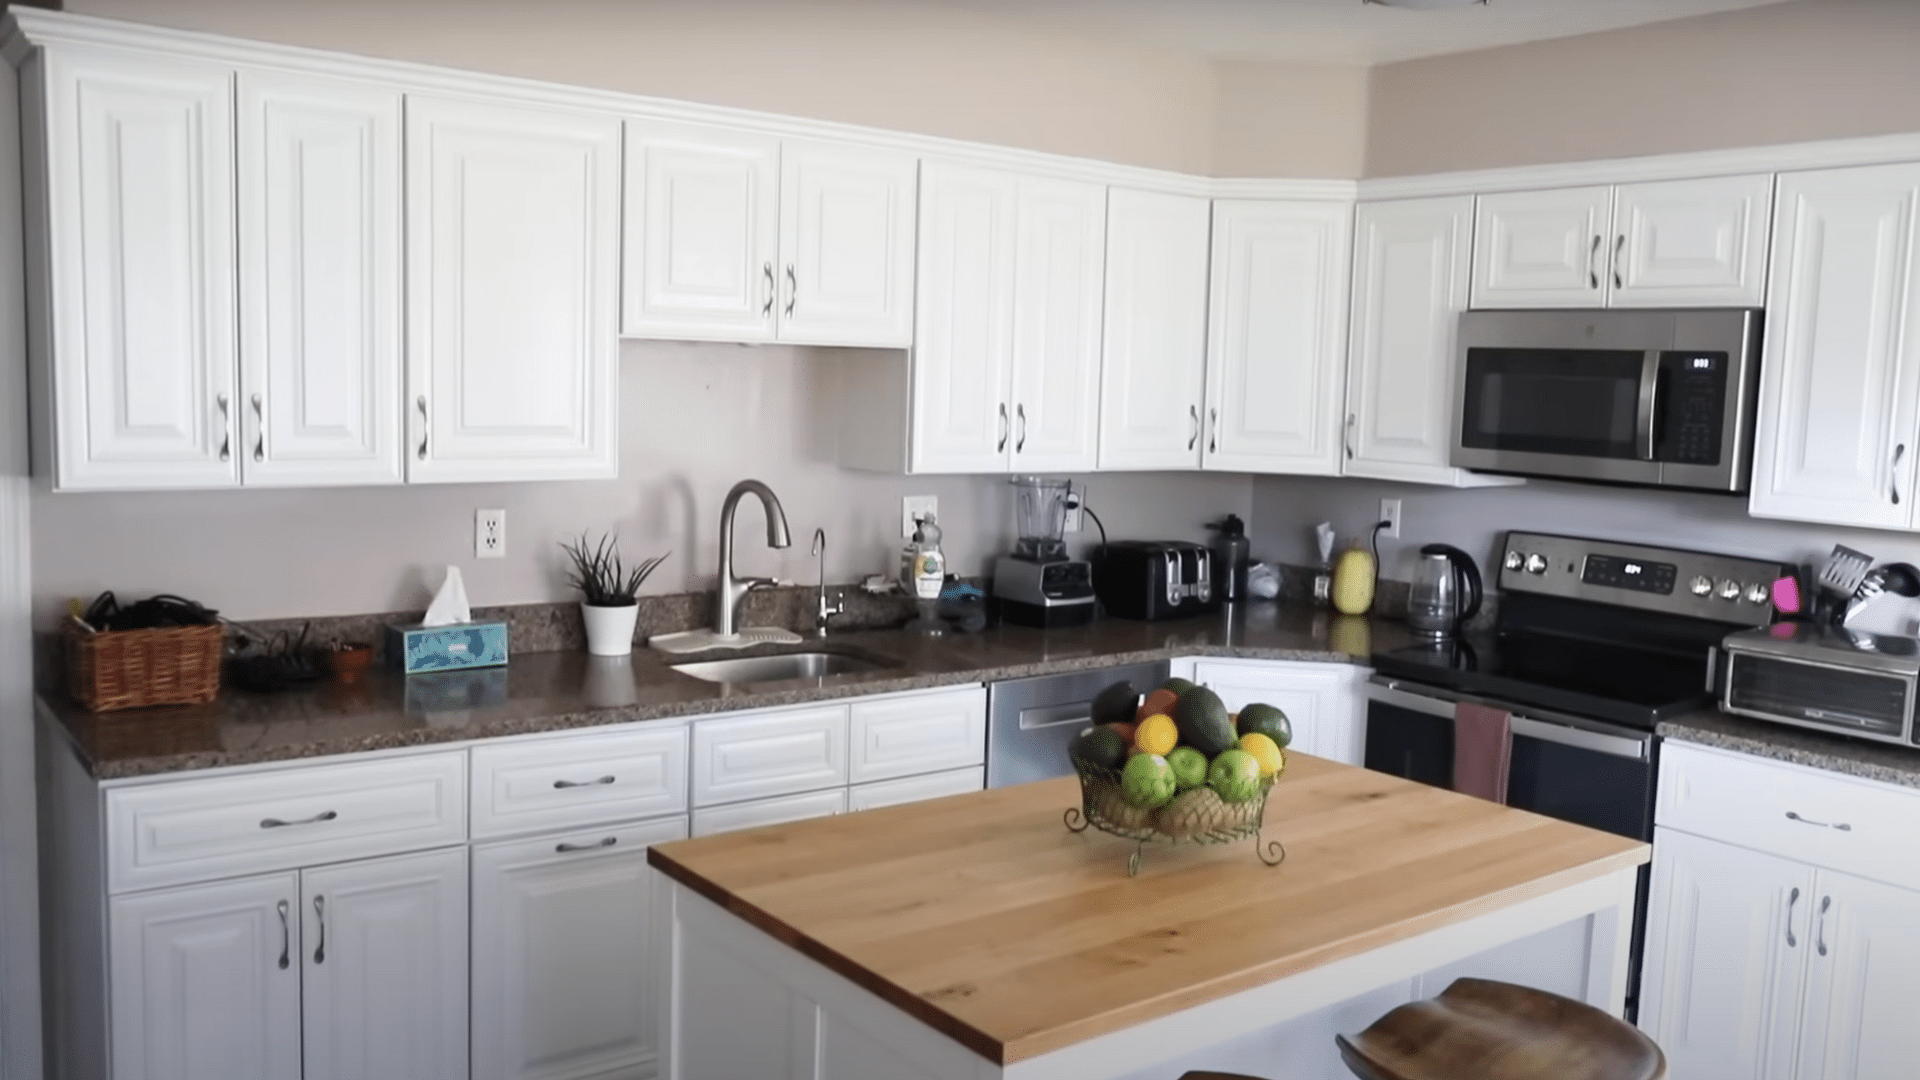
Credit: www.thepaintedhinge.com
Frequently Asked Questions
Can I Just Paint Over My Kitchen Cabinets?
Yes, you can paint kitchen cabinets, but preparation is crucial. Clean, sand, and prime them first. Use high-quality paint for durability. Consider hiring a professional for a flawless finish. Proper technique ensures long-lasting results and a refreshed look.
Is It A Good Idea To Paint Kitchen Cabinets White?
Painting kitchen cabinets white is a great idea. It creates a clean, timeless look and brightens the space. White cabinets match various styles and make kitchens appear larger. They offer versatility and are easy to accessorize. Regular maintenance is necessary to keep them looking fresh.
Is It Better To Roll Or Brush Paint Cabinets?
Rolling paint on cabinets ensures a smooth, even finish with minimal brush marks. Brushing allows for detailed work in tight spaces. Combining both methods can yield the best results, ensuring coverage and precision. Choose based on your project needs and desired finish.
What Kind Of Paint Do You Use On Kitchen Cupboards?
Use semi-gloss or satin acrylic latex paint for kitchen cupboards. These paints offer durability and easy cleaning. Choose high-quality paint for a long-lasting finish. Always prime the cupboards before painting for best results.
Conclusion
Painting kitchen cupboards white is a rewarding task. It freshens up the space. This project requires patience and care. Start with clean, sanded surfaces. Use primer to ensure lasting results. Apply thin, even coats of paint. Let each layer dry completely.
Choose the right tools for a smooth finish. Take your time for quality work. With these steps, your kitchen will look bright and inviting. Enjoy the transformation and the new feel of your kitchen. Happy painting!