How to Put in a New Kitchen Sink: A Step-by-Step Guide
Are you tired of that outdated, leaky kitchen sink that’s been a source of frustration for too long? Imagine transforming your kitchen into a more functional and stylish space with just one change.
Installing a new kitchen sink is easier than you might think, and the benefits are immediate. Not only will you enjoy a fresh and updated look, but you’ll also enhance your kitchen’s efficiency. Picture yourself rinsing fresh vegetables or washing dishes with ease, all while adding value to your home.
Ready to dive into this rewarding DIY project? Let’s get started and guide you step by step to achieve a stunning kitchen transformation.

Credit: www.instagram.com
Choosing The Right Sink
Choosing the Right Sink Selecting a new kitchen sink involves considering size, material, and style. Ensure it matches your kitchen’s design and meets your functional needs. Proper planning and measurement are key to a successful installation.
Choosing the right sink for your kitchen is crucial. It impacts both functionality and style. A well-chosen sink can enhance your kitchen’s look and efficiency. Let’s explore key factors to consider.Materials And Styles
Select a material that suits your lifestyle. Stainless steel is durable and easy to clean. Porcelain offers a classic look but may chip. Composite sinks provide various colors and resist scratches. Consider the style that matches your kitchen. Undermount sinks offer a sleek appearance. Farmhouse sinks add a rustic touch. Each style has its unique charm and practical benefits.Size And Configuration
Measure the available space carefully. A large sink might not fit small kitchens. Double-bowl sinks allow multitasking. Single-bowl sinks offer more room for large pots. Choose a configuration that supports your cooking habits. Evaluate the sink’s depth for convenience. Shallower sinks are easier for children. Deeper sinks hold more dishes and water. Ensure the size complements your countertop space.
Credit: torva.com
Gathering Necessary Tools
Gather all necessary tools before starting the installation. Essential items include a wrench, plumber’s putty, and tape. Ensure you have a bucket and cleaning supplies handy for an efficient process.
Gathering the right tools is vital for installing a new kitchen sink. Proper preparation can save time and prevent frustration. Before starting, ensure all necessary tools and equipment are ready. This will make the process smooth and efficient.Basic Tools Required
Having the correct tools is essential. Here’s a list of basic tools needed:- Adjustable wrench for tightening nuts.
- Pipe wrench for gripping and turning pipes.
- Screwdriver set for removing screws.
- Plumber’s putty for sealing joints.
- Bucket to catch excess water.
- Tape measure for accurate measurements.
Safety Equipment
Safety should always be a priority. Wear the right gear to protect yourself:- Safety goggles to shield eyes from debris.
- Gloves to protect hands from sharp edges.
- Knee pads to cushion knees while working.
Preparing The Area
Preparing the area for your new kitchen sink installation is a crucial step that sets the foundation for a smooth and successful project. Before diving into the nitty-gritty details of removing the old sink and checking for damages, take a moment to envision the transformation you’re about to create in your kitchen. It’s not just about aesthetics; a well-prepared area ensures functionality and longevity for your new sink.
Removing The Old Sink
Start by disconnecting the plumbing. Turn off the water supply and detach the pipes carefully. Use a wrench to loosen any stubborn connections. Remember, patience is key here—rushing could lead to unwanted leaks.
Once the plumbing is detached, it’s time to remove the old sink. If it’s sealed with caulk, use a utility knife to cut through the seal. Lift the sink out, ensuring you have a firm grip. If you’re struggling, don’t hesitate to ask a friend for a helping hand.
Removing the old sink can reveal hidden surprises. Do you notice any signs of mold or water damage on the countertop? This is your opportunity to address these issues before installing your new sink.
Checking For Damages
Inspect the countertop and surrounding area for any damages. Look for signs of wear, such as water stains or rot. If you find anything concerning, take action now to prevent future headaches.
If the countertop is damaged, consider repairing or replacing it. This might sound like an extra step, but think of it as investing in your kitchen’s durability. A solid foundation supports a flawless sink installation.
Also, check the cabinet beneath the sink. Is it sturdy enough to hold the weight of your new sink? Reinforcing the cabinet might be necessary to ensure your new sink is securely supported.
Preparing your area thoughtfully can make the difference between a smooth installation and ongoing problems. What unexpected challenges have you faced during a home improvement project? Reflecting on past experiences can help you anticipate and tackle issues this time around.

Credit: www.noozhawk.com
Installing The New Sink
Begin by gathering necessary tools and materials for sink installation. Remove the old sink carefully to avoid damaging the countertop. Position the new sink, ensuring it’s aligned correctly, and secure it with clips or brackets. Connect plumbing fixtures, ensuring all pipes are tightly sealed to prevent leaks.
Installing a new kitchen sink can be a rewarding project. It refreshes your kitchen’s look and functionality. Careful steps ensure a smooth installation process. Below, discover essential tips to position and secure your new sink.Positioning The Sink
Place the sink into the countertop opening. Ensure it aligns correctly. Check for any gaps around the edges. Adjust the sink to sit evenly on all sides. Use a level to confirm it’s perfectly flat. If needed, make minor adjustments. This ensures a clean and professional finish.Securing The Sink
Begin by applying a thin bead of sealant around the sink edges. This prevents water from seeping underneath. Firmly press the sink into place. Under the sink, use clips or brackets. These hold the sink securely. Tighten the fasteners carefully. Avoid overtightening, which can damage the sink. Once secure, wipe away any excess sealant. This ensures a neat appearance and a watertight seal. Proper installation enhances your kitchen’s functionality and style.Connecting Plumbing
Connecting plumbing is essential for installing a new kitchen sink. Ensure all parts fit properly to prevent leaks. Tighten connections securely and check for any drips after installation.
Connecting the plumbing for your new kitchen sink can feel like a complex puzzle. But with some guidance, it’s a task you can confidently tackle. Each connection plays a vital role in ensuring a smooth operation and preventing leaks.Attaching Drain Pipes
Start with the drainpipes, which are crucial for directing water out of your sink. Position the new drain assembly in the sink’s drain opening. Tighten the nuts securely to avoid leaks, but be careful not to overtighten, as this can cause damage. Next, align the P-trap with the sink drain and the waste line. If the pipes don’t line up perfectly, you might need to cut them to fit or use an extension. Always double-check the alignment to ensure a snug fit.Connecting Water Supply
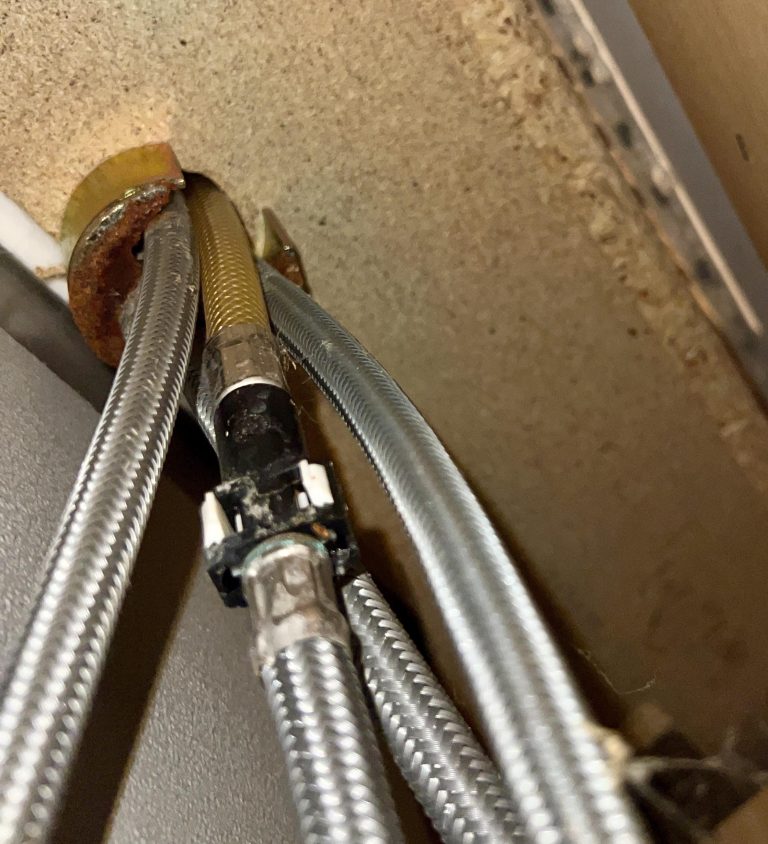
Now, turn your attention to the water supply lines. Attach the hot and cold water lines to the corresponding valves under the sink. Use an adjustable wrench to ensure a secure connection, but remember, hand-tight followed by a slight wrench turn is often sufficient. Before turning the water back on, place a bucket under the pipes to catch any leaks. Once everything is connected, slowly turn on the water supply and check for leaks. If you notice any drips, tighten the connections slightly until they stop. Remember, patience and precision are your best allies in this process. What was your biggest challenge in connecting plumbing? Share your tips in the comments!Sealing And Finishing
Ensure the edges of the sink are sealed tightly with waterproof sealant. Once dry, finish the installation by checking for leaks and ensuring smooth operation.
Sealing and finishing your new kitchen sink is the final touch that ensures both functionality and style. After the hard work of installation, this step not only prevents leaks but also adds a polished look to your kitchen. It’s like putting the cherry on top of a sundae—essential and rewarding. Let’s dive into how you can achieve a perfect seal and finish.Applying Sealant
Applying sealant is crucial to prevent water from seeping into unwanted spaces. Start by selecting a high-quality silicone sealant, as it offers durability and flexibility. Clean the area around the sink thoroughly to remove any debris or residue that might interfere with the sealant’s adhesion. A spotless surface ensures the sealant bonds effectively. When applying, use a caulking gun for precision. Hold it at a 45-degree angle and apply a continuous bead around the sink’s edge. This helps in achieving a uniform layer without gaps. Smooth out the sealant using a damp finger or a caulking tool to ensure it sits flush and looks neat. This prevents water from pooling and makes cleaning easier.Final Adjustments
Final adjustments are all about making sure everything fits perfectly. Check the alignment of your sink with the countertop. Even the slightest misalignment can cause issues later. Ensure that the sink is level and securely fastened. Loose fittings can lead to instability and potential damage over time. Double-check the tightness of all connections. Test the faucet and drain to ensure there are no leaks. Run water through the system and watch closely for any drips or seepage. If you notice any discrepancies, address them immediately. Small tweaks now save you from bigger headaches later. Have you ever thought about how a minor oversight could lead to major repairs? Taking the time for these final adjustments prevents such scenarios. Remember, a well-sealed and finished sink not only functions efficiently but also enhances the overall aesthetic of your kitchen.Testing The Installation
Testing the Installation Ensure the new kitchen sink is securely in place. Check for any leaks by running water and observe the connections. Properly installed sinks should show no signs of water seepage.
Testing the installation of your new kitchen sink is a critical step to ensure everything works smoothly. You’ve already put in the hard work, and now it’s time to make sure there are no hidden surprises waiting to disrupt your daily routine. Testing will help you catch any issues before they become bigger problems.Checking For Leaks
The first thing you want to do is check for leaks. Turn on the water and let it run for a few minutes. Pay attention to the connections under the sink. Place a dry paper towel beneath each joint. If it gets wet, you’ve got a leak. Often, a simple tightening of the connections will fix this. Sometimes, though, you may need to replace a washer or apply plumber’s tape. Do you hear any dripping sounds? Trust your ears as much as your eyes.Ensuring Proper Drainage
Once you’re confident there are no leaks, test the drainage. Fill the sink with water and then pull the plug. Watch how quickly the water drains. A slow-draining sink could indicate a blockage or improperly aligned pipes. You might want to test this several times. Each time, fill the sink to different levels and observe the drainage speed. Proper drainage is crucial for preventing overflow and water damage. Isn’t it satisfying to see the water disappear as it should? If any issues arise, address them immediately to avoid future headaches.Frequently Asked Questions
Can I Install A New Kitchen Sink Myself?
Yes, you can install a kitchen sink yourself with basic plumbing skills and tools. Ensure proper measurements and follow installation instructions carefully to avoid leaks. Consider watching tutorials or consulting a professional if unsure.
Can You Install A New Sink In An Existing Countertop?
Yes, you can install a new sink in an existing countertop. Ensure the new sink matches the existing cutout. Properly measure and prepare the area. Use appropriate tools and sealants for installation. Hiring a professional can ensure a perfect fit and finish.
What Holds A Kitchen Sink In Place?
A kitchen sink is secured by mounting clips, brackets, and sealants that keep it stable. These components prevent movement and ensure durability. Proper installation and regular checks maintain its position effectively.
What Is The First Step In The Process Of Installing A New Sink?
Turn off the water supply before installing a new sink. This prevents leaks and ensures safety during installation.
Conclusion
Installing a new kitchen sink can seem daunting at first. But with this guide, you’re now equipped with the basics. Remember, patience is key. Take it step by step. Double-check connections to avoid leaks. If unsure, consult a professional. A well-installed sink enhances kitchen functionality.
It also adds to the overall aesthetic. Enjoy your new sink and the refreshed look it brings. Your kitchen deserves the upgrade. You’ve got this! Now, get ready to enjoy smoother kitchen tasks. Happy renovating!