How to Unclog the Kitchen Sink: Quick DIY Fixes
Imagine this: you’re about to wash your dishes after a delicious meal, but instead of a clean kitchen, you’re greeted by a stubborn clog in your sink. Frustrating, right?
You’ve tried turning on the tap, hoping the water pressure might solve the problem, but the sink remains stubbornly full. If this scenario sounds familiar, you’re not alone. Kitchen sink clogs are a common issue that can disrupt your daily routine and leave you feeling helpless.
But here’s the good news: unclogging your kitchen sink doesn’t have to be a daunting task. With a few simple steps, you can tackle the problem head-on and restore your sink to its former glory. Curious to find out how? Keep reading, and soon, you’ll be equipped with all the knowledge you need to banish that clog once and for all.
Credit: www.familyhandyman.com
Common Causes Of Clogs
Clogged kitchen sinks are common household issues. Understanding the cause can help prevent them. Let’s explore the most frequent culprits lurking beneath your sink.
Grease And Oil Buildup
Grease and oil seem harmless when liquid. But they harden inside pipes. This creates blockages. Avoid pouring them down the drain. Instead, dispose of them in a container.
Food Particles
Small food bits often slip through the drain. Over time, they accumulate and clog pipes. Use a sink strainer to catch these particles. Scrape plates before washing.
Soap Residue
Soap can leave behind a sticky residue. This residue combines with other debris. It eventually narrows the pipe. Choose liquid soap over bar soap for less buildup.
Essential Tools And Materials
Plunger, baking soda, vinegar, and a wrench are essential for unclogging a kitchen sink. Keep these tools handy to tackle stubborn blockages efficiently.
Unclogging a kitchen sink might seem daunting, but with the right tools and materials, you can tackle it like a pro. Understanding what tools to have on hand can make the process smoother and more efficient. Here’s a breakdown of essential tools and materials to help you unclog your kitchen sink effectively.Plunger
A plunger is a must-have for any kitchen. It’s straightforward and effective for dislodging minor clogs. Ensure you have a cup-style plunger specifically designed for sinks, as it creates a tight seal over the drain.Drain Snake
When a plunger isn’t enough, a drain snake can be your next best friend. This flexible tool reaches deep into pipes to break up stubborn blockages. Keep a small, hand-cranked model in your toolkit for those tricky clogs that refuse to budge.Baking Soda And Vinegar
Who knew common kitchen ingredients could be so powerful? Baking soda and vinegar create a chemical reaction that can help dissolve clogs. Pour half a cup of baking soda followed by a cup of vinegar into the drain, and watch the fizz do its magic.Pipe Wrench
For more persistent issues, a pipe wrench can be invaluable. It’s essential for loosening and tightening the nuts on pipe fittings. Make sure it’s adjustable to handle various pipe sizes in your plumbing system. With these tools and materials, you’re well-equipped to handle most kitchen sink clogs. Have you ever tried using one of these tools in a new way? Share your experiences or tips with others who might find themselves in a similar situation.Using A Plunger
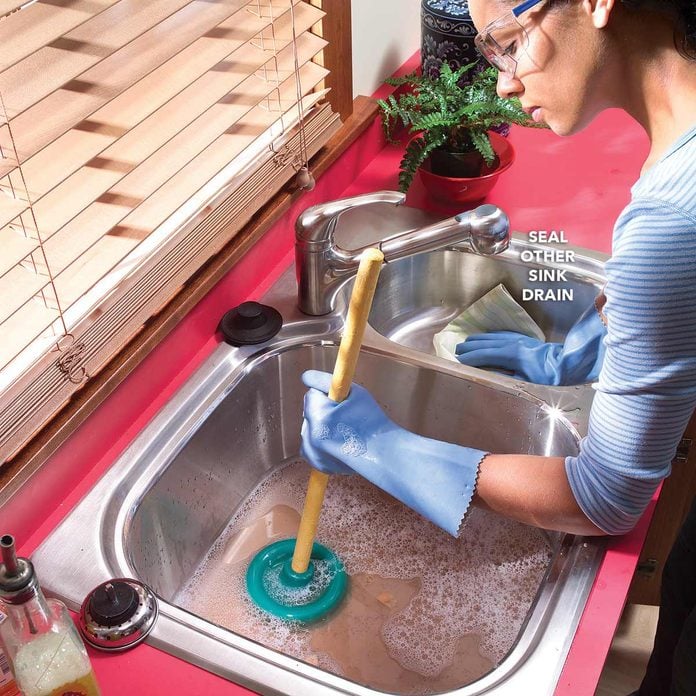
Using a plunger can effectively unclog a kitchen sink. First, fill the sink halfway with water. Then, position the plunger over the drain and push down firmly several times to dislodge the blockage.
Unclogging a kitchen sink can seem daunting, but sometimes all you need is a trusty plunger. Yes, that simple tool tucked away in the corner of your closet can be your sink’s best friend. Using a plunger is not just about brute force; it involves a bit of technique and some handy tips to make the process smooth and effective.Proper Plunger Technique
First, ensure your plunger is the right kind for the job. A flat-bottomed plunger works best for kitchen sinks. Start by filling the sink with enough water to cover the plunger’s head. This helps create the necessary suction. Place the plunger over the drain, ensuring a tight seal. Push down slowly and then pull up quickly, maintaining the seal. This motion dislodges the clog by alternating pressure.Tips For Effective Plunging
Keep a steady rhythm when plunging. Consistency is key to building up enough pressure to break through the blockage. If the water in the sink starts to drain, that’s a good sign—keep going! Sometimes air pockets form, reducing the plunger’s effectiveness. If that happens, adjust the plunger’s position and try again. If you have a double sink, seal the other drain with a wet cloth or another plunger. This prevents air from escaping and enhances the suction power. Do you notice any change in the sound or movement of the water? That’s your cue that the clog might be shifting. Patience and persistence often pay off. Remember, using a plunger is not just about the tool but also how you wield it. Proper technique and a few tips can make all the difference in restoring your kitchen sink to its free-flowing glory.Baking Soda And Vinegar Method
Clear a kitchen sink clog with baking soda and vinegar. Pour half a cup of baking soda into the drain. Follow with a cup of vinegar, and let it fizz for 10 minutes. Rinse with hot water to flush out debris.
Clogged kitchen sinks are a common nuisance, but the solution might be simpler than you think. One effective and environmentally-friendly method to tackle this problem is using baking soda and vinegar. This dynamic duo not only unclogs your sink but also helps eliminate odors, leaving your kitchen fresh and clean. Let’s dive into how you can effortlessly apply this method and get your sink running smoothly again.Preparation Steps
Before you start, gather your supplies: baking soda, white vinegar, a kettle of boiling water, and a sink stopper or rag. Make sure the sink is as dry as possible by removing any standing water with a cup or bowl. It’s crucial to have everything ready before starting to ensure a smooth process. Once prepared, you’re all set to begin unclogging your sink.Application Process
Start by pouring about half a cup of baking soda directly into the drain. Use a spoon or your fingers to push it down if needed. Next, slowly pour a cup of vinegar into the drain. You will notice fizzing and bubbling—this reaction helps to break down the clog. Cover the drain with a stopper or a damp rag to keep the reaction concentrated in the pipe. Let it sit for about 15-20 minutes. In the meantime, boil a kettle of water. After the waiting period, remove the stopper and carefully pour the boiling water down the drain to flush out the loosened debris. Repeat the process if necessary. This method is not only effective but also safe for your pipes compared to harsh chemical drain cleaners. Have you tried this method before? It’s amazing how everyday household items can solve such pesky problems!Employing A Drain Snake
Employing a drain snake is a practical method to unclog your kitchen sink. It’s a simple tool, resembling a long, flexible cable, designed to navigate through pipes. Effective in reaching deeper blockages, the drain snake is a valuable asset for any homeowner. Understanding how to use this tool can save you both time and money.
Inserting The Snake
Begin by removing the sink stopper or strainer. Carefully insert the snake into the drain opening. Push it gently, allowing it to follow the pipe’s natural curves. Feel for resistance, indicating a blockage. Keep the snake straight, avoiding twists that may damage pipes.
Clearing The Blockage
Once the snake hits an obstruction, rotate the handle. This action will help dislodge the clog. Continue turning until the snake moves freely. Pull the snake out slowly, ensuring the debris comes with it. Repeat the process if necessary, ensuring the drain is completely clear.
Cleaning The P-trap
Cleaning the P-Trap in your kitchen sink can solve clog issues. The P-Trap is a U-shaped pipe under the sink. It holds water to block sewer gases. But it can also trap food and debris. Regular cleaning keeps water flowing smoothly. Let’s explore how to clean the P-Trap effectively.
Removing The P-trap
Start by placing a bucket under the sink. This catches water and debris. Use a wrench to loosen the nuts on both ends of the P-Trap. Hold the trap firmly and twist gently. Remove the P-Trap with care. Check for any large clogs or debris inside. These can block water flow completely.
Cleaning Procedures
After removing the P-Trap, empty its contents into the bucket. Use a bottle brush or old toothbrush to scrub inside. Remove any stuck-on grime or residue. Rinse the trap thoroughly with water. Ensure it’s clean before reattaching. Inspect the washers and seals for wear. Replace them if needed.
Reattach the P-Trap to the sink pipes. Tighten the nuts securely with a wrench. Run water through the sink to check for leaks. Watch the flow for any signs of blockage. This ensures your cleaning was effective.
Preventive Measures
Regularly clean your kitchen sink to prevent clogs. Dispose of grease and food scraps in the trash. Use a drain strainer to catch debris before it enters the pipes.
Preventing clogs in your kitchen sink is crucial. Regular maintenance and smart habits help keep your drains clear. Simple, consistent actions prevent build-up and ensure smooth water flow. Here are practical tips to maintain a clog-free kitchen sink.Regular Maintenance Tips
Regular maintenance is key to a healthy sink. Start with weekly cleaning. Use a mixture of vinegar and baking soda. Pour half a cup of baking soda down the drain. Follow with a cup of vinegar. Let it fizz for a few minutes. Rinse with hot water. This breaks down minor blockages and odors. Check the sink strainer frequently. Remove food particles daily. They can build up and cause clogs. Invest in a high-quality sink strainer. It catches debris effectively. Run hot water after each use. It helps dissolve grease. Grease can solidify and block pipes. Hot water keeps it moving.Avoiding Future Clogs
Avoid pouring grease or oil down the sink. Instead, collect it in a container. Discard it with your trash. This prevents sticky build-up. Be mindful of what goes down the drain. Dispose of coffee grounds, eggshells, and fibrous foods in the trash. They can accumulate and block the pipes. Install a garbage disposal unit. It grinds food waste into small particles. This reduces the risk of clogs. Ensure the disposal is used correctly. Run cold water when using it. This helps the waste move smoothly. Educate all family members. Awareness ensures everyone contributes to prevention. Teach children not to throw toys or trash in the sink. These habits will help maintain a free-flowing kitchen sink. A little effort goes a long way in avoiding plumbing issues.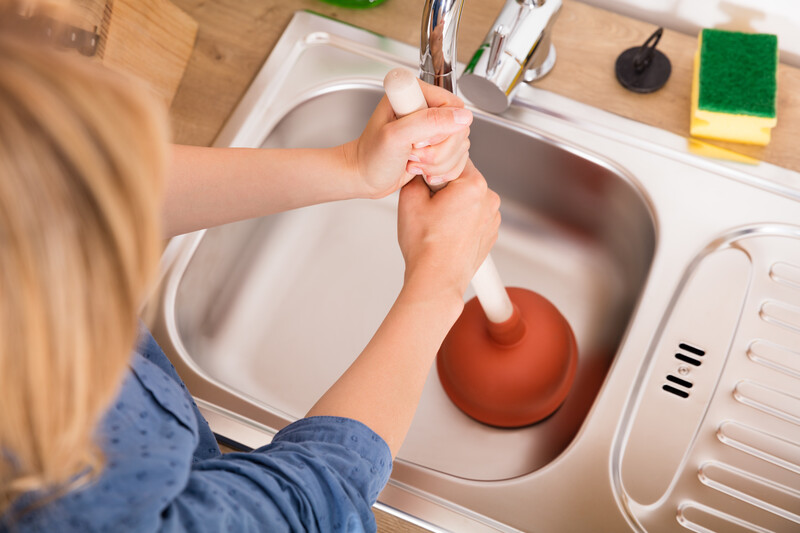
Credit: www.homeserve.com

Credit: aslanplumbing.ca
Frequently Asked Questions
What Can I Pour Down The Sink To Unblock It?
Use baking soda and vinegar to unblock a sink. Pour baking soda first, then vinegar. Let it fizz for 5 minutes. Rinse with hot water to clear the blockage. Avoid harsh chemicals to protect pipes and the environment. Repeat if necessary for stubborn clogs.
How Do You Unclog A Sink With Standing Water?
Use a plunger to dislodge debris. Pour a mix of baking soda and vinegar. Wait, then flush with hot water.
How To Unblock A Kitchen Sink Without A Plunger?
Pour boiling water into the sink to loosen debris. Use baking soda and vinegar for a natural solution. Insert a drain snake to remove blockages. Consider using a wet/dry vacuum to clear stubborn clogs. Always wear gloves for safety while handling cleaning agents.
What Do Plumbers Use To Unclog A Sink?
Plumbers often use a plunger or plumber’s snake to unclog sinks. They might also use chemical drain cleaners or hydro jetting for tougher clogs. These tools effectively remove blockages and restore proper drainage.
Conclusion
Unclogging a kitchen sink can seem challenging, but it’s manageable. Start with simple solutions. Try hot water or a plunger. Still clogged? Use baking soda and vinegar. These are safe and effective. For stubborn clogs, a plumber’s snake might be necessary.
Remember to maintain your sink regularly. Avoid pouring grease or large food scraps down the drain. This prevents future clogs. With these steps, your kitchen sink should stay clear. A clear sink means a happy kitchen. Keep your tools handy.
You’re ready for any clog that comes your way. Happy unclogging!