How to Install a New Kitchen Sink Faucet: Step-by-Step Guide
Are you ready to give your kitchen a quick yet impactful upgrade? Installing a new kitchen sink faucet might be just the change you need.
It’s a task that, surprisingly, you can tackle on your own with a bit of guidance. Whether your old faucet is leaking, outdated, or you just crave a fresh look, this guide will show you exactly how to get it done.
Imagine the satisfaction of transforming your kitchen space with your own hands. The process is simpler than you might think, and by following these easy steps, you’ll not only enhance your kitchen’s functionality but also boost its style quotient. Stick around, and you’ll discover how to make this DIY project a breeze, saving time and money while adding a personal touch to your home.
Choosing The Right Faucet
Selecting the right faucet is crucial for a smooth installation. Consider style, functionality, and fit for your sink. Ensure compatibility with existing plumbing to avoid complications.
Choosing the right faucet for your kitchen sink is a crucial step that sets the tone for both functionality and style in your kitchen. A well-chosen faucet can enhance your kitchen’s look and make daily tasks more efficient. Consider your kitchen’s overall design and your personal needs as you embark on this selection journey.Consider Style And Finish
When selecting a faucet, style and finish should reflect your kitchen’s personality. Do you want a sleek, modern look or a classic, timeless appeal? Matching the faucet finish with other kitchen hardware, like cabinet handles, can create a cohesive design. Popular finishes include stainless steel, chrome, brushed nickel, and oil-rubbed bronze. Each offers a unique aesthetic and requires different levels of maintenance. Think about how the faucet’s design complements your kitchen’s overall theme. If your kitchen is minimalist, a simple, streamlined faucet might be best. For a more traditional kitchen, ornate detailing could add the perfect touch.Check Compatibility With Sink
Before making a purchase, ensure the faucet is compatible with your sink. Count the number of mounting holes in your sink—this dictates the type of faucet you can install. Standard configurations include single-hole, three-hole, and four-hole setups. Measure the distance between existing holes to avoid installation headaches. Consider the faucet’s height and reach to ensure it fits comfortably with your sink and doesn’t splash water outside the basin. A tall faucet with a long spout might be perfect for a deep sink but could cause splashing in a shallow one. Lastly, check if additional features like a pull-down sprayer or side sprayer fit your setup. These can greatly enhance functionality, making tasks like rinsing vegetables or filling large pots easier. Are you ready to transform your kitchen with the perfect faucet choice?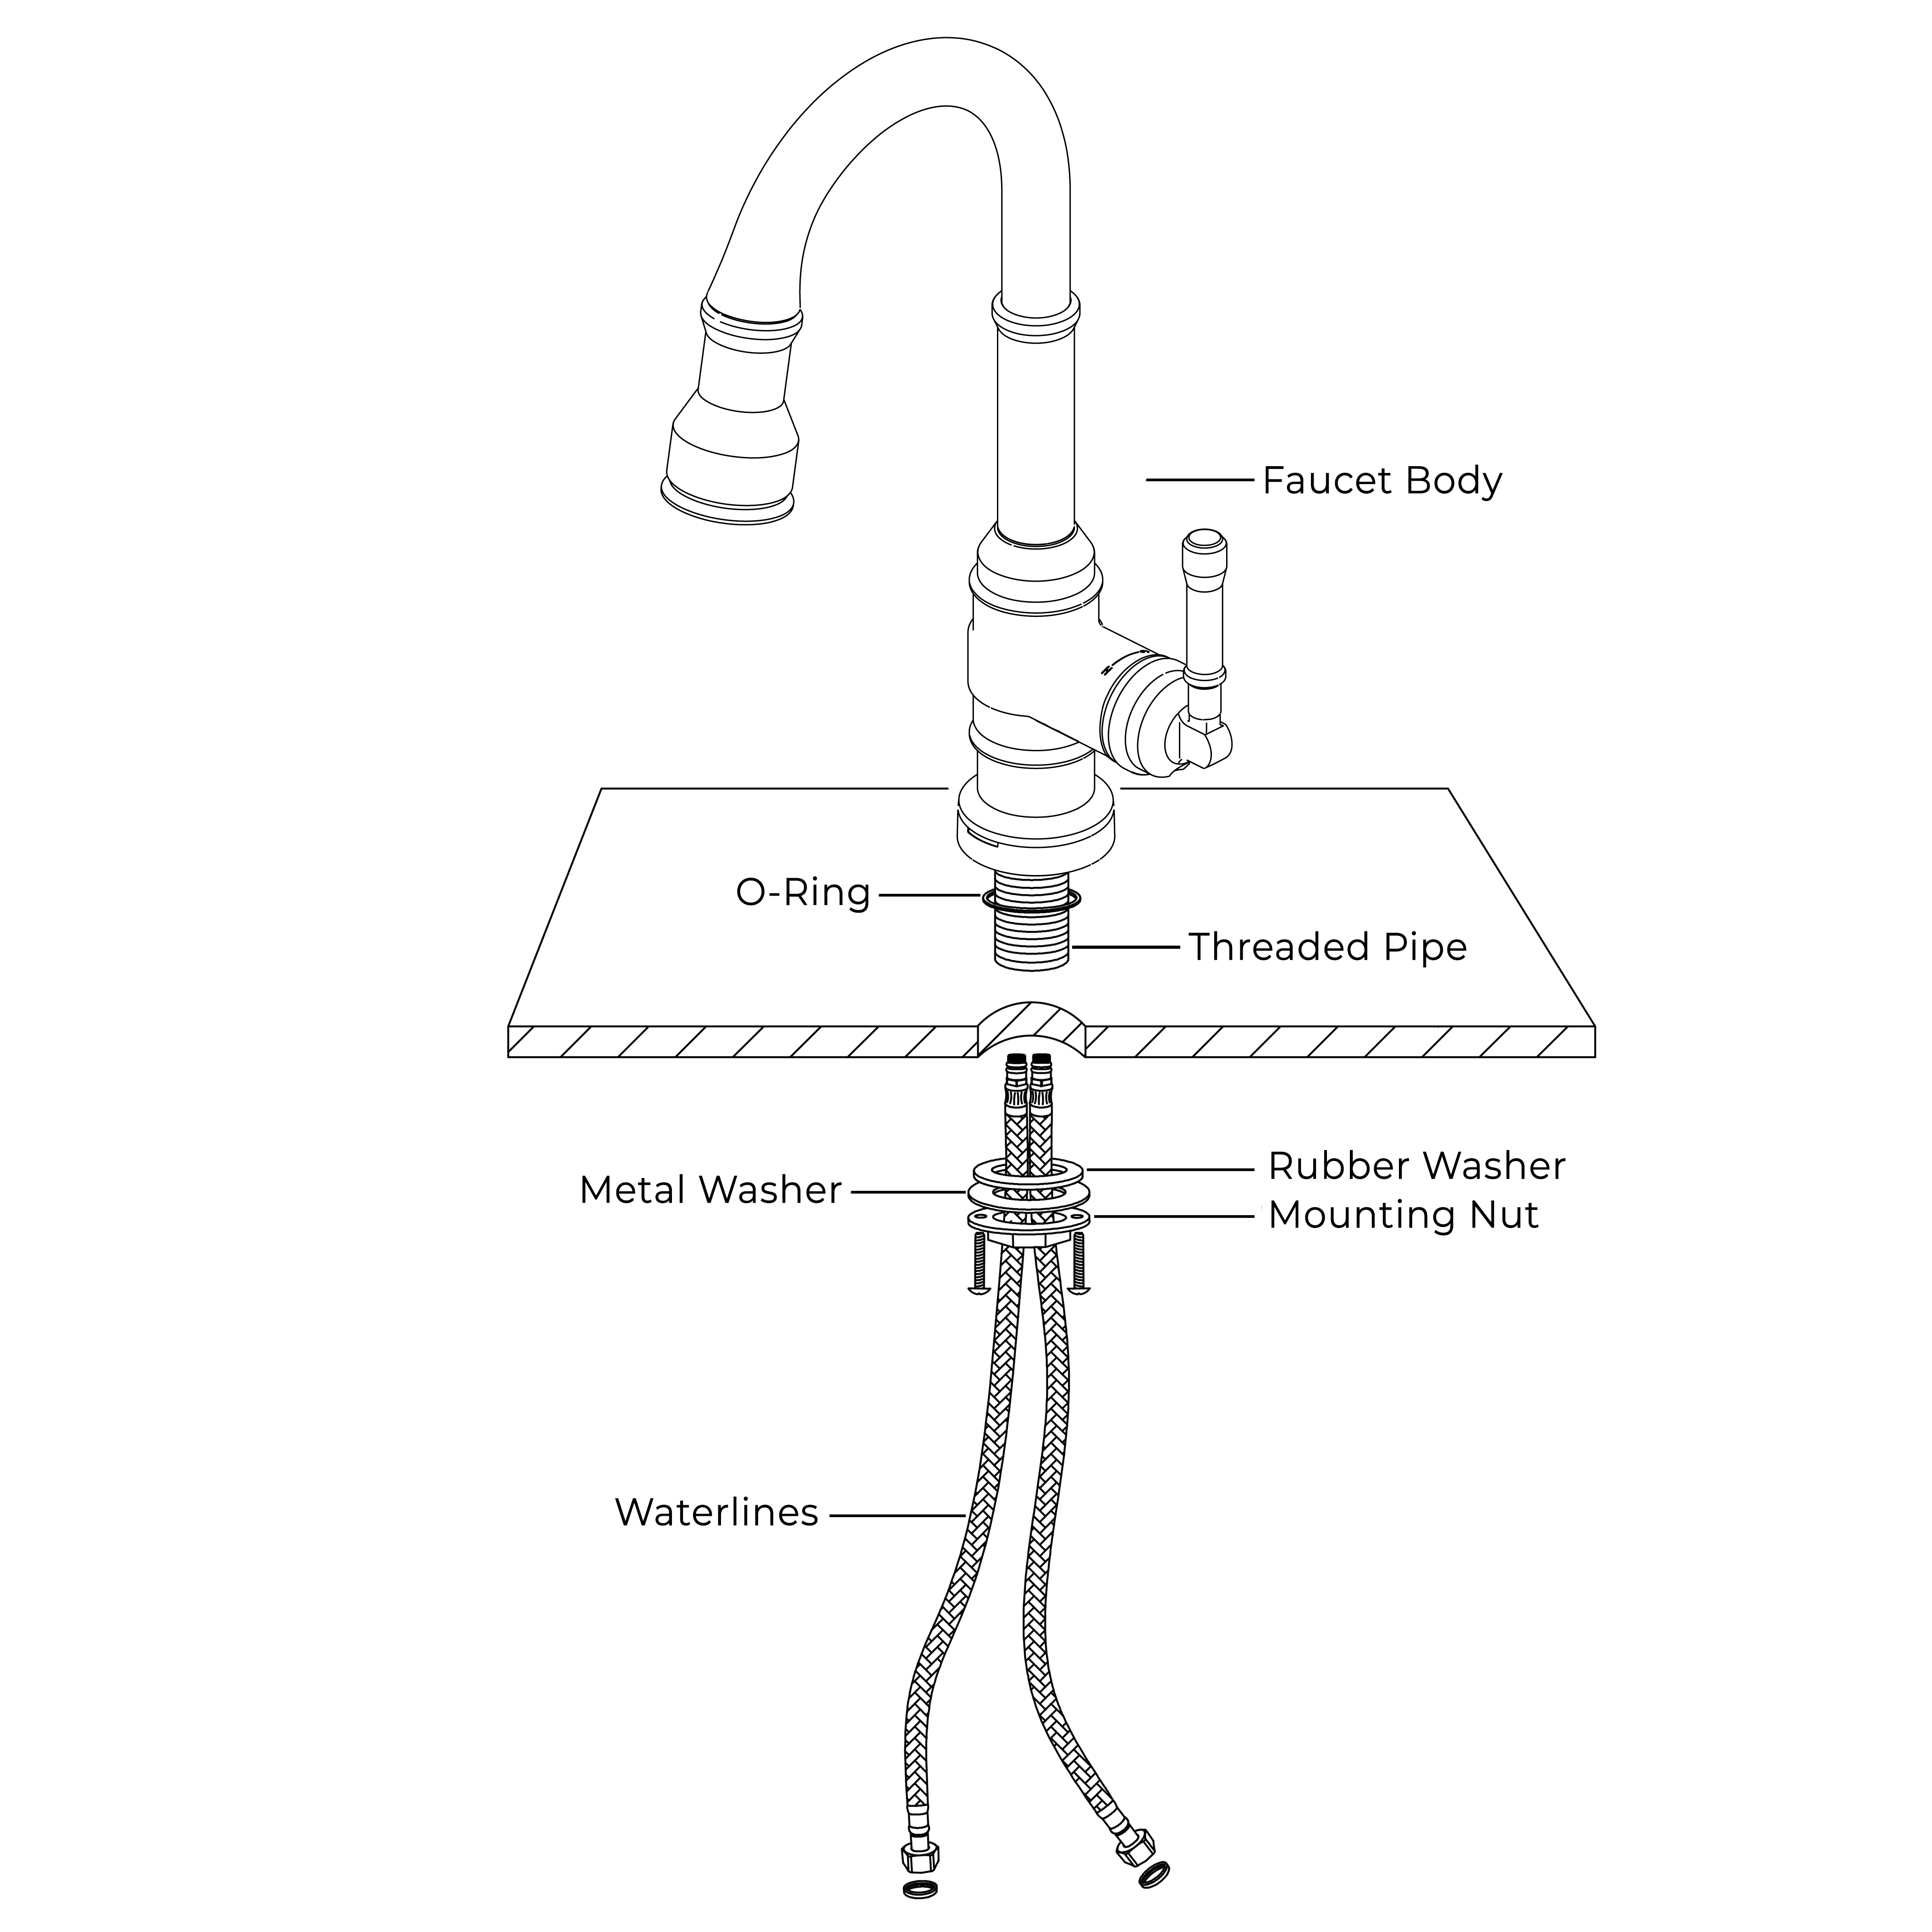
Credit: www.fontanashowers.com
Gathering Necessary Tools
Before installing a new kitchen sink faucet, gather all necessary tools. Having everything ready makes the process smoother and faster. This preparation ensures you work efficiently and avoid unnecessary delays.
Essential Tools List
Collect these tools for a successful faucet installation:
- Adjustable wrench
- Plumber’s tape
- Basin wrench
- Screwdriver
- Bucket or bowl
- Old towel or rag
Each tool plays a vital role. An adjustable wrench helps tighten and loosen nuts. Plumber’s tape prevents leaks. A basin wrench reaches tight spaces. Screwdrivers remove screws easily. Buckets catch excess water, and towels clean spills.
Safety Equipment Required
Safety is crucial during installation. Prepare these items:
- Safety goggles
- Gloves
- Knee pads
Safety goggles protect eyes from debris. Gloves shield hands from sharp edges. Knee pads provide comfort while kneeling. Prioritize safety to prevent accidents and ensure a smooth installation process.
Preparing The Workspace
Clear the area under the sink. Remove any items that might obstruct access to plumbing. Ensure you have necessary tools ready nearby.
Preparing the workspace is crucial for a smooth kitchen faucet installation. A clean and organized area helps prevent mishaps and keeps the process efficient. Begin by assessing your workspace and removing any items that could obstruct your project. This will save you time and frustration.Clear Under-sink Area
Start by removing everything from beneath the sink. Cleaning this space allows easy access to plumbing connections. Store cleaning products and other items in a safe place. Ensure the area is free of clutter for a more comfortable working environment. Having a clear space makes identifying tools and parts simpler.Turn Off Water Supply
Locate the water valves under the sink. Turn each valve clockwise to shut off the water. This prevents accidental leaks during installation. After turning off the supply, test the faucet. Ensure no water flows from it. This confirms the supply is completely turned off. Taking these steps ensures a hassle-free installation process.Removing The Old Faucet
Turning off the water supply, disconnect the old faucet carefully. Use a wrench to loosen nuts and remove it.
Removing the old faucet is often the most challenging part of installing a new kitchen sink faucet. It’s a task that requires some patience and a little bit of elbow grease. But don’t worry—you don’t need to be a plumbing expert to get it done.Disconnect Water Lines
Before you can remove the old faucet, turn off the water supply. Look under your sink for two valves—one for hot and one for cold water. Twist them clockwise until they stop. Next, place a small bucket or towel under the pipes to catch any water that might spill out. Using an adjustable wrench, gently loosen the nuts connecting the water lines to the faucet. Once they’re loose, you can unscrew them by hand. Have you ever felt a small victory when you unscrewed something stubborn? That’s exactly the feeling you’ll get here!Loosen Mounting Nuts
Now, it’s time to tackle the mounting nuts holding the faucet in place. These nuts are usually located underneath the sink, securing the faucet to the countertop. A basin wrench is ideal for this task, thanks to its long handle and swivel head. Reach up and give the mounting nuts a good turn counterclockwise. Sometimes, these nuts can be corroded, making them difficult to remove. If that’s the case, a penetrating oil can be your best friend, loosening them up. Do you remember the last time you were stuck in traffic, and a shortcut saved your day? Think of penetrating oil as that shortcut for stubborn nuts. Once they’re loose, the faucet should easily lift off from the top of the sink. Congratulations, you’ve cleared the path for your new faucet!Cleaning And Inspecting The Sink
Before you can enjoy the satisfaction of a newly installed kitchen sink faucet, it’s essential to prepare your sink properly. Cleaning and inspecting the sink lays the foundation for a smooth installation process and ensures your faucet lasts longer. Imagine this as giving your sink a fresh start, free from debris and imperfections that could hinder the installation. Let’s dive into the details.
Remove Debris And Residue
Start by clearing any debris or residue around the sink area. Use a mild cleaner and a soft cloth to gently wipe down the surfaces. If you’ve ever noticed how grime accumulates in corners, this step is crucial. Pay attention to the edges where the sink meets the counter and around the existing faucet base.
Sometimes, stubborn residue requires a bit more effort. Consider using a toothbrush or a gentle scrubbing pad to reach those tricky spots. You’ll be amazed at the difference it makes. A clean surface not only looks better but also helps your new faucet fit snugly and securely.
Check For Damage
Inspect the sink for any signs of damage, such as cracks or chips. These imperfections might seem minor, but they can affect the stability and functionality of your new faucet. A quick glance could save you from future headaches. Have you ever installed something only to realize later that a small flaw caused big issues? This step helps avoid that scenario.
If you find damage, consider whether it needs immediate repair. For minor cracks, a sealant might suffice. For more significant issues, professional advice could be necessary. Always weigh the importance of having a reliable sink that supports your daily tasks without hassle.
Cleaning and inspecting your sink might seem like extra work, but it’s a crucial step in ensuring a successful faucet installation. Have you ever skipped a preparation step only to realize its importance later on? Don’t let that happen here. Take a moment to prepare your sink properly, and you’ll thank yourself when your new faucet functions flawlessly.
Installing The New Faucet
Installing the new faucet in your kitchen can be a rewarding DIY project. Whether you’re updating your kitchen’s look or replacing a leaky fixture, this task can bring a sense of accomplishment. With a few tools and some patience, you can have your new faucet up and running in no time.
Position And Secure Faucet
Start by threading the faucet through the mounting holes on your sink. It helps to have someone hold the faucet steady while you work underneath. Once the faucet is in place, secure it with a mounting nut. Tighten the nut snugly to ensure stability, but be careful not to overtighten. Have you ever wished for an extra pair of hands? This is one of those moments where it could come in handy.
Connect Water Supply Lines
With the faucet securely in place, it’s time to connect the water supply lines. Align the hot and cold water lines to their respective valves under the sink. Hand-tighten the connections first to avoid cross-threading. Then, use a wrench to finish tightening them. A small tip: keep a towel nearby to catch any unexpected drips. After everything is connected, turn on the water supply and check for leaks. A little diligence now can save you from a watery mess later.
Testing For Leaks
You’ve just installed your new kitchen sink faucet, and it’s looking great. But before you start celebrating, there’s one crucial step left: testing for leaks. This might seem like a small detail, but ensuring your connections are watertight can save you a lot of hassle in the future. Imagine going through all the effort of installation only to find water pooling under your sink! Let’s make sure that doesn’t happen.
Turn On Water Supply
First, you’ll need to turn the water supply back on. You might feel a bit anxious doing this, especially if plumbing isn’t your forte. However, it’s straightforward. Simply open the valves under your sink that you previously shut off during the installation process. Listen closely as you do so; a smooth flow of water is what you’re aiming for.
Notice any unusual noises? If you hear anything odd, it might be a sign of air trapped in the lines or a blockage. Don’t panic; just proceed to the next step.
Inspect Connections
With the water running, take a moment to inspect all the connections you made. A quick visual check is often enough to spot any obvious leaks. Run your fingers along the edges of the connections. Feel any moisture? That could indicate a problem.
Also, use a flashlight to look closely at the base of the faucet and around the sink area. Even small drips can lead to big issues if left unchecked. Tighten any loose connections and wipe away moisture to see if it returns.
Ever wondered why plumbers always carry a towel? It’s because a simple wipe can make spotting leaks so much easier. Remember, catching a leak early can prevent water damage and keep your kitchen looking pristine.
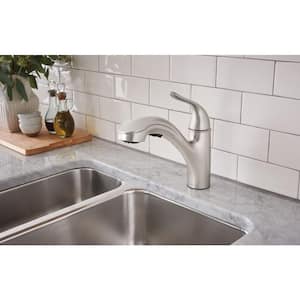
Credit: www.homedepot.com
Finishing Touches
Tighten connections and test for leaks to ensure a secure fit. Clean the area and polish the faucet for shine. Organize tools and discard packaging for a neat finish.
Finishing touches are the final steps that transform your kitchen sink faucet installation from a mere task to a job well done. These steps ensure that your new faucet not only functions perfectly but also looks impeccable. Paying attention to these details can make the difference between a good installation and a great one.Seal And Secure
Begin by applying a thin bead of silicone sealant around the base of the faucet. This helps prevent water from seeping underneath and causing damage. Use a damp cloth to smooth out the sealant for a clean finish. Ensure that the faucet is securely tightened to the sink. Double-check all connections to avoid leaks. Imagine the inconvenience of discovering a leak after you’ve put away your tools. A quick inspection now can save you from future hassles.Clean And Organize Workspace
Once the faucet is secured, clean up any excess sealant or debris around the sink area. A clean workspace not only looks better but also helps you spot any potential issues before they become problems. Gather all tools and materials used during the installation. Store them in their designated places for easy access next time. Take a moment to admire your handiwork. Installing a new kitchen sink faucet is no small feat. How does it feel to know you accomplished this on your own?
Credit: www.youtube.com
Frequently Asked Questions
Can I Replace A Kitchen Sink Faucet Myself?
Yes, you can replace a kitchen sink faucet yourself. Ensure you have the right tools and follow instructions carefully. Turn off the water supply before beginning. It’s a manageable DIY task for most homeowners. If unsure, consult a professional plumber.
Do You Have To Use Plumbers Putty When Installing A New Faucet?
Plumber’s putty is not always necessary for faucet installations. Some faucets use rubber or plastic gaskets instead. Check the manufacturer’s instructions for specific requirements. Using plumber’s putty can help prevent leaks, but ensure compatibility with your sink material. Always follow the guidelines provided for the best results.
What Would A Plumber Charge To Install A New Kitchen Faucet?
A plumber typically charges between $150 and $350 to install a new kitchen faucet. Costs vary by location and faucet complexity. Always request a detailed quote to avoid surprises.
How Do You Install A Faucet Step By Step?
Turn off water supply. Remove old faucet using wrench. Install rubber gaskets on new faucet. Place faucet in mounting holes. Secure it underneath sink with nuts. Connect water supply lines to faucet. Turn on water supply. Check for leaks and ensure proper operation.
Follow manufacturer instructions for specific installation details.
Conclusion
Installing a new kitchen sink faucet can seem challenging. But, with patience, it’s doable. This guide simplifies the process step-by-step. You’ll save money and learn useful skills. Remember, take your time and double-check each step. The right tools make the job easier.
Enjoy your new faucet and the fresh look it brings. Soon, you’ll be proud of your handiwork. Share the experience with friends or family. They’ll appreciate your efforts. Stay confident and keep learning. Your kitchen deserves the best. Happy installing!