
Are your kitchen cupboards looking tired and outdated? Imagine transforming your entire kitchen without the hefty price tag of a complete renovation.
Painting your old kitchen cupboards can be the perfect solution. It’s an affordable and satisfying way to breathe new life into your space. You might be wondering where to start or worried about making mistakes. Don’t worry; you’re not alone.
Many homeowners have successfully revitalized their kitchens with just a few strokes of a paintbrush. In this guide, we’ll walk you through each step, providing expert tips and tricks to ensure your cupboards look as good as new. By the end, you’ll feel confident and ready to tackle this project, knowing exactly how to achieve a stunning result that will impress anyone who steps into your kitchen. Let’s get started on creating a kitchen you’ll love!
Choosing The Right Paint
Choosing the right paint can transform old kitchen cupboards with a fresh, new look. Consider durable, washable options for high-traffic areas. Opt for colors that complement your kitchen’s style.
Painting old kitchen cupboards can breathe new life into your space. The right paint choice is crucial for a successful project. It affects durability, appearance, and ease of application. Selecting the perfect paint ensures a lasting and beautiful finish.Types Of Paint For Cupboards
Choosing the right type of paint is essential. Latex paint is a popular choice. It dries quickly and cleans easily. Oil-based paint offers a durable, smooth finish. It is more resistant to stains and scratches. Chalk paint provides a vintage look. It is simple to apply and requires minimal prep work.Color Selection Tips
Color affects the overall mood of your kitchen. Light colors make small kitchens feel larger. They reflect more light, brightening the space. Dark colors add depth and warmth. They work well in larger kitchens. Consider the style of your home. Neutral colors offer versatility and appeal. Bold colors create a statement and add personality.Understanding Finishes
Finishes impact the final look and maintenance. Matte finishes hide imperfections but are harder to clean. They suit low-traffic areas. Satin finishes offer a smooth, subtle sheen. They are easy to clean and work well in kitchens. Gloss finishes are shiny and reflective. They highlight imperfections but are highly durable. Choose a finish that matches your needs and style.
Credit: www.reddit.com
Preparing The Cupboards
Preparing old kitchen cupboards for a fresh coat of paint is crucial. Proper preparation ensures a smooth finish and long-lasting results. Follow these steps to get your cupboards ready for painting.
Cleaning And Degreasing
Start by removing all items from the cupboards. Use a mild detergent mixed with warm water to clean surfaces. Focus on areas with grease buildup, especially near cooking spaces. For stubborn grease spots, try a vinegar solution. Rinse thoroughly to remove any soap residue. Allow the cupboards to dry completely.
Removing Hardware
Unscrew and remove all hardware like handles and hinges. Keep screws and small parts in a labeled container. This prevents loss and confusion during reassembly. If replacing hardware, ensure new pieces fit existing holes.
Sanding Techniques
Sanding creates a rough surface for paint to adhere better. Use medium-grit sandpaper for a thorough job. Sand in the direction of the wood grain to avoid scratches. For intricate designs, consider using a sanding sponge. Wipe away dust with a damp cloth after sanding. This prepares the surface for primer application.
Repairing And Priming
Repairing and priming old kitchen cupboards ensures a smooth surface for painting. Begin by sanding away imperfections and applying primer to seal the wood. This process helps the paint adhere better, offering a fresh, lasting finish.
Repairing and priming kitchen cupboards can breathe new life into your space. This step is crucial before painting. It ensures a smooth and long-lasting finish. Old cupboards often have imperfections. Fixing these is key to a professional look. Let’s explore the steps involved.Filling Holes And Cracks
Start by examining your cupboards for holes or cracks. Use a putty knife to fill them with wood filler. Make sure to press the filler into the gaps. Allow it to dry completely. Sand the surface lightly with fine-grit sandpaper. This creates an even surface for painting. Be gentle to avoid damaging the surrounding wood.Priming For Adhesion
Priming is essential for paint adhesion. Choose a primer suitable for your cupboard material. Apply the primer evenly with a brush or roller. Cover all surfaces, including edges and corners. Let the primer dry according to the instructions. This layer helps the paint stick better. It also enhances the paint color and finish.Painting Techniques
Painting old kitchen cupboards can breathe new life into your space without a major renovation. The right painting techniques will not only enhance the look but also ensure durability. It’s all about choosing the right tools and methods to achieve a smooth, professional finish. Let’s dive into the various options available and see how they can transform your kitchen.
Using Brushes Vs. Rollers
Brushes are ideal for intricate areas such as corners and edges. They offer precision, allowing you to tackle detailed work seamlessly. But they can sometimes leave visible brush strokes if not used carefully.
On the other hand, rollers are perfect for covering larger surface areas quickly. They create a smooth, even finish and are less likely to leave marks. However, they might struggle with tight spots, requiring you to switch to a brush occasionally.
Consider what areas of your cupboards require attention before selecting your tool. Have you ever tried to paint a tricky corner with a roller? It’s a challenge! That’s where a brush can be a lifesaver.
Spray Painting Option
Spray painting can deliver a flawless finish, making your cupboards look factory-fresh. It’s fast and effective, especially for large, flat surfaces. The downside? It requires careful preparation to avoid overspray and ensure even coverage.
Proper masking and ventilation are crucial with spray painting. Imagine the ease of handling an entire cupboard door in minutes! Yet, overspray can be a mess if you’re not cautious.
Is spray painting worth the extra effort? If you desire a sleek, professional look, it might be your best bet.
Applying Multiple Coats
Applying multiple coats is essential for durability and depth of color. It helps to hide any underlying imperfections, giving your cupboards a polished look.
Start with a primer to ensure the paint adheres well. Follow up with two or more coats of your chosen paint. The first coat provides coverage, while subsequent ones add richness.
Ever wondered why some painted cupboards look flawless while others seem patchy? The secret often lies in the number of coats applied.
Are you willing to invest the time for multiple coats? The payoff in quality and longevity is well worth it.
Drying And Curing
Proper drying and curing ensure a smooth, long-lasting finish on painted kitchen cupboards. Allow paint to dry fully between coats. This helps prevent peeling or cracking later. Curing, which can take weeks, strengthens the paint’s durability. Patience during this process pays off with beautiful, refreshed cupboards.
Drying and curing are crucial in painting old kitchen cupboards. Without proper drying, the paint won’t last long. Once you finish applying the paint, patience is key. Let’s explore some essential tips to ensure the best results.Allowing Adequate Drying Time
After painting, let the cupboards dry thoroughly. Most paints need at least 24 hours. Check the paint label for specific drying times. Humidity affects drying; choose a dry day for painting. Use fans to speed up the drying process if needed. Ensure the area is well-ventilated. This helps the paint dry evenly.Avoiding Common Mistakes
Avoid rushing the drying process. It leads to paint peeling. Do not close the cupboard doors too soon. This could cause them to stick. Avoid placing items inside the cupboards while drying. Dust and dirt can stick to wet paint. Ensure all surfaces are clean before painting. Use a tack cloth to remove dust. Patience is essential for a smooth finish.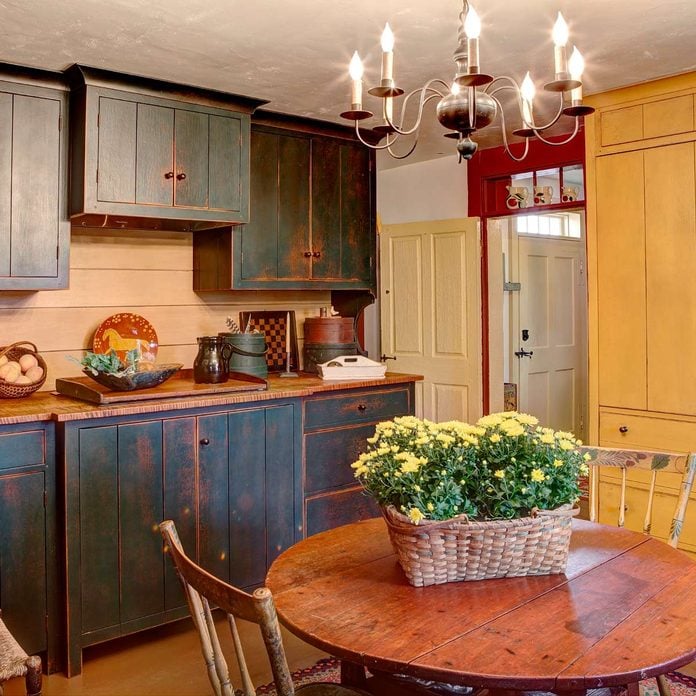
Credit: www.familyhandyman.com
Reassembling And Final Touches
Reassemble the cupboard doors carefully, ensuring each hinge aligns perfectly. Attach handles and knobs for the final touches. Inspect for any missed spots or uneven paint layers before declaring the task complete.
Reassembling and Final Touches Congratulations, you’ve reached the final stage of transforming your old kitchen cupboards! The excitement of seeing your hard work come together is truly rewarding. As you reassemble and add those last little touches, you’ll see your vision come to life.Reattaching Hardware
Start by carefully reattaching the handles and knobs. These small details often make a big difference in the overall look. Ensure each piece is securely fastened, giving your cupboards a polished feel. Consider updating the hardware for a modern twist. Sleek, metallic finishes can add a touch of elegance. Alternatively, vintage-inspired knobs can bring a cozy, rustic charm. What style speaks to you?Adding Decorative Elements
Now, it’s time to add some personality. Decorative elements can breathe life into your cupboards. Think about adding a stencil design or some chic decals for a unique touch. For those who love a bit of flair, attach some stylish trim or molding. It can elevate your cupboards from ordinary to extraordinary. Have you considered adding under-cabinet lighting? This simple addition can brighten your space and highlight your work. Remember, every detail counts. What small changes can you make to reflect your style?Maintenance Tips
Transform old kitchen cupboards with fresh paint using simple steps. Clean surfaces thoroughly and sand lightly for smoothness. Apply primer before painting to ensure long-lasting results and vibrant color.
Maintaining the beauty and functionality of your freshly painted kitchen cupboards requires some attention and care. It’s not just about the initial transformation; it’s about keeping them looking vibrant and fresh for years to come. Here are some essential tips to help you preserve your handiwork and ensure your kitchen continues to be a place you love.Cleaning Painted Surfaces
Regular cleaning prevents the build-up of grease and grime. Use a gentle dish soap mixed with warm water for a mild cleaning solution. Avoid harsh chemicals as they can dull the paint. Instead, opt for a soft sponge or cloth to gently wipe the surfaces. Consider a monthly schedule to keep your cupboards looking pristine. Does your kitchen accumulate more dust than expected? Adjust the frequency accordingly.Touch-up Advice
Small scratches and chips are inevitable. Keep a small can of paint for touch-ups on hand. Quick fixes can be done with a fine brush for precise application. This ensures seamless blending with the existing coat. Regular inspection helps in catching and repairing minor flaws before they become noticeable. How often do you examine your cupboards? A little attention goes a long way in maintaining their charm.
Credit: www.pinterest.com
Frequently Asked Questions
How To Prepare Kitchen Cupboards For Painting?
Start by removing all doors and hardware. Clean surfaces thoroughly to remove grease and dirt. Sand the cupboards lightly to create a smooth surface. Repair any dents or scratches with wood filler. Apply a primer to ensure paint adhesion. Let the primer dry completely before painting.
What Type Of Paint Is Best For Cupboards?
Use a high-quality, durable paint like acrylic or latex. These paints offer a smooth finish and are easy to clean. Semi-gloss or gloss finishes are ideal for kitchens. They resist moisture and stains, keeping cupboards looking fresh. Always choose paints designed for cabinets or furniture.
Can I Paint Over Varnished Cupboards?
Yes, you can paint over varnished cupboards. Clean and sand the surfaces to remove gloss and improve adhesion. Apply a bonding primer suitable for varnished surfaces. Let it dry completely before painting. This ensures the paint adheres well and lasts longer.
How Long Does Cupboard Paint Take To Dry?
Cupboard paint typically takes 24 hours to dry. Drying time can vary based on paint type and conditions. Ensure good ventilation and moderate temperature. For best results, avoid heavy use or cleaning for a few days after painting. This allows the paint to cure properly.
Conclusion
Painting old kitchen cupboards brings fresh life to your space. The process is simple and affordable. Clean, sand, prime, and paint for best results. Choose colors that match your style. Use quality paint for durability. Take your time to avoid mistakes.
Enjoy the transformation and feel proud of your work. Your kitchen will look new and inviting. An updated look adds value to your home. Share the joy with family and friends. Painting is a rewarding DIY project. Your effort makes a big difference.
Happy painting!